
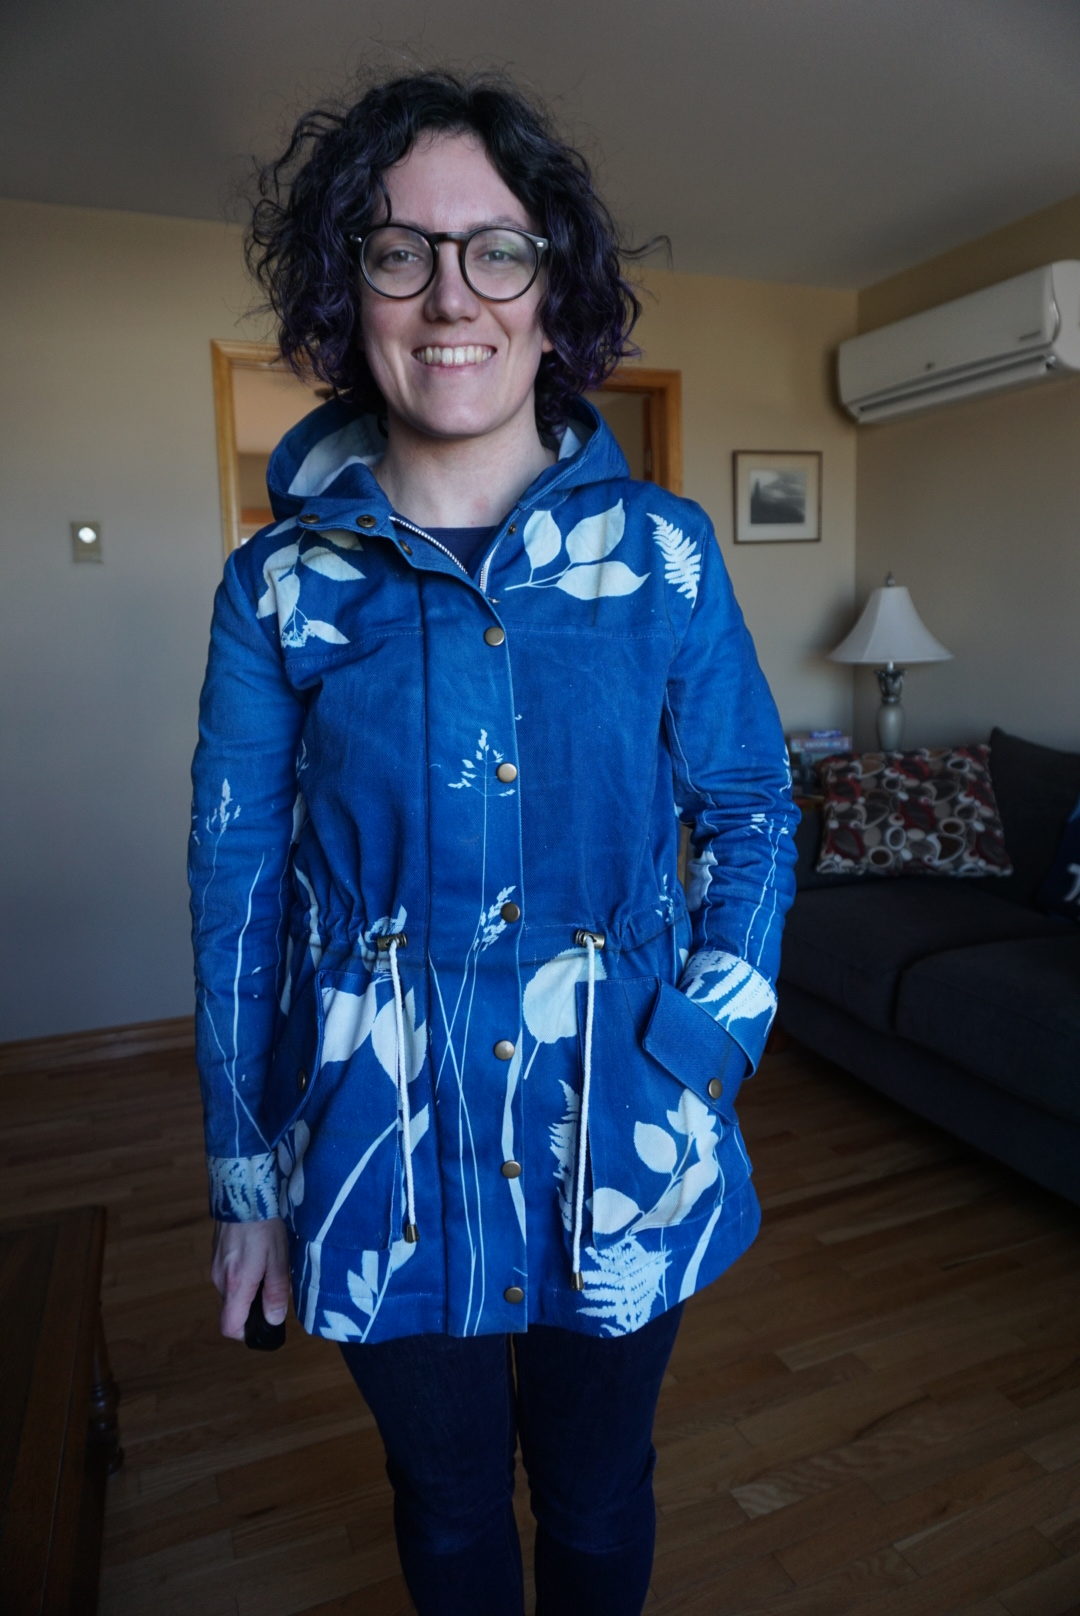
Hi! It’s been a little bit – like I mentioned on Instagram, I was very busy finishing up coursework for my degree program, but I’m all done! And then social distancing set in pretty much immediately after my last class, so I’m trapped at home with a lot of fabric and potential projects to start (or finish)! Here’s my first finished project – although I started work on it last July – my cyanotype-printed Kelly Anorak!


If you are new to the blog, you can read all about my cyanotype experiences in my previous post about it! What’s mainly relevant now since I’m showing you a finished product is that I cut all of my pattern pieces after pre-treating it with the cyanotype solution but prior to printing so that I could plan where different things would go on the finished garment. This is relevant also in that it’s kind of related to why it took me SO long to actually feel motivated to dig in on the sewing with this project. When I was manipulating the fabric while printing it, it involved rinsing it in two different baths in order to get rid of the cyanotype solution and lock in the print. This caused the edges of the pieces to fray a bit, and in some cases to get a little distorted in shape, especially the ones that had any curved edges.
I started sewing not long after I finished the printing, but seeing the distortion that was present in the pieces gave me this latent worry that I had put all this time in to the textile, but that it wasn’t going to fit or it wasn’t going to line up in terms of pieces fitting together as I sewed. And that made me basically set it aside for months. It loomed on the side table in my sewing zone, making me feel guilty for not finishing it and guilty for not WANTING to work on it. But as the temperatures started warming up here, I began to have the urge more and more to sew it, but just didn’t have the time. Enter enforced time at home – and I’m so glad I finished it!

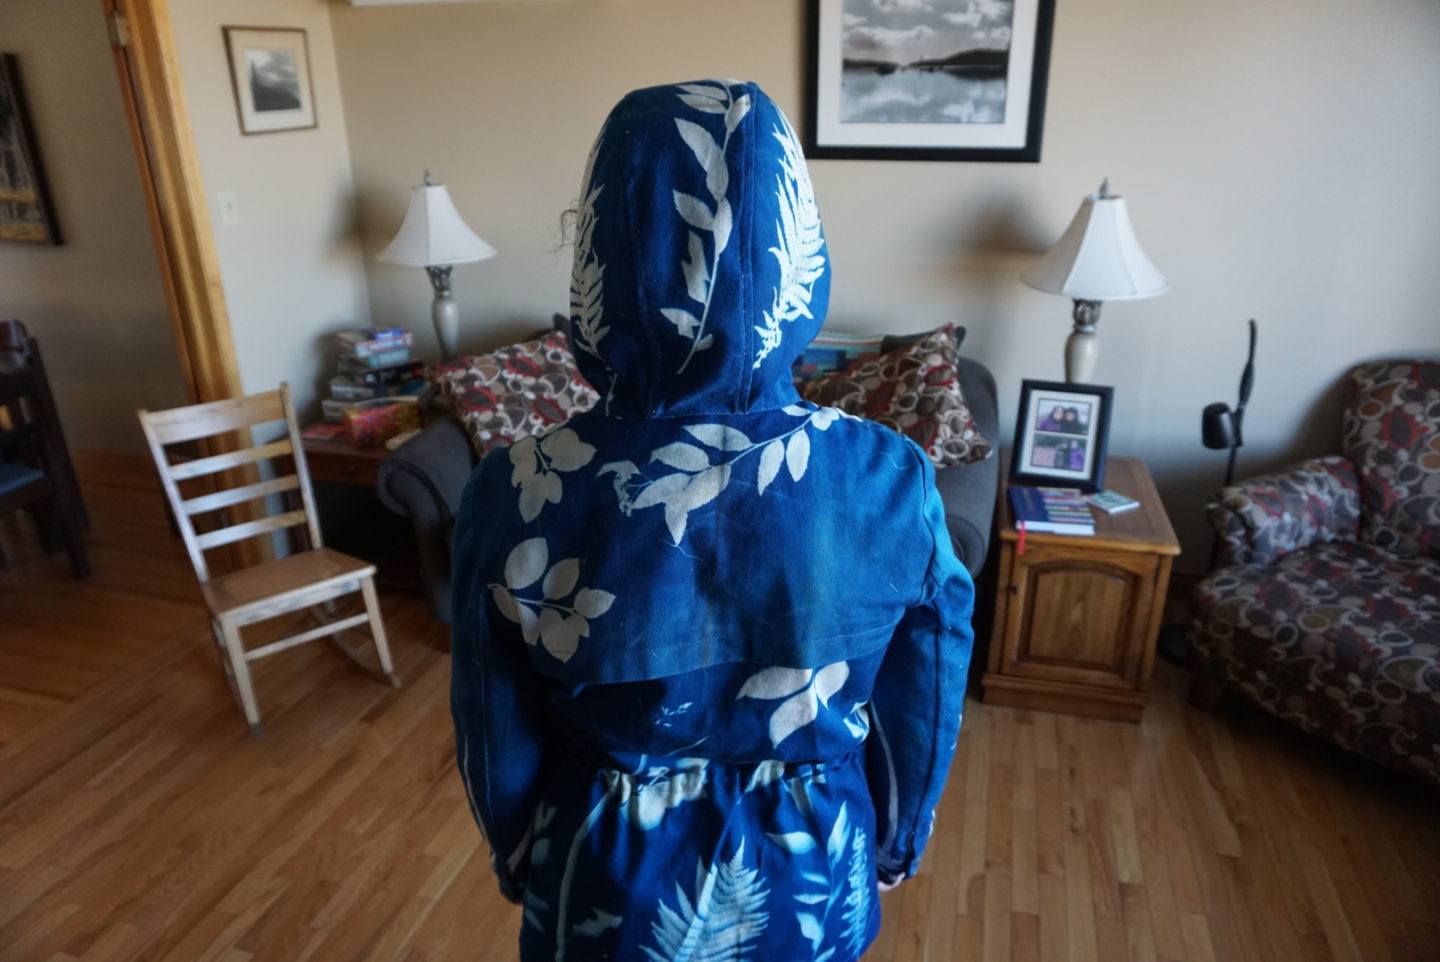
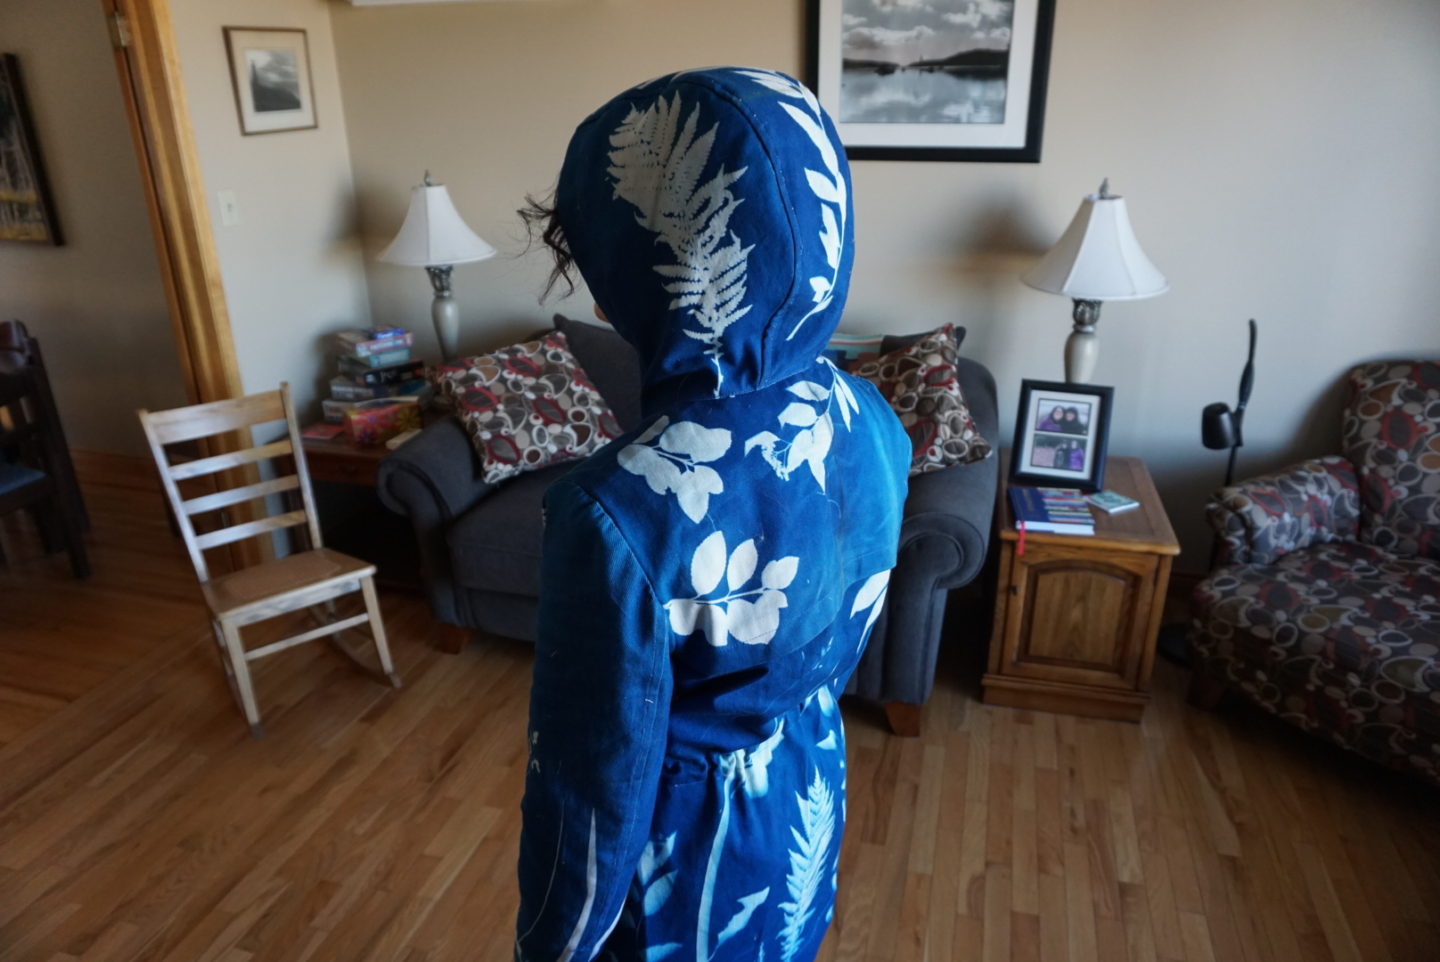
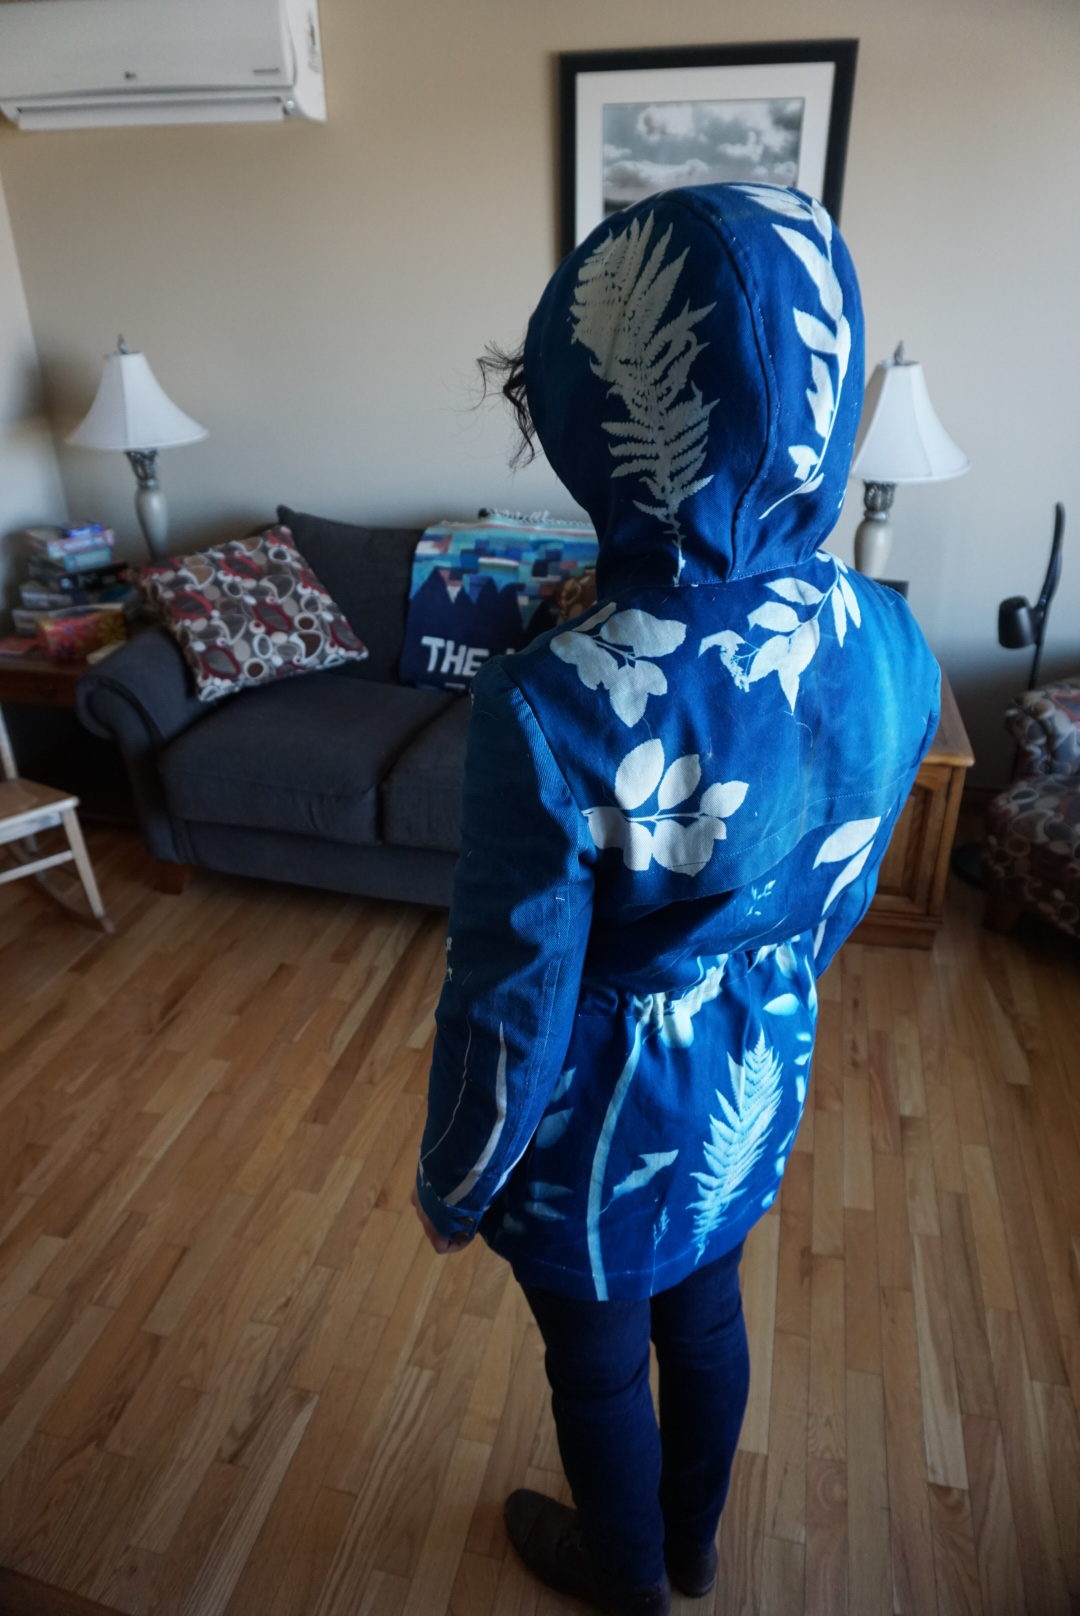
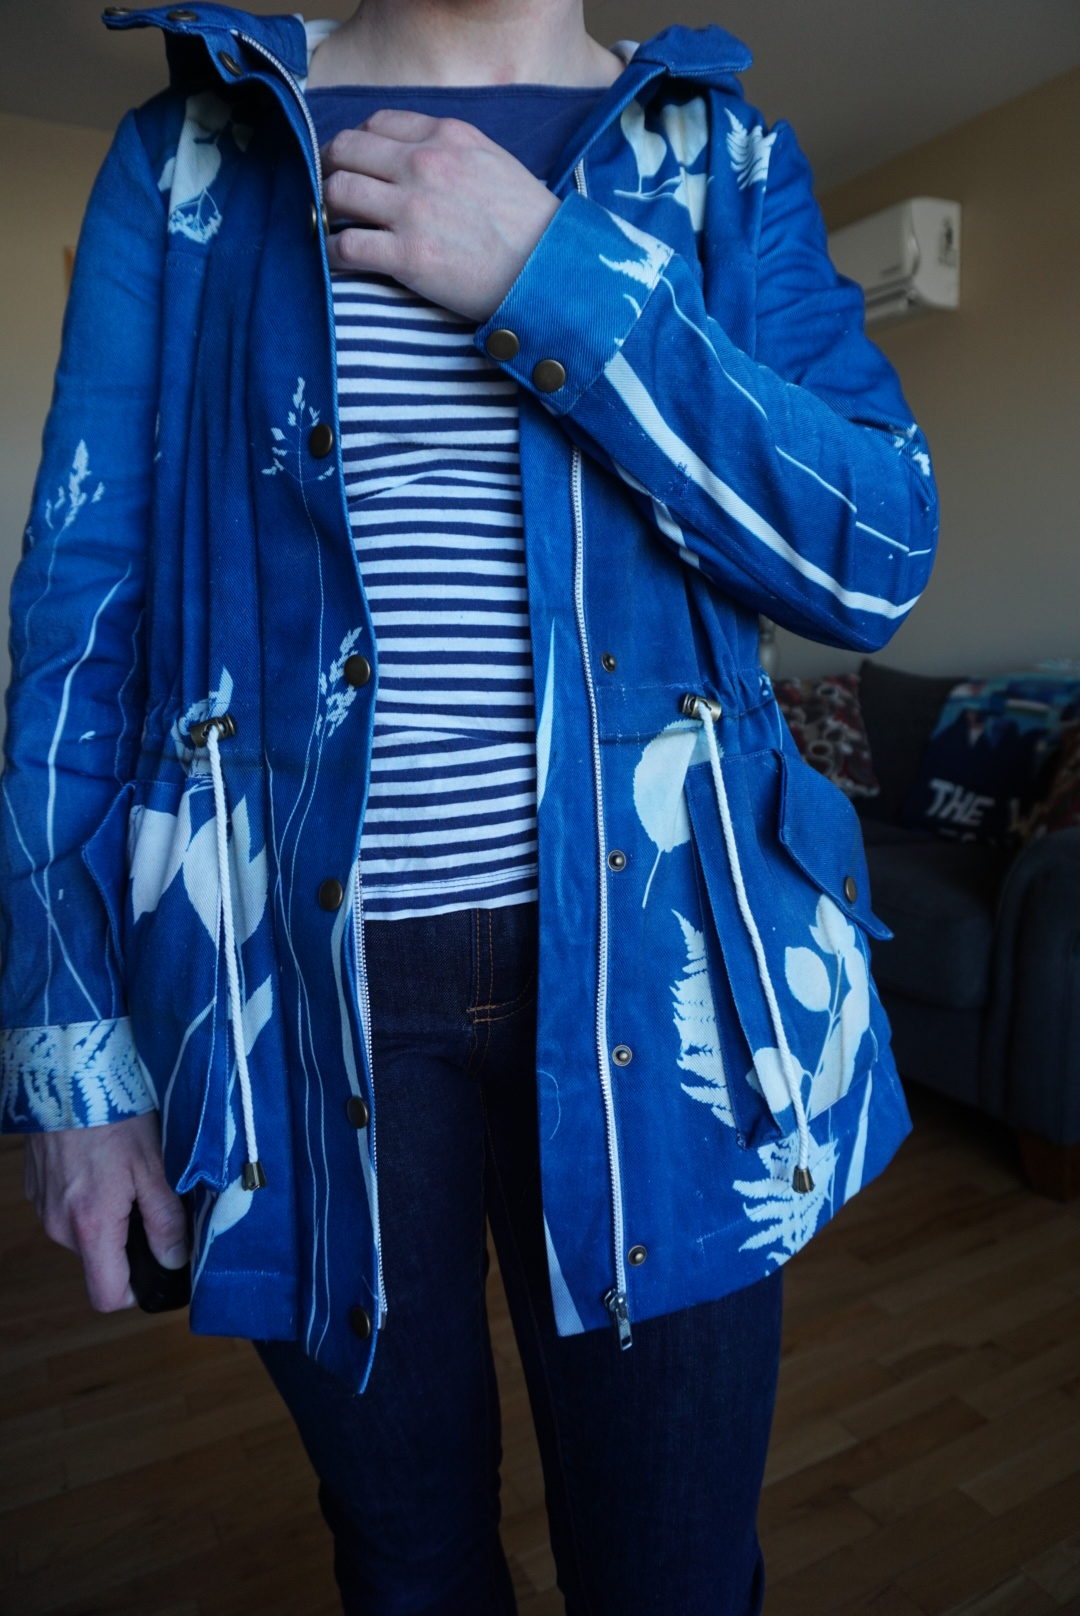
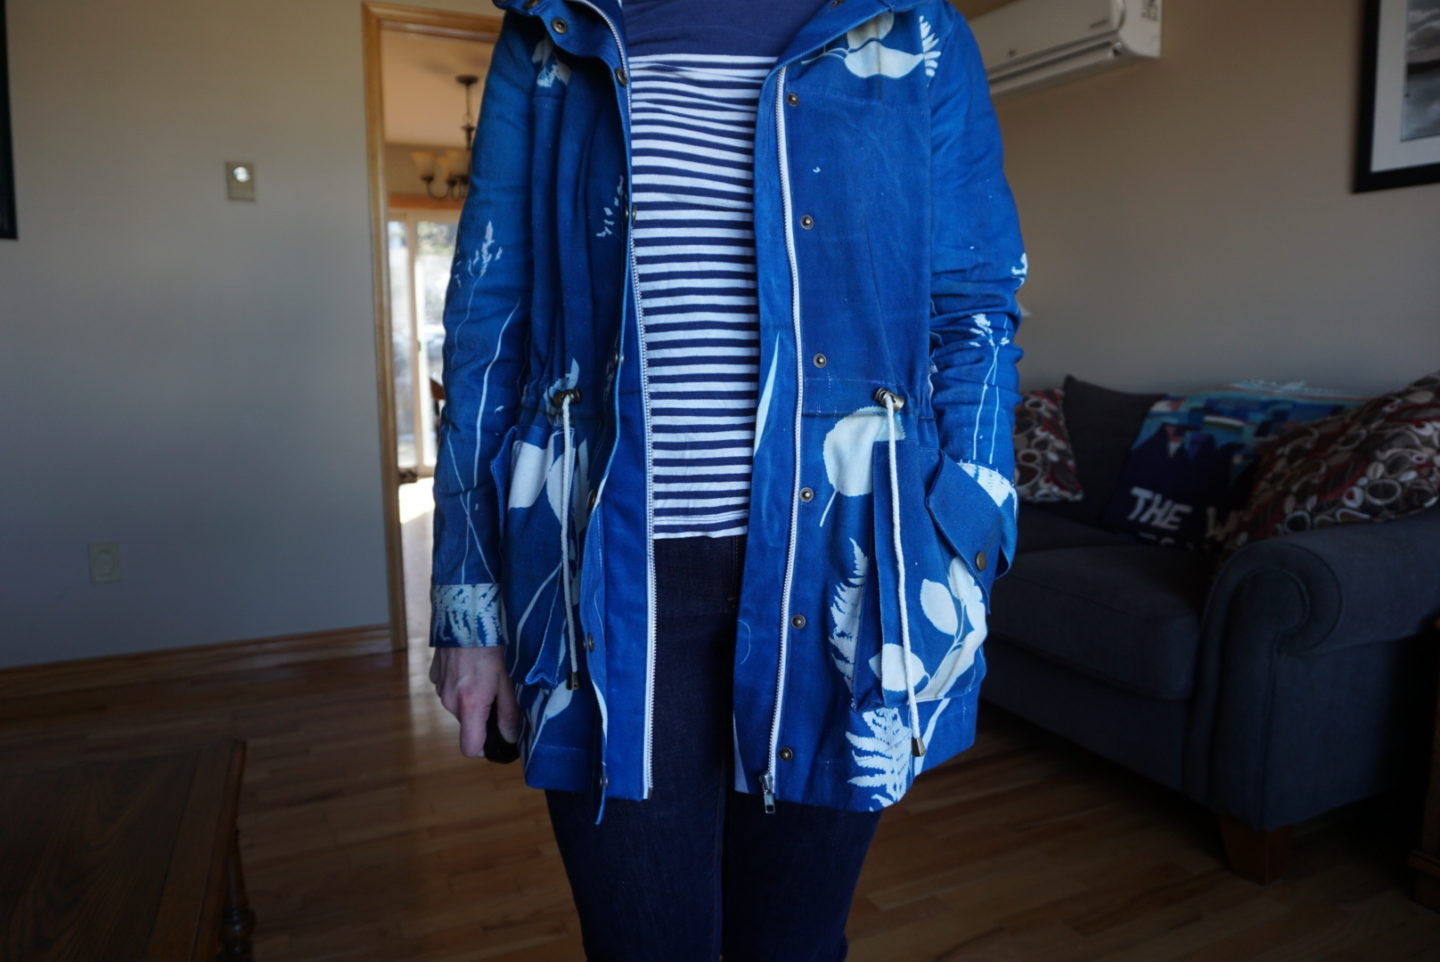
I’m pretty into how the pattern placement turned out, although it feels funny to call it pattern placement when I was the one putting the print on the pieces instead of putting the pieces onto areas of print that I wanted to highlight. There are some things I would change if I was going to do another garment, like I think I got too busy with the back piece (it was the very first one I printed) and it could probably benefit from more negative space. But I learned my lesson from it and the front is a good example of that. The hood, however, I consider my shining moment in print placement. I put a curved fern on each side piece, and then had a long-stemmed plant with a bloom stretch up the center piece toward the front of the hood, and I am in LOVE with how it turned out. Check it out below! In some ways I think it’s kind of helmet-like, but since it’s botanical it feels more like that resilient protection of nature as opposed to evoking the military or armour.


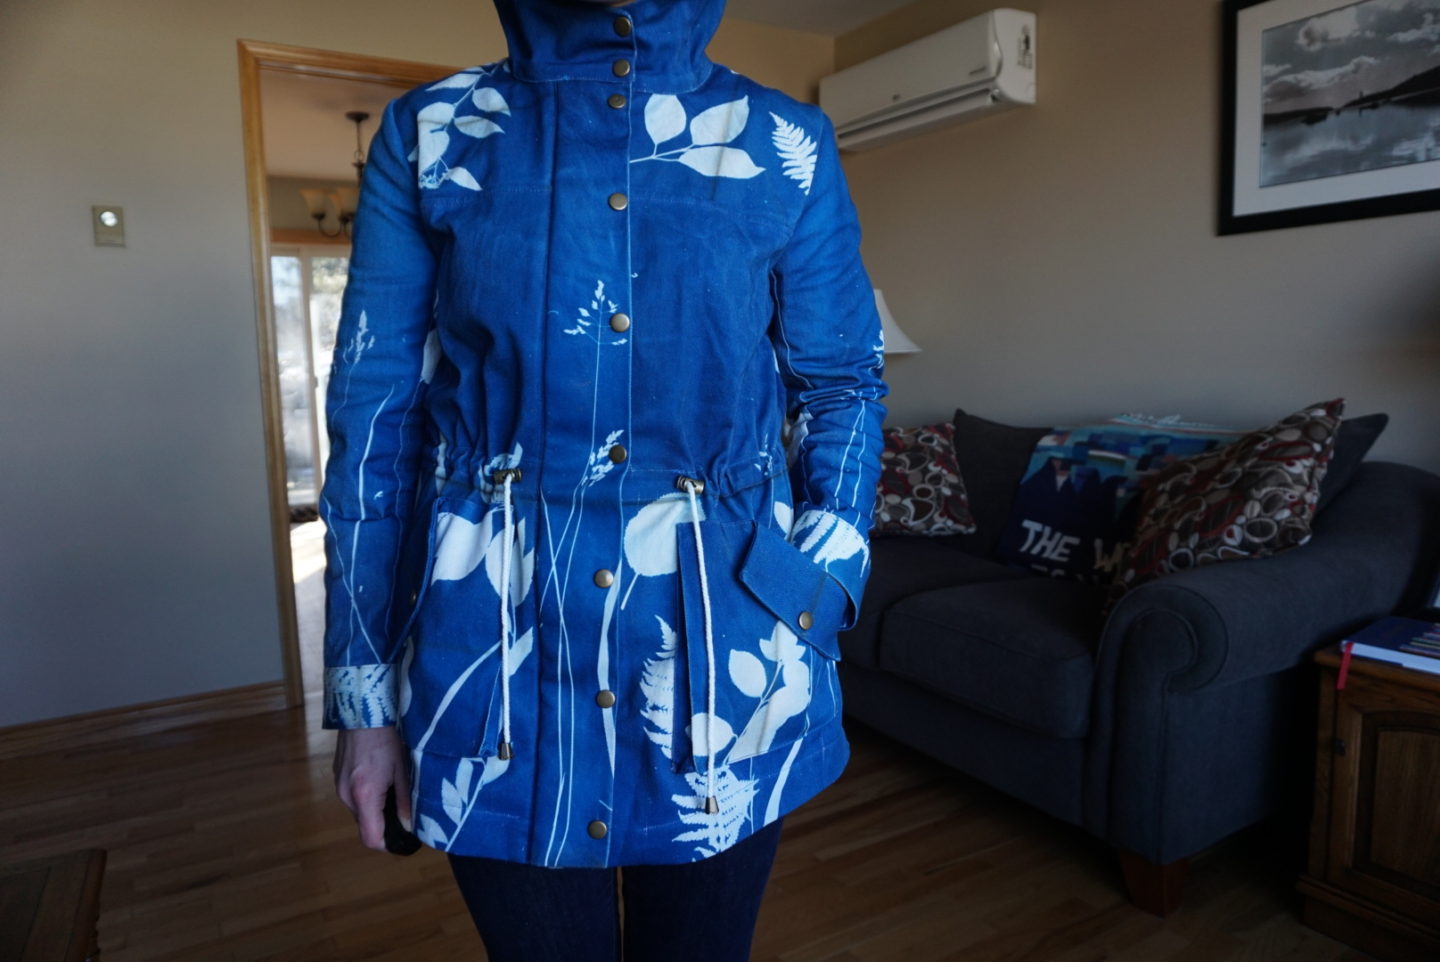
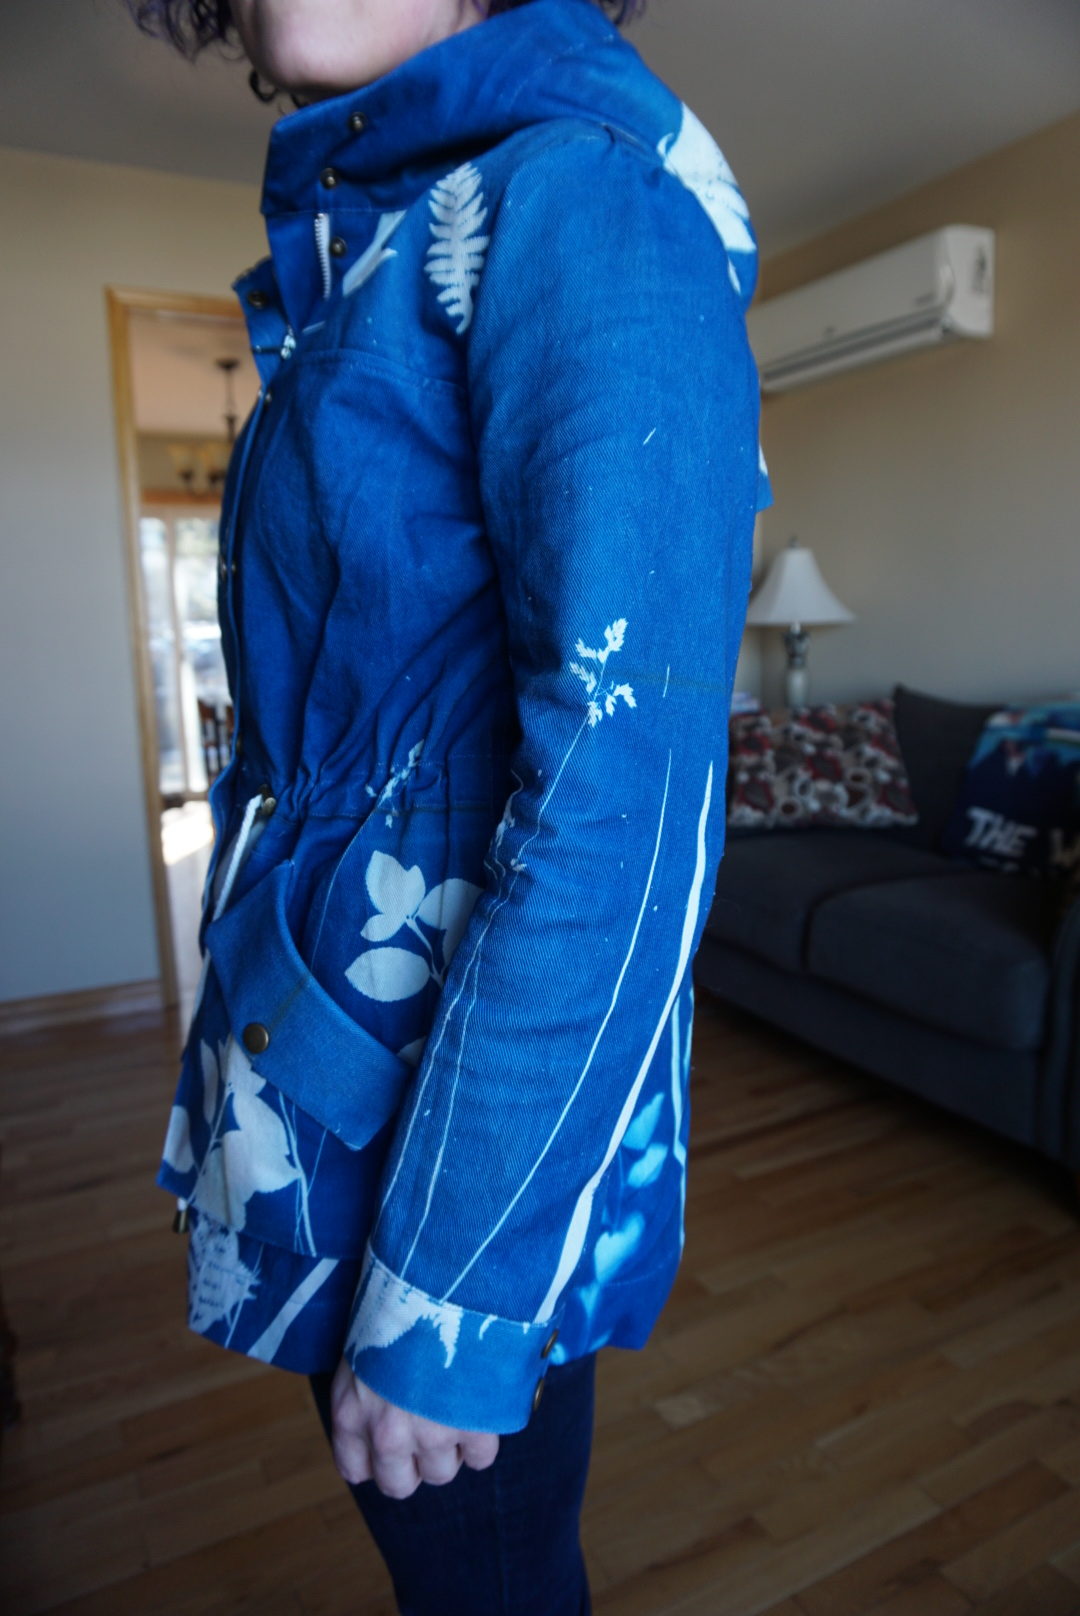
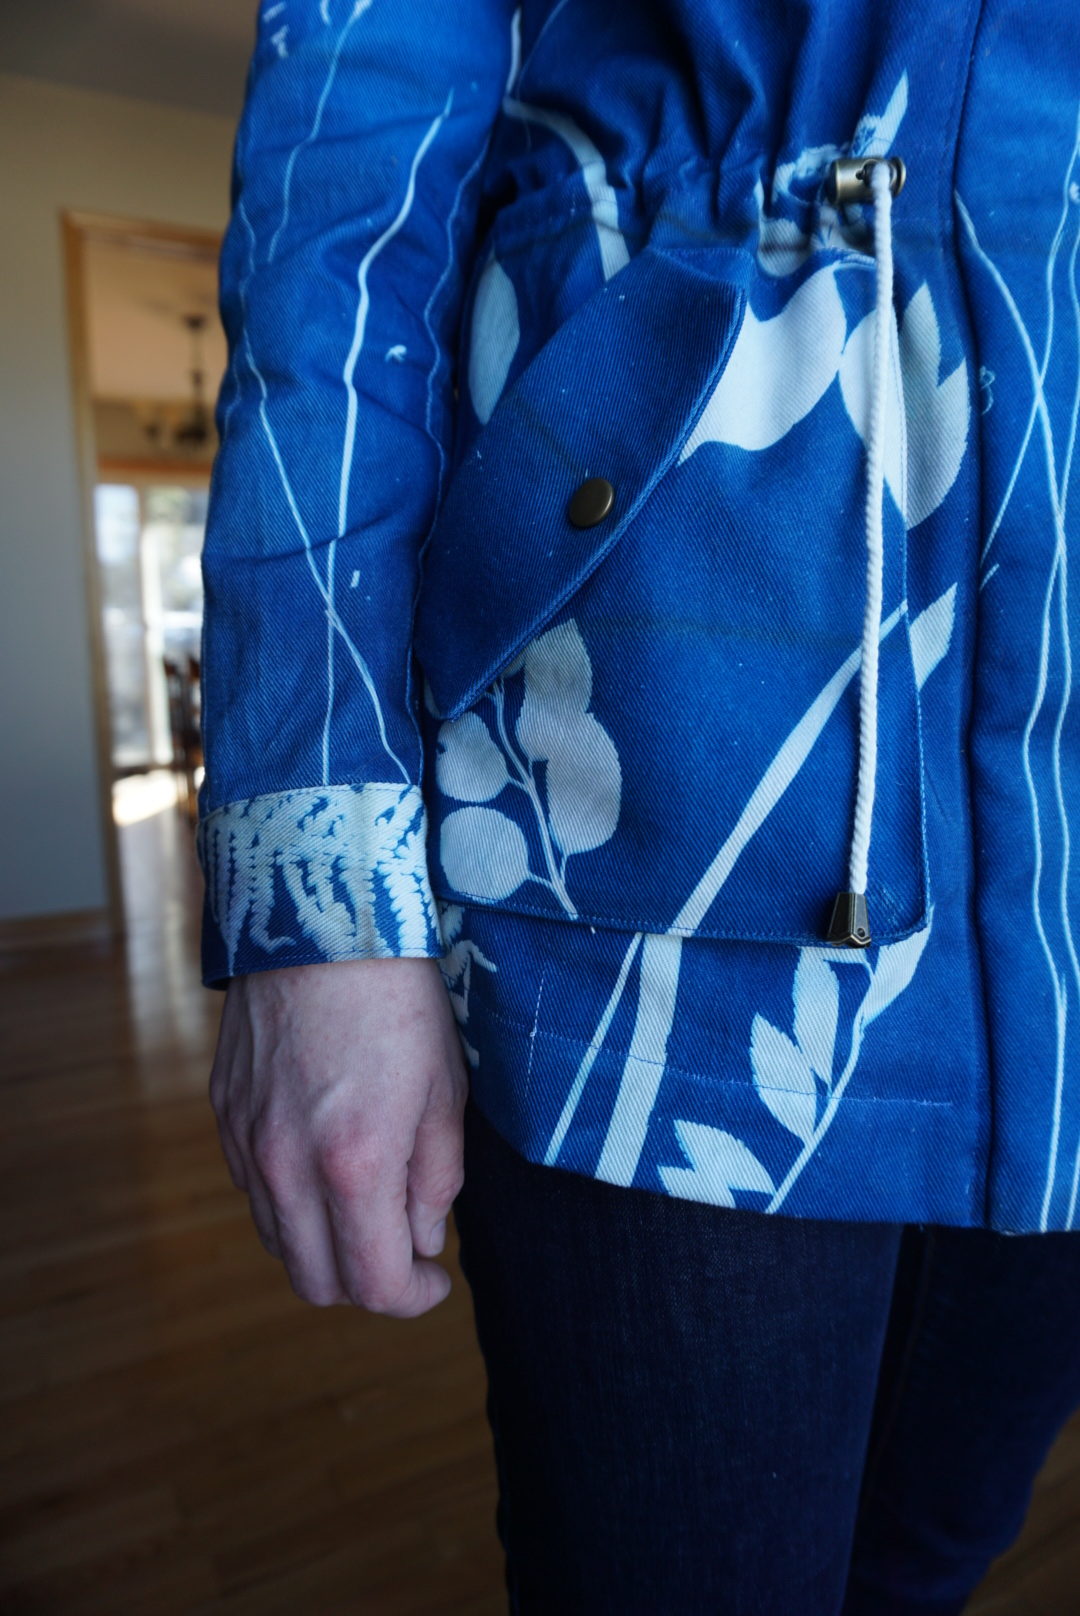
Another place where I was very purposeful about pattern placement was on the cuffs, where I laid a fern across each one. When I interfaced them, I had to made sure to make the fern side the exterior side. I like the way the fern tendrils reach toward the hand in a way that feels very contrasting from the more sparse, delicate grass that grows out of the bottom of the sleeves. As well, something I’m quite surprised by looking at these photos is the consistency of the colour overall. I did use a timer, but considering I was dragging massive double-paned windows in and out of the sun in high heat and shifting sun position, I’m pleasantly surprised. I’m glad there’s some variation in the shadow colour in terms of starkness, and as well there are variations in the blue which I think give it a bit of depth, but overall I think it’s pretty cohesive!
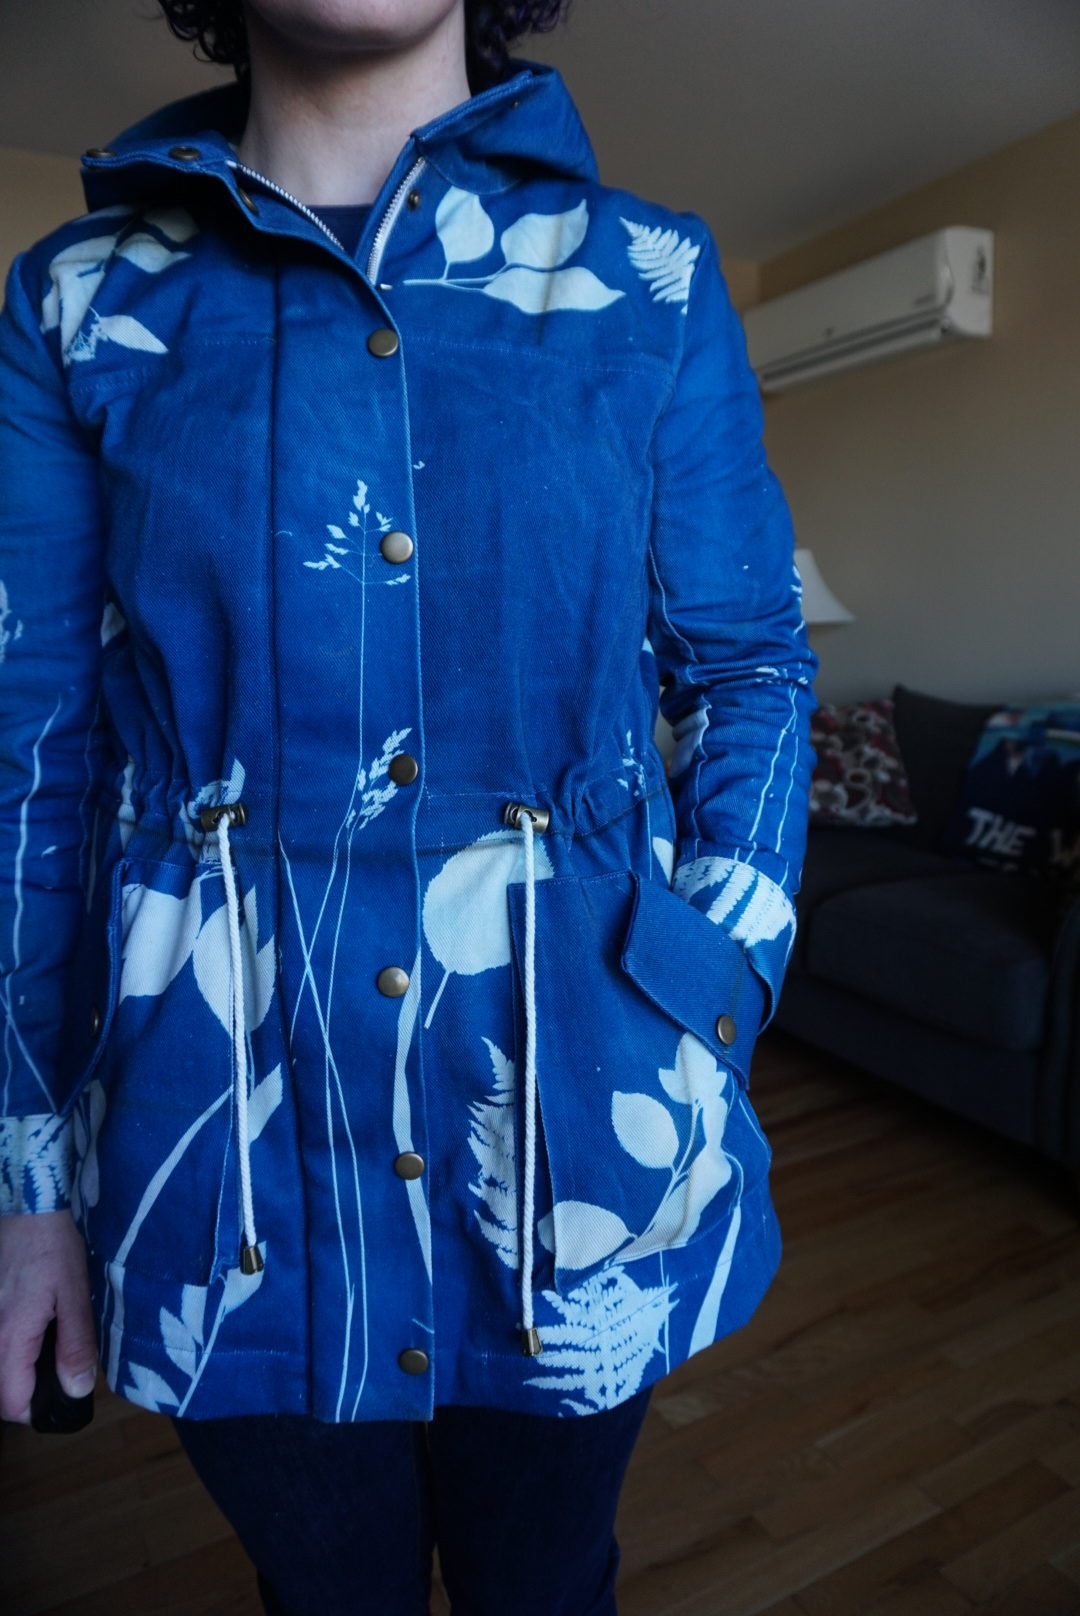

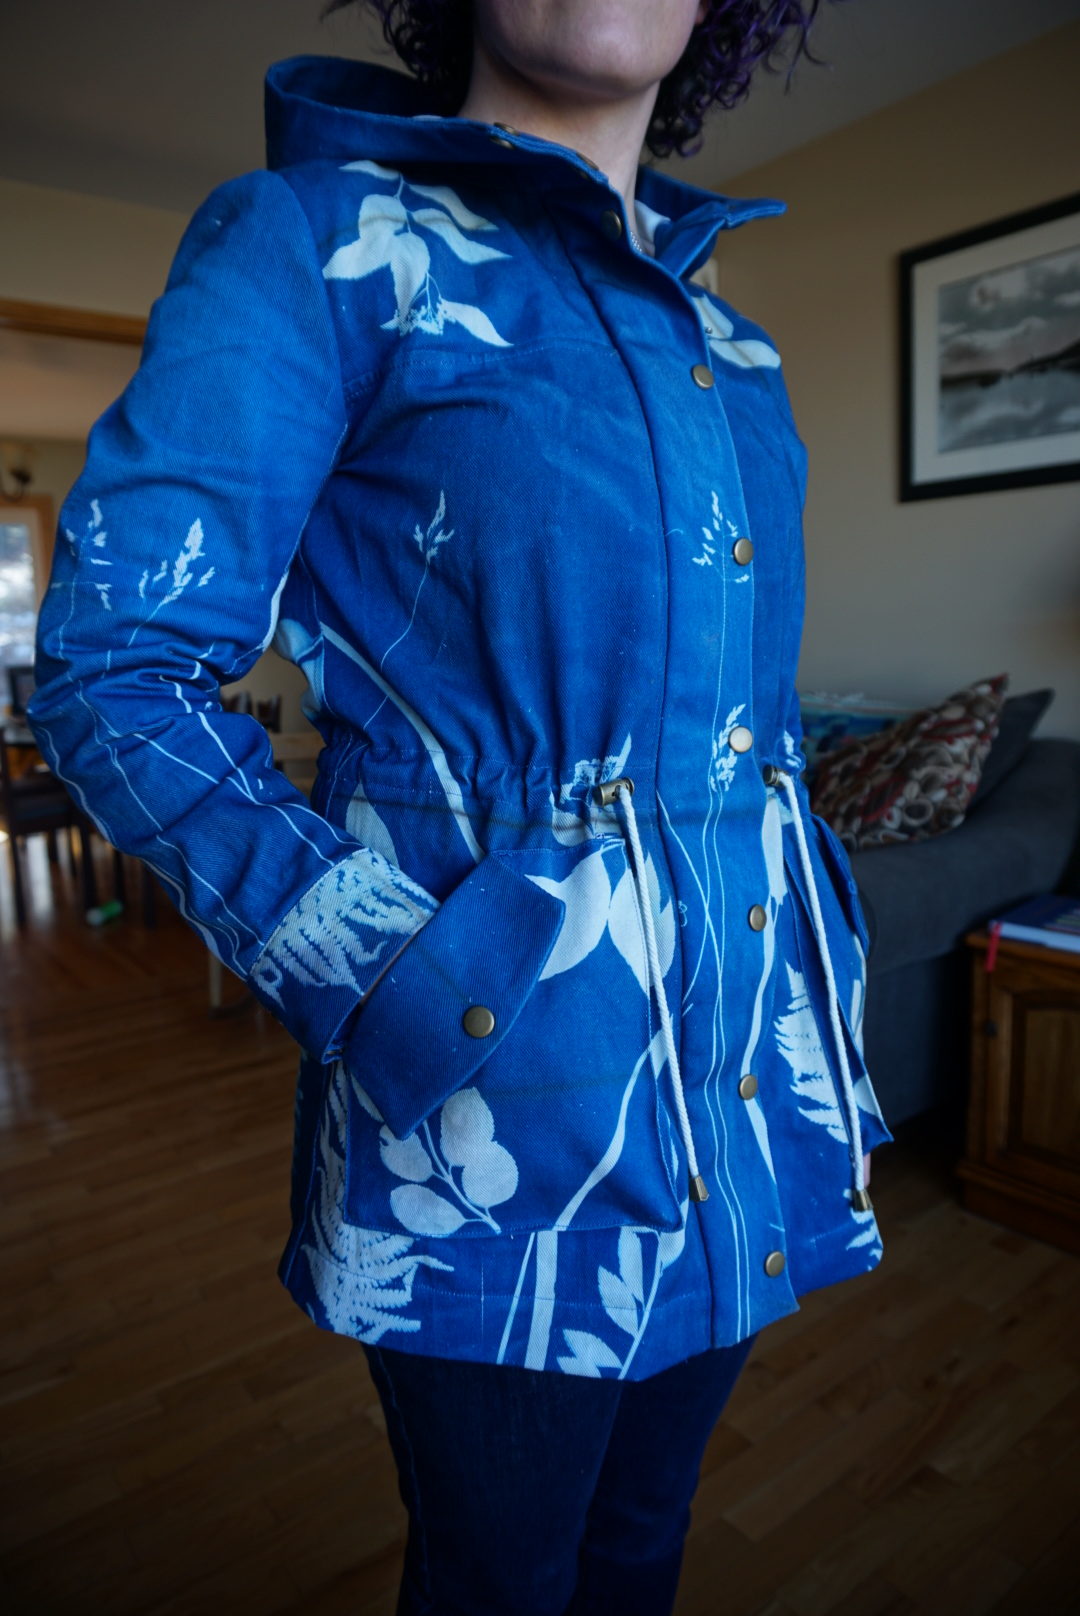
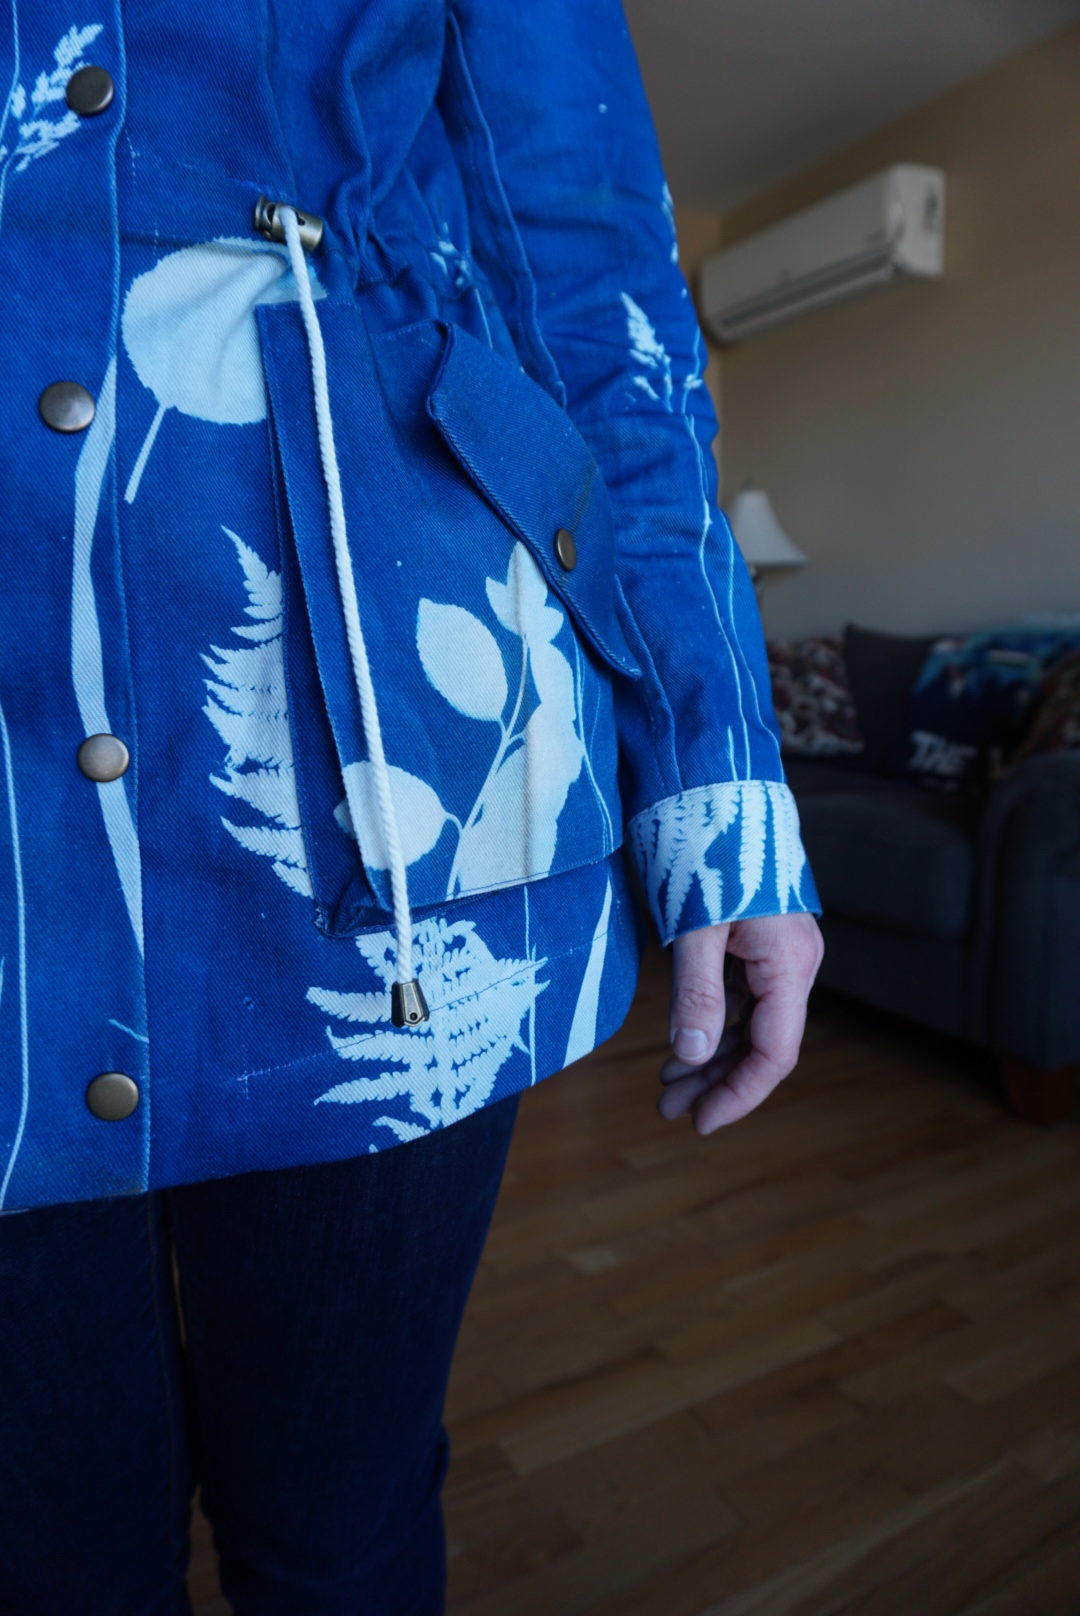
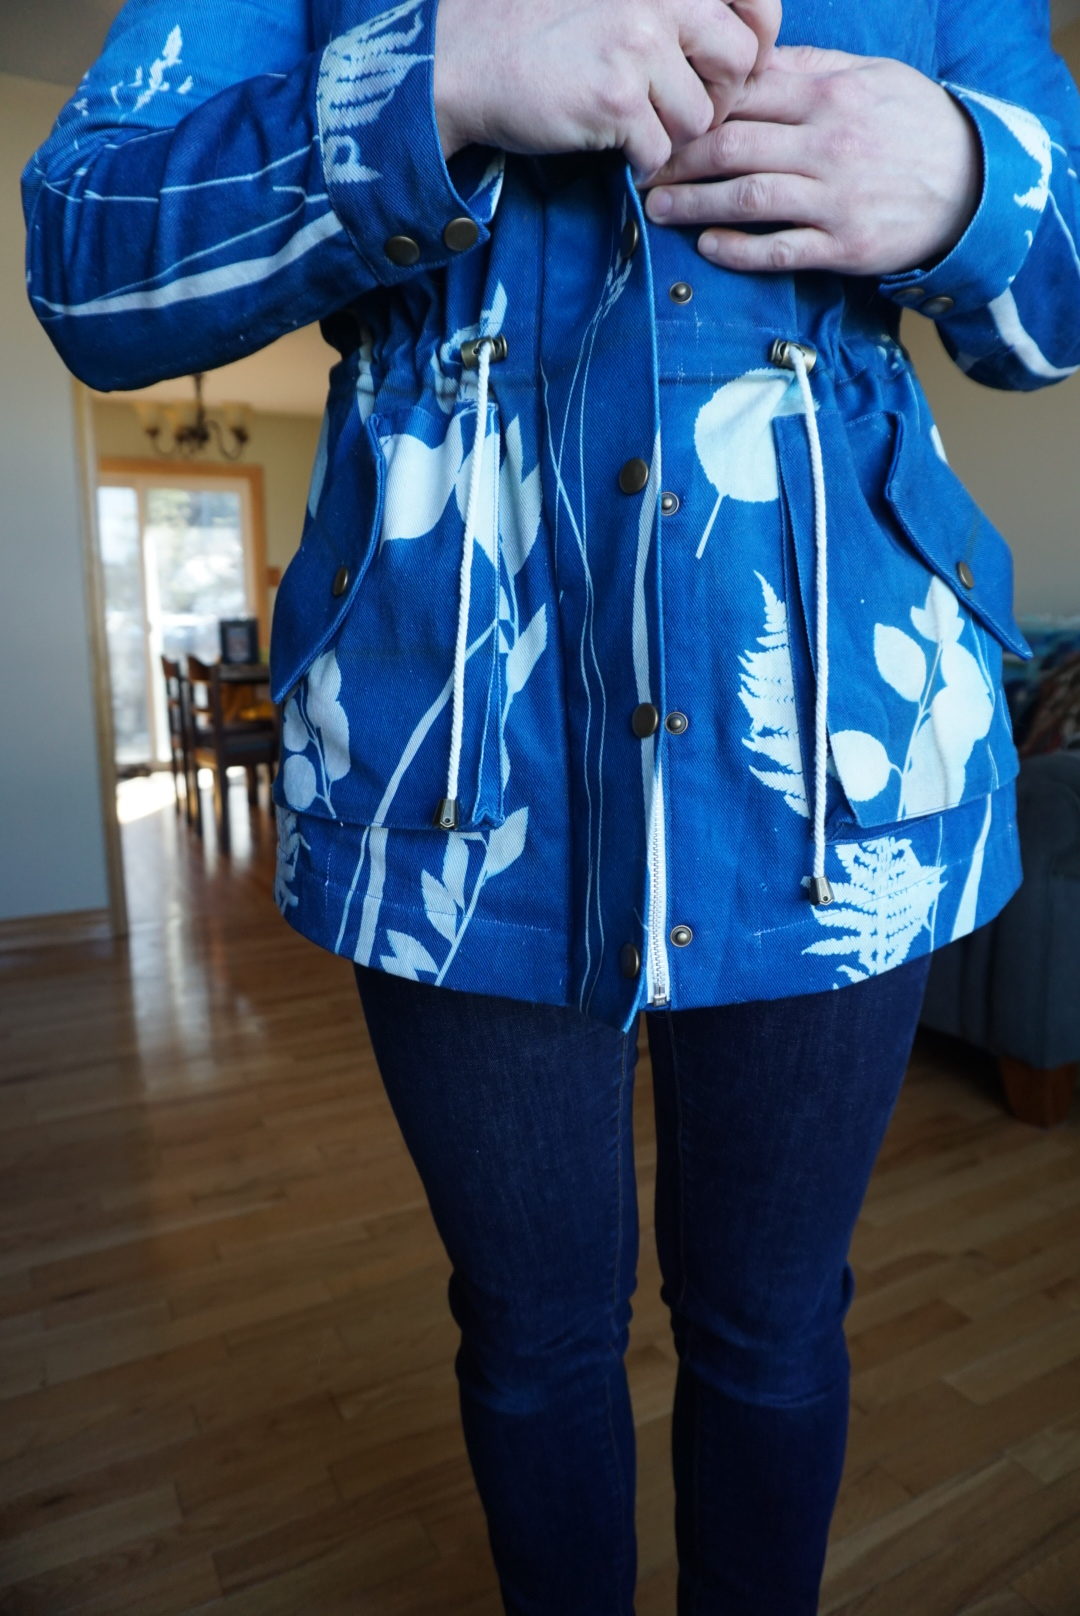
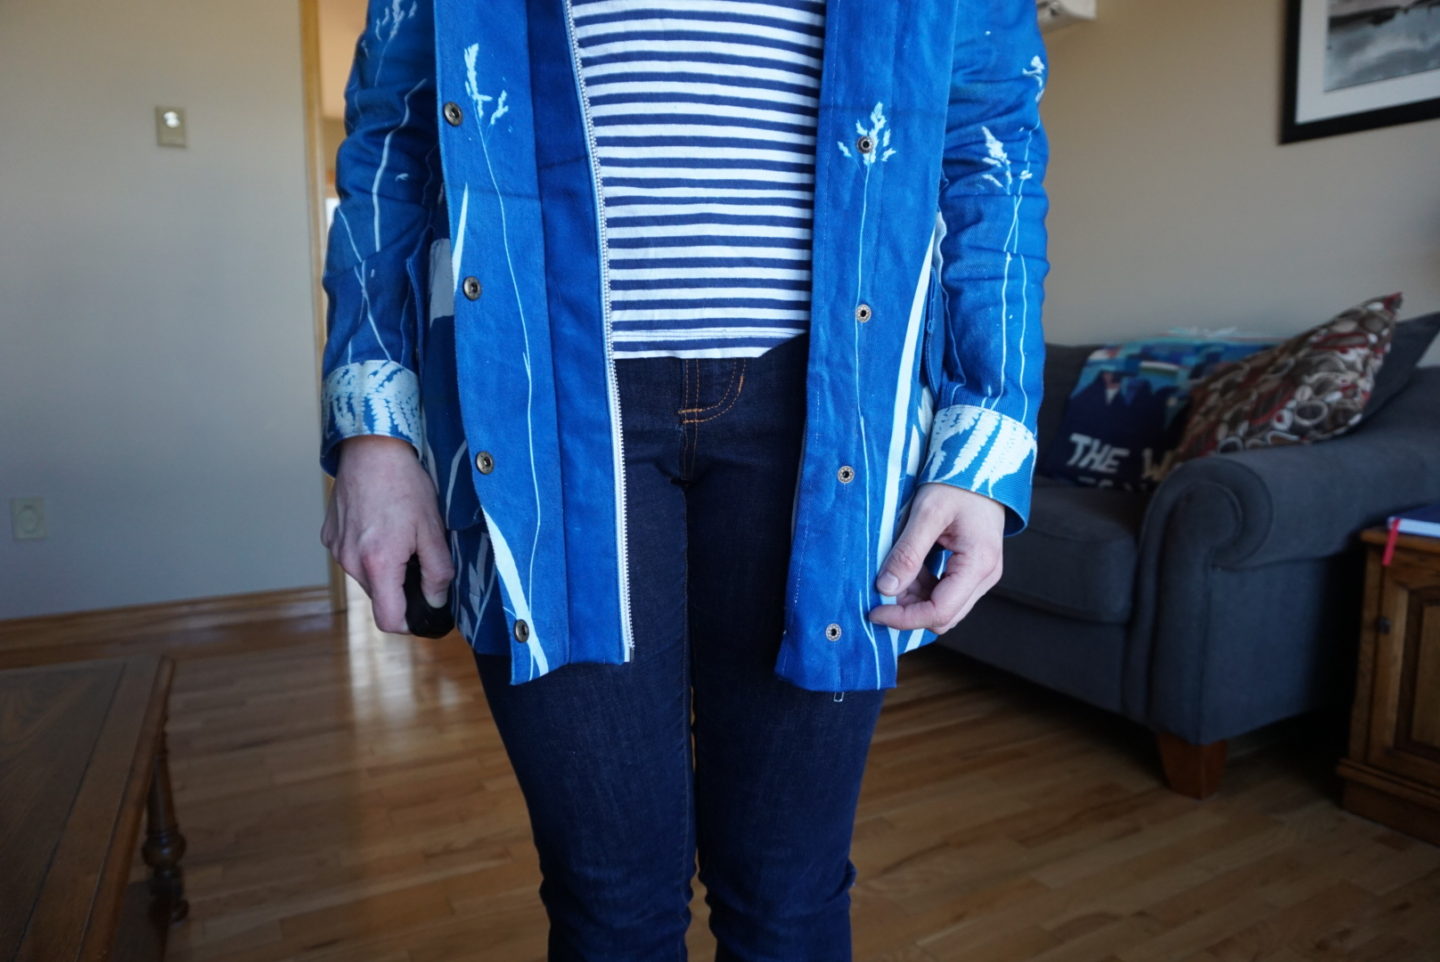
I was in Vancouver last July, soon after printing the fabric, and I went to Dressew to find a zipper for my anorak because I’d heard they were the place to go for zippers and other notions. I actually bought 4 different colours of zippers (they actually had many colours of 26″ long separating metal zippers!) because I didn’t have a good mental impression of the fabric colour and I didn’t have a swatch with me on my trip. I ended up going with the white because I loved the contrast it gave, as well as tying in the white plant shadows I’d made on the fabric. I also used a white drawstring for that reason. I actually couldn’t find a good one in store when I was first searching, all terrible stiff/scratchy polyester braiding, but then I put a call out on Facebook yesterday afternoon and within an hour I had this beautiful cotton cording in hand! Coincidentally from the same heroine who provided me with the windows to do the printing in the first place! I know good people.


On the inside, I cyanotyped the drawstring casing so it would also be blue, but I didn’t put any shadows on it. I think in retrospect it would have been clever to put small letters on it spelling my name as a signature inside or something, but obviously I can’t do that now. Next project! I also wasn’t thinking straight when I put the snaps on the cuff – I think I was in “FINISH IT” mode – and I stupidly put the first one on the very outer corner instead of in the middle of the cuff, so then I ended up putting two snaps on each cuff to even out my mistake. I’m actually into it in retrospect, but I did initially have a panic because snaps involve poking holes in the fabric!
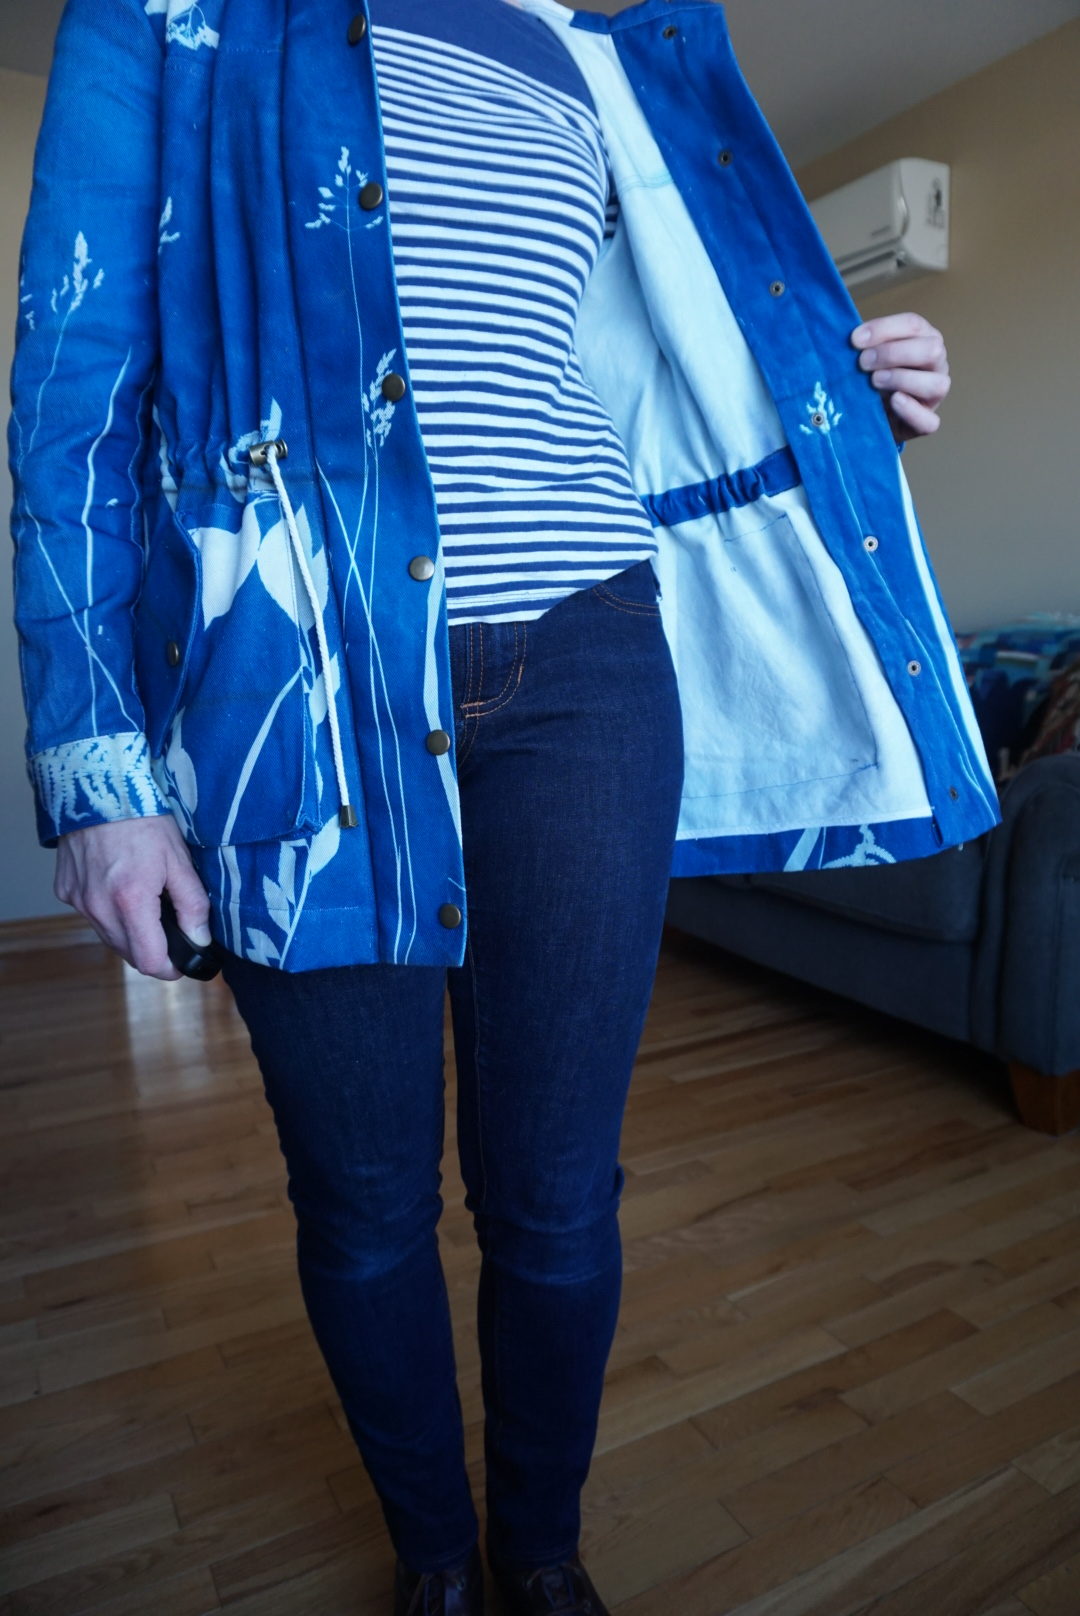
One of my most favourite details of the print on this jacket is something that happened COMPLETELY by accident, which I think is kind of magical. When I was printing all the various facing pieces, I wasn’t paying very much attention to which was which and how it would all go together in the actual jacket, because there are SO MANY FACING PIECES and I decided not to care. I just printed them all quite delicately, because I knew I had lots of stronger leaf shapes on the front pieces. I accidentally printed one of the fabrics upside down (it’s one that actually has a right side up because part of the upper edge curves up to match the neckline), but I ended up flipping it back the right way and snipping off the curve and hoping it would be fine – it was – and that created the serendipitous magic that you see below. Both of my innermost facing pieces have a delicate grass flower growing from the bottom, and I think it’s so beautiful! I think I love it even more because it wasn’t planned.

I’m so glad I got over my silly reservations and just sewed this jacket! I’m so happy to have such a special garment; I’d been wanting something like this for myself ever since I made my sister’s Kelly out of fabric she’d dyed herself. I think the Kelly is such a great canvas to do something interesting with print, especially something like cyanotype since it has lots of pieces but none of them are particularly large. I’m hoping to get into some natural dye things this summer, but we’ll see how things play out in this uncertain world! At least I have lots of sewing to keep me distracted – what should I work on next? Quilts? Clothing? Knitting?!

This is outstanding! The huge amount of work you put into it really shows. It’s obviously made with care. You’re also making me want to revisit this pattern – I’m not a big fan of my Kelly, mainly because I rushed. This is the opposite!
Author
Thank you! 🙂 I want to see yours! I tried to check your blog to see if it was on there but couldn’t find it. Are you hiding it from the world?!