
I’m so excited about this project! It’s a collaboration between me and my sister for her birthday (which is today)! And this blog post features writing from Amy as well! Amy went to NSCAD for her undergrad degree, and took a bunch of textiles courses during her time there. She hand-dyed this fabric as part of a course she took, and wanted it to become a garment that she could wear. She graduated a few years ago and it had been sitting in a closet since then, so for her birthday I said my gift would be to turn it into whatever she wanted. I’ll talk more about the garment itself below, but Amy wrote about the dyeing process for this post, so I’ll turn it over to her! Her thoughts start below this photo.
The dyeing process is a lengthy one, and not necessarily because you are constantly working on the fabric for a long period of time, but because of the waiting and the soaking. There are two main categories of dye, natural and chemical. While I much prefer natural dye techniques, sometimes the dyestuff is not available do you because of the season, or the process will not provide the vibrancy or tone of colour that you are looking for. Chemical dye powders are much cheaper than natural dye powders (there are companies that process natural dyestuffs into powders for purchase), but the chemical powders are much more hazardous to human health as well, so there are trade offs.
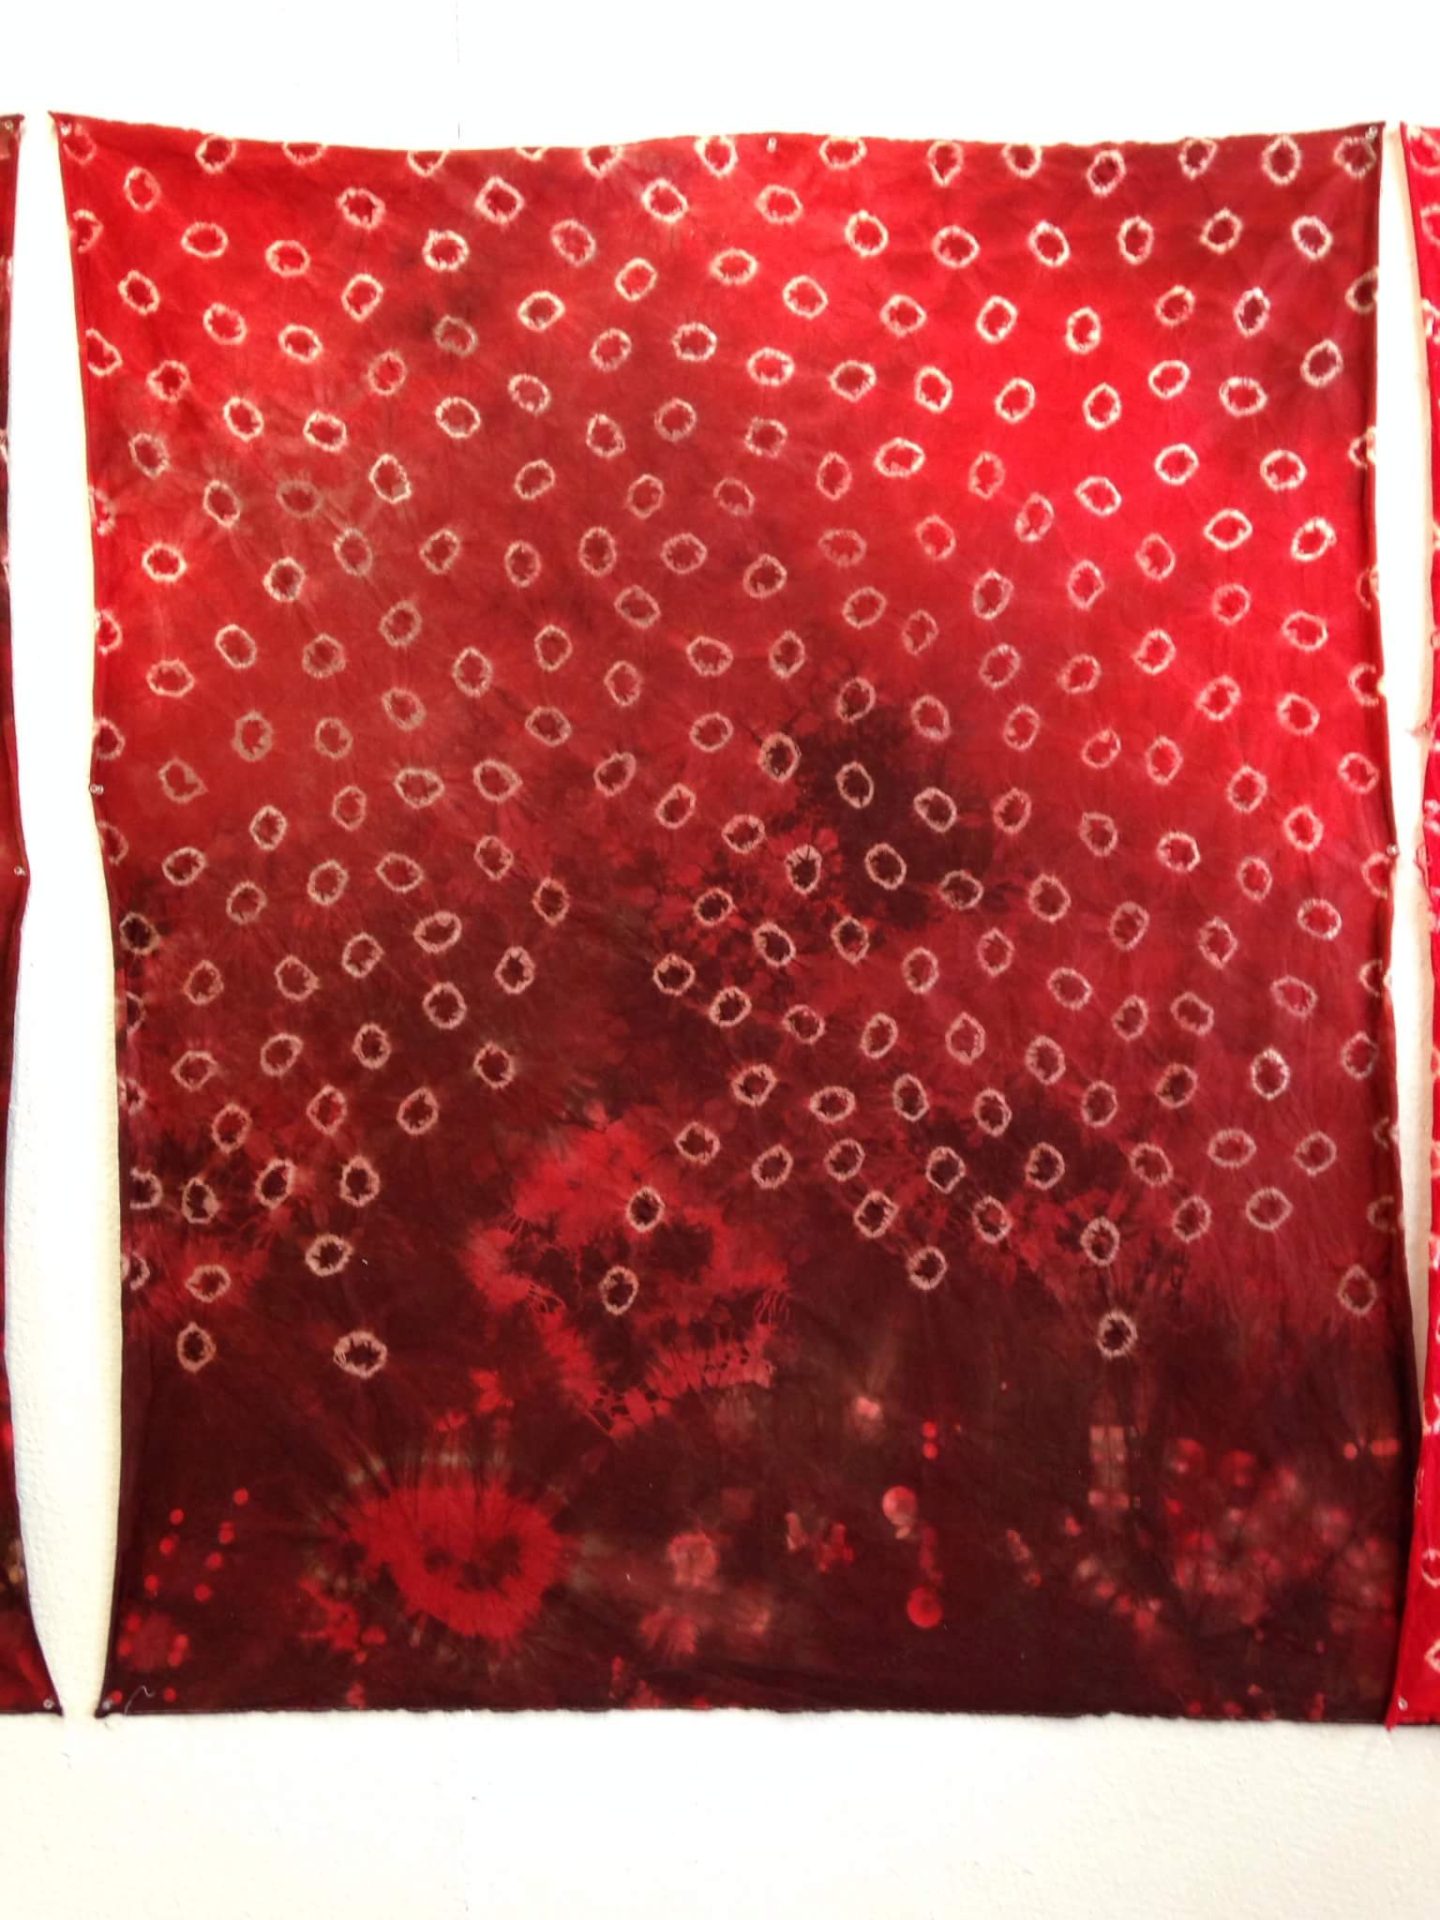
For these pieces, I bought a vast length of 100% cotton, twill weave canvas and split it into four equal panels. As the four panels were intended to be viewed together for an assignment at NSCAD, I wanted them to be similar to each other, but for the pieces to “progress” through a colour and pattern path as you looked from panel to panel. They were representative of a disease infiltrating a living body.

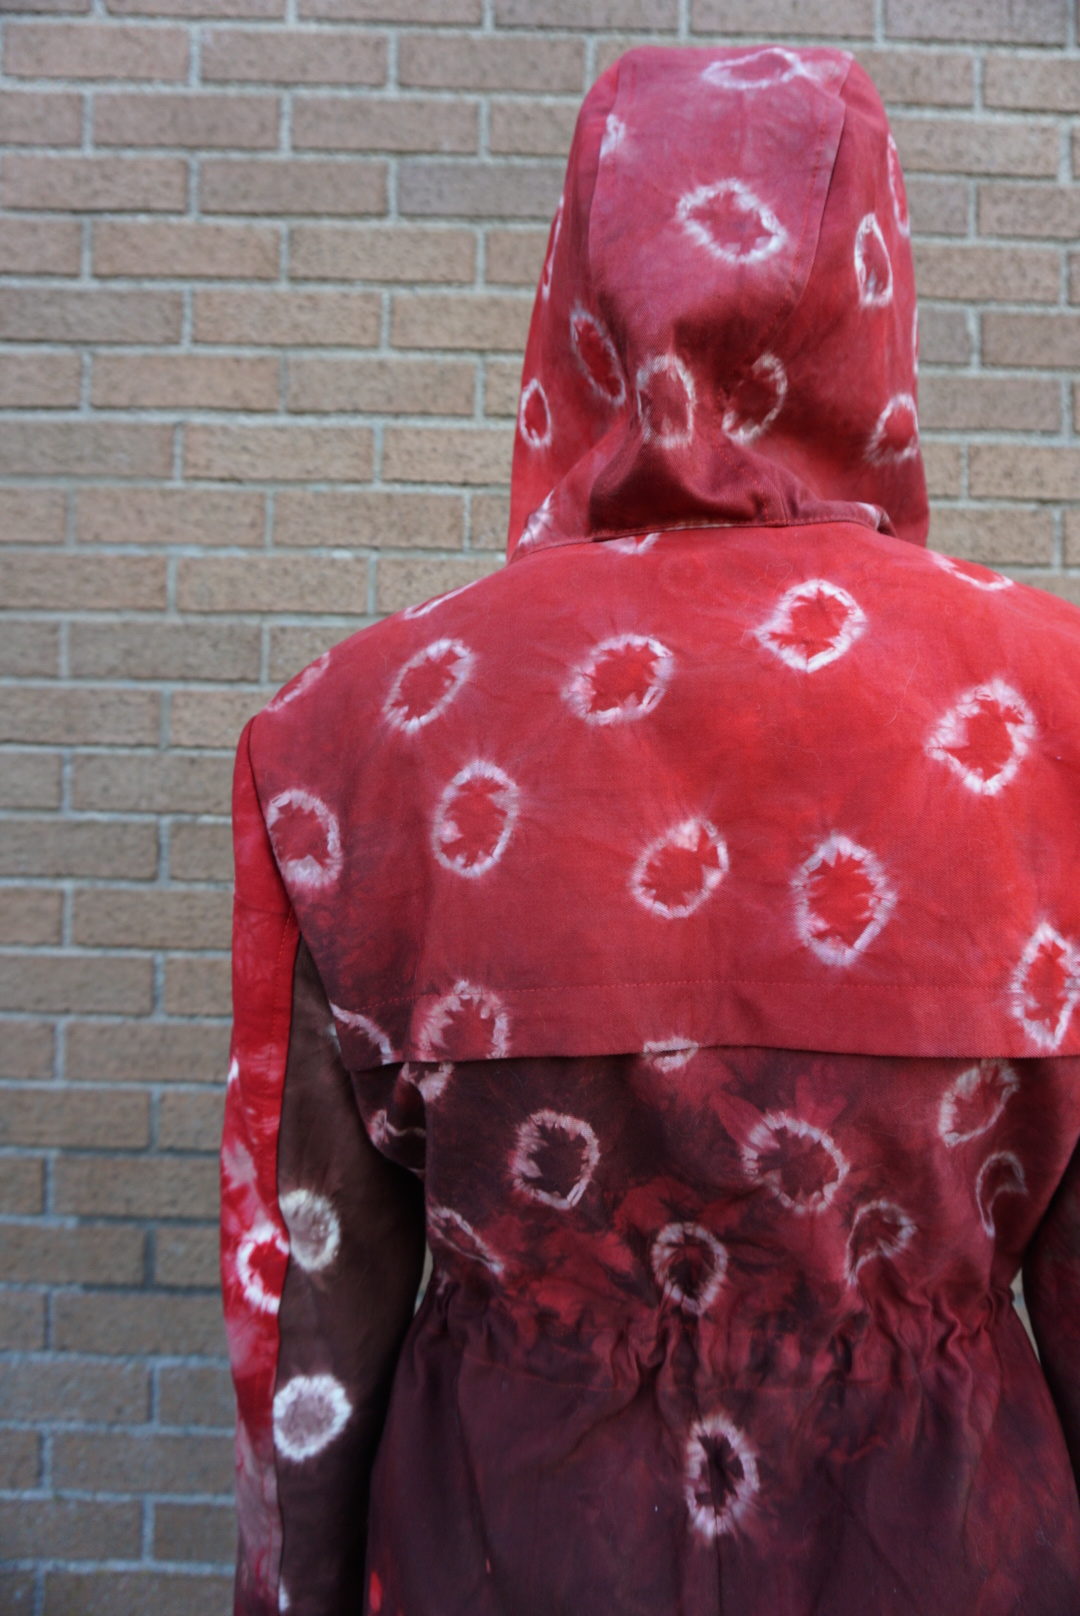
Over the course of many days, I tied up the panels with various restrictive techniques. I wanted the places I was tying up to remain white or to have only a light wash of the dye bath colour. The predominant thing I used to tie up were Lite-Brite pegs. I don’t have a Lite-Brite anymore, but for some reason my hoarder nature said I would use the pegs, and here I was using them! I used tiny pieces of twine to tie up each individual tiny peg into the cloth, and pulled extremely tight, so I would get as white a circle around the peg as I could after the piece went in the dye bath. Each panel got a different amount of pegs, arranged so that from the first panel to the last, the white circles from the peg represented the “disease” taking over the panels, with the last one entirely covered in them. I also restricted the fabric by other Shibori techniques, primarily clamping wooden circles tightly onto a folded section of the fabric.
I used chemical MX dye powders to mix a fire-engine red dye bath, and a brown dye bath in plastic buckets. During this part, you have to wear a dust particle mask, gloves intended for handling corrosive chemicals that go up to your bicep, and a full apron or lab coat. You have to measure and mix the dye powder with water in plexiglass containment units so the powder chemicals are not entering the general air of the studio, and then add the concentrated mix to the measured water in the plastic bucket to make your dye bath. The first three panels were entered into the brown dye bath, but only partly, so that the brown dye started to creep up the fabric left out of the bath, but not take over the entire piece. Then you wait hours while it soaks. Then massive rinsing occurs, as you try to get as much residual dye of out the fabric. Then you must fully dry the piece before you put it into the secondary dye bath. As I wanted some restricted parts of the fabric to remain white, I could not untie the bundle of cloth, so this dying process took a few days.
After the three panels were dry from their brown dye baths, I took out some of the tied-up restrictions, as I wanted there to be bright red parts of the fabric within the brown. Most of the Lite-Brite pegs remained tied up as I wanted the white circles to illustrate the concept of the panels together as one piece. Some of the fabric was tied up, clamped, or restricted in other new ways to preserve the brown dyed fabric when the panels went into the red dye bath. As before, some of the fabric was left out of the dye bath on certain panels, to retain the brown, but the last panel which had no brown on it at all was fully submerged in the red dye bath. They were left to soak for the appropriate amount of time, and then rinsed out thoroughly.
I wanted the white on the canvas to remain as contrasted as possible, so I chose to once again allow the panels to dry with the tied restrictions. If you choose to take out your restrictions when the fabric is still wet, the dye can run into your restricted areas, even if you have rinsed 900 times. So after a few days’ wait, I removed all restrictions on the dyed panels, and ironed for hours! After having been tied up and then dried that way, the fabric was so wrinkly.
Finally! The process took about two weeks in total, but I was finished and I had my four panels. The first began with a lot of brown, with only minimal red coming into the piece to interact with the “healthy” fabric. The middle two panels showed the red dye infiltrated the panels, with the white circles I had restricted during the process continuing the takeover. The last panel was entirely patterned with white circles on the bright red fabric, with no trace of brown left over.
Dyeing your own fabric is time consuming, and if you are using chemical dyes, it can have a negative effect on the environment and water quality. This environmental issue is the primary reason why I prefer natural dyes, but I also enjoy the process of adventuring through nature to gather your own dyestuffs. I think it connects you more deeply with the piece of fabric you are dyeing, than when you simply purchase your dyes from a store. Either way you go though, hand dyed fabric adds so much customization and colour options, and you end up with pieces that are 100% unique!
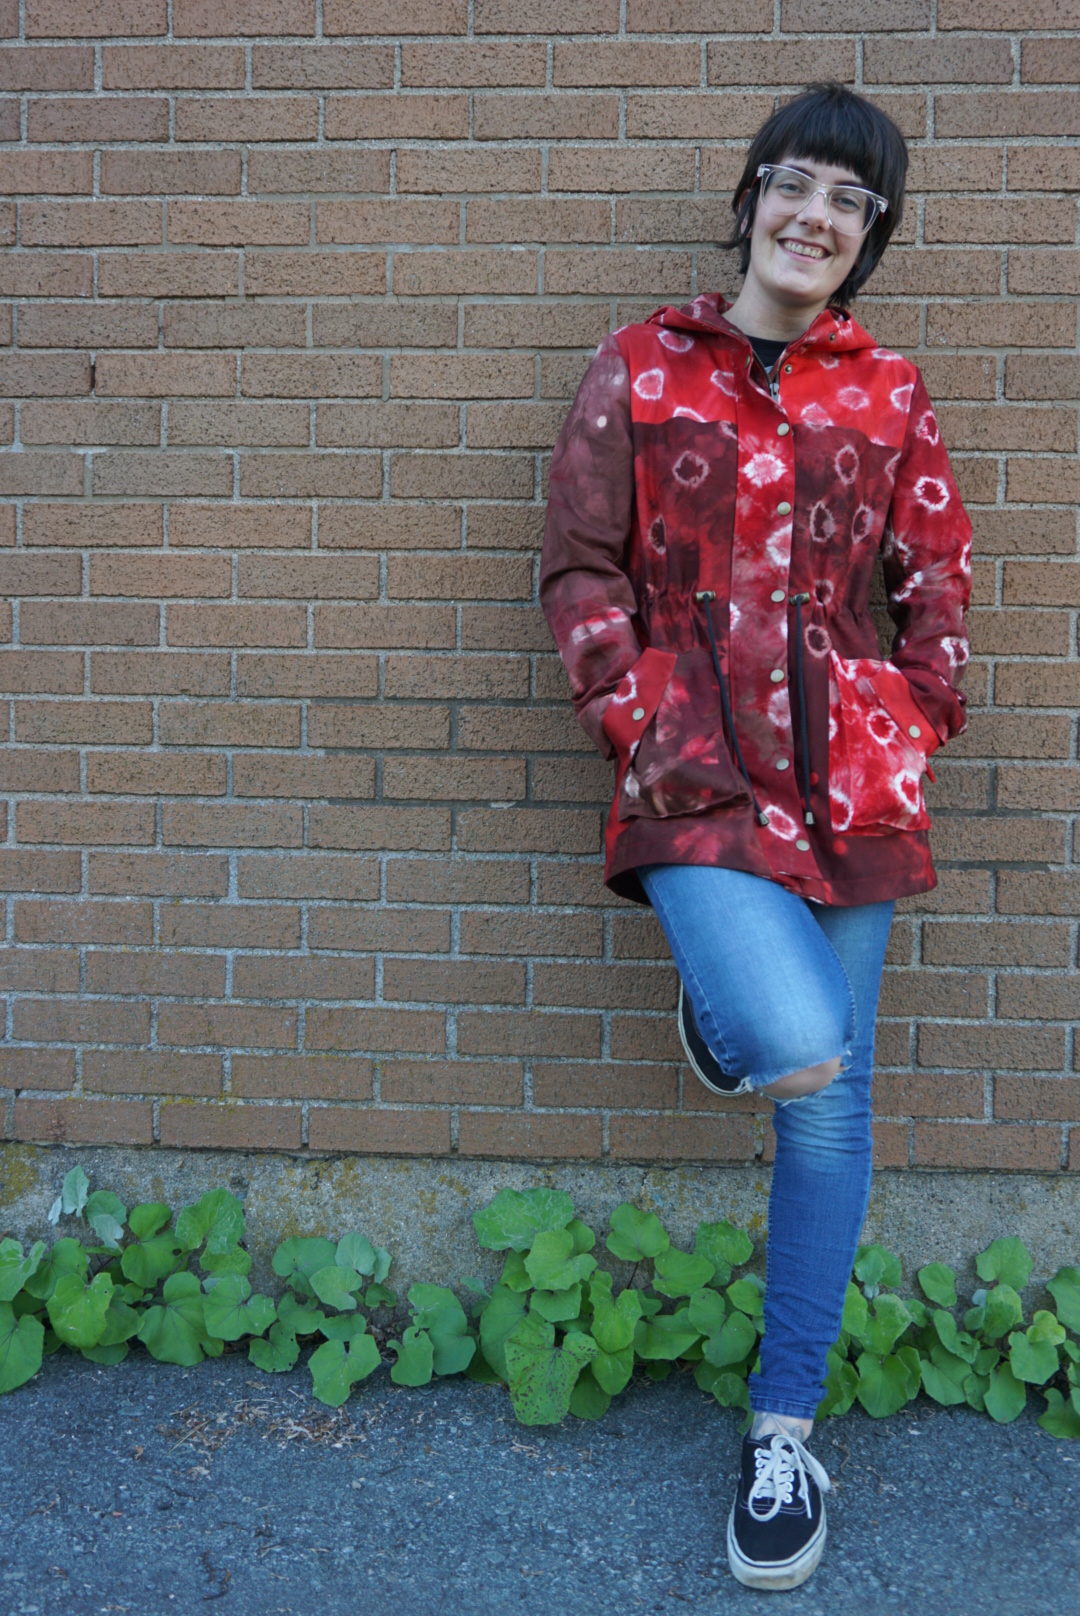
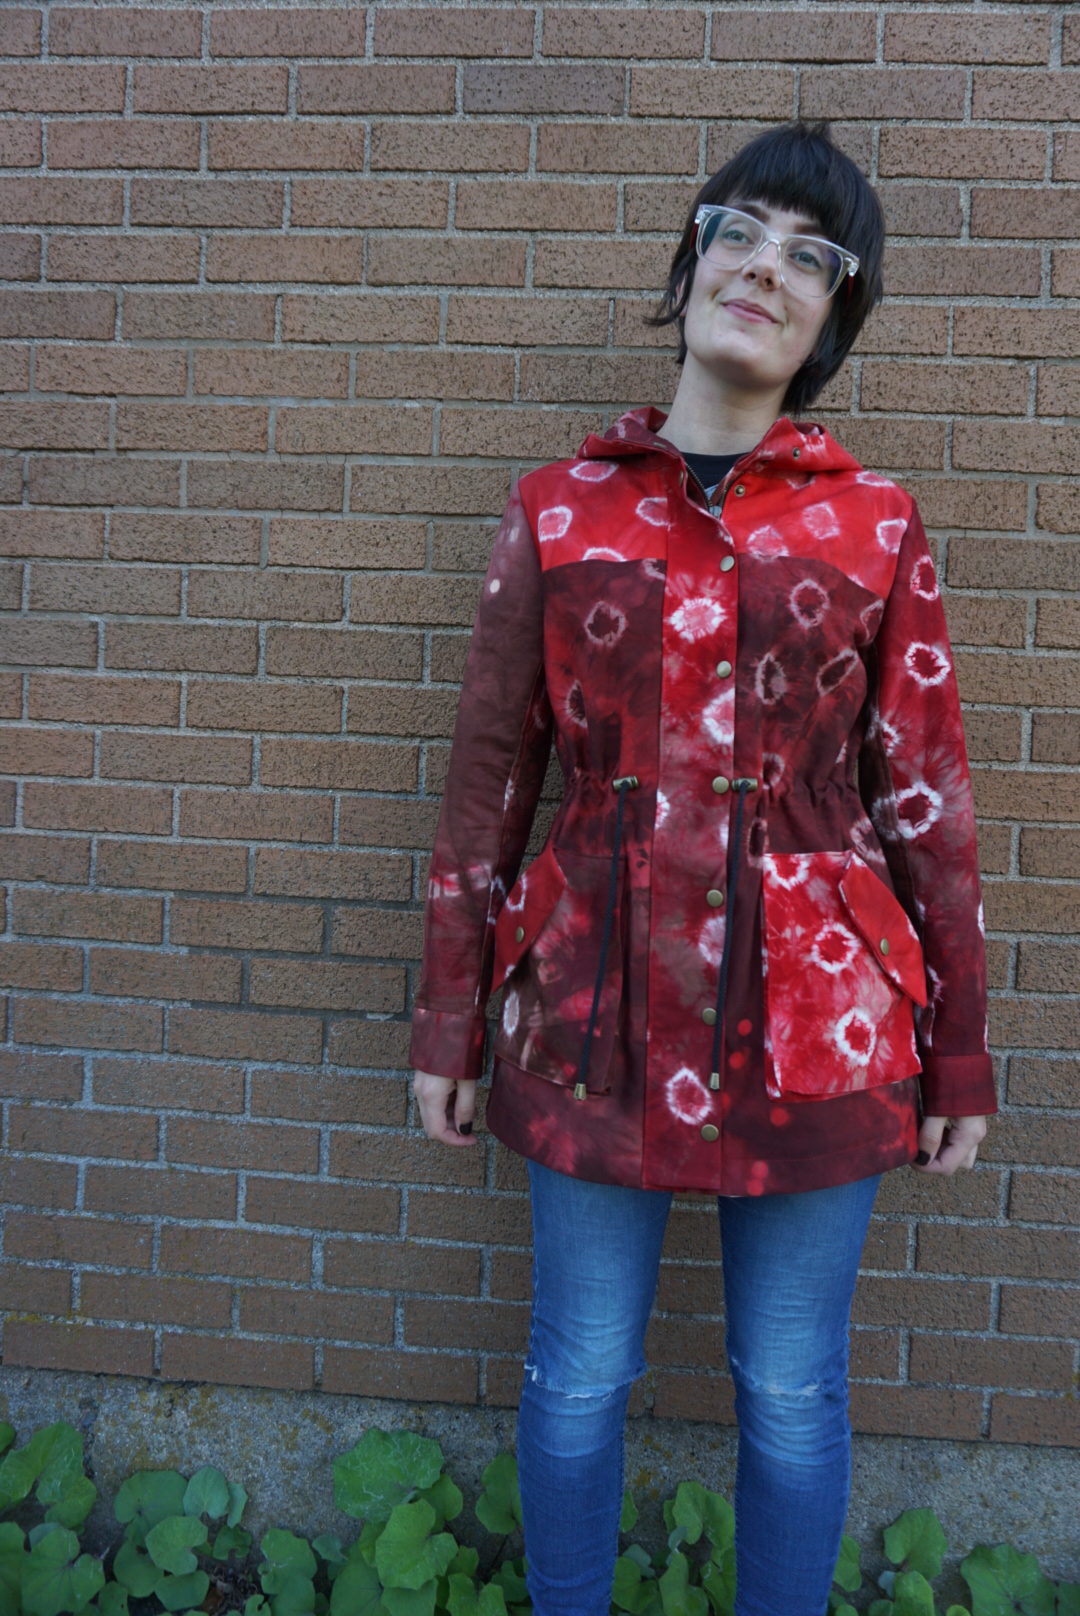
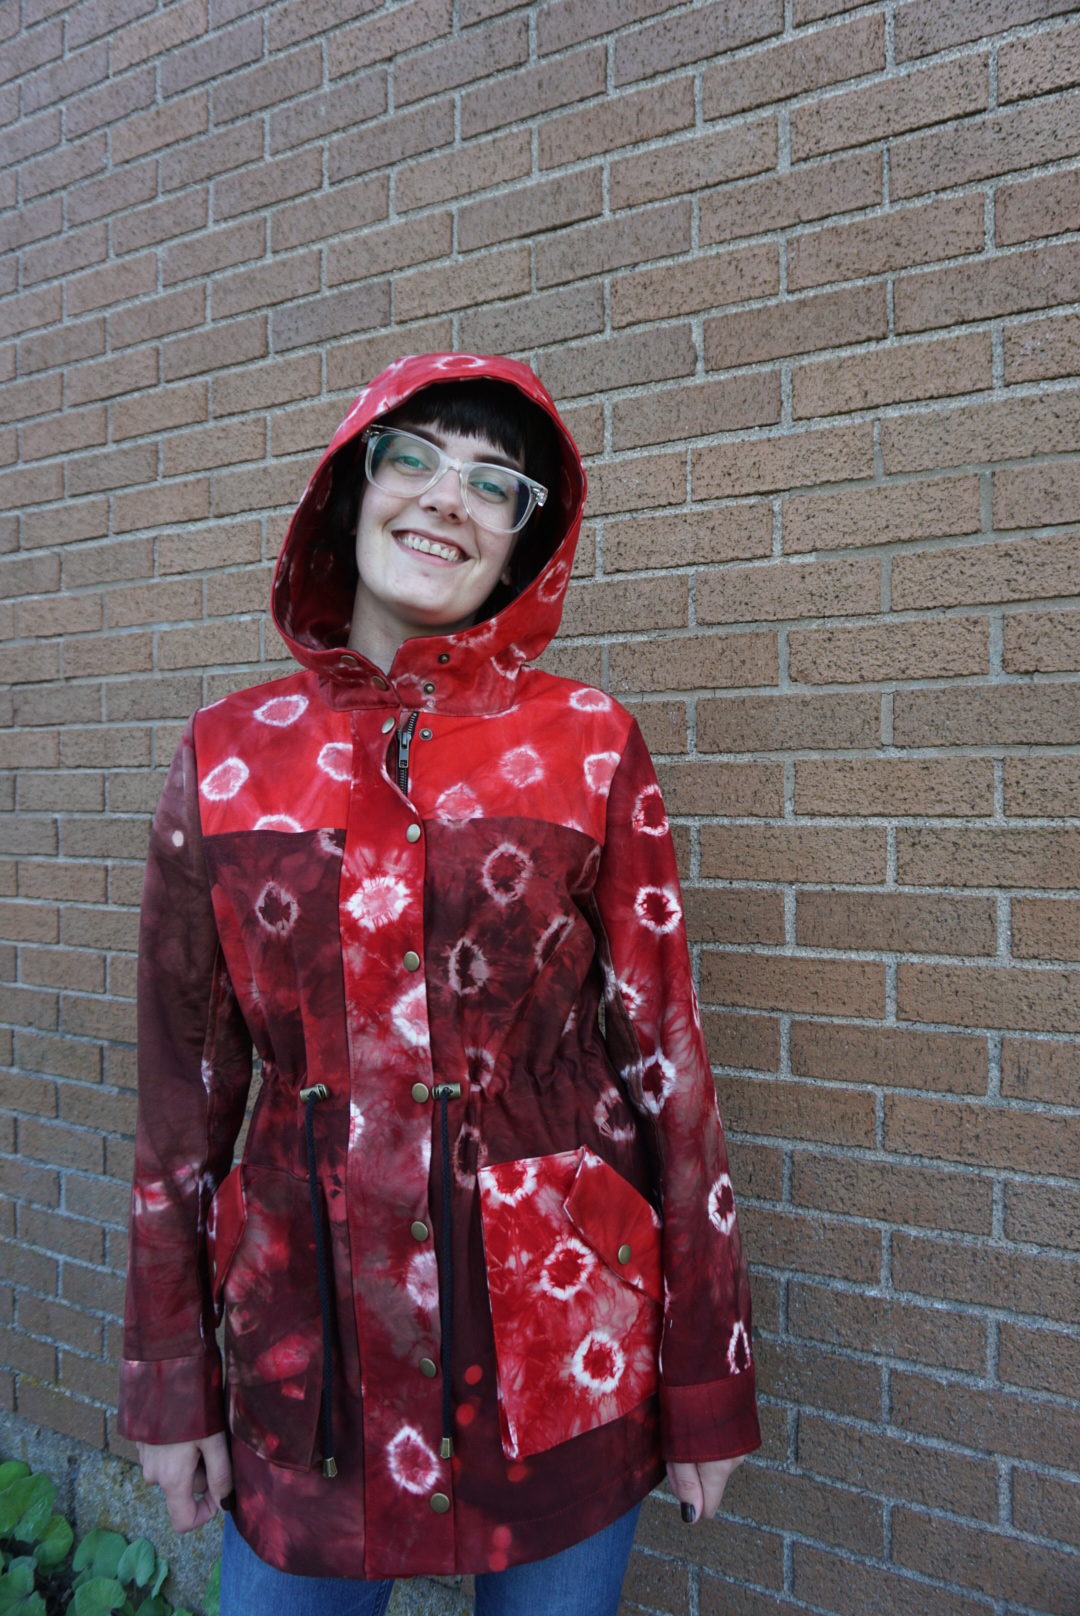
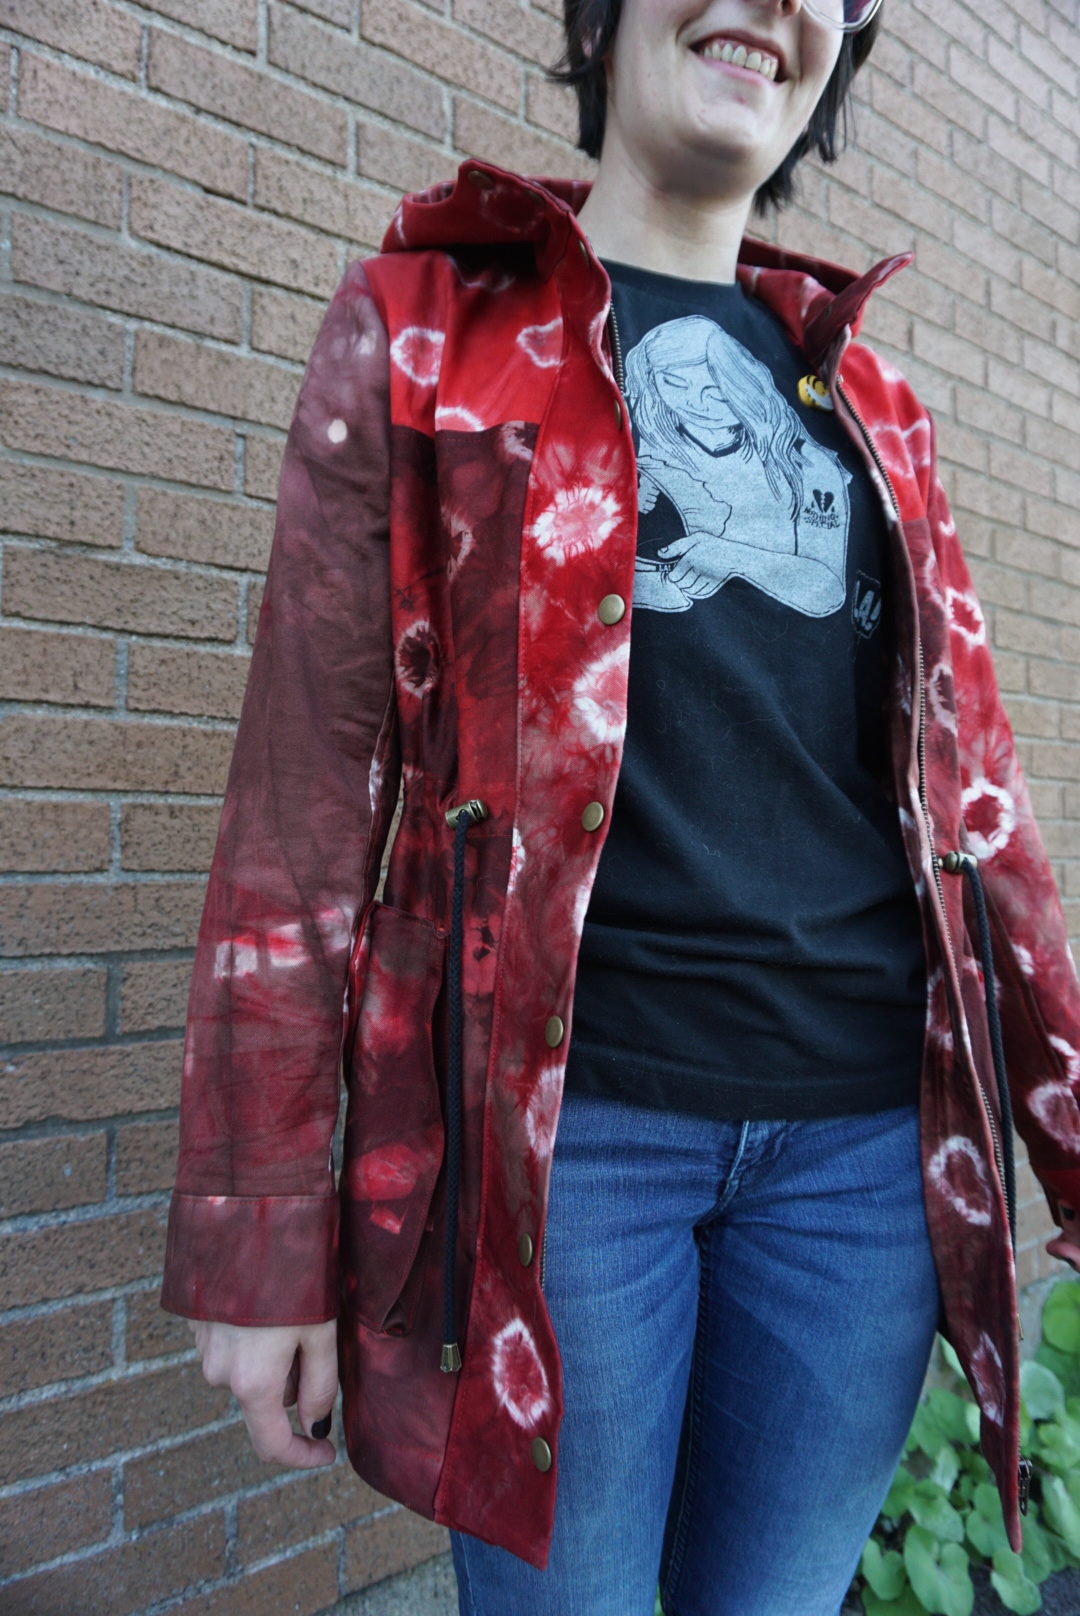
(I’m back!) Amy helped me with the cutting part of the process because she wanted to help choose pattern placement on the jacket. We cut everything on a single layer, which was more time-consuming, but allowed us to really customize the jacket and optimize all the unique elements of the dye in the fabric. I especially love the dots on the bottom front as you can see in the photo above.

I’ve made the Closet Case Kelly Anorak before, and Amy knew she wanted that pattern for this jacket. I actually ended up giving mine away, because I made it in this (kelly) green colour that I like the idea of in theory, but NEVER wear. Because of that, I knew how the sizing was and just made Amy a size down from mine (an 8). It was also a good practice run even though it was a couple years ago, especially with the snaps. I used a hardware kit from Closet Case Patterns that our mum bought for Amy for Christmas last year, back when she was thinking she would make the jacket herself.
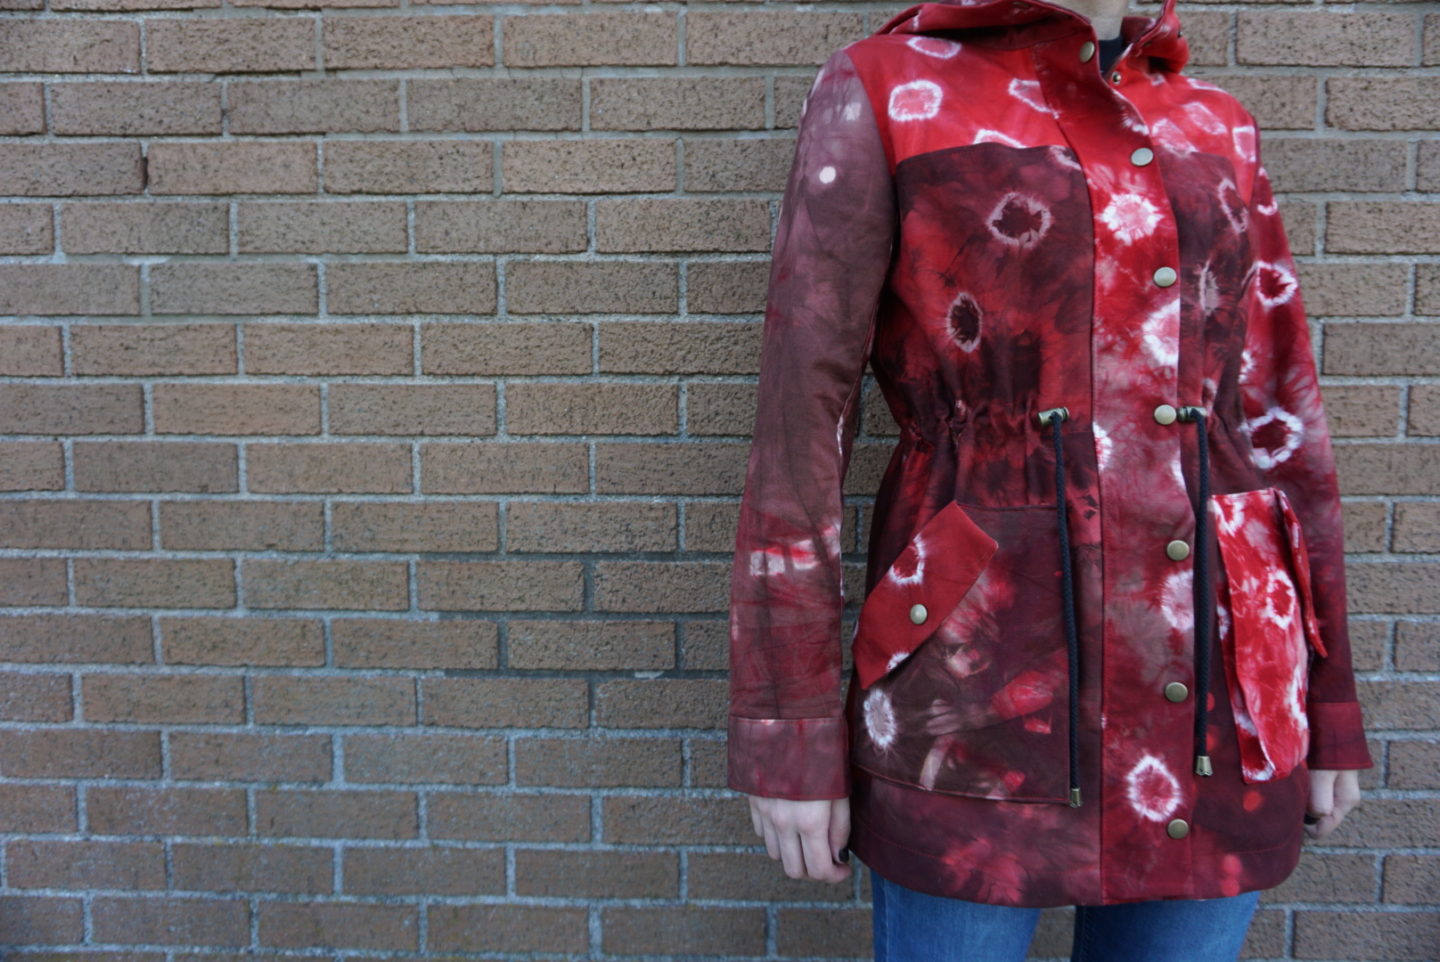
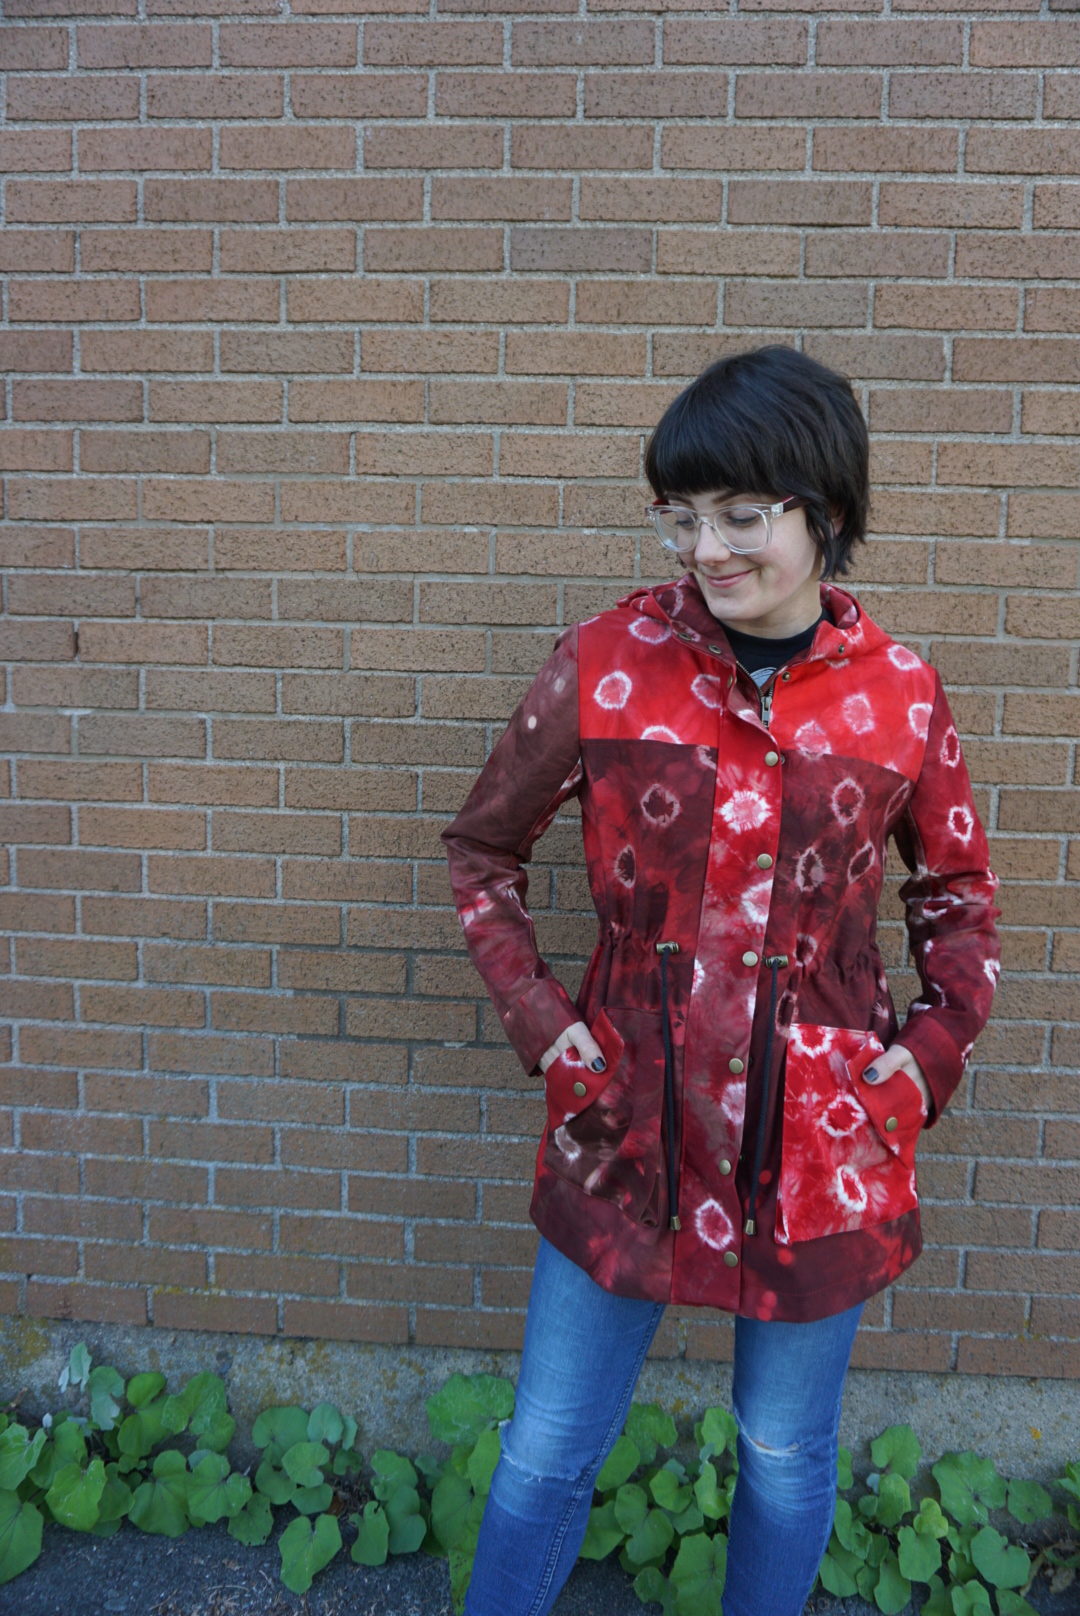
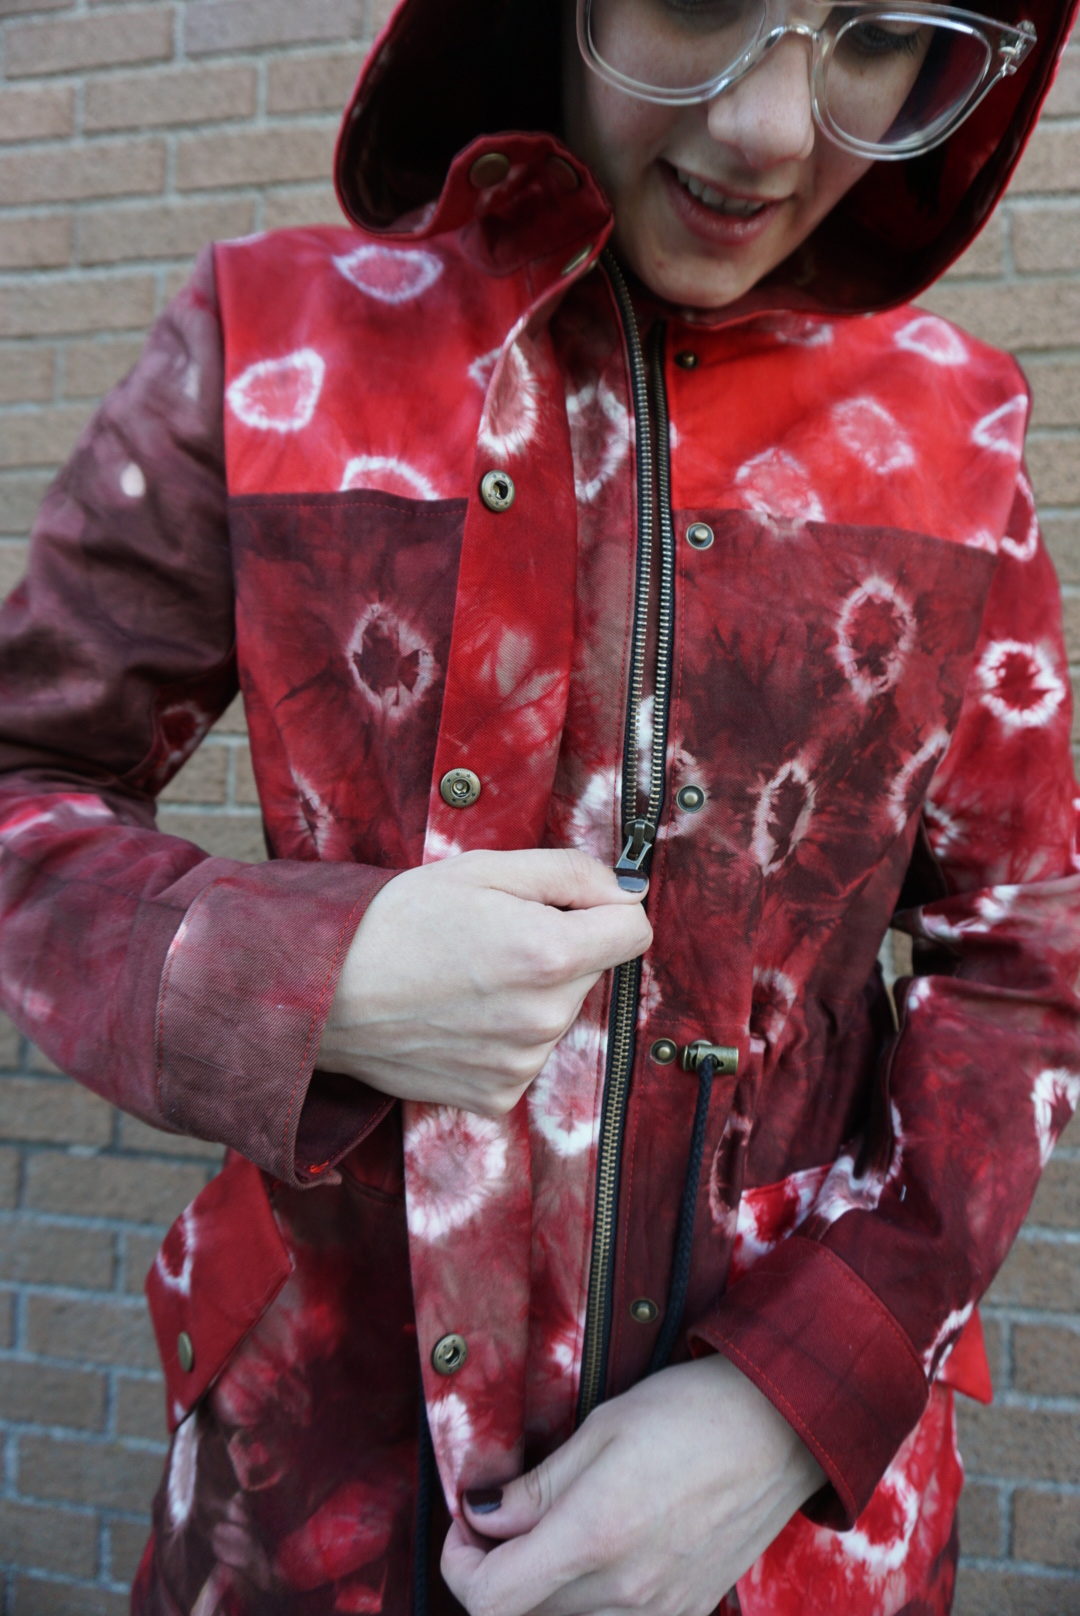
I made version A of the pattern, using the original unlined version. Since the fabric was so special, it seemed wrong to cover it up on the inside with a lining. I covered seams with bias tape where they were exposed at the hem and neckline, and did flat-fell seams on the sleeves and other areas where the pattern indicated. I have to say, I was super anxious about the snaps. I’ve put snaps in before, but where I’d been so careful and diligent with this one-of-a-kind fabric, I was worried I’d be right at the finish line and mess everything up. It seems so much more drastic when you have to poke an actual hole in the thing that you’ve just spent so much time and effort on. I was careful with the snap placement on this, because when I’d made my own version, I put one of the snaps a bit too close to the zipper and it made it hard to zip the zipper past it. I was wary of doing the same with this one! But they turned out great! It was a LOT of work, because the fabric was thick and especially the bottom snaps near the zipper have a lot of layers to poke the hardware through. But I was patient and settled in with a podcast and my hammer and awl and got ‘er done!


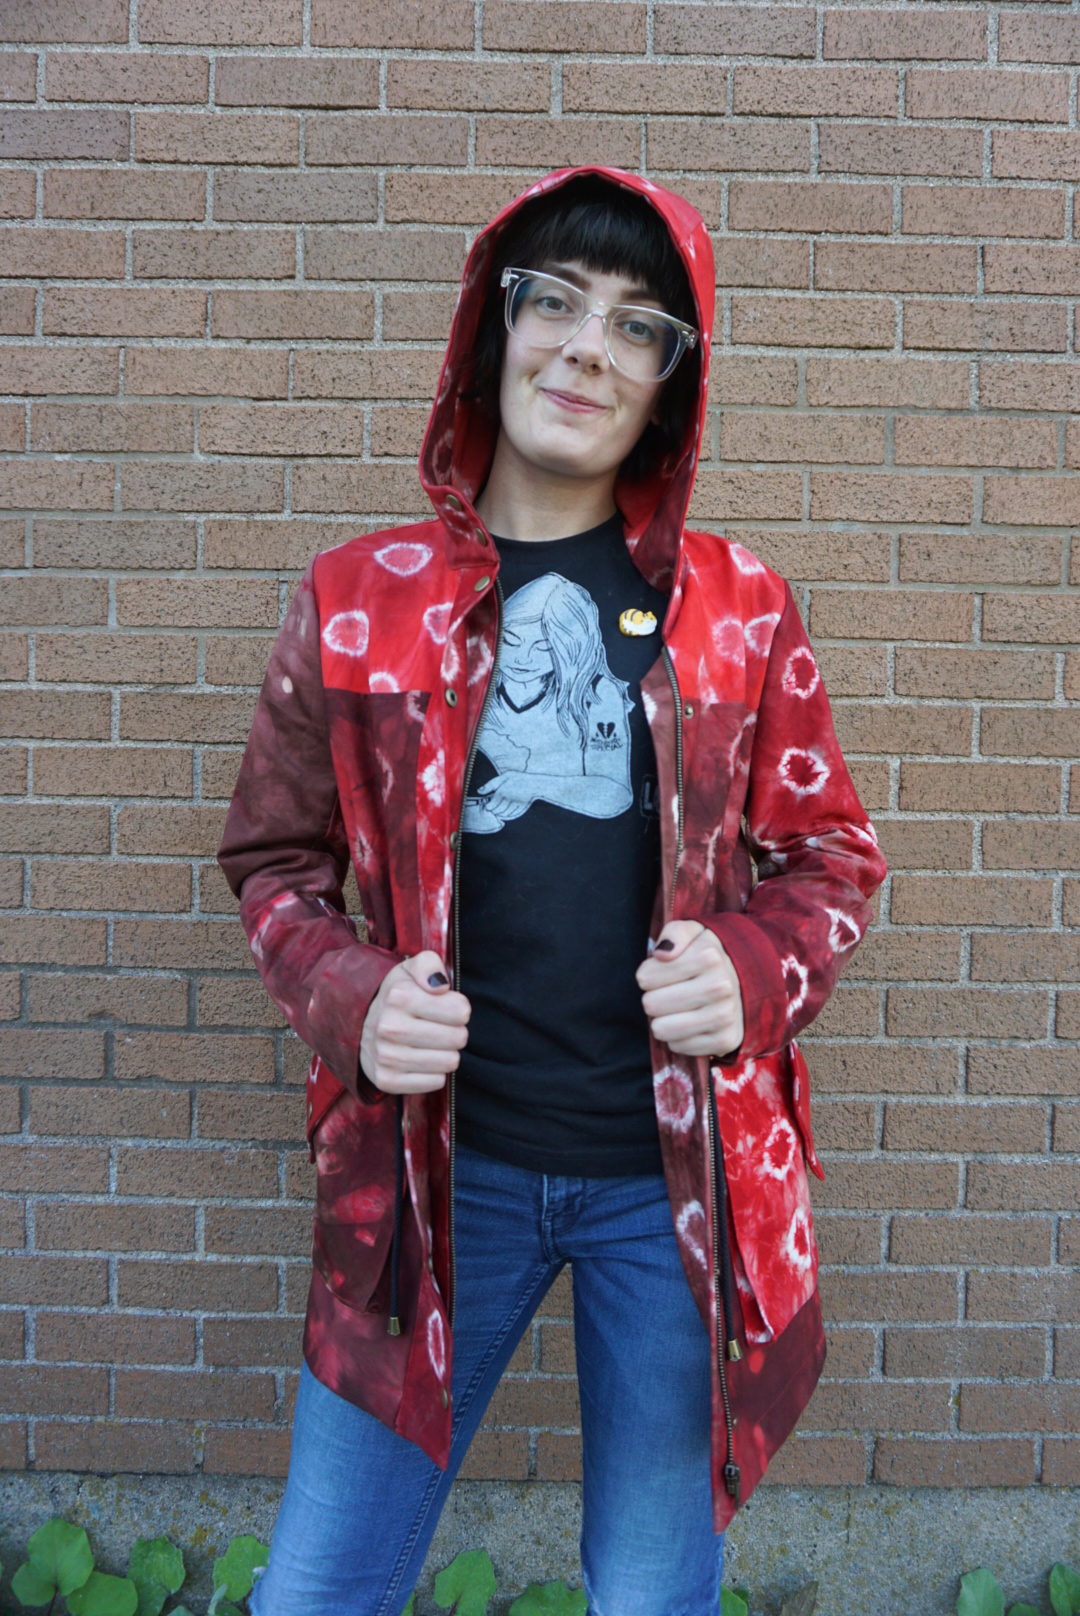
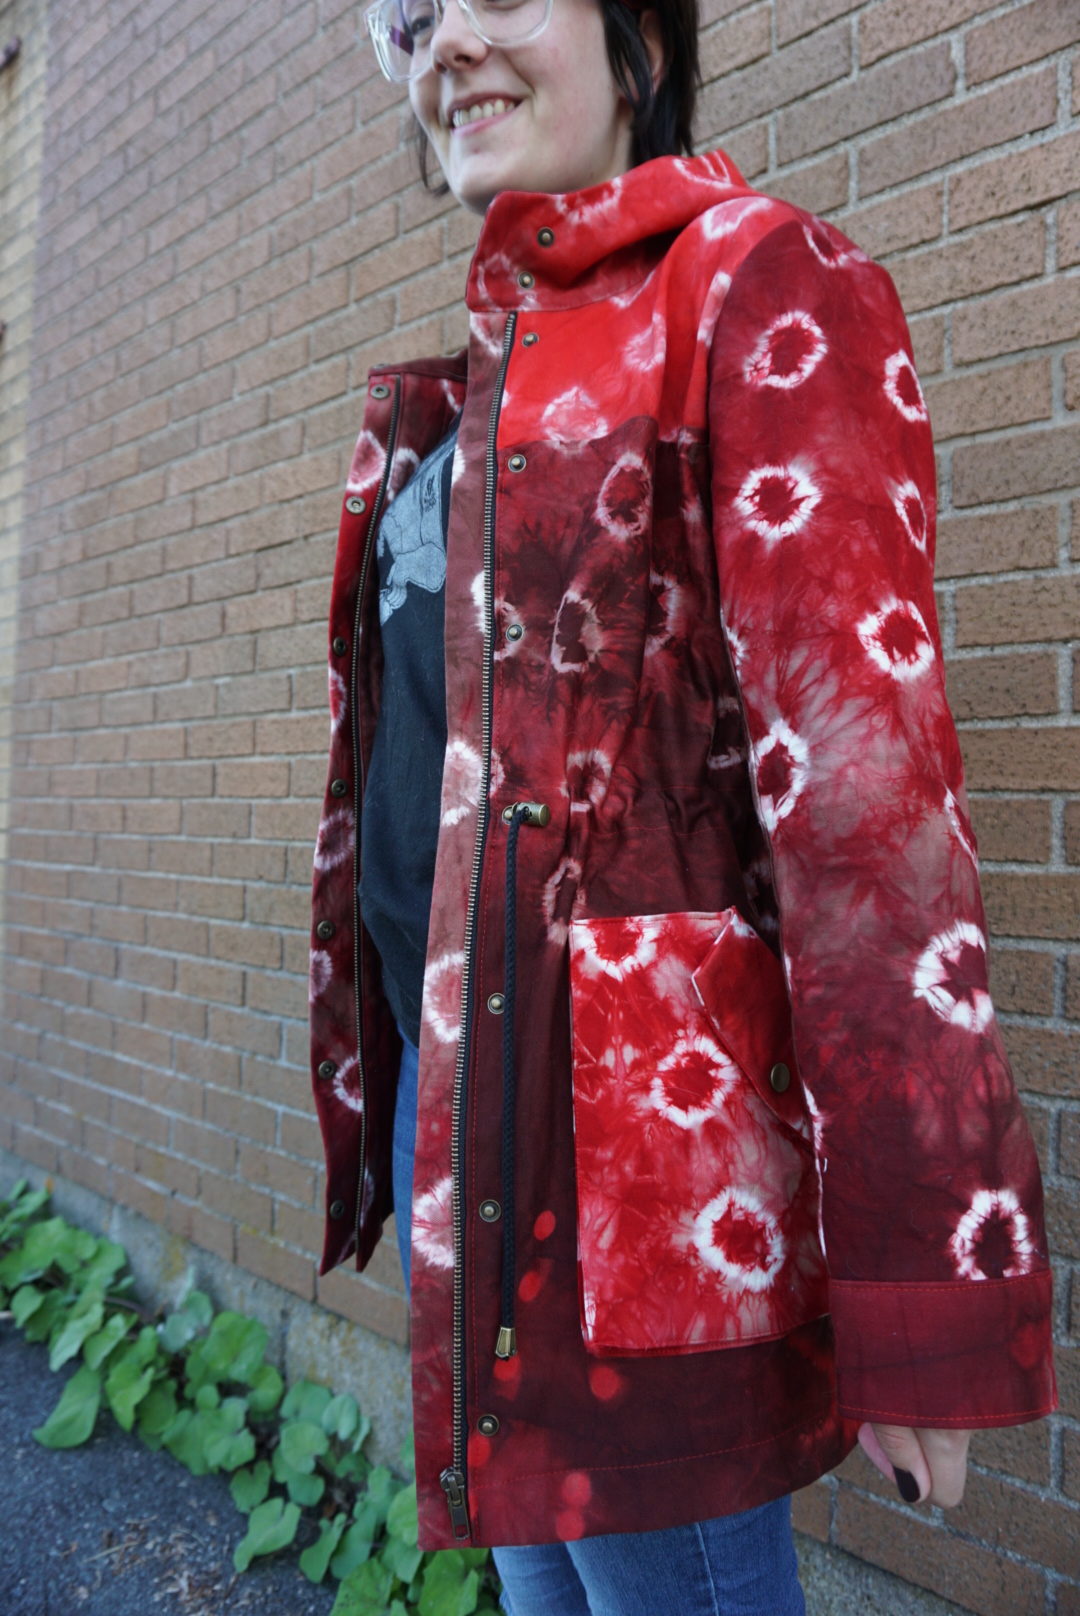

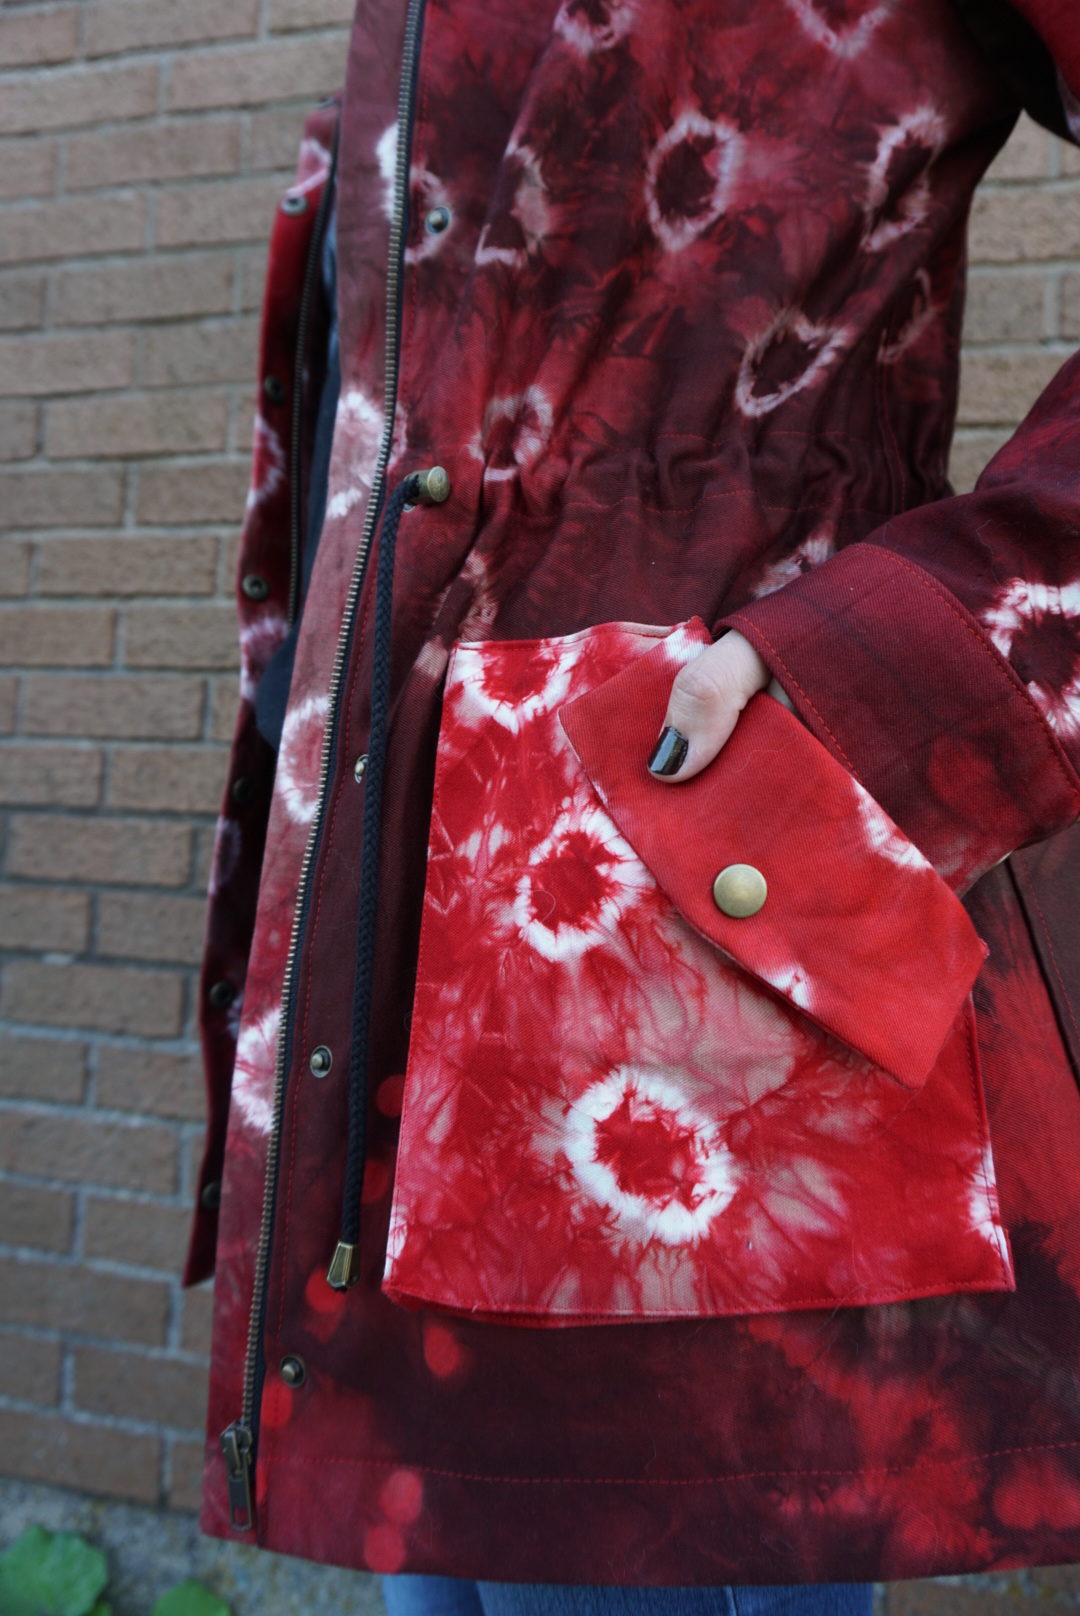
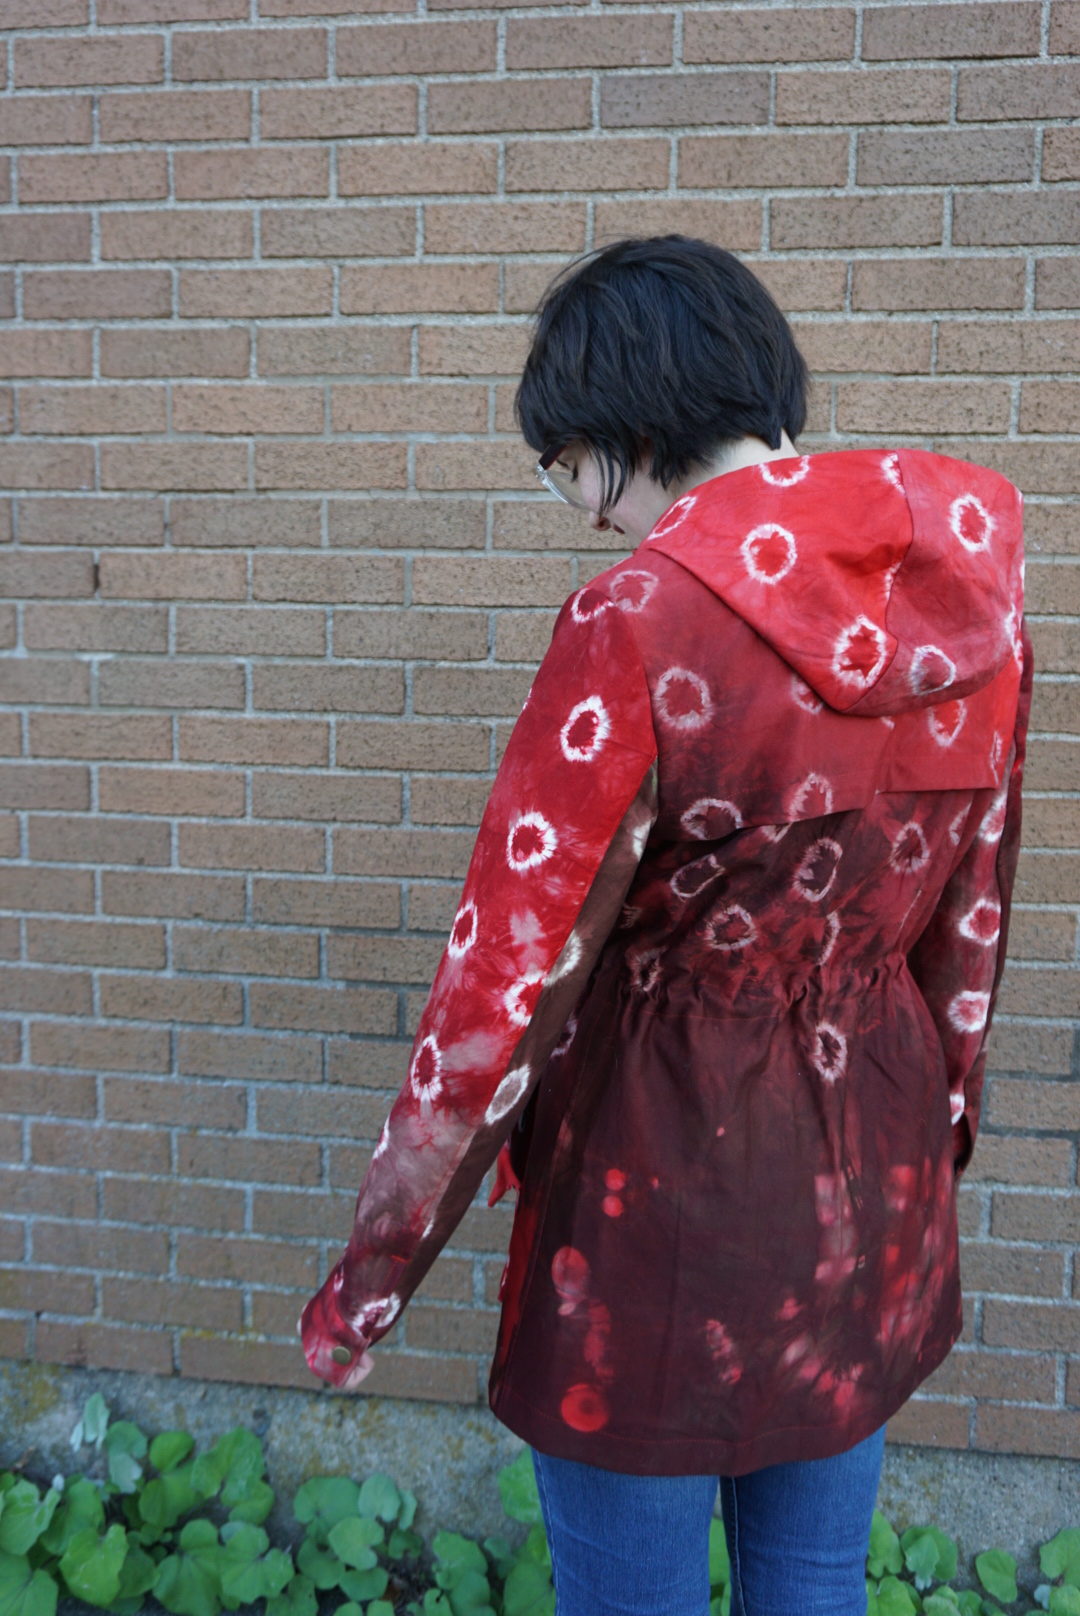
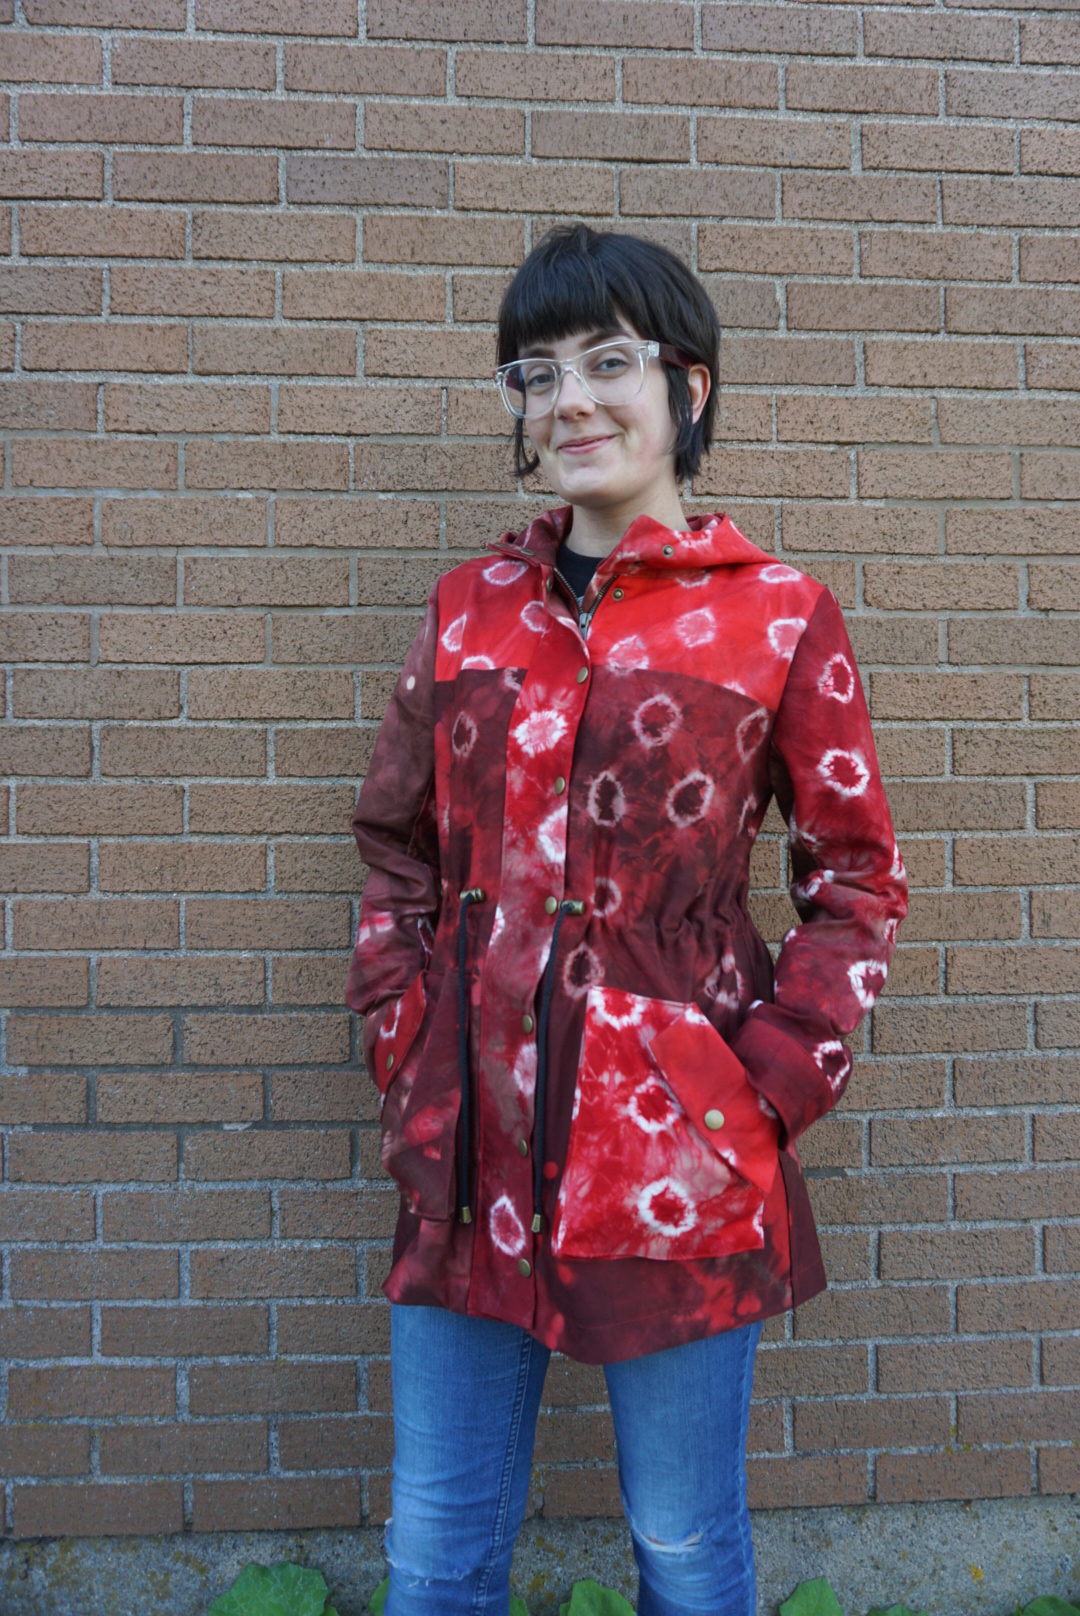
I was so inspired while working on this jacket! Every time I did anything I kept saying out loud, “this is SO COOOOL” and holding it up to look at. I really love that it’s not symmetrical. Both sleeves are different, and same with the pockets. I got this cyanotype kit recently, and I’m really intrigued to do something with it. I definitely want to return to the Kelly Anorak eventually to make my own version, and maybe I could do some sort of sun-printing for that. I’ve also wanted to try indigo dyeing for a while now, but it feels like a huge commitment to take on. Maybe next summer when it gets warm again; I’ll let it percolate over fall/winter and be ready to get it going. Have any of you ever made garments with a special fabric like this? I really loved the feeling of making a garment that felt like such a collaboration between me and my sister, and she is really happy with it which is the cherry on top!

This looks so so so amazing!! I love it! When I look at it, it seems like it’s just ripe for hand-waxing to make it into a raincoat. Maybe that’s a step you and Amy could tackle next? (Pro-tip: waxing an entire coat is fucking exhausting and requires a hairdryer, a stove, and a paintbrush you’re willing to sacrifice.)
Author
Amy/I don’t have any desire to turn it into a raincoat, otherwise I already would’ve! But thanks for the tips! I’m glad you love it. 🙂