
I’m back on the blog! I didn’t mean to take a break, but things were very busy at work and I think I had exerted a lot of story-telling power with my series of posts about my grandma’s quilt (1, 2, 3, 4 if you missed that). I ended up spending any sewing motivation I had on actually sewing and prioritized that over documented and sharing my makes. So I’ve sewn a number of garments since 2024 started, and now I’m going to bombard you with all of my sewing! The first thing I wanted to share is not the first thing I sewed chronologically, but it’s the garment that I’m most excited about. If there was a Venn diagram of people who sew and people who climb, most of the People Who Sew circle would not overlap with the People Who Climb circle. Lately I’ve been finding more and more of that overlap on Instagram, but Leila (@leila.makes) was one of the first people I found. When I saw that she was developing a climbing pants pattern, I was so excited. While there are a number of pattern designers offering patterns geared toward outdoor activities, there weren’t any pants patterns that fit what I would look for in a climbing pant. But now there is! Leila launched her Topo Pants and I purchased it immediately. It’s been a long time since I anticipated a pattern like this, counting down to the release date and snapping it up right away. It came out on May 31, and I sewed them within the week, took photos while I went climbing in them, but then didn’t get a chance to take any detail photos until yesterday. So here we are, better delayed by a month than never?

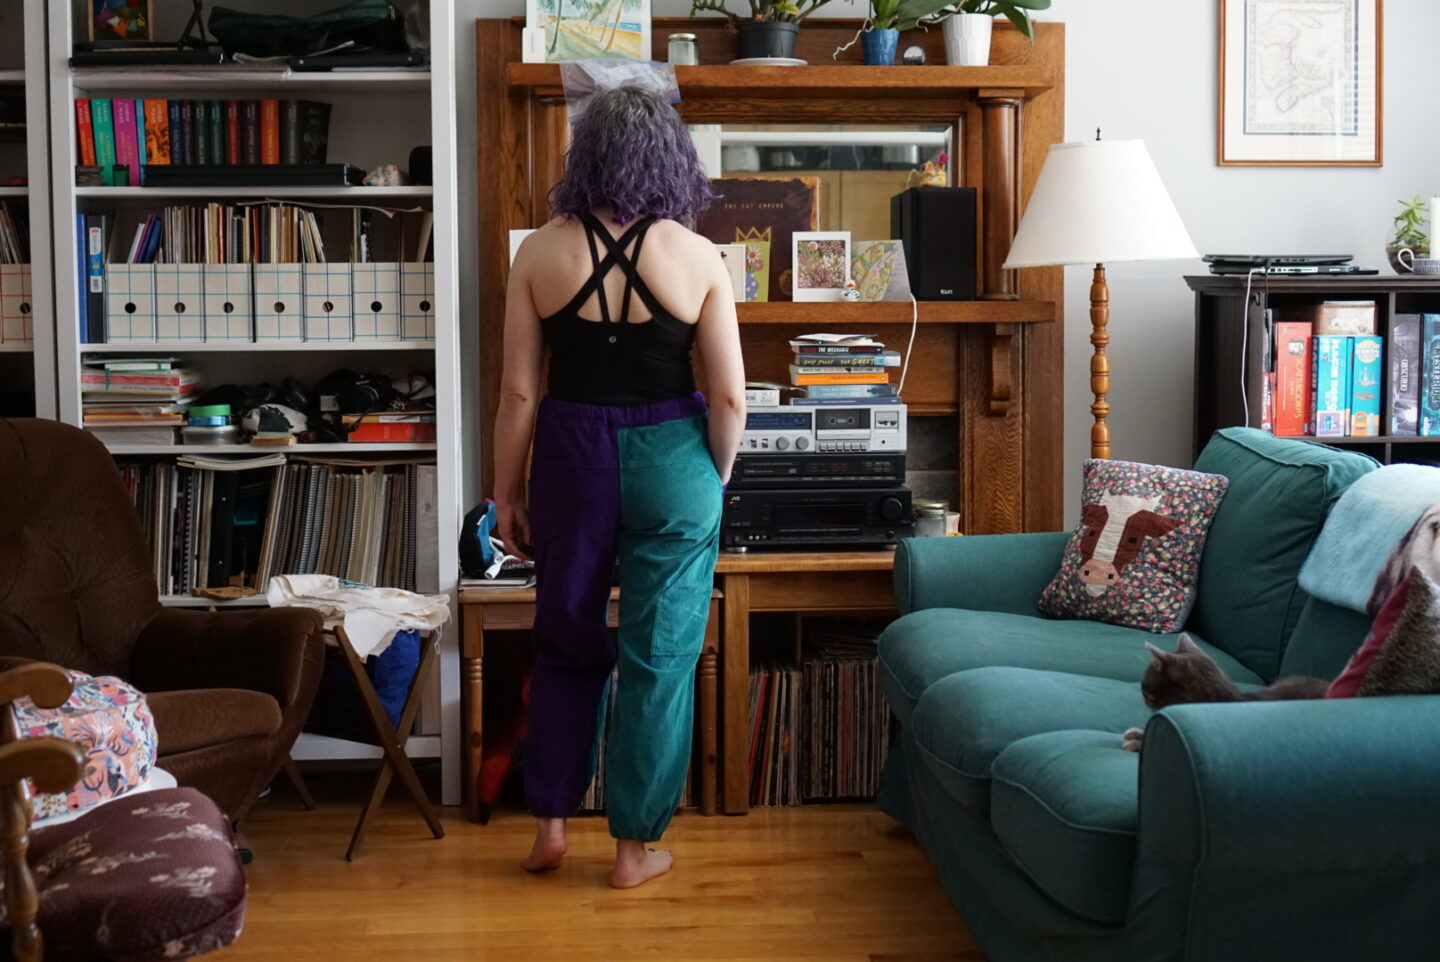
As you can see, I chose to colour-block my first version of the Topo pants. This is because I’m still (happily) on the “use what you have” train! I got into this mindset during the first, most severe stint of pandemic lockdowns, where I couldn’t go to the store to get more of something. I couldn’t go get the perfect matching thread, or the most ideal elastic, or a different fabric. I just had to use what I had. And I found it unexpectedly satisfying. Somehow I’m still going with that, and alongside that has been the goal of not letting fabrics enter my stash just to languish. I got these two colours of corduroy at the infamous Grandmothers to Grandmothers fabric and yarn sale at the beginning of May – $2/metre for fabric is hard to resist, even when you are trying not to buy fabric! I had originally intended each colour to become a pair of 90s-vibes high waisted pleated shorts. But the Topo pants pattern got released at the end of May, and I was more interested in sewing that than I was in the shorts, so I used the fabric for these pants! I’m really enjoying being able to finally commit to the idea of “sew the fabric now, you can get more later if you need it”. It’s what Helen and Caroline have been saying on Love to Sew for years: “There’s always more fabric!” I had never really been able to mentally embrace that before, but I’ve turned the corner over the last four years! I originally intended to have one leg be completely purple, and the other completely green, but I was limited by amount and width of the fabric I had. As well, the nap of corduroy is unidirectional, so that restricted the way I could cut things out if I didn’t want to have the nap running in different directions (which I didn’t). Because of that, I had to colour-block differently, but I like how they turned out! They BARELY fit onto the amount of fabric I had, which left an extremely tiny pile of scraps at the end. I wish I had measured the amount/width of fabric I had of each colour so I could report that to you, but I was more concerned with “it fits!” and “I want to sew these pants NOW!”
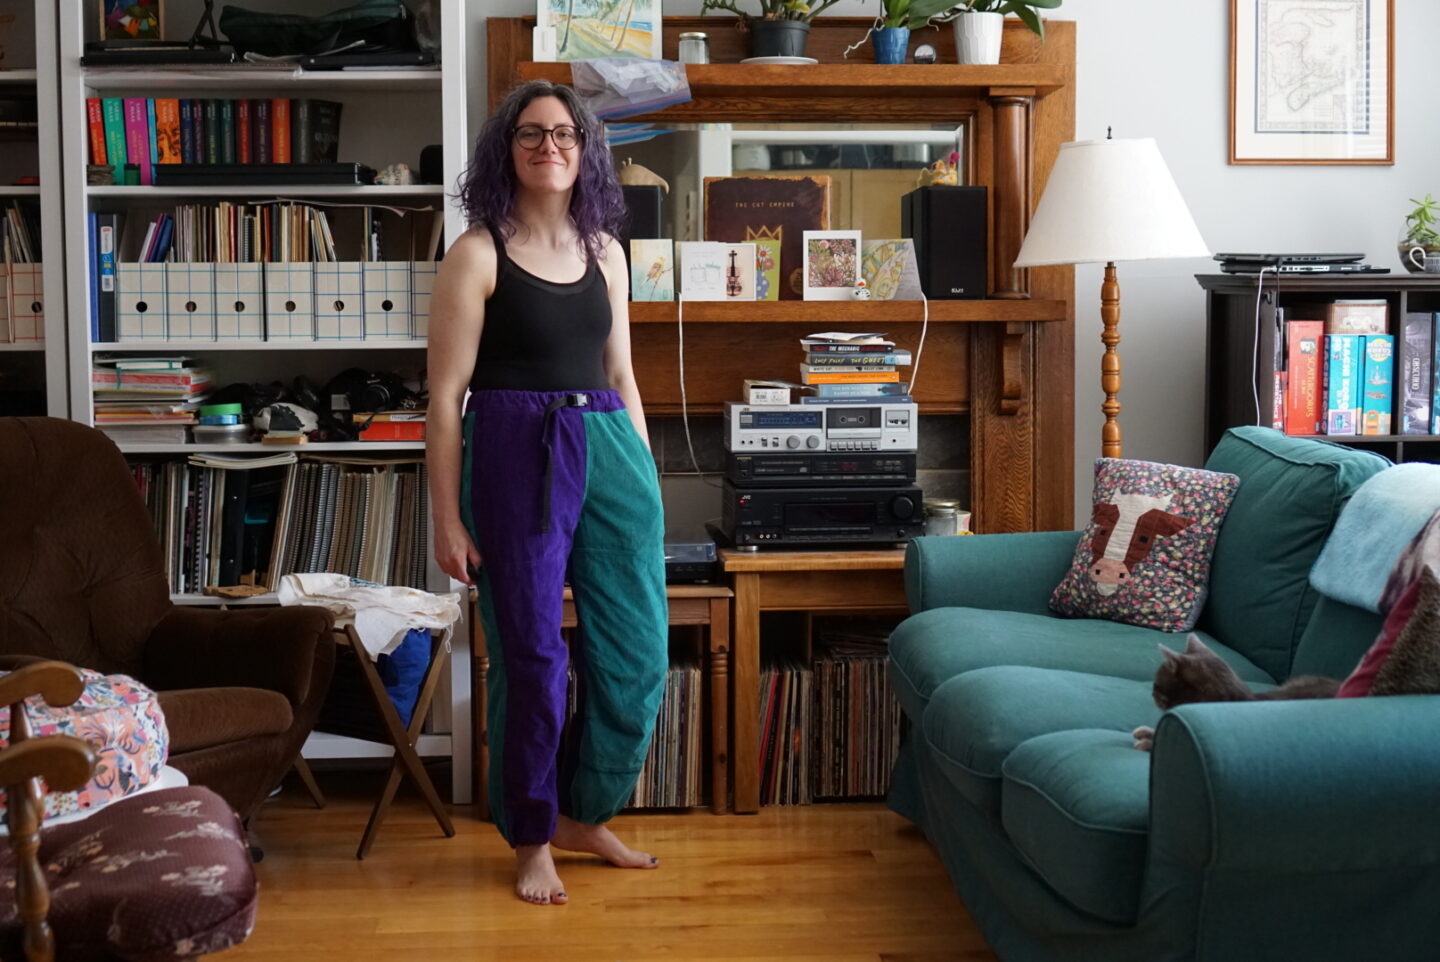
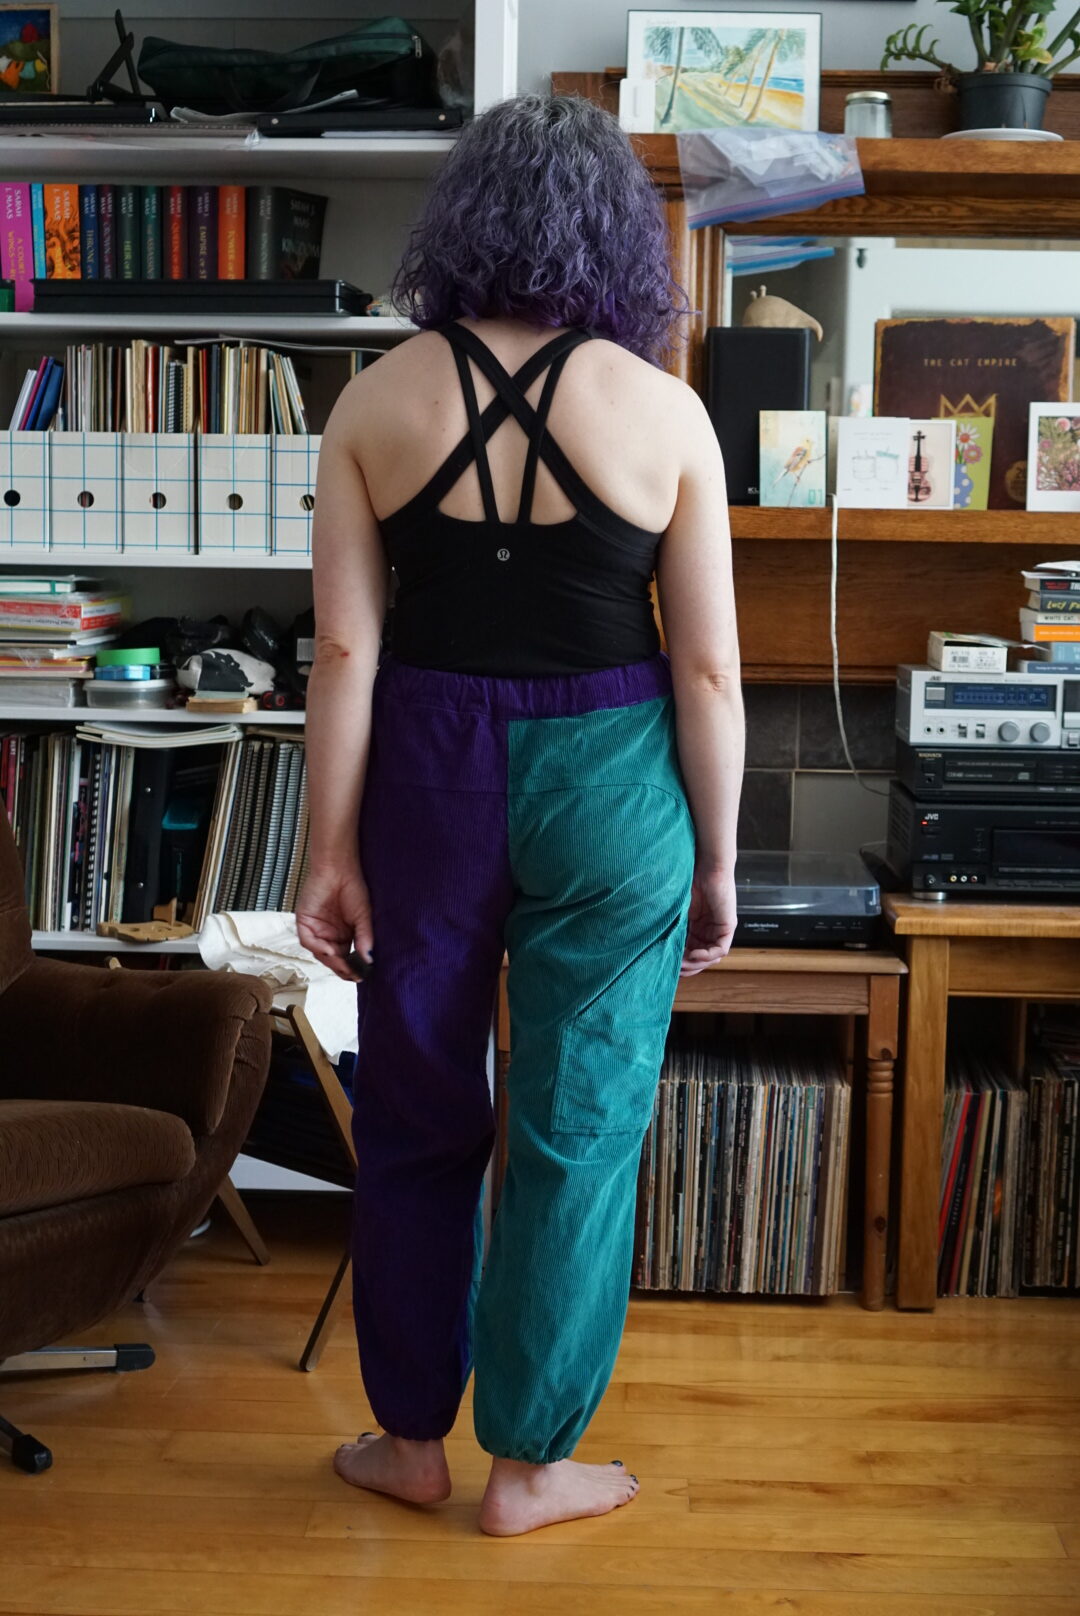
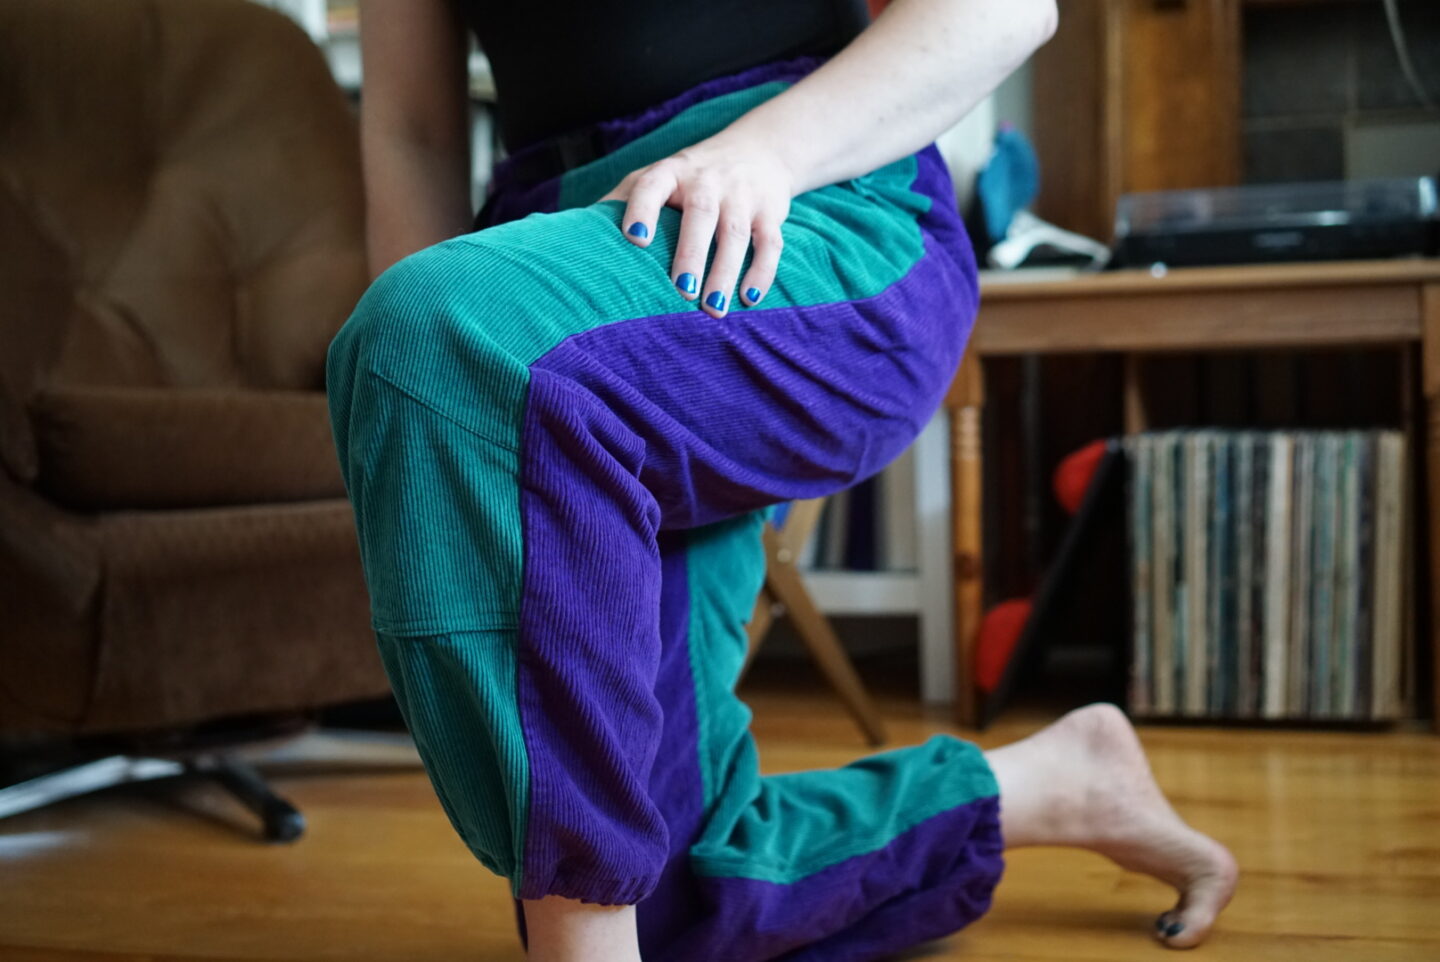
I made a few modifications to the pattern pieces prior to cutting the fabric. The pattern is designed to be gender neutral, and Leila includes some really helpful tips to help you modify it for different bodies. I ignored those tips. Mainly due to impatience, not because I had carefully assessed the finished garment measurements and compare them to my own in a meticulous, detailed process. My thought process was more along the lines of, I don’t feel that precious about this fabric and hopefully it will be fine? So this is very much a wearable muslin that happened to fit exactly how I had hoped. The Topo pants go from a 33″ hip up to a 64″ hip, which I was really happy to see! I made a size 10 based on my hip measurement (I’m a 39″ hip and size 10 is a 40″ hip), because the waist measurements span a range for each size due to the elastic waist of the pants. The pattern is drafted for someone who is 5’6″, and I’m 5’4″. Normally the difference in height is recommended to be divided by two before you remove it from your pants length, since a shorter person typically has their shortness distributed evenly between the top and bottom halves of their body. Not me! I am mostly leg, and because of this I have found that more of my shortness proportionally shows up in my leg region. Is this scientific or based on some sort of fitting guidelines? Definitely not. But I’ve typically had good luck with removing the full height difference from the length of pants patterns instead of dividing it by two. (If it’s a jumpsuit, I base it more on desired hem length and where I want the waist to hit on me). I held the pattern pieces up to myself and decided based on ~vibes~ (and past experience) that I would remove 1″ from the lengthen/shorten line in the rise of the pants, and 1″ from the L/S line above the knee. Leila included more L/S lines than I’ve seen in typical patterns, which I really appreciated! It made it way easier to make sure I was shortening at the same place on the front and back pieces. She also includes guidelines about where the knee darts should fall when your leg is straight in order to have them line up with your knee when you bend your leg. The additional L/S lines helped to be precise about that as well. You can see below that these adjustments turned out well!
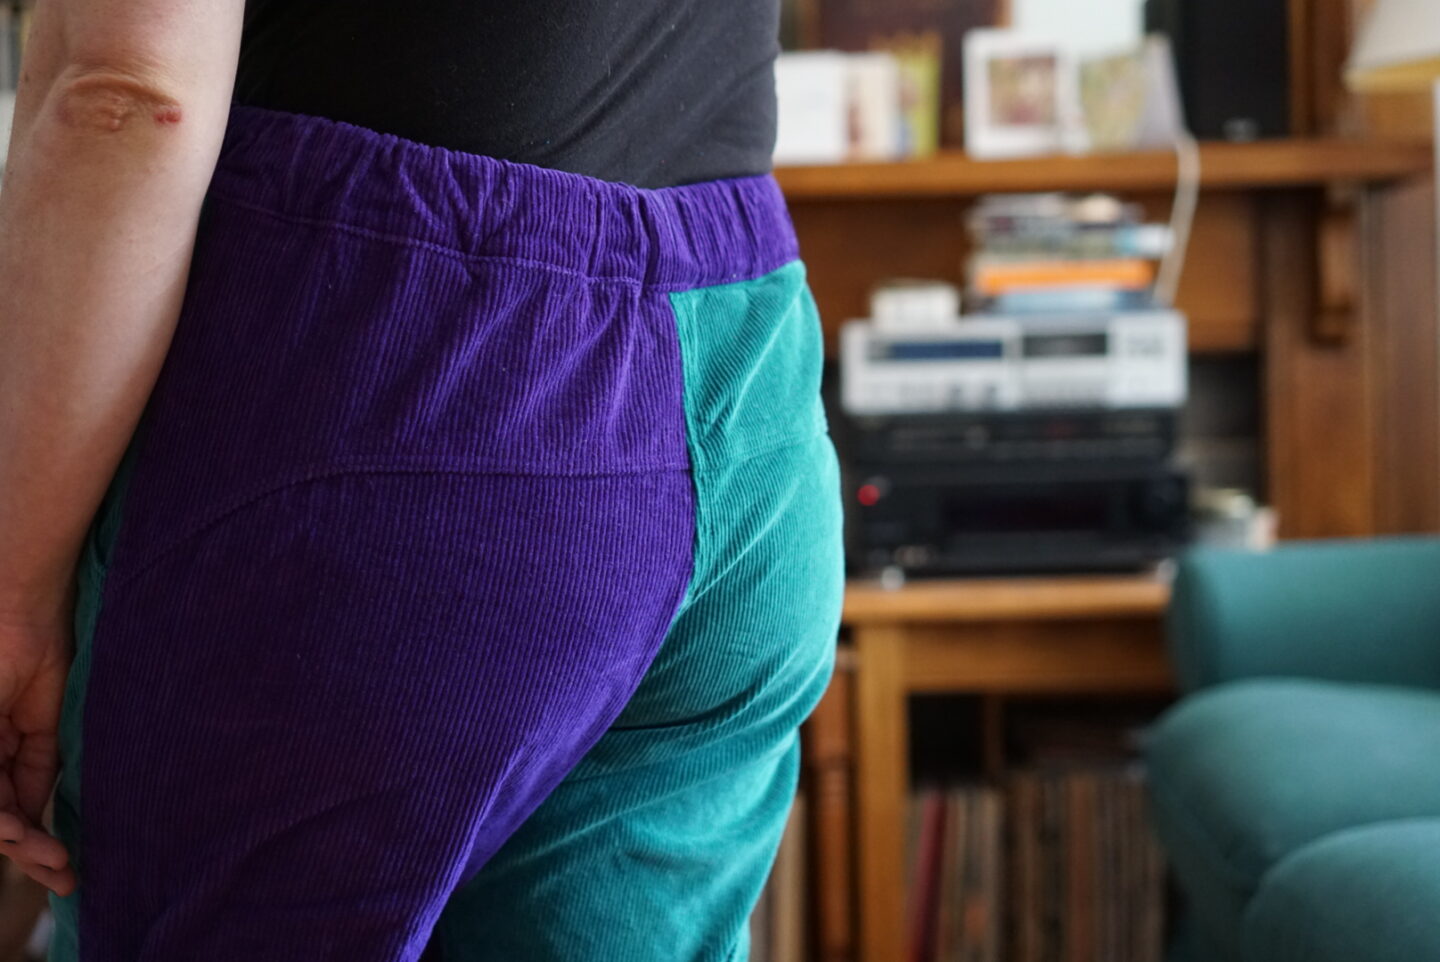
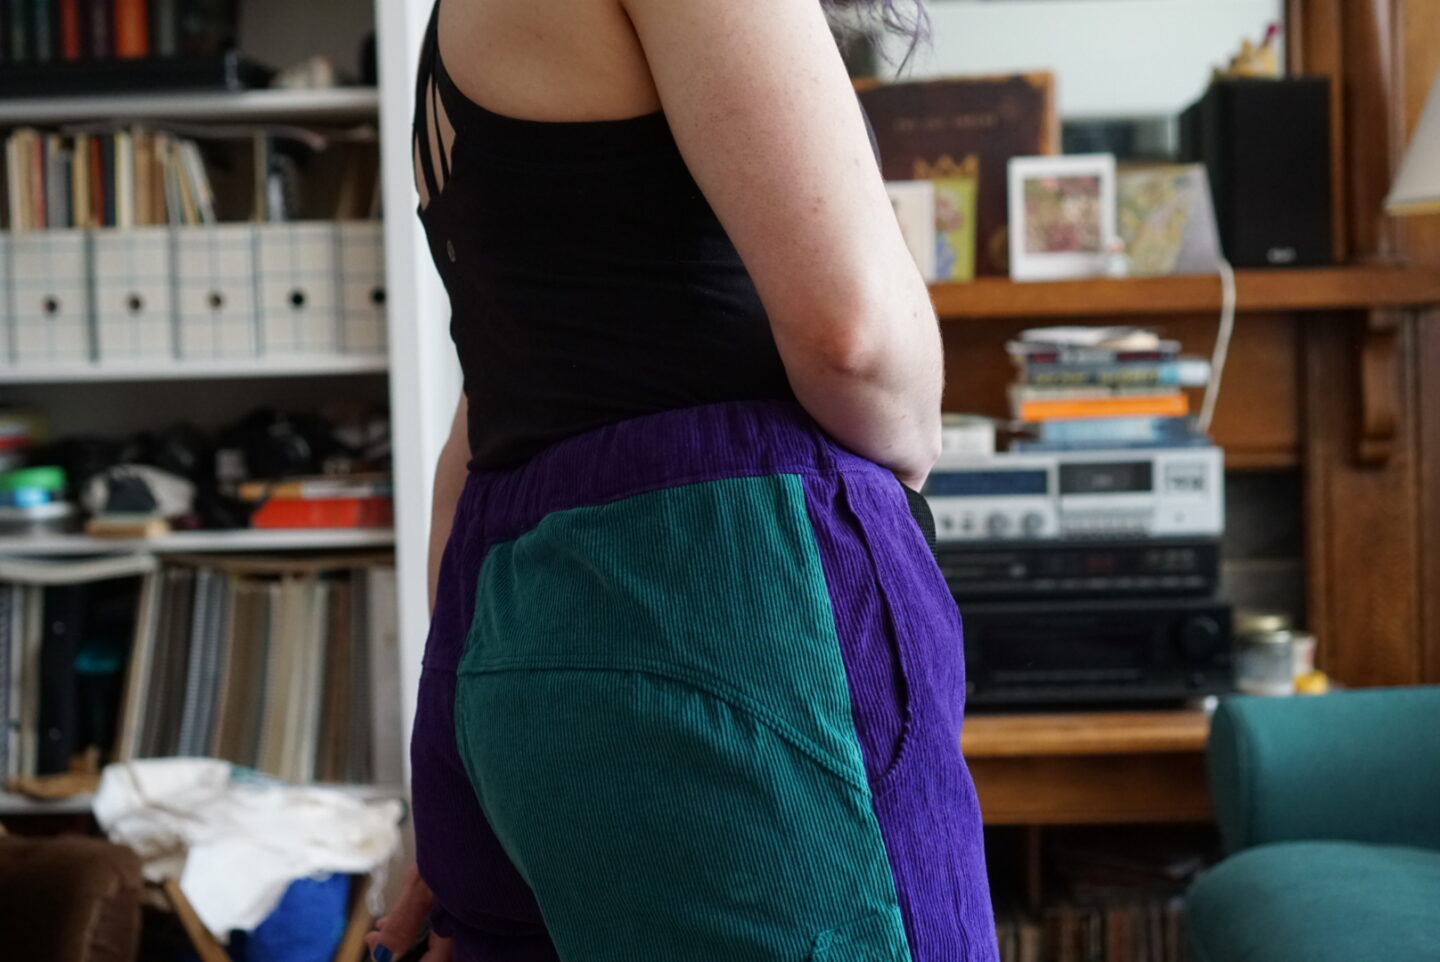
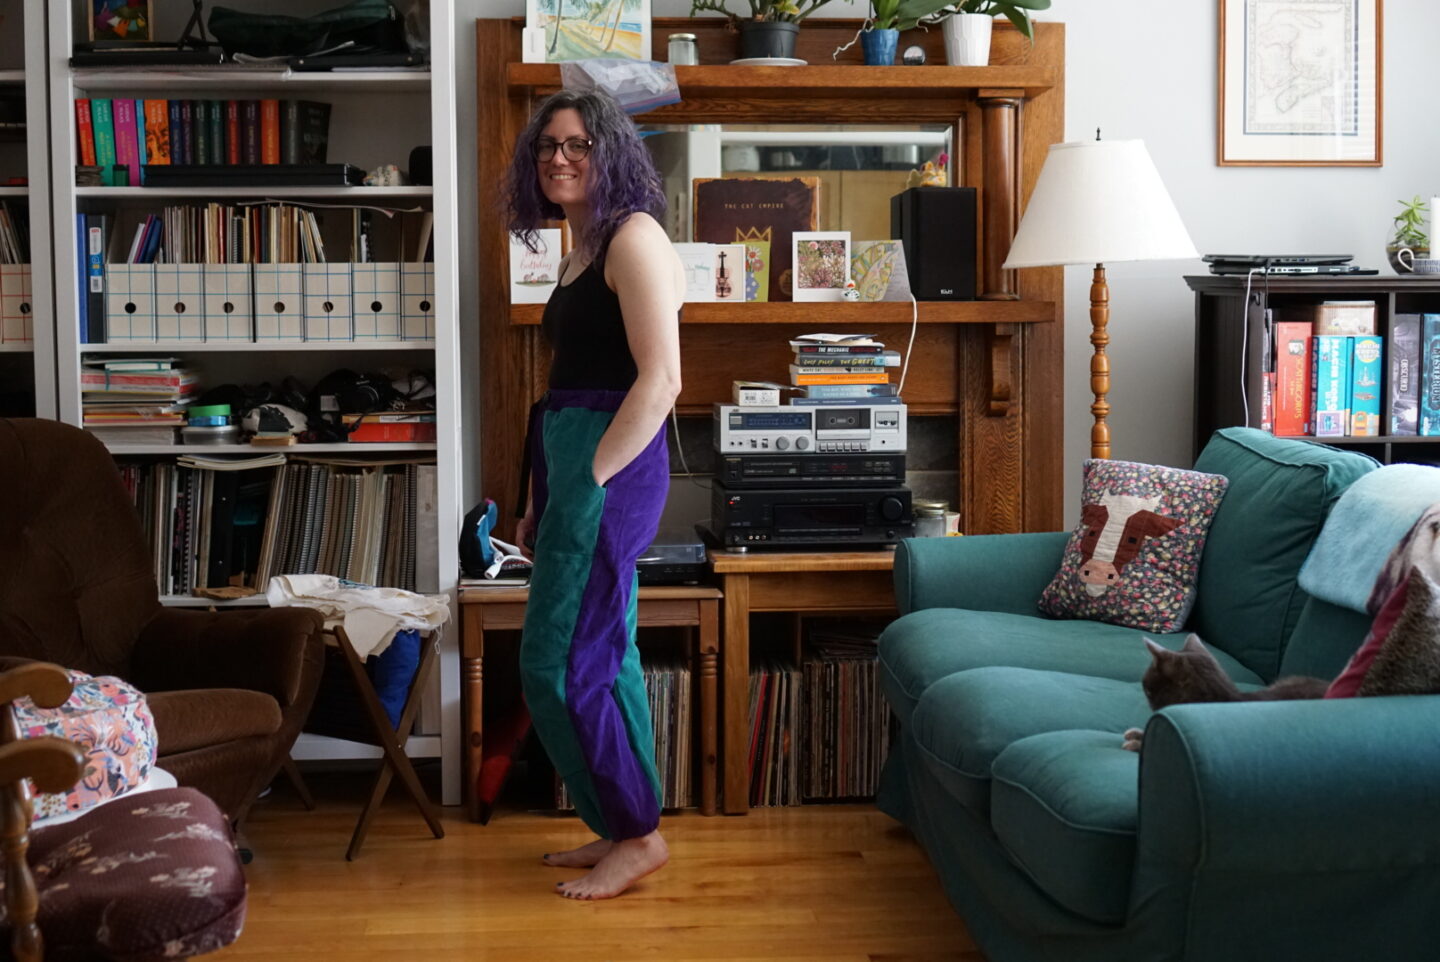
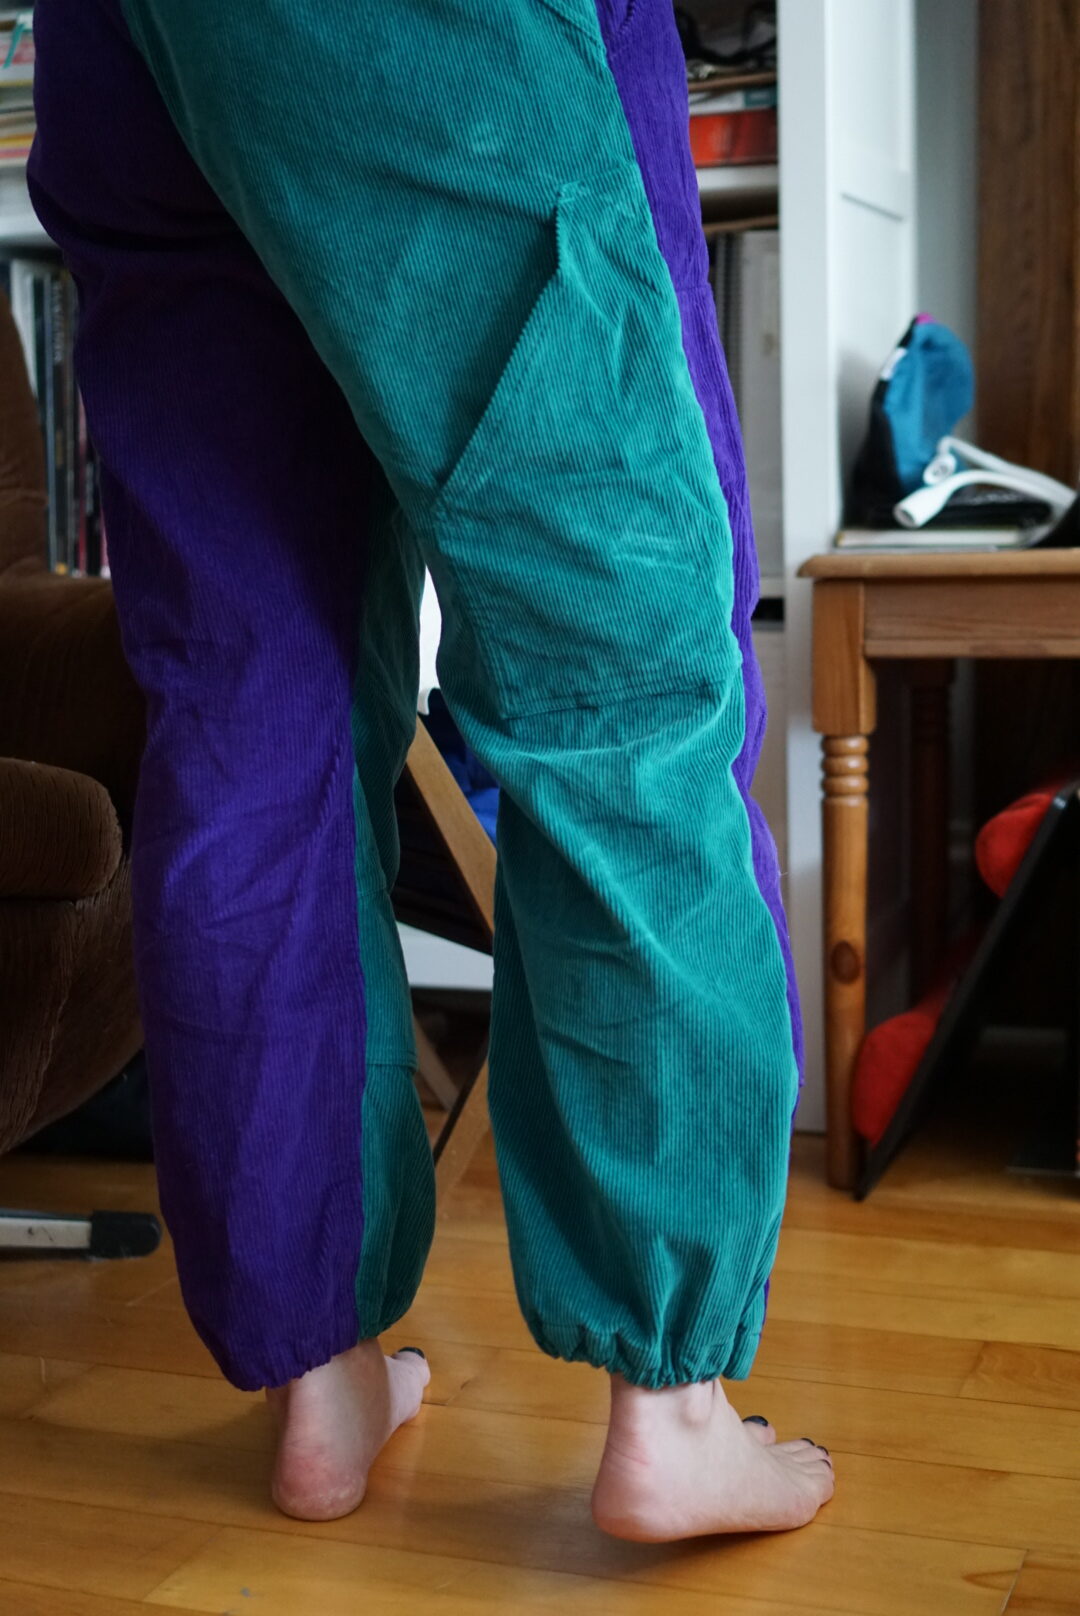
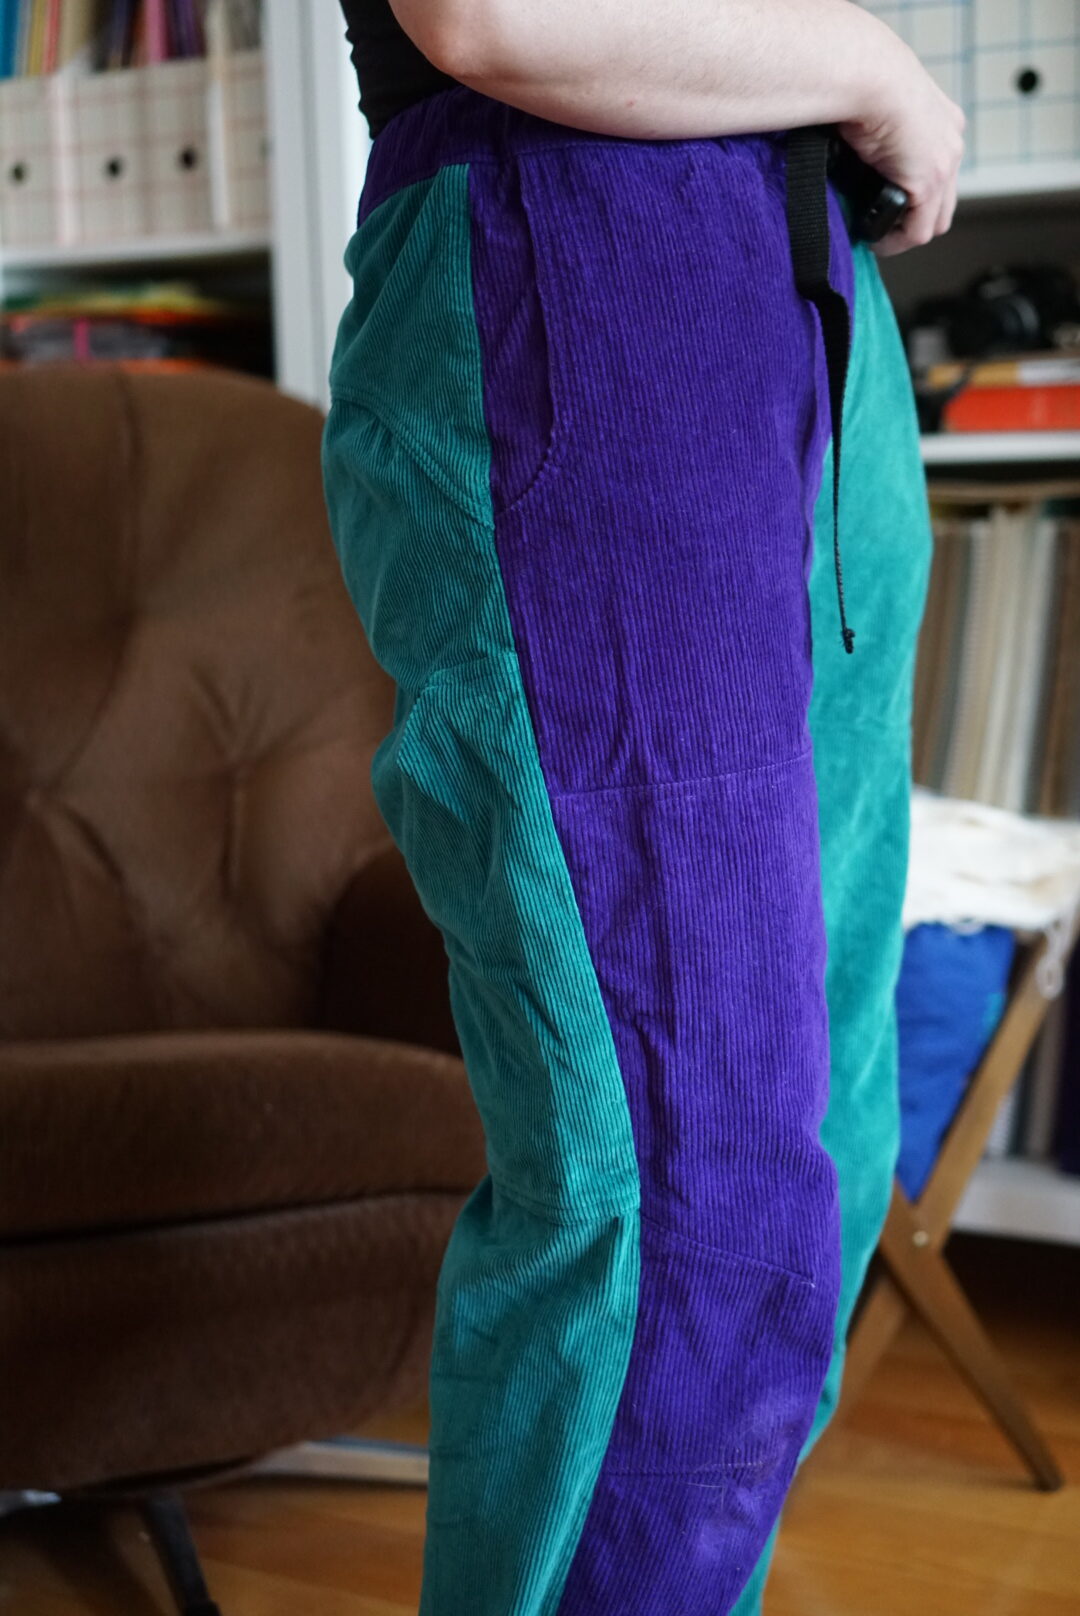
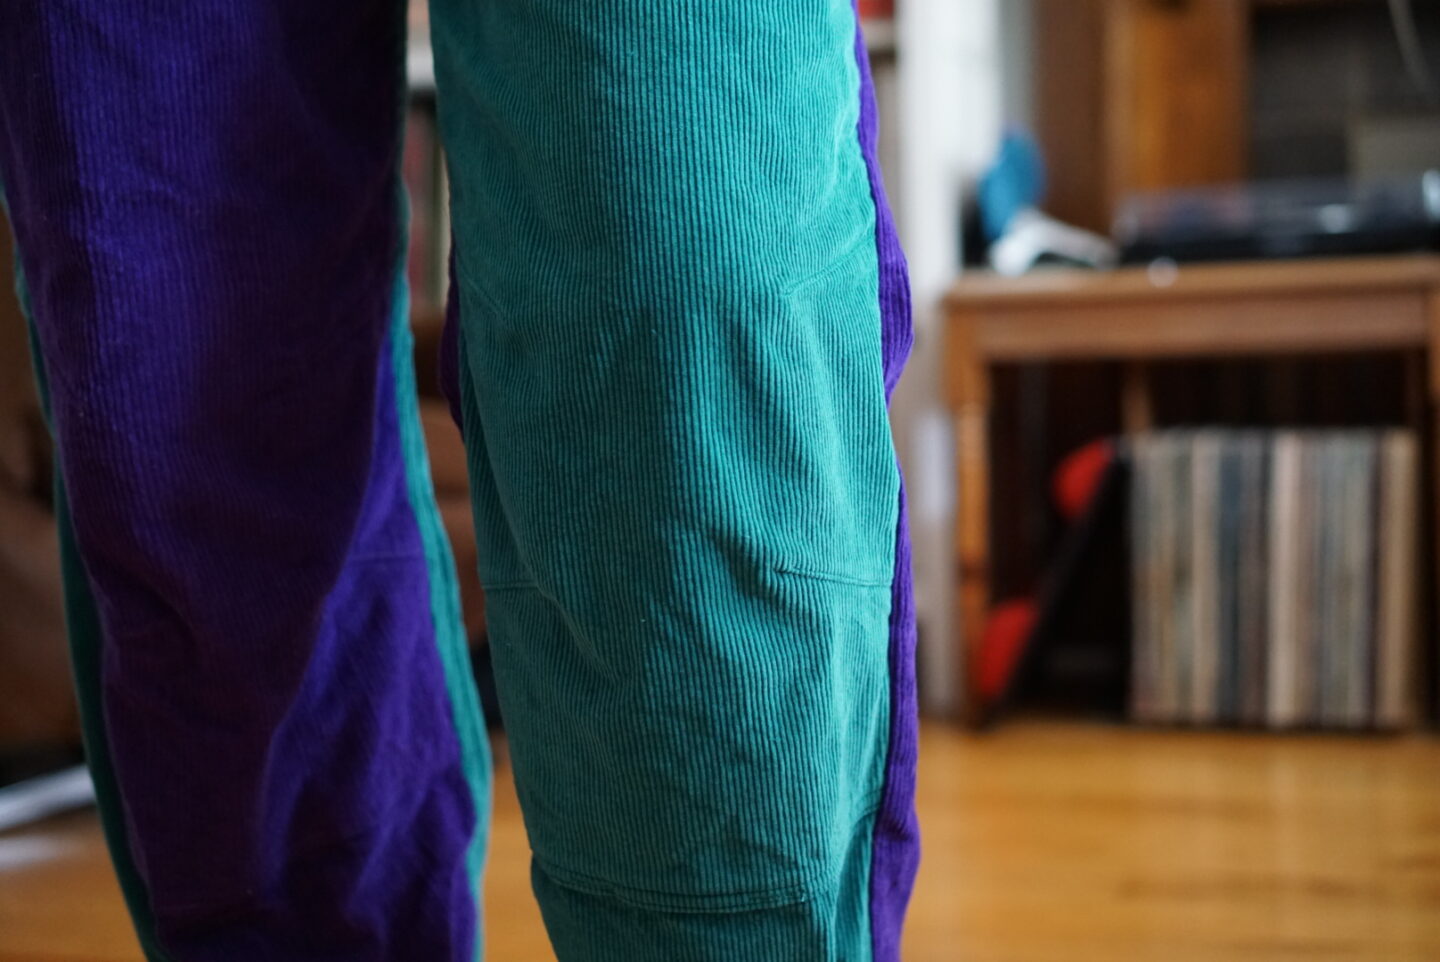
As you can see above, the Topo pants have a ton of awesome design details. The way the pattern instructions are written really encourages you to customize the pants for your own use, and I appreciated how easy it was to do that. The pattern instructions are awesome for these pants. I’m not someone who needs to have their hand held, but I also appreciate when patterns don’t make me guess about details and measurements that the designer likely knows and has on hand. If you know where you designed the pants pattern to fall at the waist, tell me! If your intended fit is baggy in a particular area, tell me! Then I can make my own decisions and not guess. I think the instructions for the Topos do a good job at hitting the Goldilocks “just right” amount of detail without being detailed to the point of overwhelming a newer sewist or to the point of being pedantic to a more experienced sewist. So let’s talk about those details. There are two views of the pattern. Both views have an elastic waist, curved yoke, faux fly, side seam pockets (that get anchored in the waistband!), double fronts, and elastic cuffs. View A has double fronts that get sewn in the side seam, but are tucked under and top-stitched near the in-seam, as well as having more shape along the top. View B has double fronts that are anchored in both in-seam and side seams, and go straight across at top and bottom, plus double knee darts. I made view B, because I knew I would want the knee darts for climbing, and I preferred the shape of the double fronts. I also added the optional patch pocket as you can see below, on the back of the right leg. This pocket will be great for holding a little brush while I climb, or snacks! In the instructions, Leila gives some tips on how to appropriately place this patch pocket so that you don’t accidentally have it cross the knee-bending line. This is super helpful, especially if you were planning to put something like a phone in that pocket! I included a side-on photo below so you can see where I ended up putting my patch pocket relative to the knee darts. The bottom edge ended up just above the end of the upper knee dart, which is higher than the initial guidelines given in the pattern. That made sense to me since I removed the 1″ from the L/S above the knee darts! Also, peep the attention to detail on the way the end of the curved yoke meets the bottom pocket edge of the side seam pockets. So good!
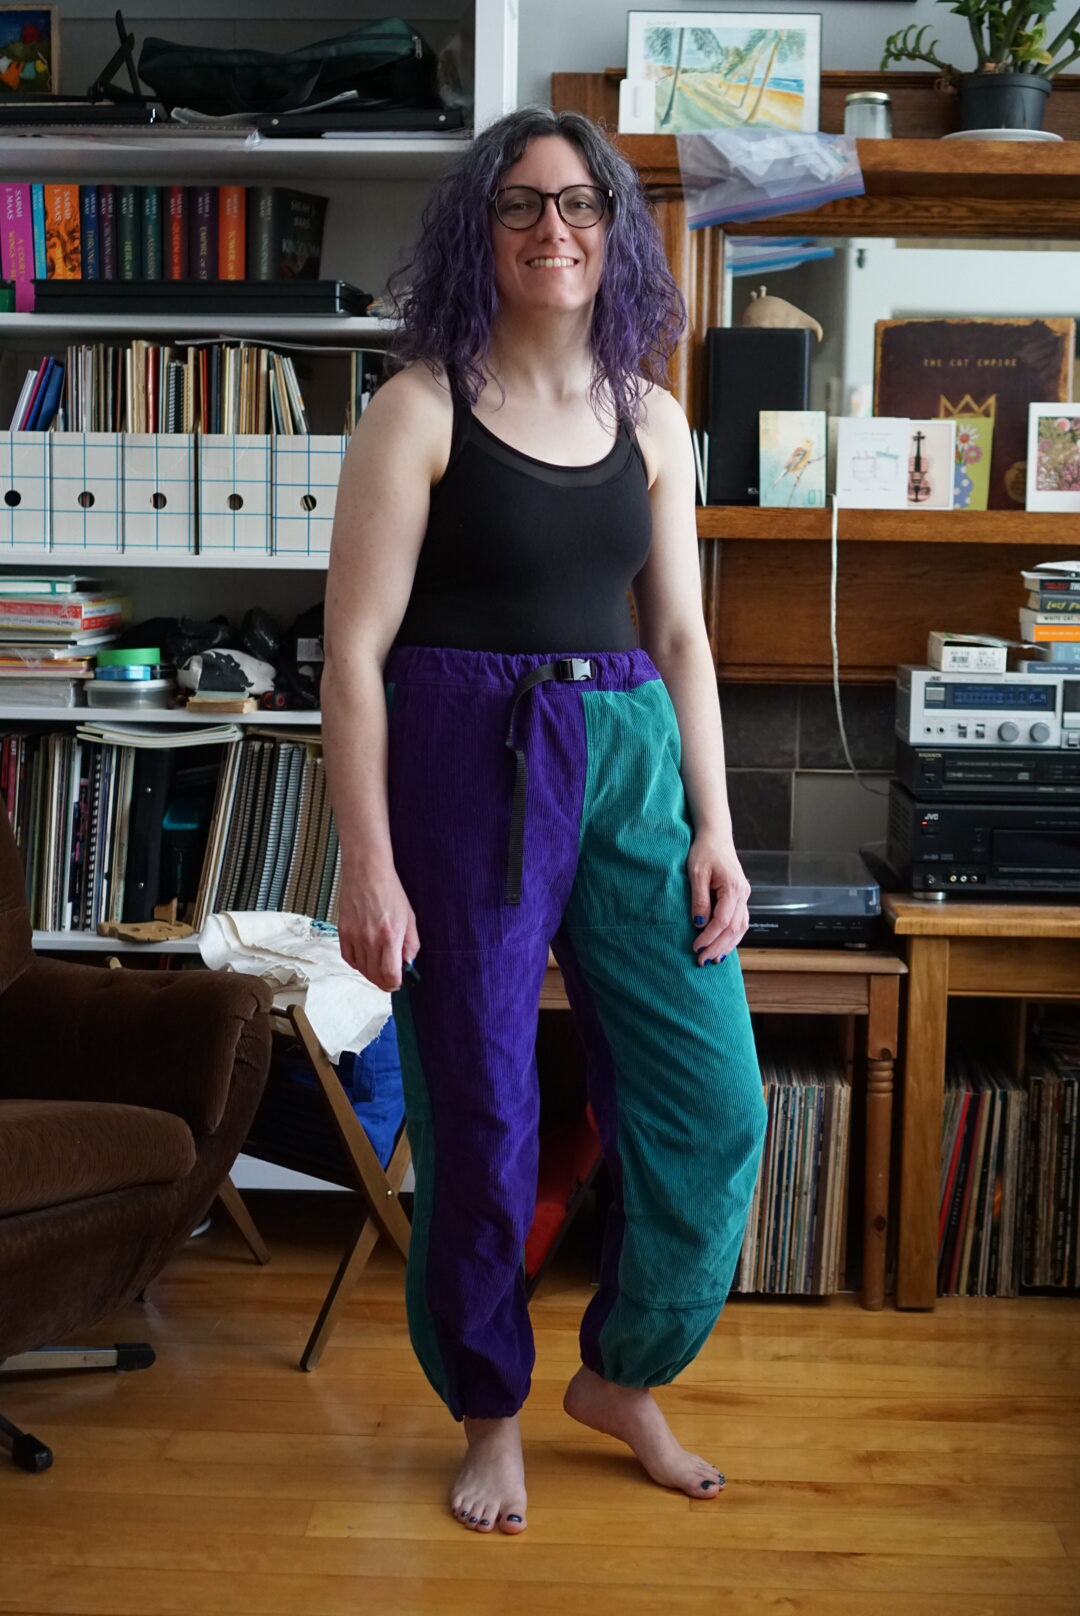
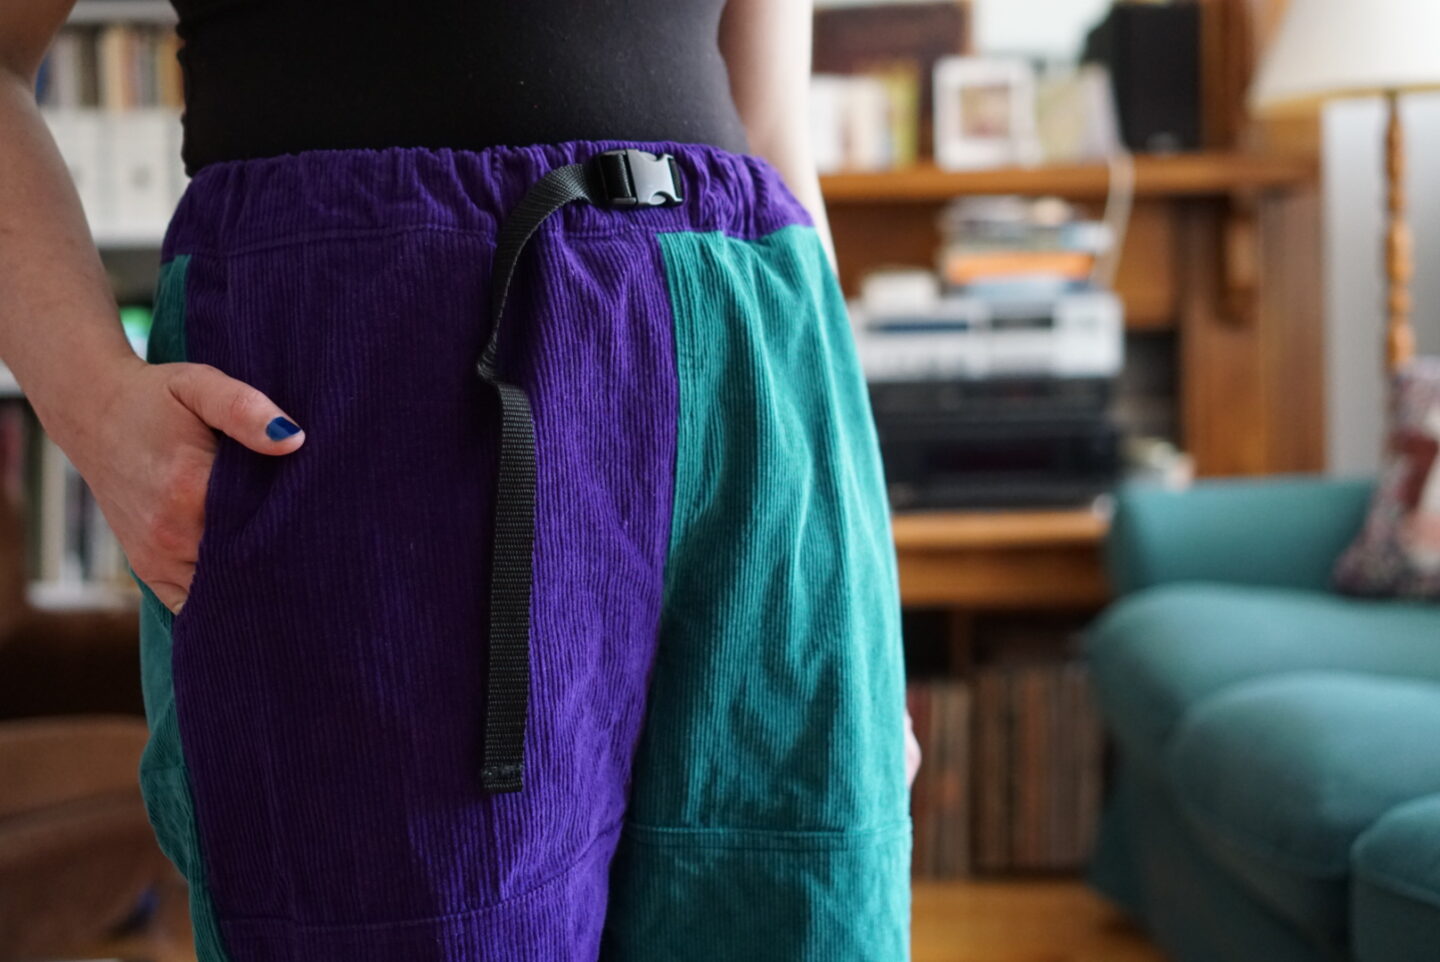
I forgot to mention a couple design details! There is a drawstring included in the pattern, which you can tie inside the front waistband so that it’s hidden. The pattern includes buttonhole markings for this, but you could easily use grommets instead. There’s also an optional carabiner loop that you can add, but I chose not to do that. I also swapped out the drawstring for a webbing belt. My partner had just retired a pair of his climbing pants, so I scavenged the webbing, belt buckle, and cuff elastic and adjusters. To include the belt, I moved the buttonhole markings to the outside of the waistband, and made them bigger. In retrospect, I should also have moved them farther apart, because the buckled hardware only juuust fits in the space between the buttholes. In order to tighten the belt, I have to gradually cinch it in so that the buckle nestles perfectly in the space. The ends of the hardware have to sneak inside the buttholes a bit to make it lay flat. So that’s workable for this pair but an easy thing to adjust for future pairs. The webbing is 3/4″, but I ended up having to buy new webbing to use with the pilfered buckle because my partner is a very slim human and the webbing from his pants was not long enough to use for these. I really like the belt detail, and will likely include it on future versions of these!
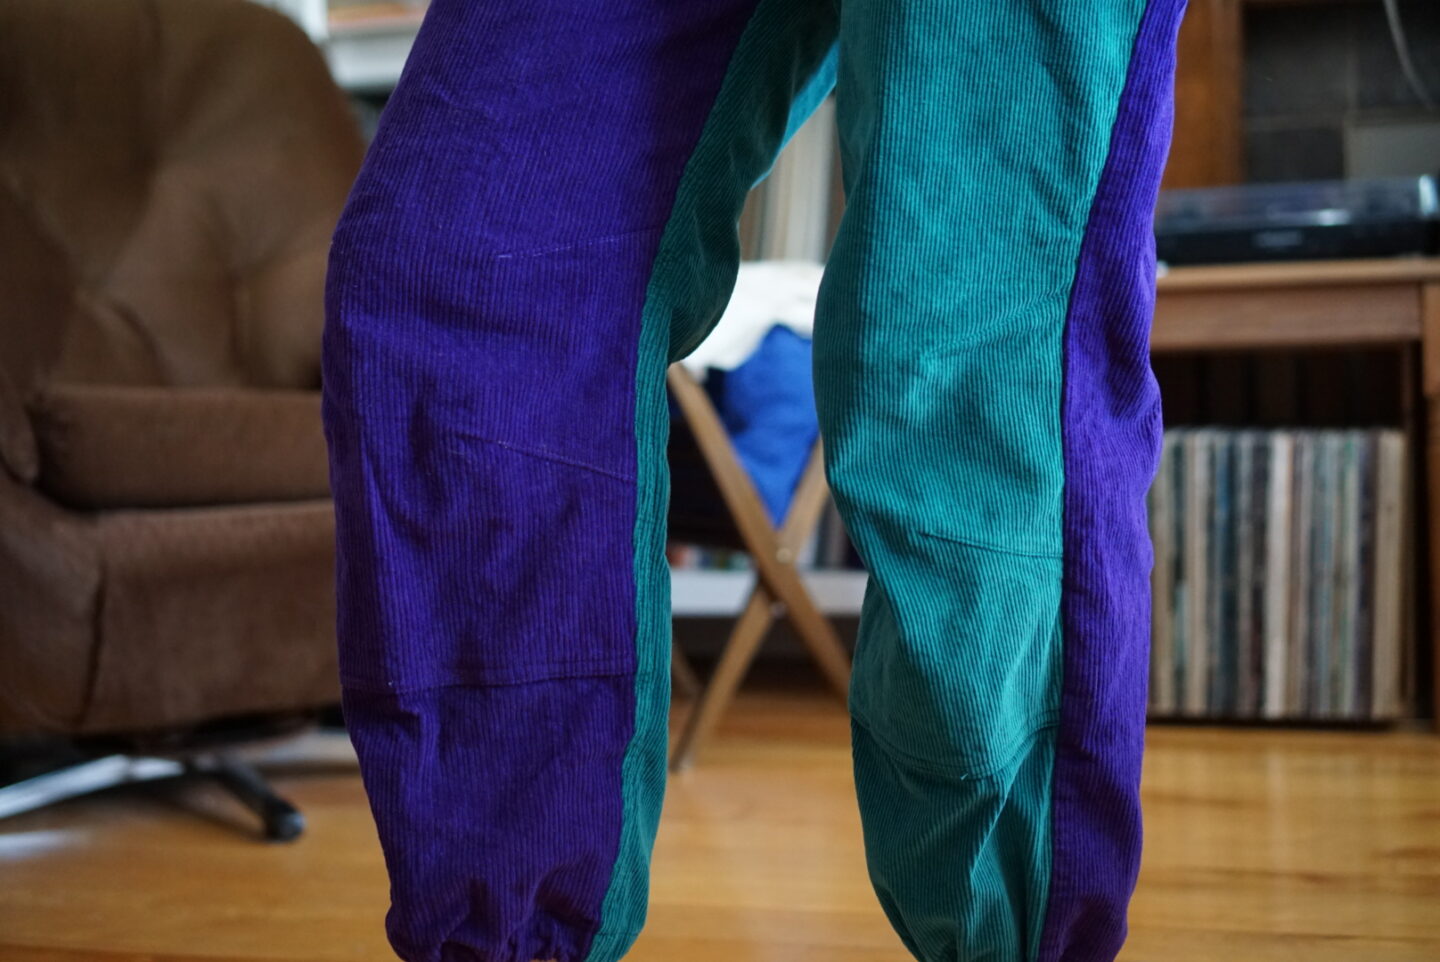
When I was making the length adustments, the main thing I was nervous about was the knee dart placement. I’m happy to say that the knee darts hit exactly where I wanted! I’ve never sewn pants with knee darts before, so I’m glad it worked out. It was funny to start a pattern and immediately have to sew SIXTEEN darts – four for each knee, times two because the darts need to be sewn in the double fronts as well. I thought it was going to be annoying to sew them all, but it was surprisingly satisfying. Overall, I loved sewing these pants. It was just a very enjoyable process, and it’s so nice to sew with bottom weight fabrics because they’re usually stable and do exactly as they’re told. The Topo pants are just a really FUN sew, from start to finish. Check out the double fronts and the knee darts below. I’m very pleased with how they line up and center on my knee when it’s bent.
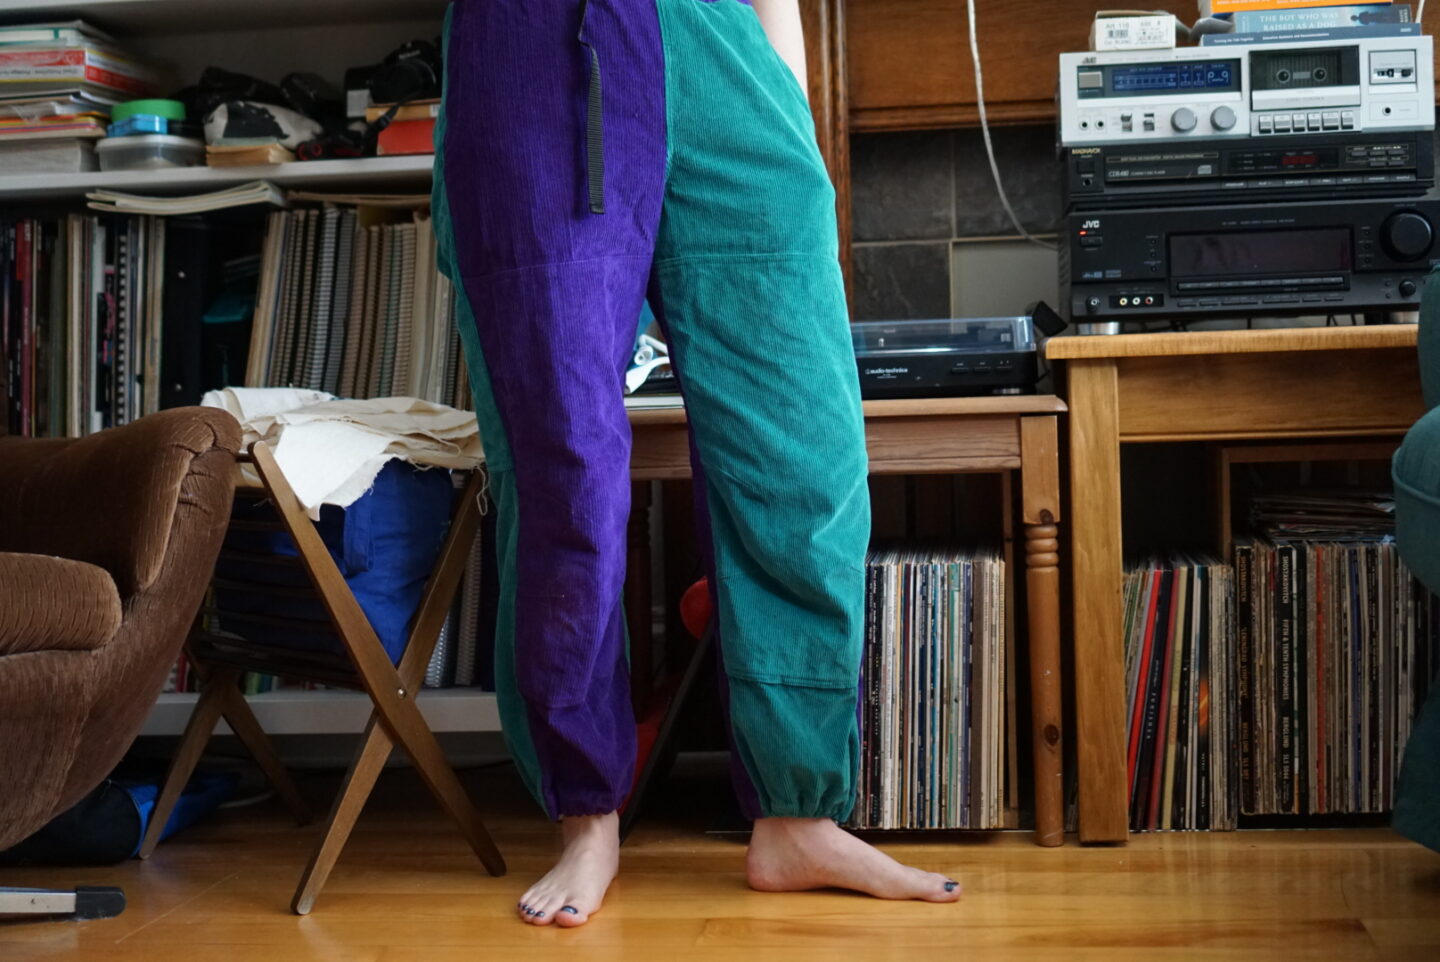
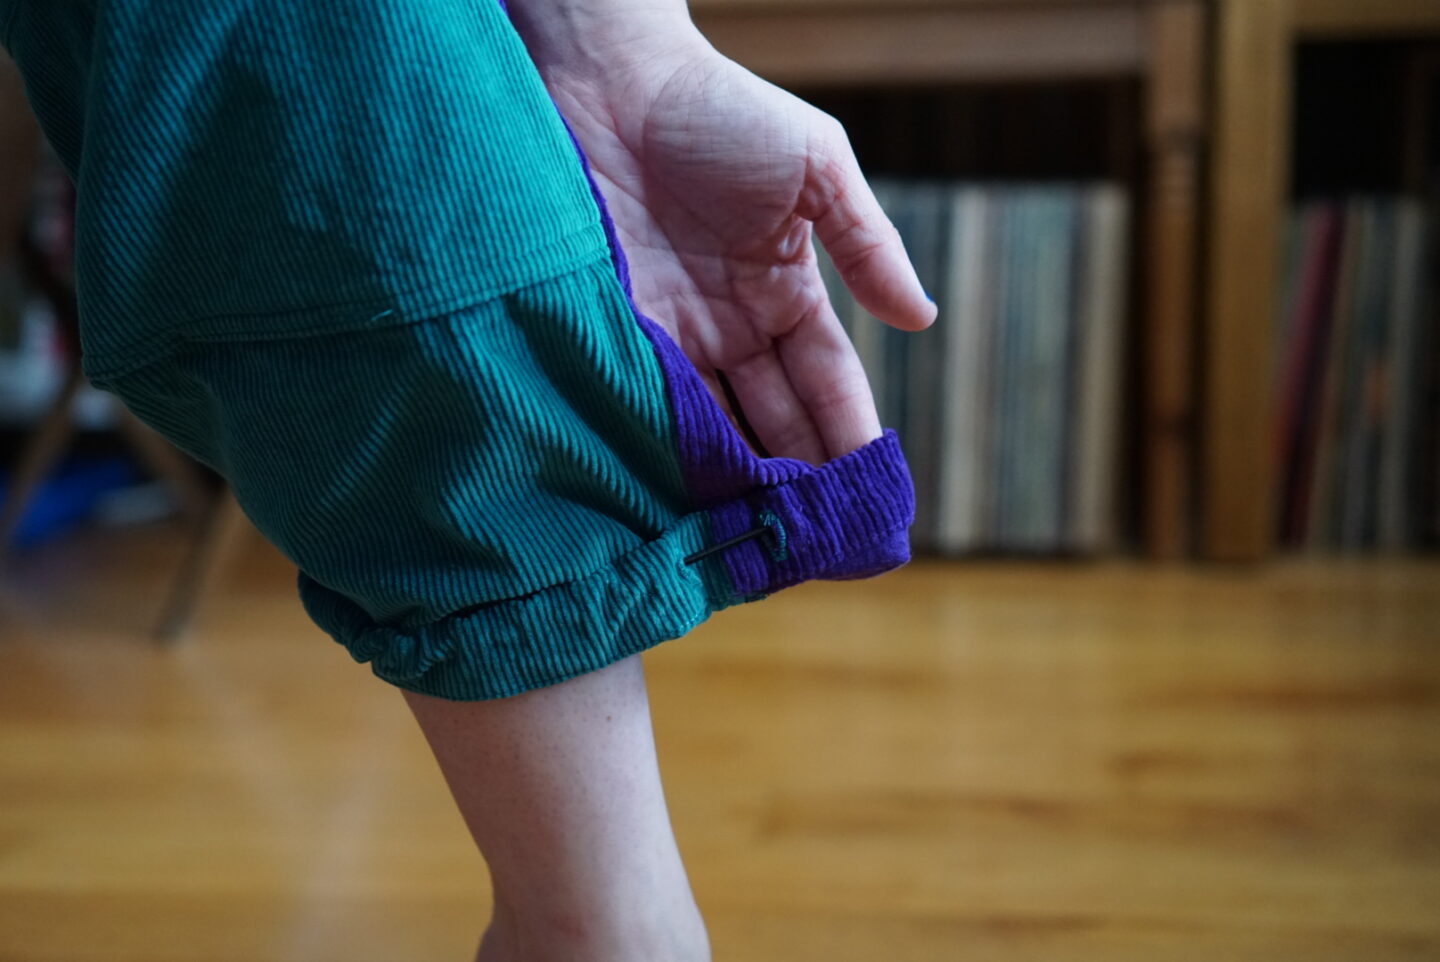
Below, you’ll see the cuff. I was originally going to use the cuff adjuster that I stole from the worn out pants, but I messed up my plan. I forgot to move the buttonholes up the cuff by 1″ in order to have them be on the outside of the pants instead of the inside. I had already sewn and cut open the buttonholes by the time I realized, and I didn’t want the adjusters to dig into my ankle, so I went with the original pattern instructions. I found that the elastic I took from the old pants was too worn out, but I had the same elastic in my stash from when I was sewing lots of masks. You end up deciding on the elastic length after it’s fed through, then you sew the ends together and rotate the loop so that the join hides inside the channel. You can see that below.
I took the pants out for their maiden climb within a few days of finishing them, and asked some random people at the climbing gym to take photos of them in action. Below you’ll see them on a slab climb, as well as on an easier overhang climb that I climbed for photo purposes so that they could been seen from the side. Thank you random strangers! To be honest, double-front corduroy pants are not ideal for summer, and my legs got very sweaty in these while I was climbing and I had to roll them up. But I persevered for the sake of these blog photos! They’ll be great for fall climbing, and I have an extra reason to sew another pair or two in the meantime!


If it wasn’t clear from what I wrote above, I found these pants so fun to sew. They have so many great details without anything being fussy. Everything is so thoughtful and customizable, and they fit great. I’m definitely going to make more pairs, and am thinking about different colour-blocking and other fun colours. If you are also a climber who sews, I figured I’d include a link to this older post of mine that includes a tutorial and free pattern for a little duffle bag that I use to hold my climbing shoes and chalk bag. My friend had a store-bought bag that his grandmother gave him, and I loved it so much that I measured it and made my own. I use it every time I go bouldering, and it falls in the same category of “very satisfying and very useful sew”. You can find that here. Has anyone else made the Topo pants yet? Let’s internet-shout together about how much we love them! And if you’re a fellow climber who sews, send me a DM on Instagram so that I can follow you!
