
Note: This blog post is the second in a series of four. Starting with the first post is recommended. You can find the links to the other posts here:
Part 1 (My Mother’s Quilt) / Part 3 (Quilt Cleaning) / Part 4 (The Finished Quilt)
I know from talking to other crafty people that there are so many families with beautiful quilt tops made by grandparents or other relatives that never made the transition to a finished quilt. My grandmother quilty business was not quite as unfinished as many inherited quilt tops are. She had sandwiched it with batting and backing fabric and basted it before losing interest. When I stumbled across it as we were trying to sort through the contents of her house, she told me that if I wanted to finish it, I could have it. The fact that it was already sandwiched and ready to be quilted lulled me into a false sense of the scale of the task before me. I enthusiastically told her that I would love to finish it. And then I left it untouched for years.
I think part of my enthusiasm at the time came from having just made my first quilt. I didn’t know that quilt patterns really existed, and I had made up my own pattern for a TARDIS. I hand quilted that quilt, so I think that made me feel like I had the skills to take on my grandma’s quilt. In the moment, I was also very into the idea of completing something my grandma had started, especially when I knew it was the sister quilt to the one that I had already loved so well. But once I took it home, I think the memory of how long it had taken to hand quilt my own quilt, and the fact that I was not totally satisfied with the size or consistency of the stitching on that quilt made me reluctant to start work on my grandma’s quilt. I wanted the quilting to be high quality so that it suited the stitching that she had already done. And we all know that perfect is the enemy of good! That mental goal of having it be amazing prevented me from starting for so long! It’s yet another good lesson in “done is better than perfect”. A couple years ago, that was basically what motivated me to actually start hand quilting. It had been haunting me for years, making me feel guilty about not working on it, and I just wanted it to be done.


As I mentioned in my previous post in this series, when I first started working on this quilt, I used regular all-purpose polyester thread, folded double. I finished the full center square before I noticed that the batting was thin, polyester batting, which had now been aged for almost 40 years. I ripped out all of my stitches and replaced the batting, sandwiching and basting it again. This past winter, a few years after I first attempted to start, I had let go of my grudge toward that batting and wanted to finish it to give my mum as a gift. I had learned a lot in the two years since I first tried to get going on it. In the spring of 2020 during COVID lockdowns, Craftsy (known at the time as Bluprint) made all of their online classes completely free for a couple weeks. Since this quilt had been living in the back of my mind for a full decade, even though I wasn’t working on it at the time, I thought it would be good to take a look at some hand quilting classes. I still had it in my mind that I wanted the quilting to live up to the piecing and the history of the quilt. I learned a lot from those classes about burying knots, which threads to use for different types of projects, how to get consistent stitch length, and how to sew multiple stitches at once.
I ended up ordering a bunch of balls of white DMC Pearl Cotton in size 8. It’s used for quilting without holding it double, which I was not used to! I got better as I went along, but even by the end I still occasionally pulled the thread out of the needle by accident. Which is not fun because the hand quilting needles I was using were small, and it was tricky to get the thicker thread through the eye of the needle. But I got so much better at threading needles through the course of working on this quilt! I started with the center section again, following the edges of the piecing to guide my stitching. I also used the edges of the pieces to guide my stitches in the skinny border surrounding the center design of half square triangles (HSTs). This matched what was done on my mum’s finished quilt.


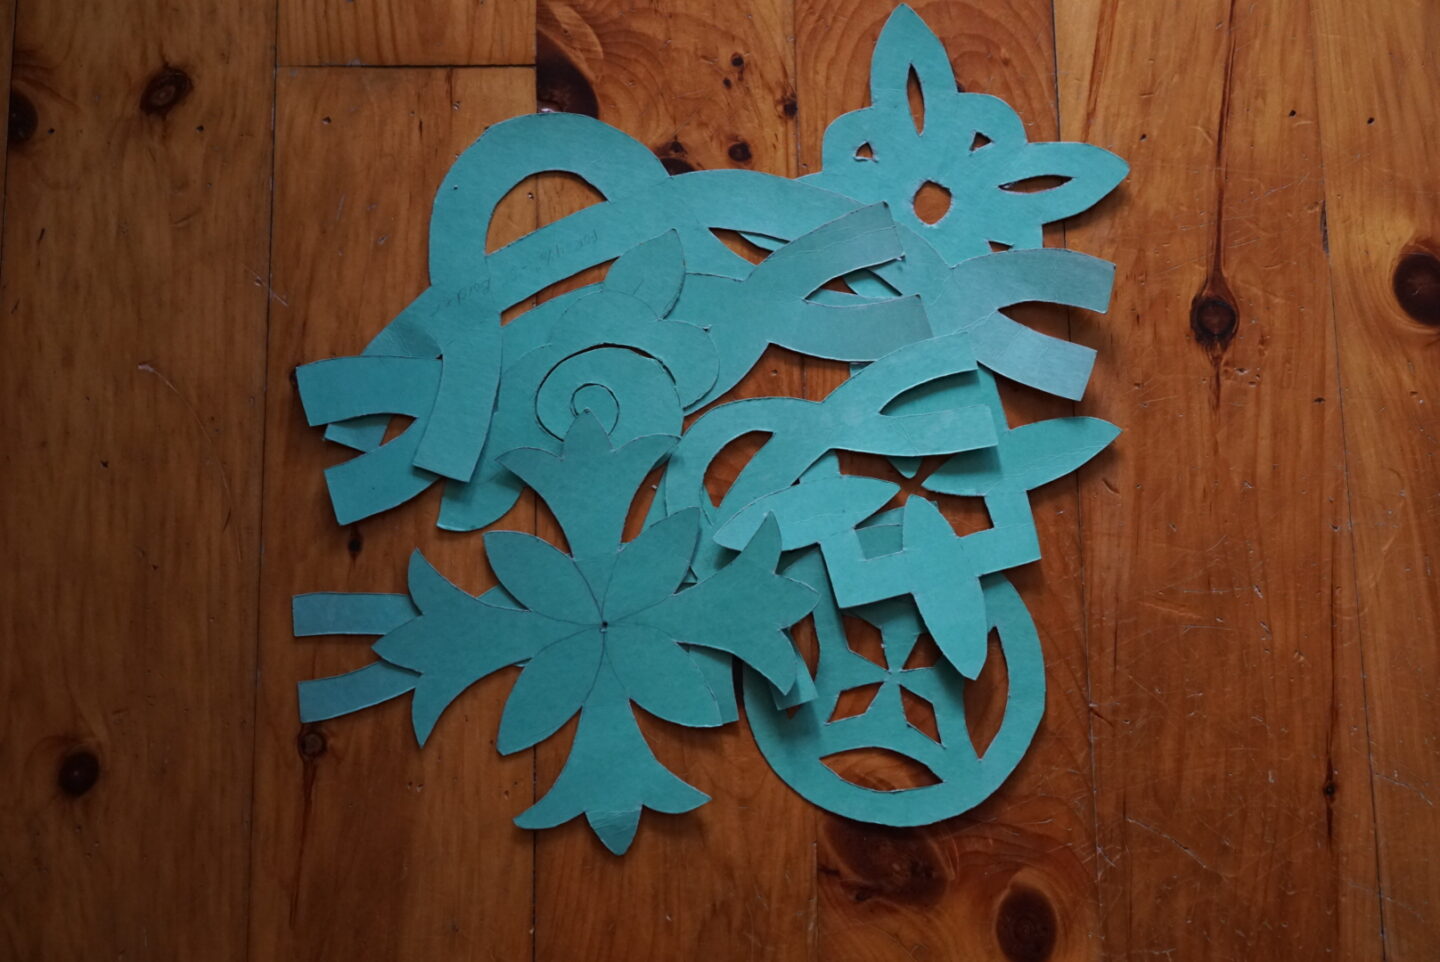
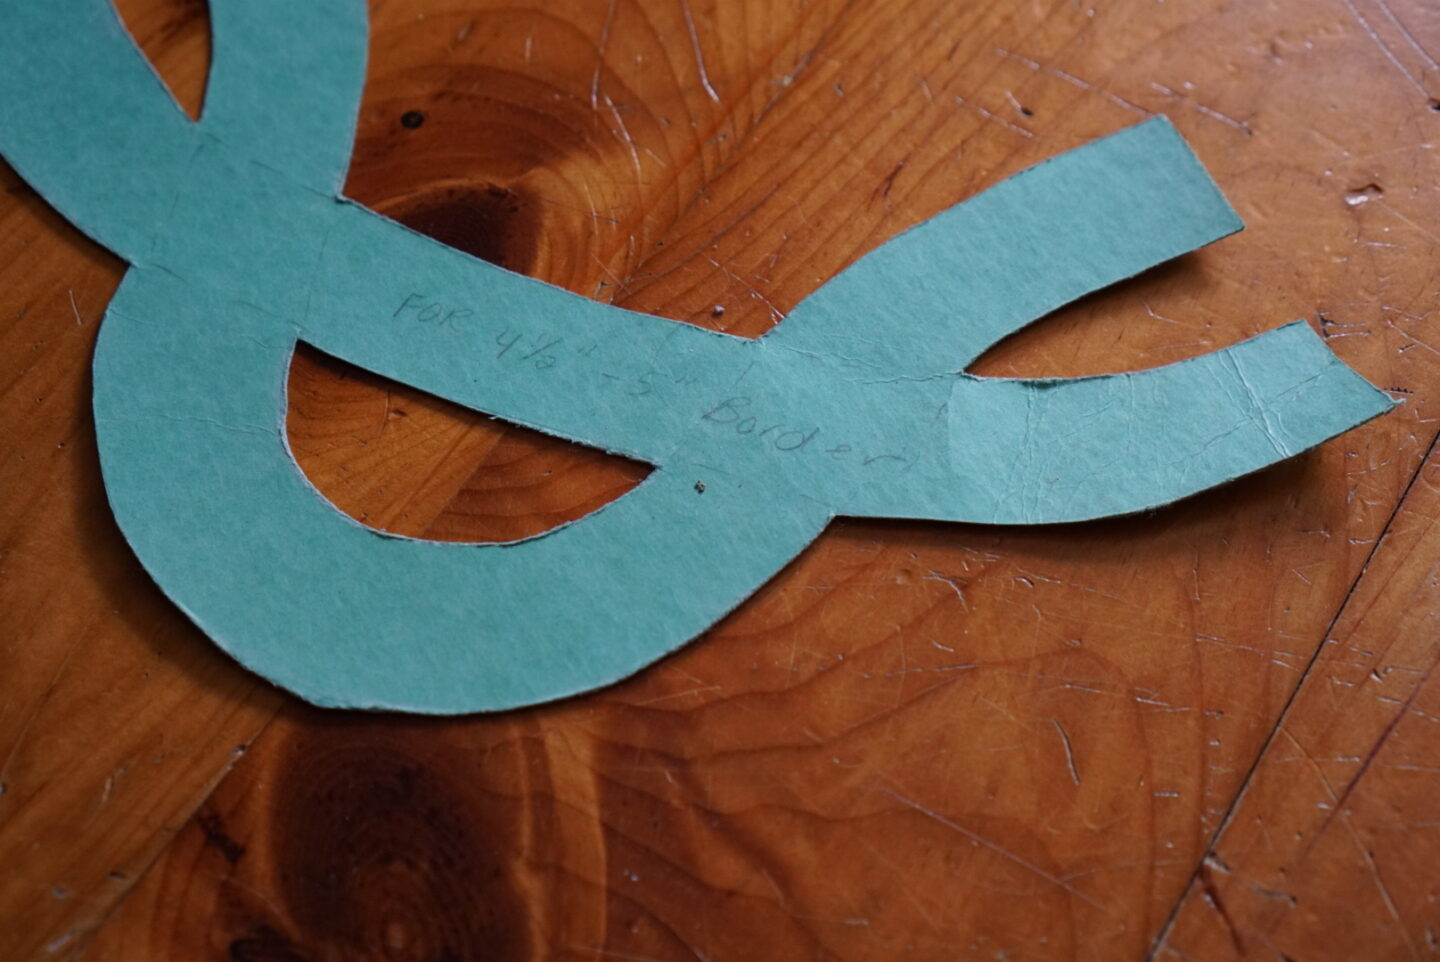
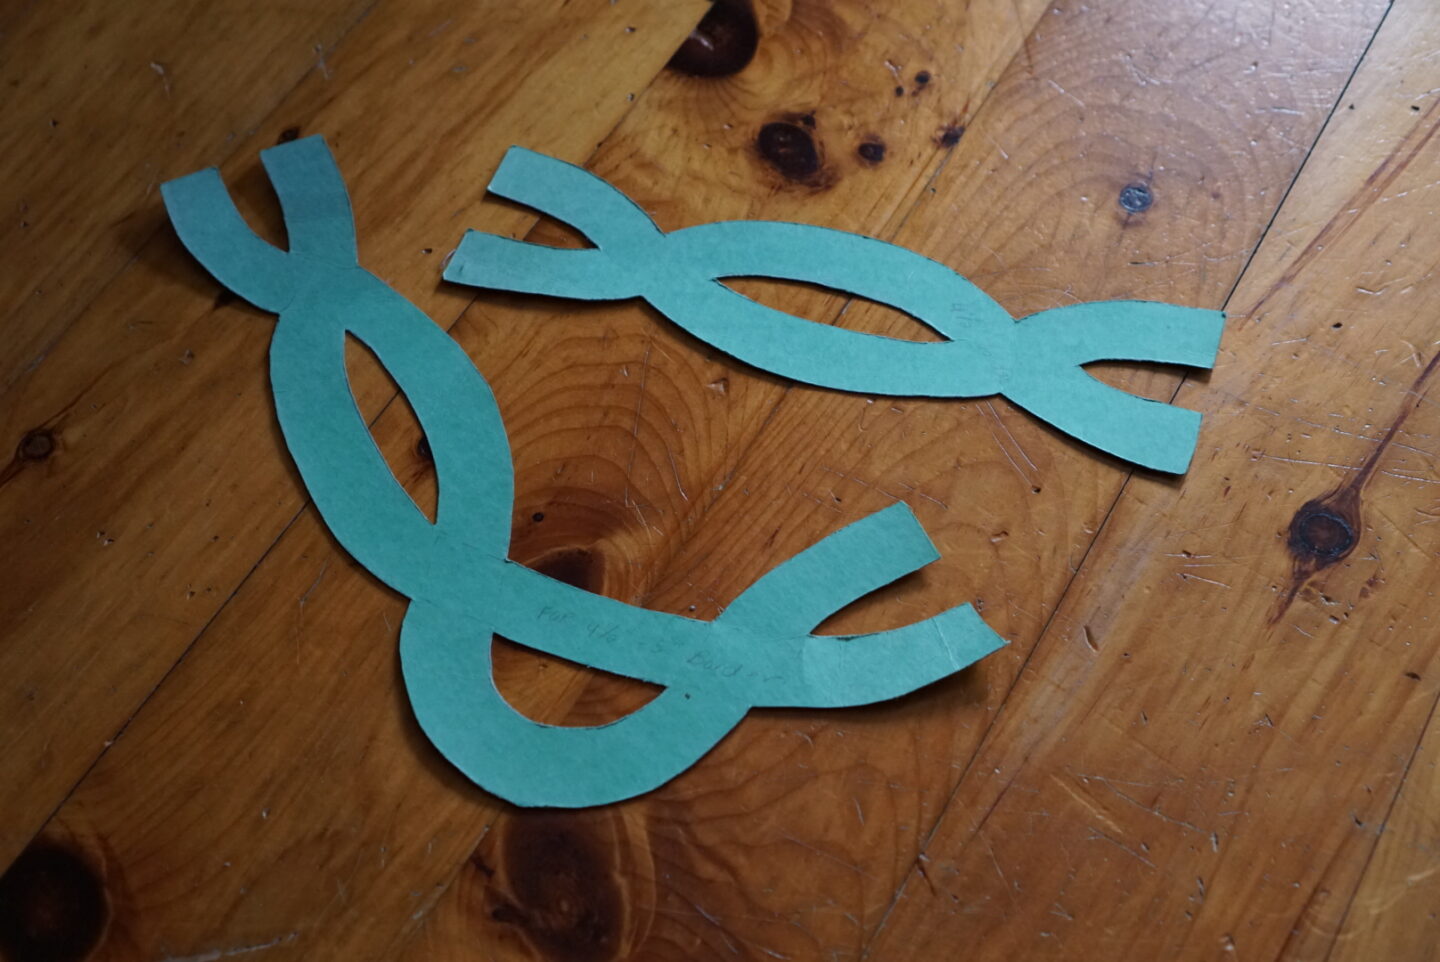
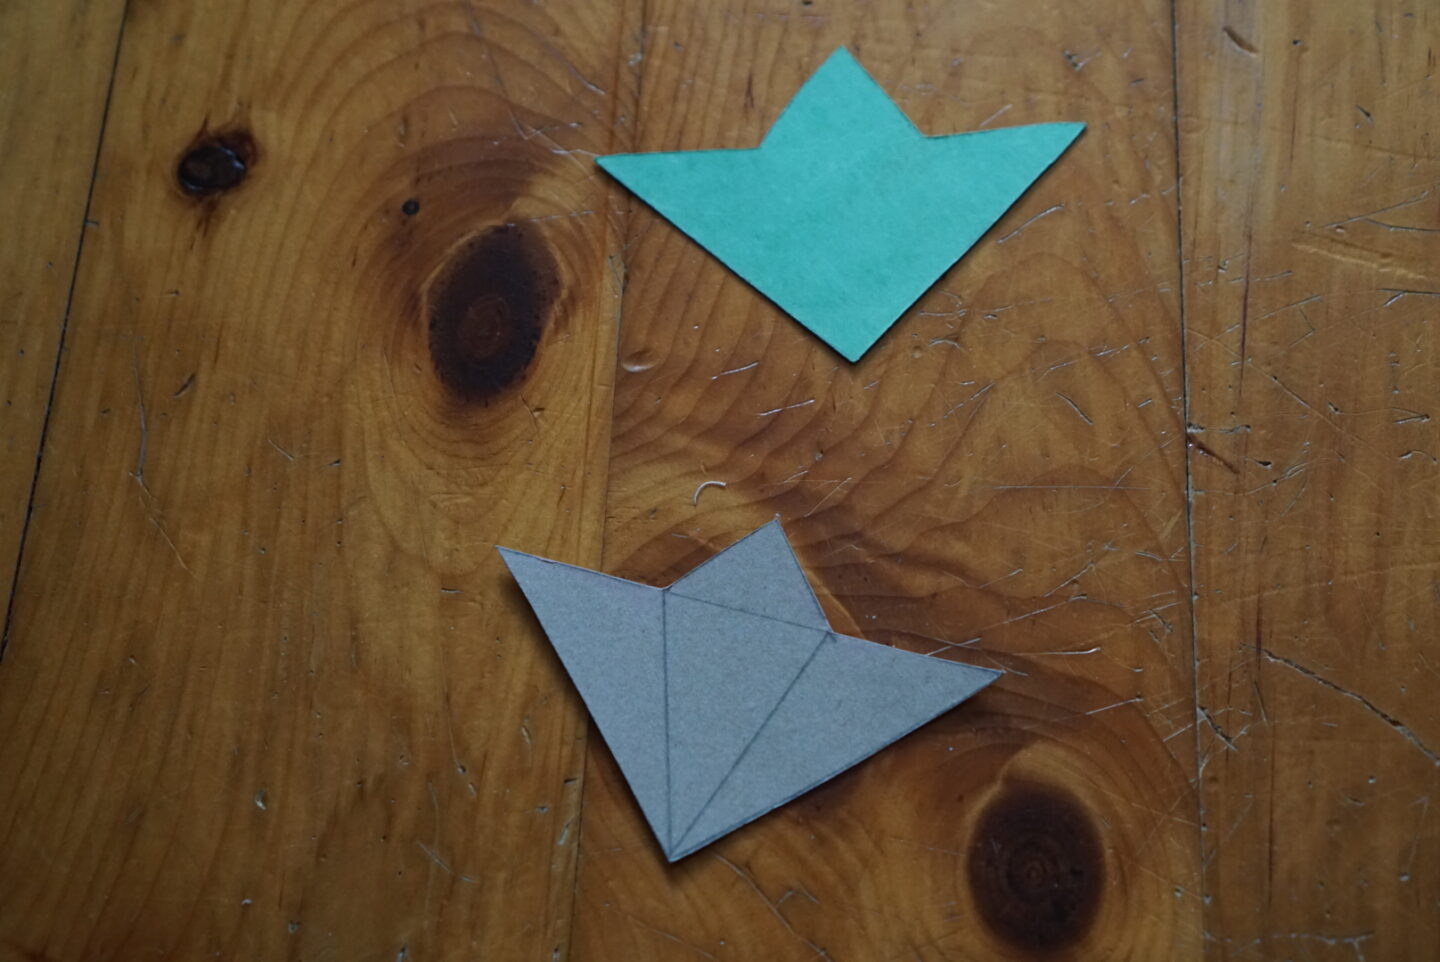
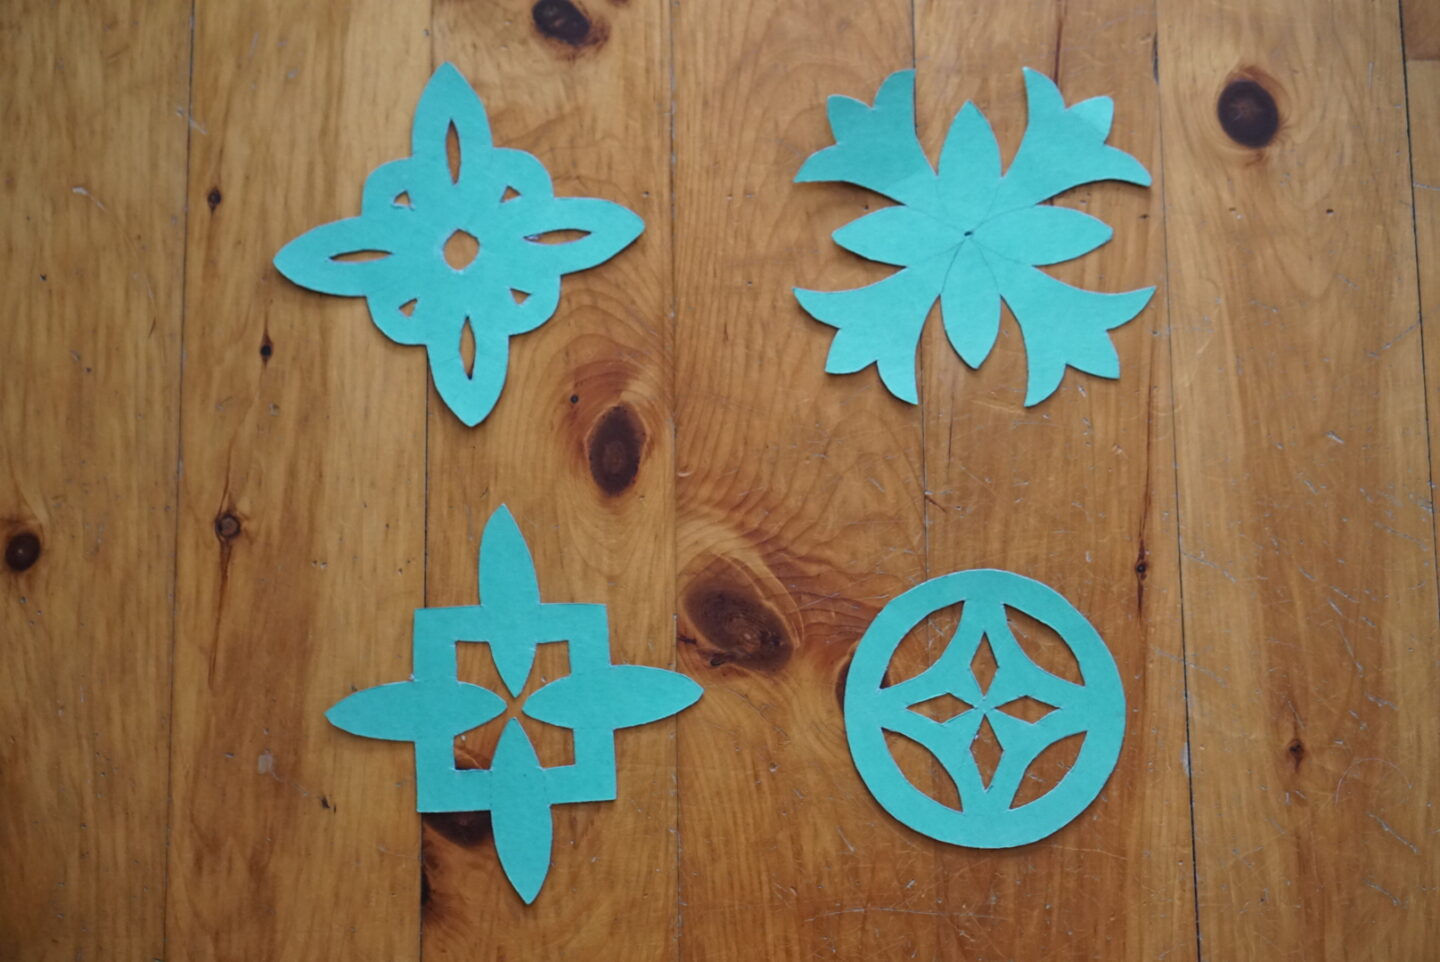
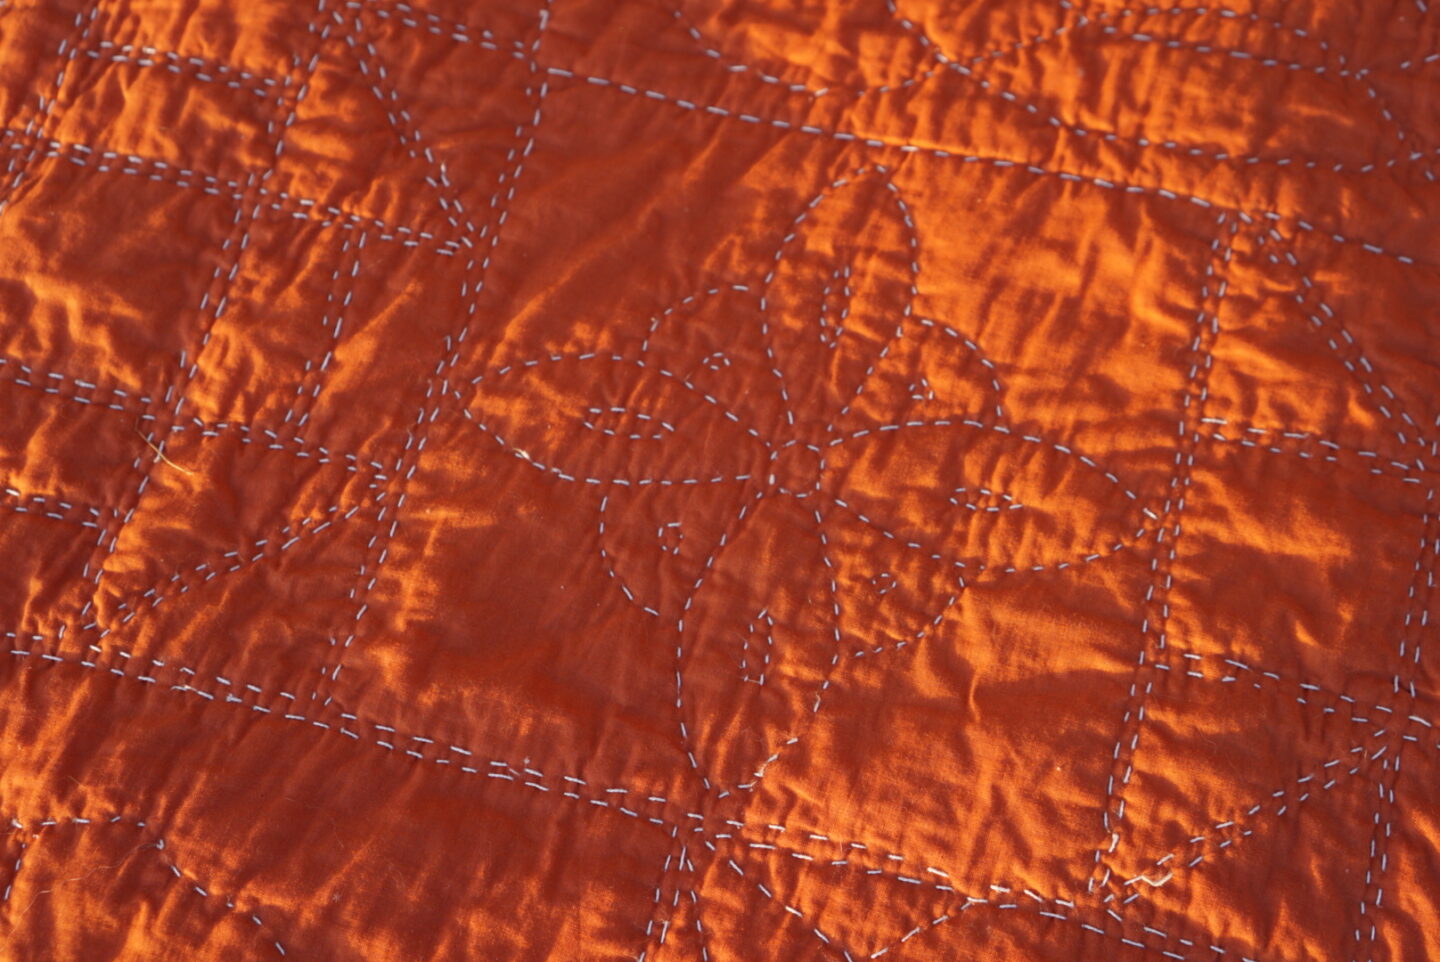
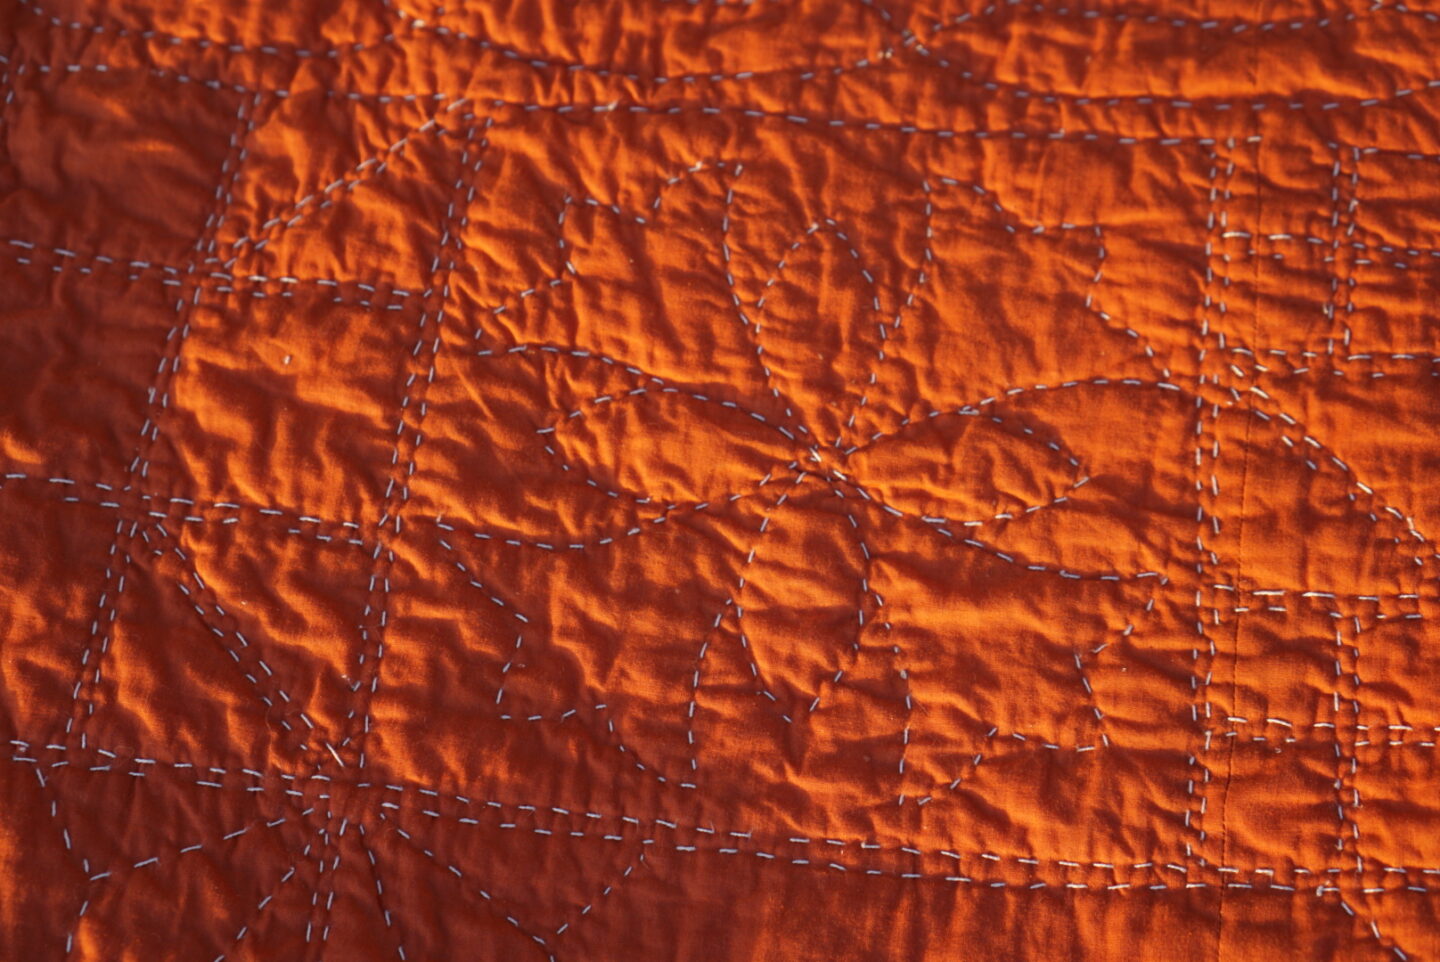
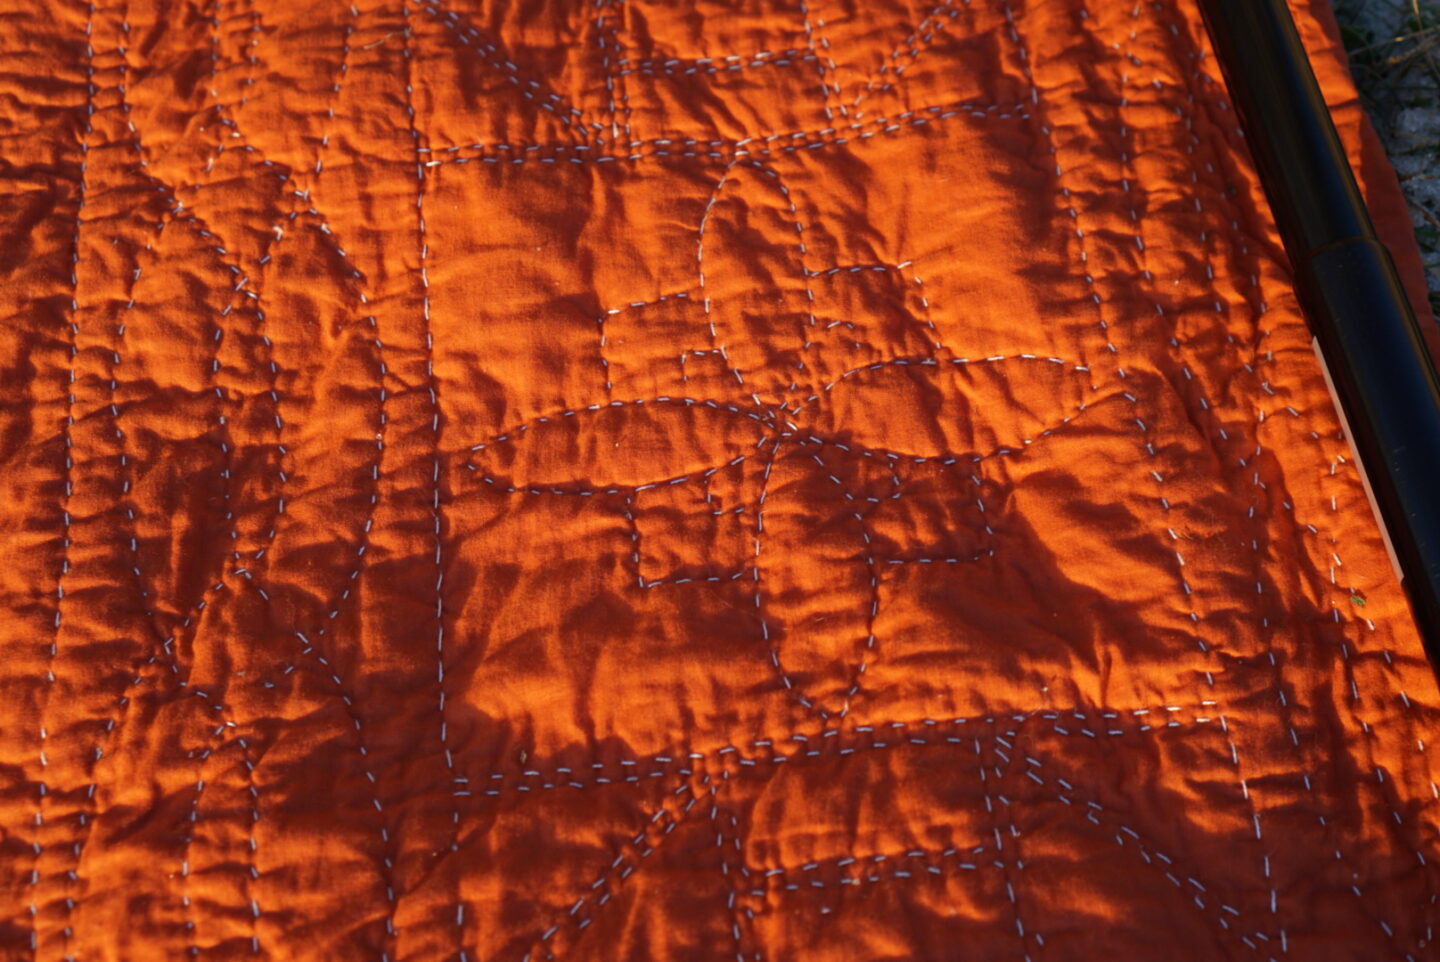
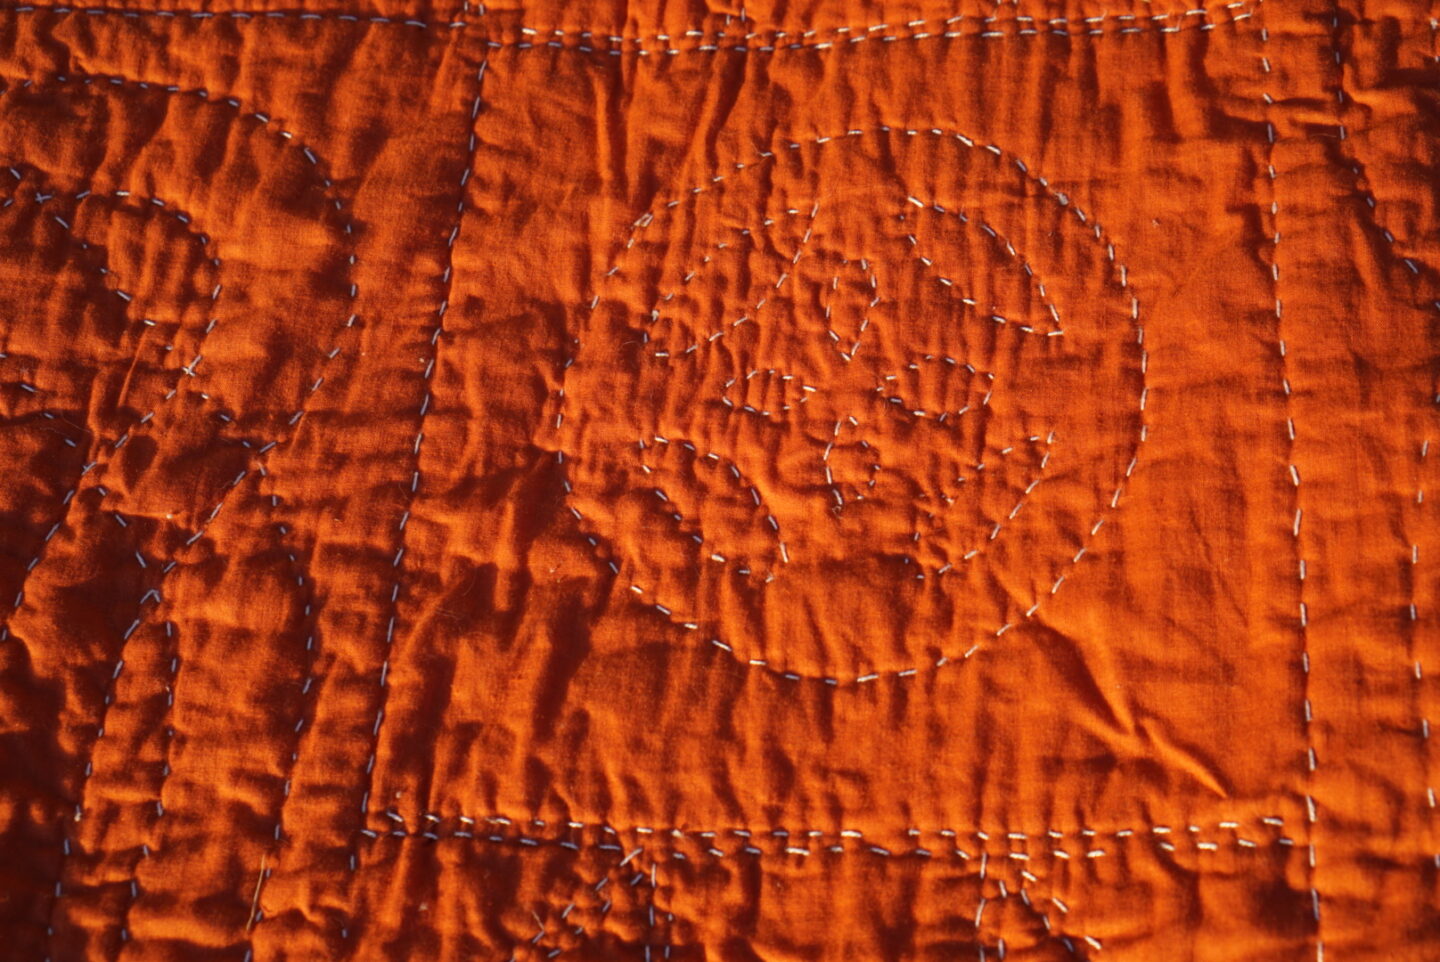
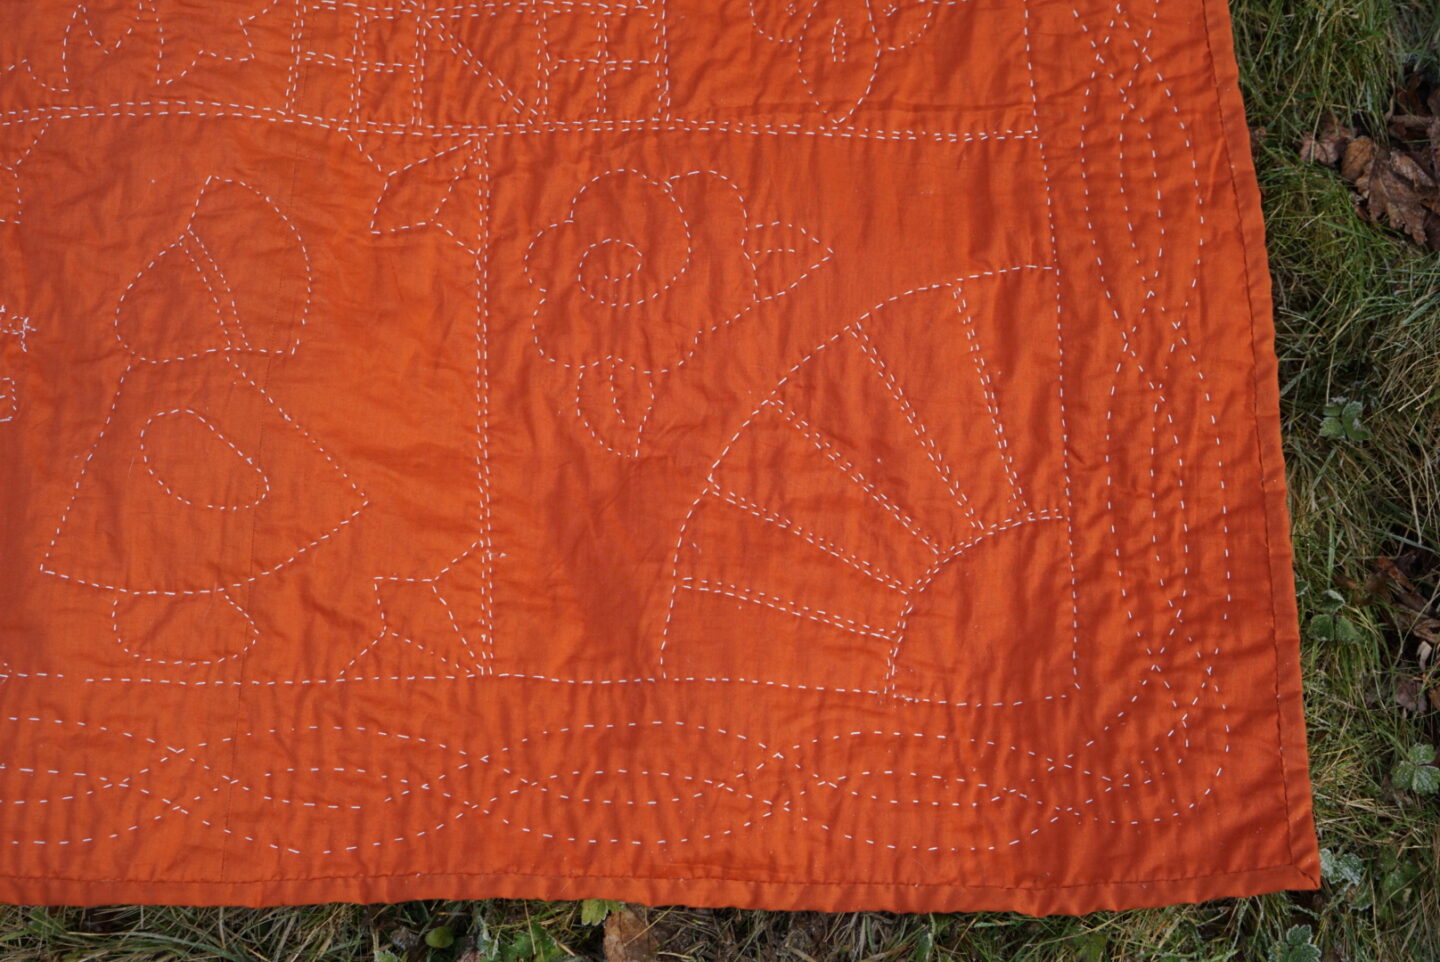
I really wanted to make the quilting match the other quilt as much as possible. This involved a lot of close inspection of my mum’s quilt as I went along, since a lot of the quilting threads had worn away. It made me notice a lot of things that I hadn’t noticed before, which I’ll talk about as we go through the quilt. It also helped a lot that I had my mum’s original cardboard stencils from when she quilted her own quilt. I don’t know if I could have recreated the quilting so faithfully if I hadn’t had the stencils to guide me. Luckily, I had already gotten those stencils from my mum when I originally took possession of my grandma’s quilt, so I didn’t have to spoil the surprise by asking for them. You can see the stencils below, and I’ll show you individual ones when I show you the corresponding sections of the quilt. The first ones I used were the thicker cables for the border that surrounds the HSTs at the center of the quilt. I traced around them with chalk, and then filled in the interior lines after I lifted the stencils. Then, I just stitched along those lines. When we get to the outer border of the quilt, I’ll talk about my technique for the cables, as I have better photos of the process for that section.


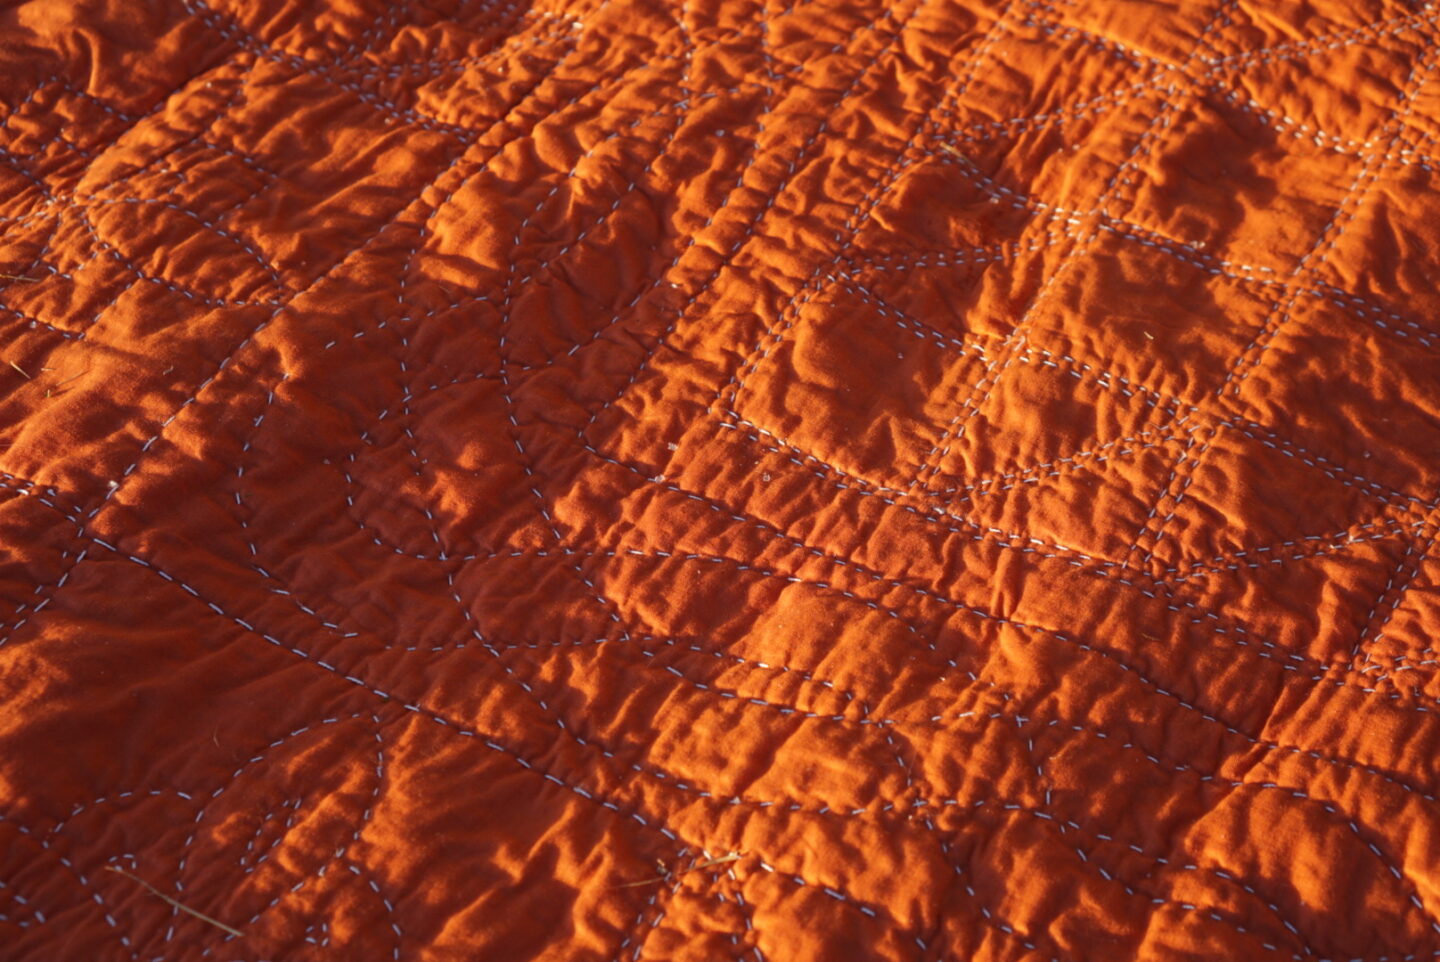
I will mention that most people complete multiple stitches in each pass when they are hand quilting, but I could not do that. You have to be able to put tension on the fabric, and while I did have it pulled flat in a quilting hoop, the hand pieced nature of the top combined with the age of the quilt made me reluctant to pull it tight enough to use that technique. It obviously would have been way more efficient and saved a lot of time, but when I tried it, it pulled the seams apart a little bit and I gave up on it. That meant that I had to do all the stitches one at a time, which definitely contributed to how long it took. I’m interested in the future in trying the technique on a project that has sturdier seams and isn’t so precious to me.
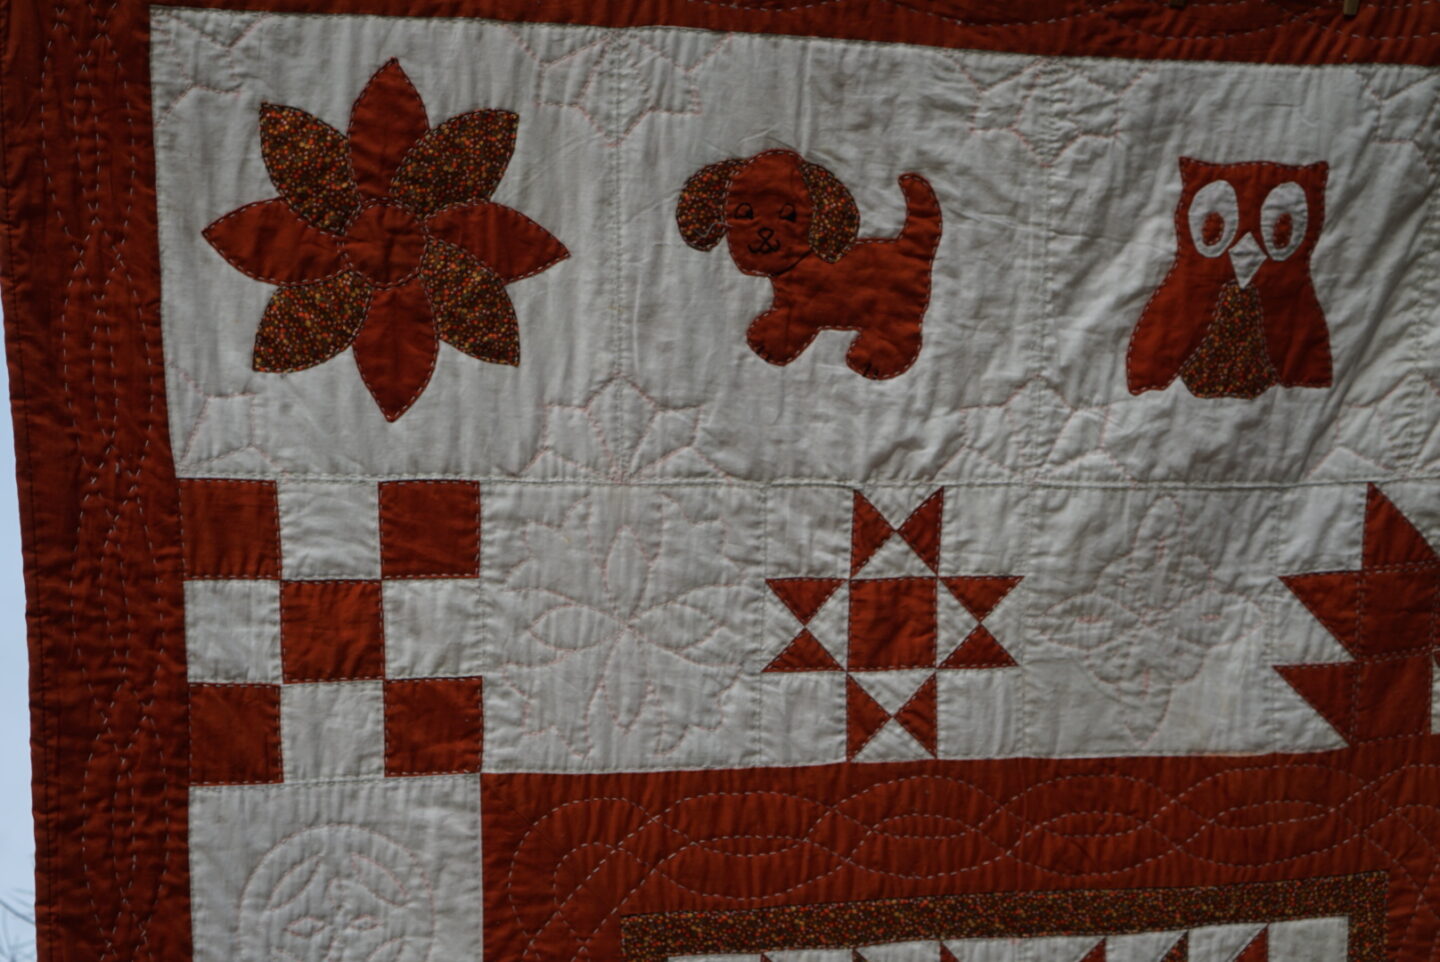
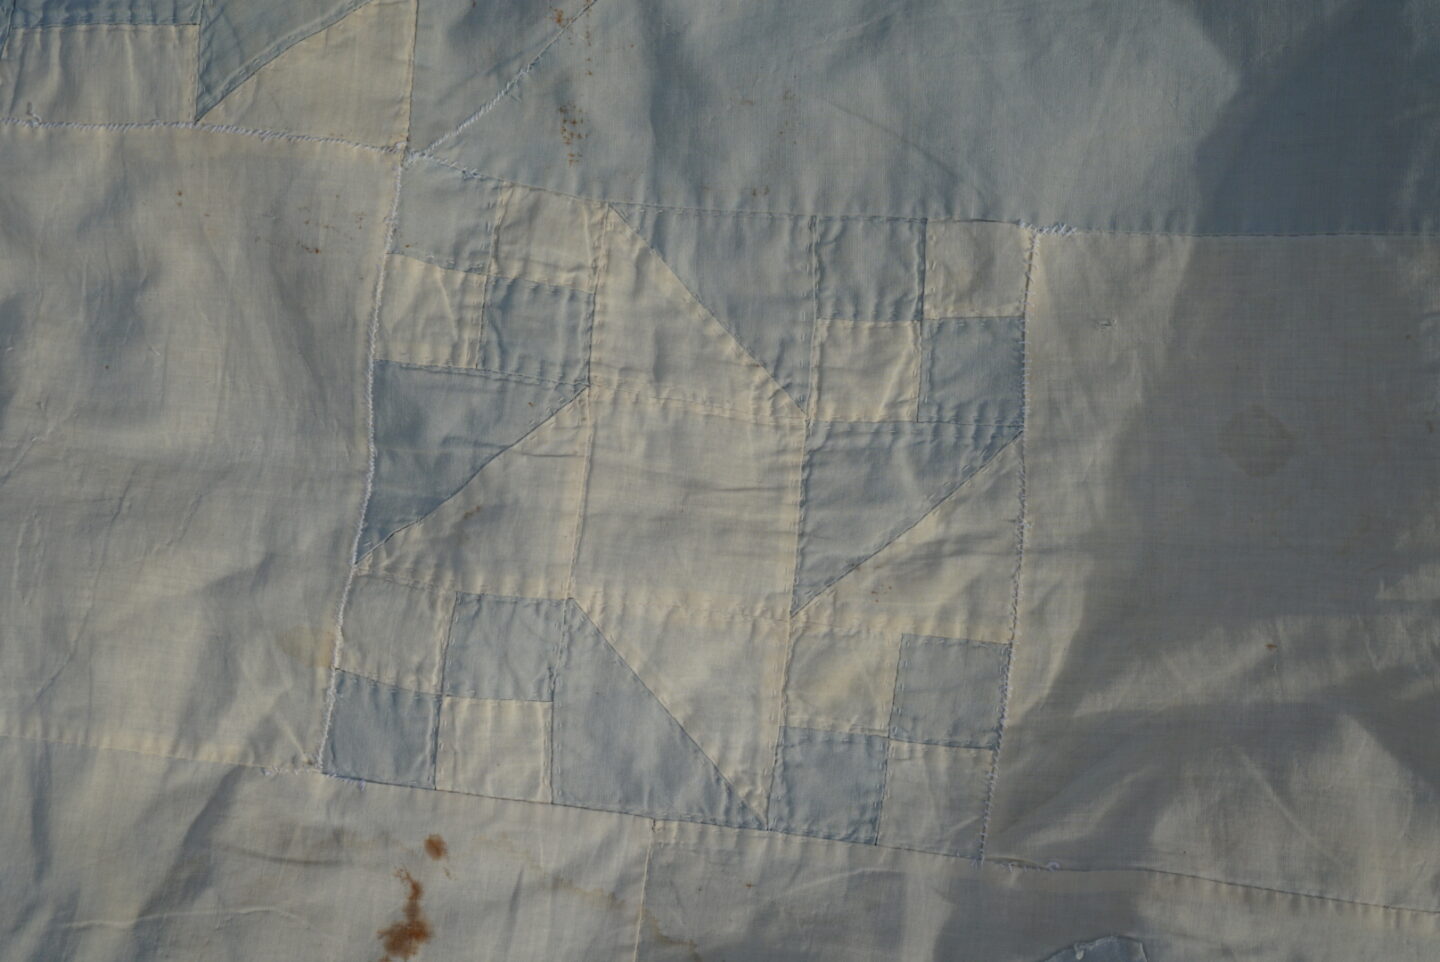
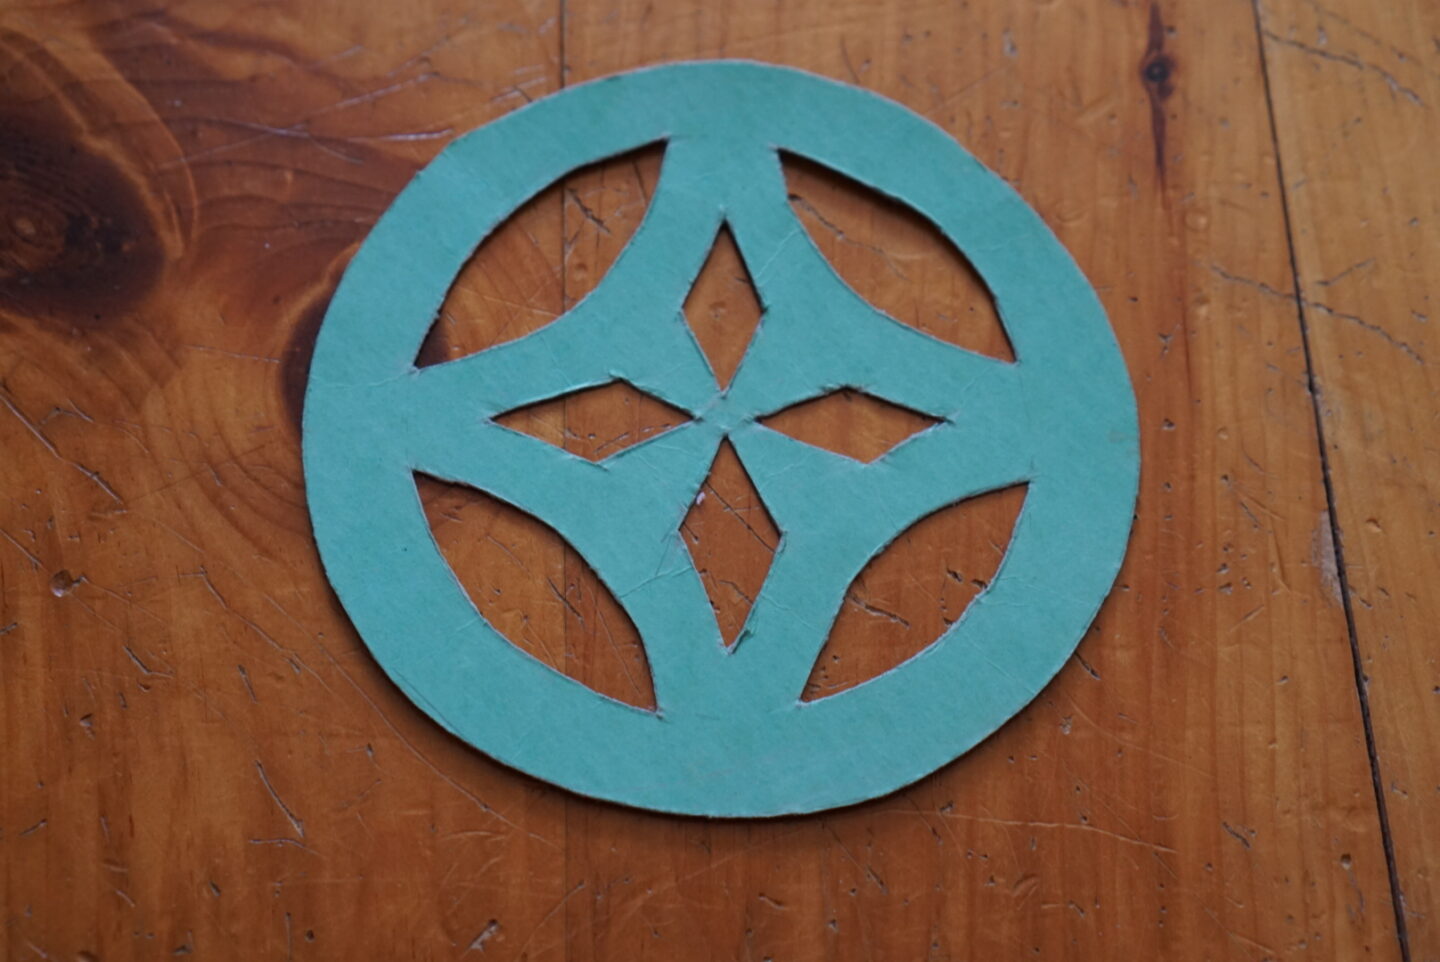
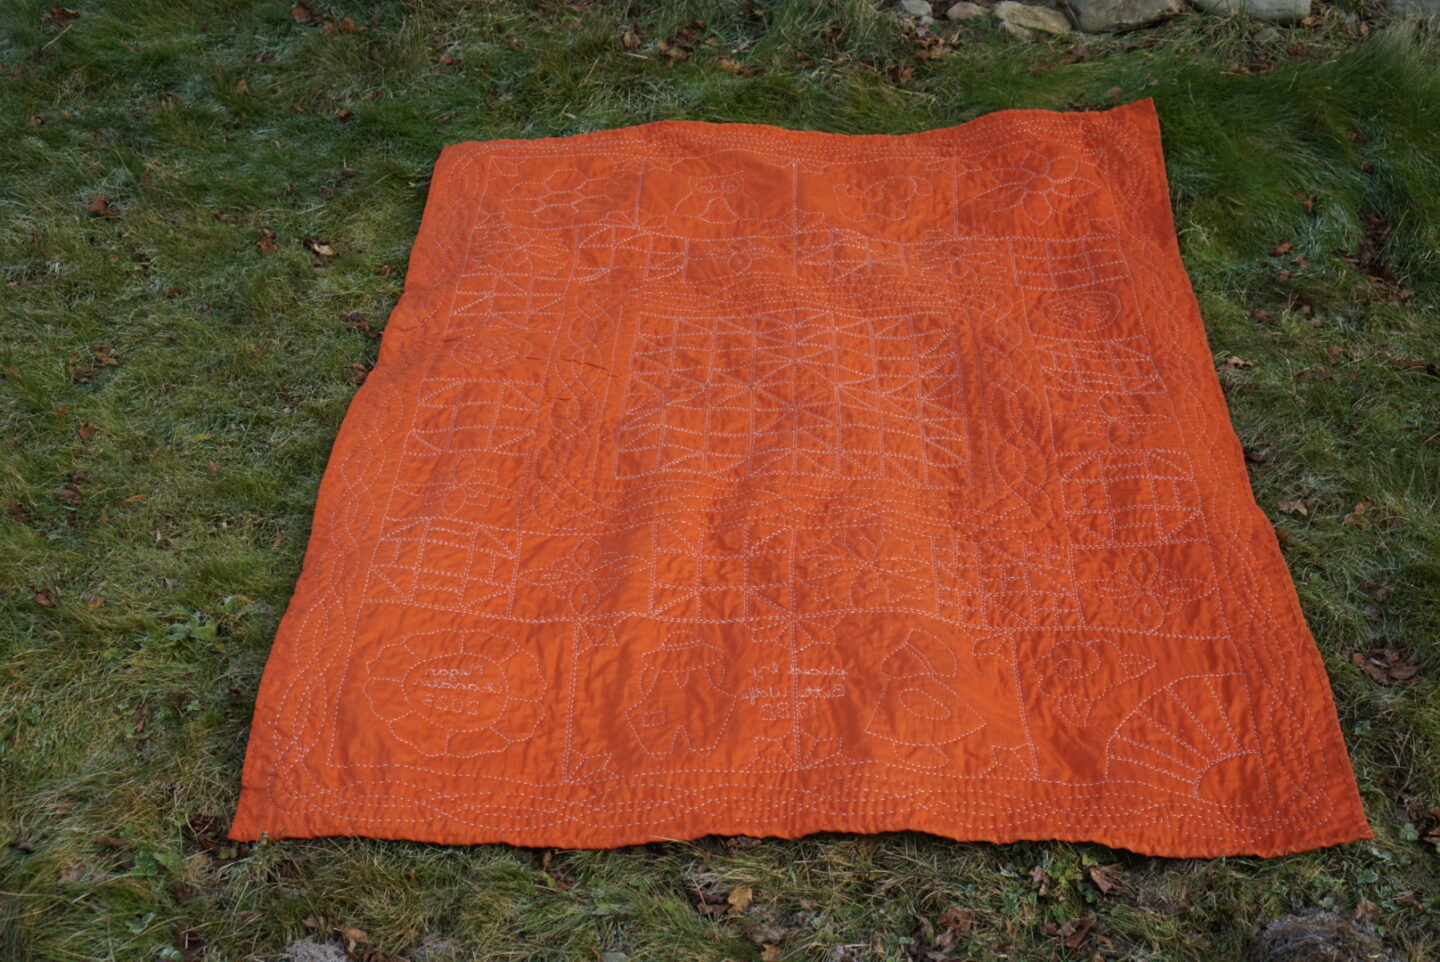
Outside of this cabled border, there is a ring of blocks surrounding it. There is a row at the top and bottom, and columns at each side. These blocks alternate between solid white squares and two colour pieced blocks. Since it’s a sampler quilt, each of the pieced blocks is unique. For the pieced blocks, I used the piecing to dictate my quilting. It was so interesting to spend time with each block individually, as I gave the designs attention in a way I never had with my mother’s quilt. It also made me realize that my grandma and my mum chose a lot of the same blocks, but some of them are different! All of the quilt blocks in this quilt are traditional designs, and I want to talk about their names and give you resources to learn a bit about the history of each of them.
I had to do some research in order to figure out the names of the blocks, as there are hundreds of traditional quilt block designs, most with multiple names (often varying by region). My sister loaned me her copy of 849 Traditional Patchwork Patterns: A Pictorial Handbook by Susan Winter Mills, which really helped. It doesn’t have any history in it, but it provides diagrams of the blocks and lists the name(s) of each one. It’s organized by the shape of the pieces, so there’s a triangle section, a square section, and so on. The index was also very helpful when trying to confirm information that I found online. Another great source of general information was the Scissor Tail Quilting quilt block library. It has a bit of history, instructions on how to construct the blocks, and a colouring sheet for each block to print out if you want to try out different colour combos. A book that a lot of my online sources below draw from is Barbara Brackman’s Encyclopedia of Pieced Quilt Patterns, published in 1993. I would love to get my hands on a copy of this, and might attempt to borrow it through interlibrary loan in the new year. Those are the general resources I used, and I’ll include a more specific link with each block I talk about.
In the photo above, you can see two of the pieced blocks clearly: the one on the left that looks like a checkerboard, and the star in the middle of the image. The first one is called the Nine Patch, because it has nine patches. It’s a three by three block, and the first known Nine Patch blocks were made at the beginning of the nineteenth century. It’s a very common block for beginners to learn, as it’s simple to make and can be made using scraps. Blocks that are based on a three by three grid are often referred to as nine patch blocks as an umbrella term. You can learn more about the Nine Patch here. The star is an eight point star known as the Ohio Star or the Eastern Star. The Ohio Star is strongly associated with the American Civil War. There’s an Ohio Star quilt made in honour of Mary Patterson Leary, who was married to anti-slavery fighter Lewis Sheridan Leary, in the International Quilt Museum. She was remembered by her loved ones as often sitting and sewing in her rocking chair. You can read more about the quilt block and this story here. The design at the center of my mum and grandma’s quilt is based on the Ohio Star (from what I can tell), although rotated compared to the block in the photo above. The Ohio Star is a nine patch block.

Continuing clockwise, we have the next two blocks. The next one is called the Maple Leaf and likely originated in the late 1800s. The original design is fully pieced, however the version in this quilt has an applique stem. This means that the stem is a separate piece sewn on top of the white base instead of a thin piece sewn between two white sections. The Maple Leaf is another nine patch block. You can learn more about it and how to make it here. The other block in this image is a nine patch block called the Friendship Star. Friendship Star blocks were often sewn in secret as a contribution to a larger quilt being made by a friend group for a friend who might be getting married or moving away. For quilts like those, the person contributing the block would often stitch their name in the background or even in the center of the star. You can read more about the Friendship Star here. As you can see, the Friendship Star in this quilt has a lot of dye that bled into the surrounding fabric. That’s something that I’ll discuss in more detail in Part 3 of this series.

This block is called the Shoofly. It’s also known as Simplicity, Hole in the Barn Door or Eight Corned. It originated in 1850, and was very popular because it was suitable for quilters of all skill level and could be used in various ways in a full quilt. Quilts are believed to have been used as codes in the Underground Railroad, and a Shoofly quilt is thought to have identified someone who could offer assistance to people who had escaped from enslavement. There are many possible explanations for the name itself, which you can read about here. This is another nine patch block.
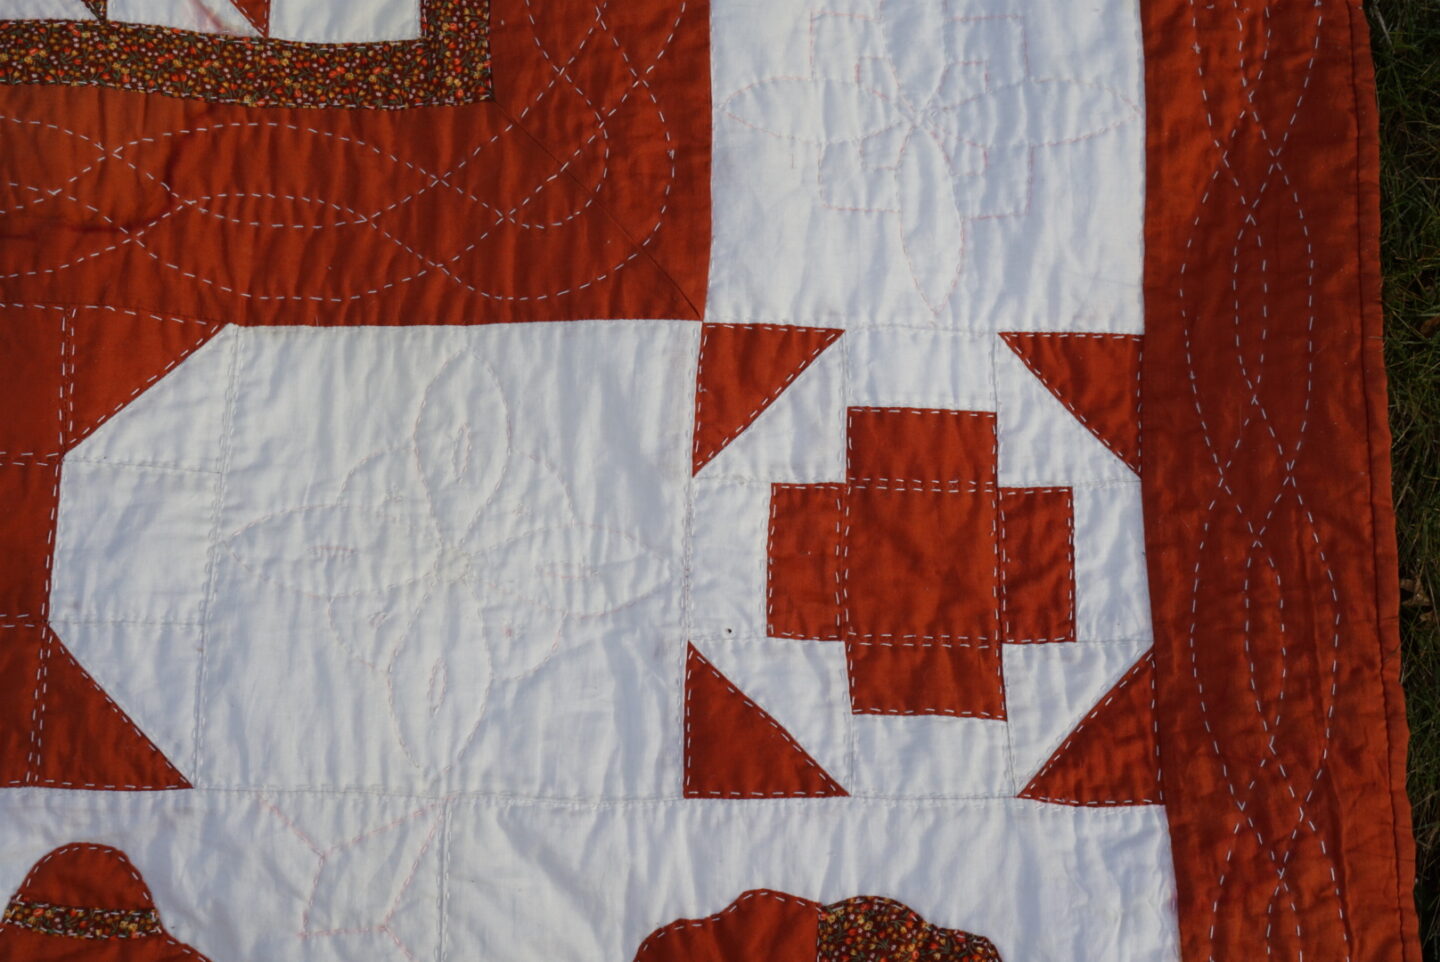

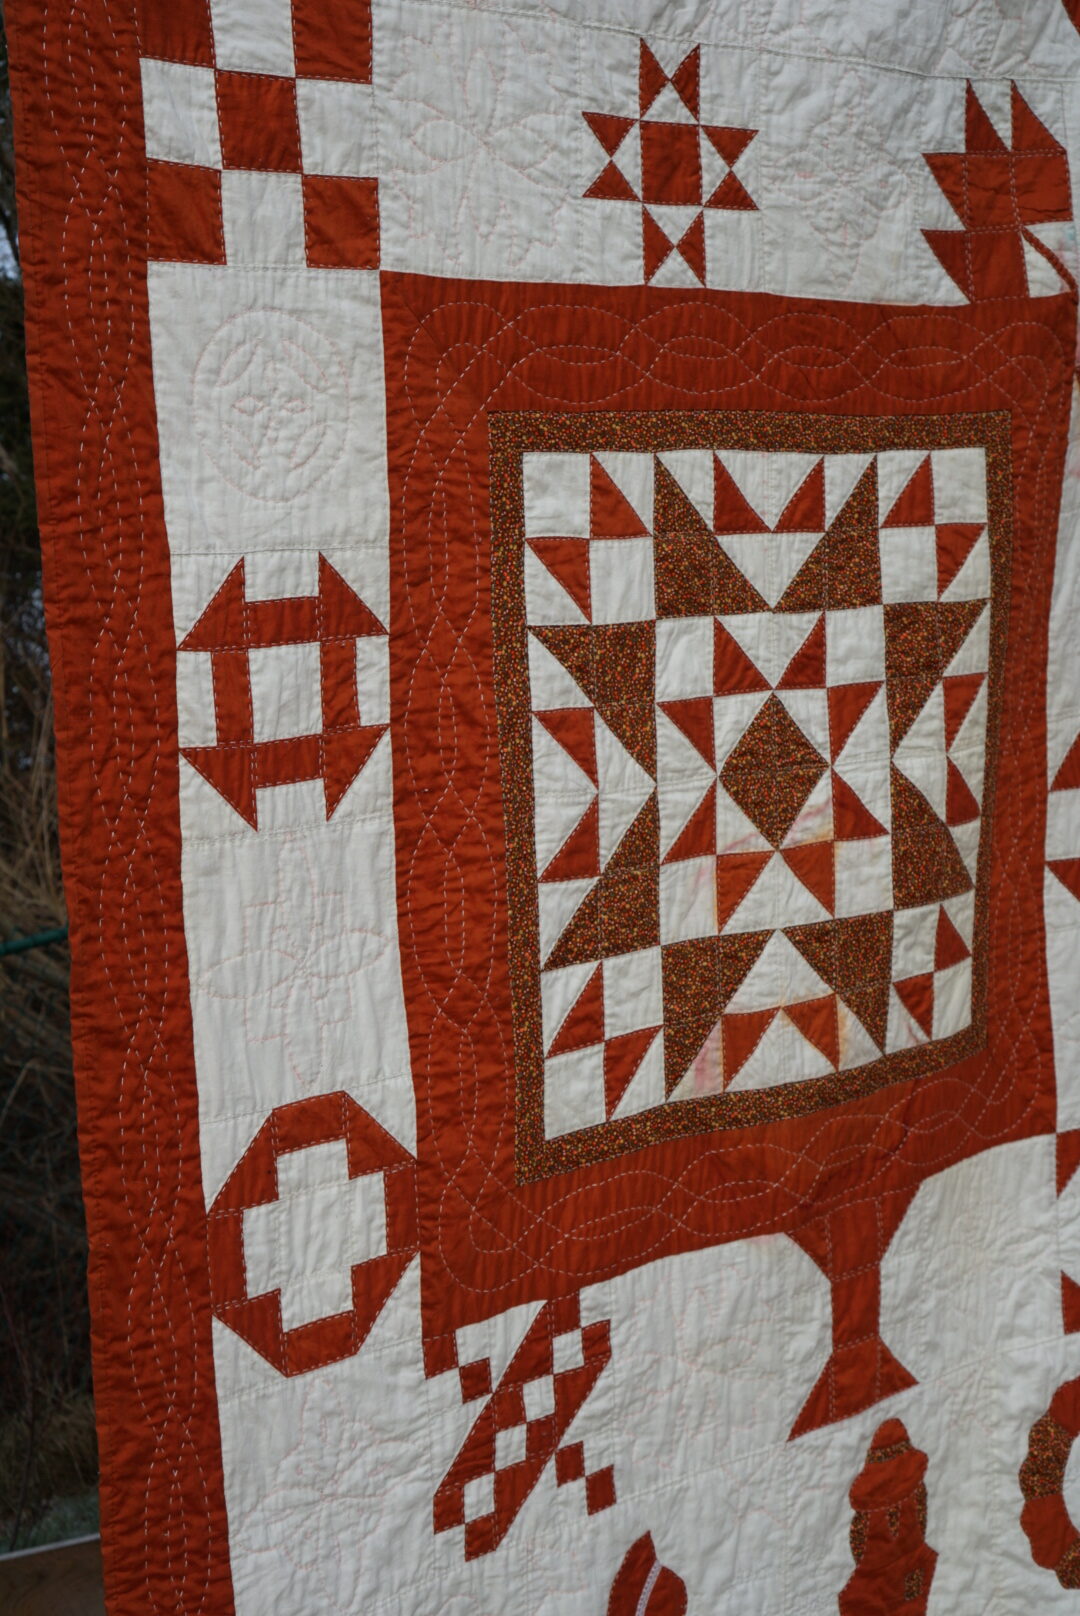
The block below the Shoofly has multiple different names, mainly depending on the colour placement. If you ignore the colour placement, the block below Shoofly is actually the same as the two in the column on the left side of the quilt! The placement of the colours in the one below the Shoofly block would usually be called the Greek Cross. The same name would be used for the lower one on the left side, as the plus sign in the middle is also visible, but with inverted colours. If the middle square was the other colour, it would be called the Grecian Square. The higher block on the left side might seem likely a completely different block, but the piecing is the same as the other two. In this arrangement, it’s known as the Churn Dash, or sometimes the Monkey Wrench. This is yet another nine patch block. It was very popular during the 1930s Depression era of quilting, and has 20 different names! You can read a bit more about it here.
The block that follows the first Greek Cross if we continue clockwise is known as the Spool, another nine patch. It is a representation of a thread spool, as you can probably tell. There’s a bit more information about this block here.

The last block to discuss in this section is the one with the smallest pieces in it. It’s another nine patch (surprise! they’re all nine patch blocks!) and it’s called the Jacob’s Ladder. It looks complicated all assembled, but the units are just HSTs and four patches (two by two squares). This is a very old block. Some historians date it to prior to the Revolutionary War (1775-1783), although others believe it originates from the Civil War. The name has biblical roots; in Genesis, Jacob dreams of a ladder to heaven. You can read more about it here.
There are two blocks that are used in my mother’s quilt that are not used in my grandma’s. The first is a variant on the Friendship Star, where the four corner blocks are replace by four patches. The funny thing about spending so much time pouring over my mum’s quilt during this process is that until now, I had never noticed that there was a little mistake! As you can see below, one of the triangle component blocks is rotated in the wrong direction. I think it’s endearing to see that, and it humanizes that image of my mum working on the quilt in her early 20s. The other one is called the Card Trick, and is the youngest block design between these two quilts. It was designed in the 1970s by Beth and Jeffrey Gutcheon for McCall’s magazine. It’s a really cool design, and you can read more about it here. It looks intimidating to make, but I think it would be easier than it appears.
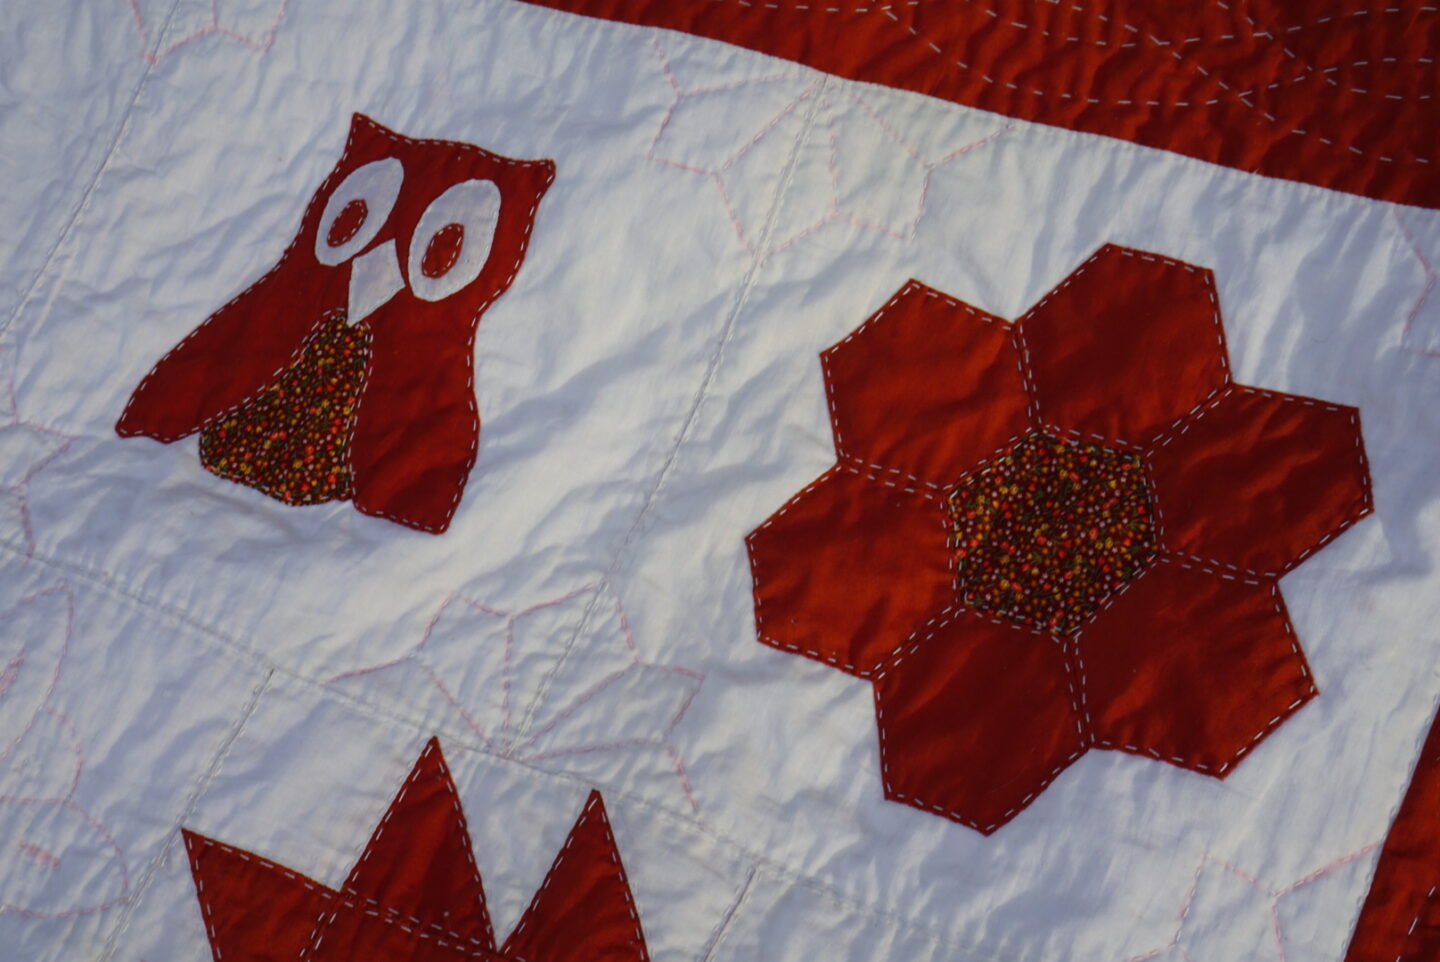
The top and bottom rows of the quilt feature bigger applique designs. Applique is a technique used to layer fabric designs on top of a base block, usually a plain fabric block. I had a harder time finding information about these designs, but I’ll tell you what I know. The top left corner is a designed known as the Friendship Dahlia, which was a popular block in the 1930s. You can read more about the block here and here. On my mum’s quilt, her Friendship Dahlia was almost completely detached from the quilt. This was due to the age of the quilt, but also because the applique designs had all been quilted by stitching “in the ditch” to make the stitching less visible. Because of seeing the effects of time on the other quilt, I quilted all of these applique on top of the pieces instead of in the ditch. I think it will help with longevity, but I also really like the look of it! I couldn’t find any information about the dog or the owl (on my mum’s quilt she has a cat instead of a dog).
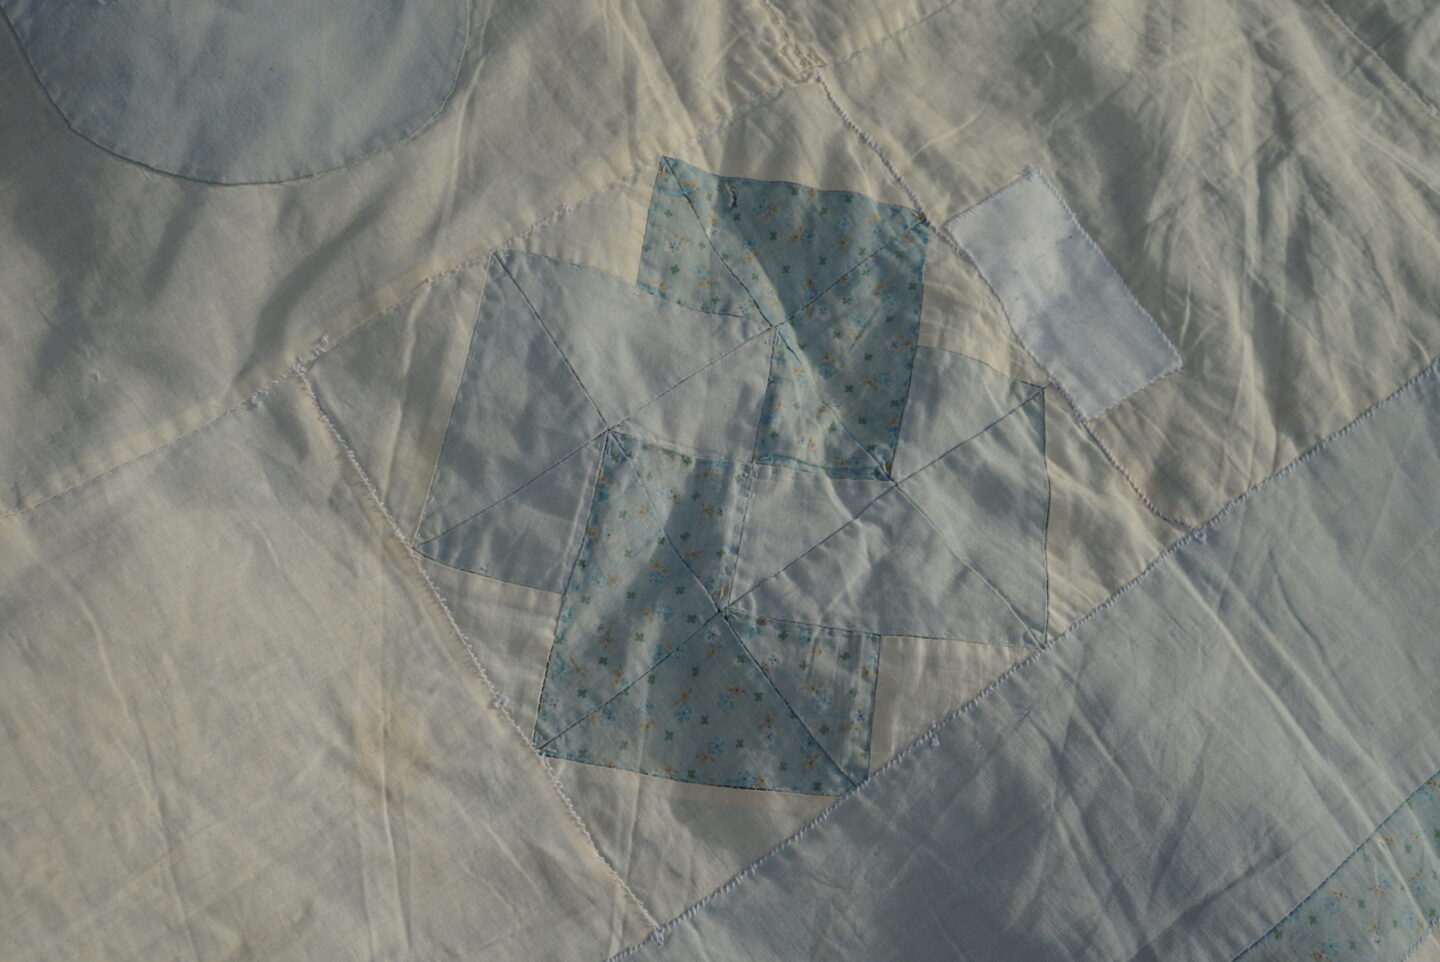
The block in the top right corner is called Grandmother’s Flower Garden, which is a very well-known block, most popular between 1920 and 1930. The three most popular quilt designs during that time were this one, the double wedding ring quilt, and a third one that that’s featured in the bottom row of this quilt. A hexagon piece was a very common motif in quilting, originating in 18th century England. It was known as a one-patch because you could make an entire quilt with just this shape. “Hexies” are very common in English Paper Piecing. A lot of Grandmother’s Flower Garden quilts feature a yellow center with pastel colours to form the petals, which might be a very familiar image to you. You can read more about the block and its history here.
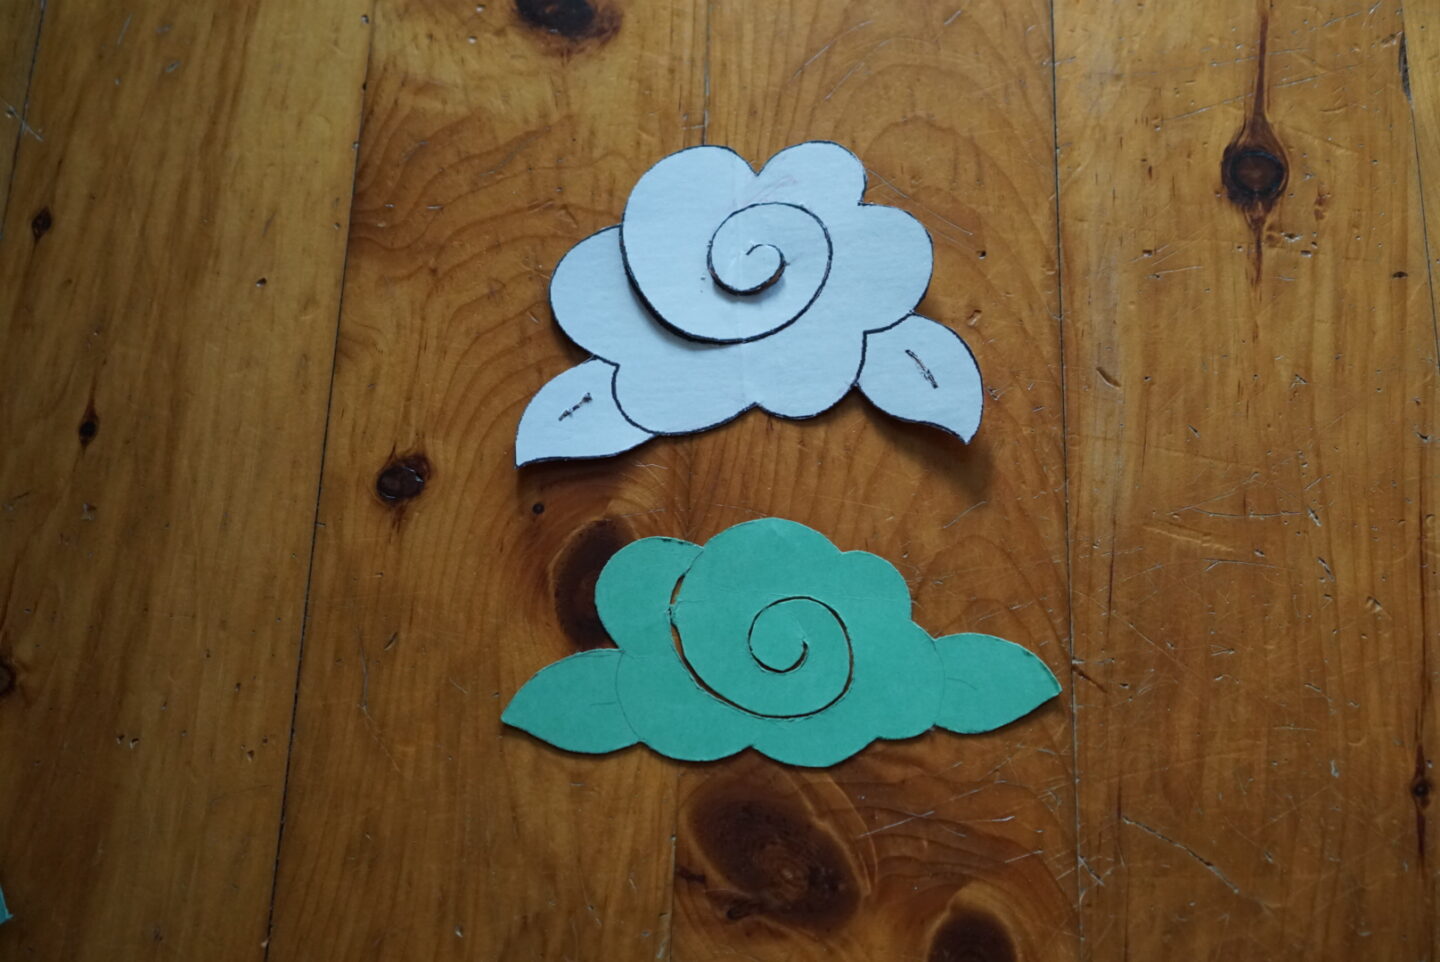
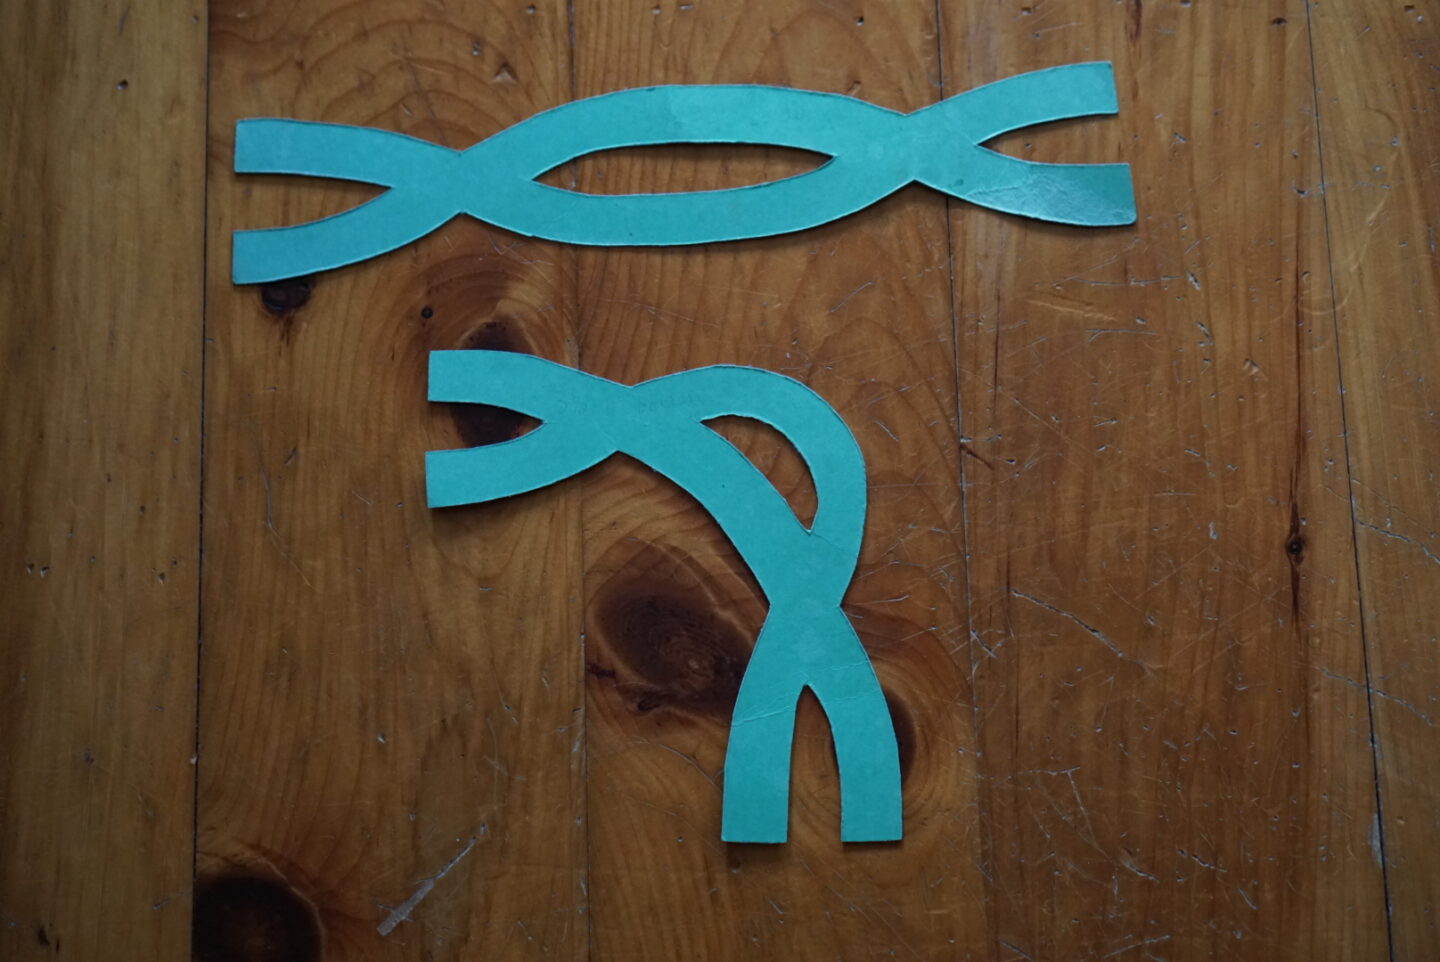
These applique blocks feature a pointed star quilting motif in the corners. I couldn’t find the stencil for that design, but I was able to recreate it based on the quilting in my mum’s quilt. And then of course after I finished the quilt I found the original stencil piece. You can see those below.

In the bottom row, I was able to find information about all four of these designs. In the bottom left corner, there is a block called Grandmother’s Fan, which first appeared in 1897. You can read more about it here. This block likely resulted from the fascination at the time with Japanese art after many Americans were exposed to it at the 1876 Centennial Exhibition in Philadelphia. In the background of this block, there’s a quilted flower. I couldn’t find this stencil originally, so I recreated one from an image I found online that looked very close. And then I found the other stencil later. I think I did a pretty good job with replicating it!
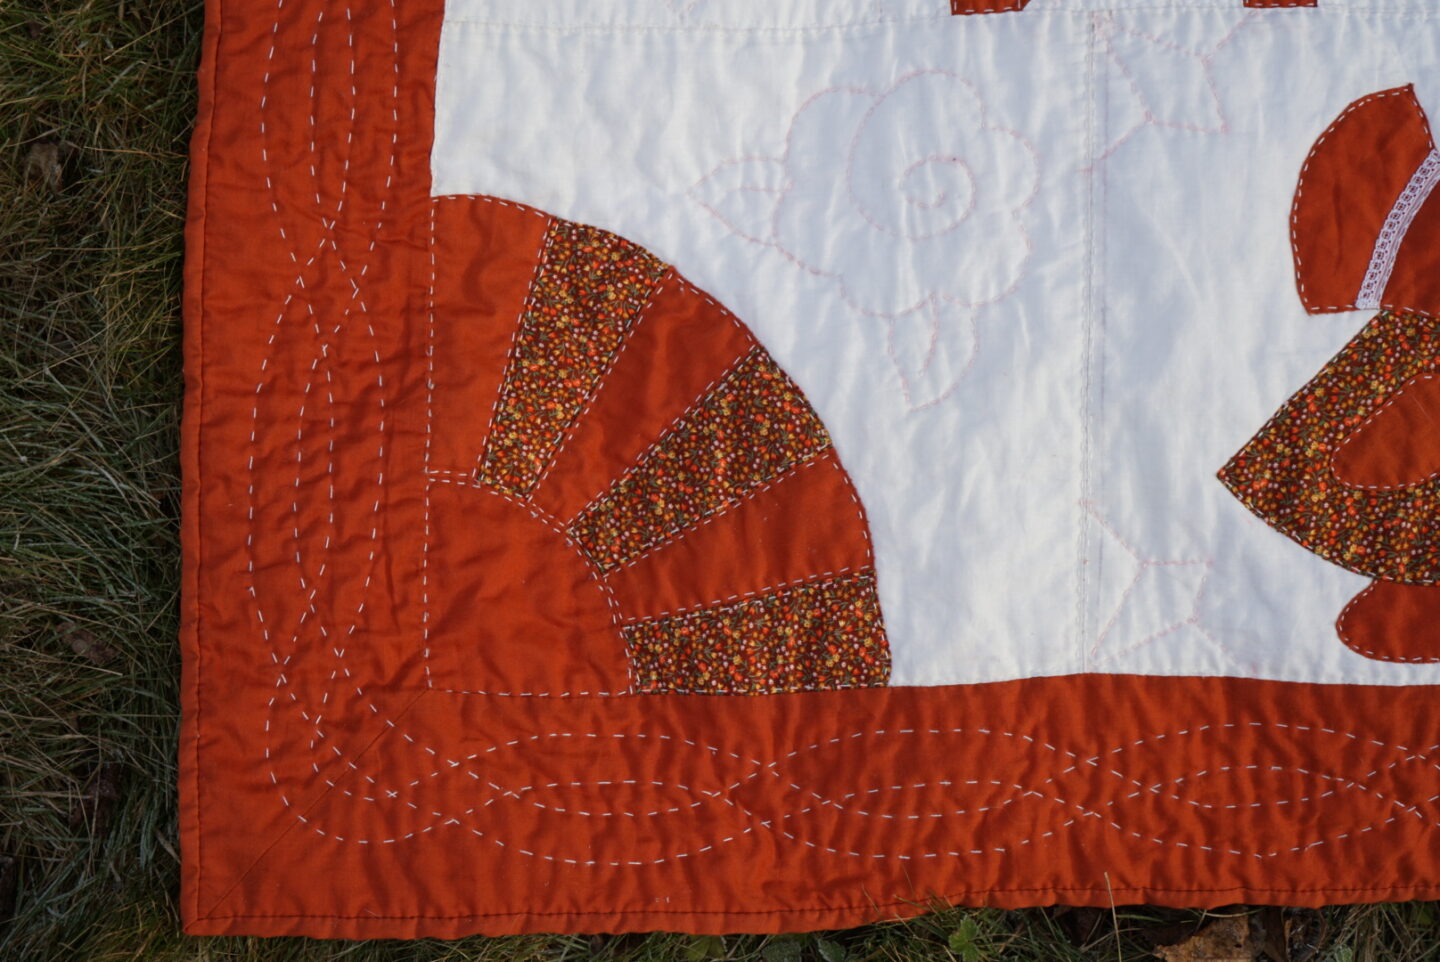
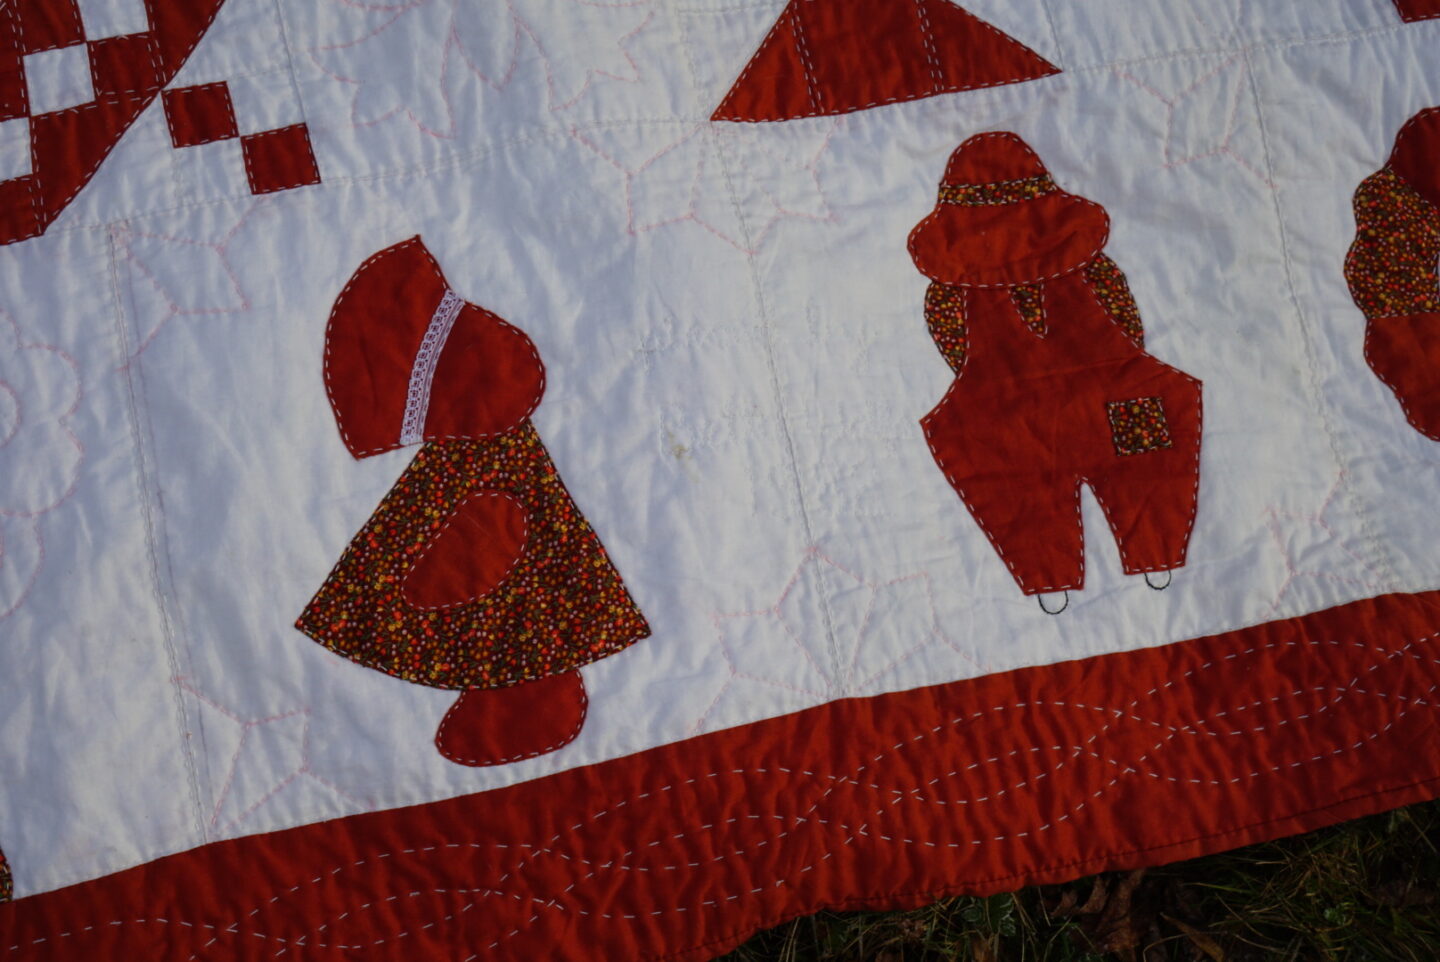
The next two blocks are very well-known. The one on the left below is the third of the very popular 1920-1930 patterns I mentioned above. The design is known as Sunbonnet Sue, and the block on the right is Sunbonnet Sam, her brother. The design originated with Kate Greenaway, who illustrated children’s books in the late 1800s. Her drawings were very well-known and often featured girls wearing sunbonnets. In 1900, Bertha Corbett published a book called The Sun-Bonnet Babies, which lead to a series of books. These books were just as popular in America as Kate Greenaway’s were in England, and the motif of the girl with the sunbonnet made its way into quilts. There’s a lot more history here, if you’re interested. This is the only place I could find an image of Sam similar to the one in this quilt.
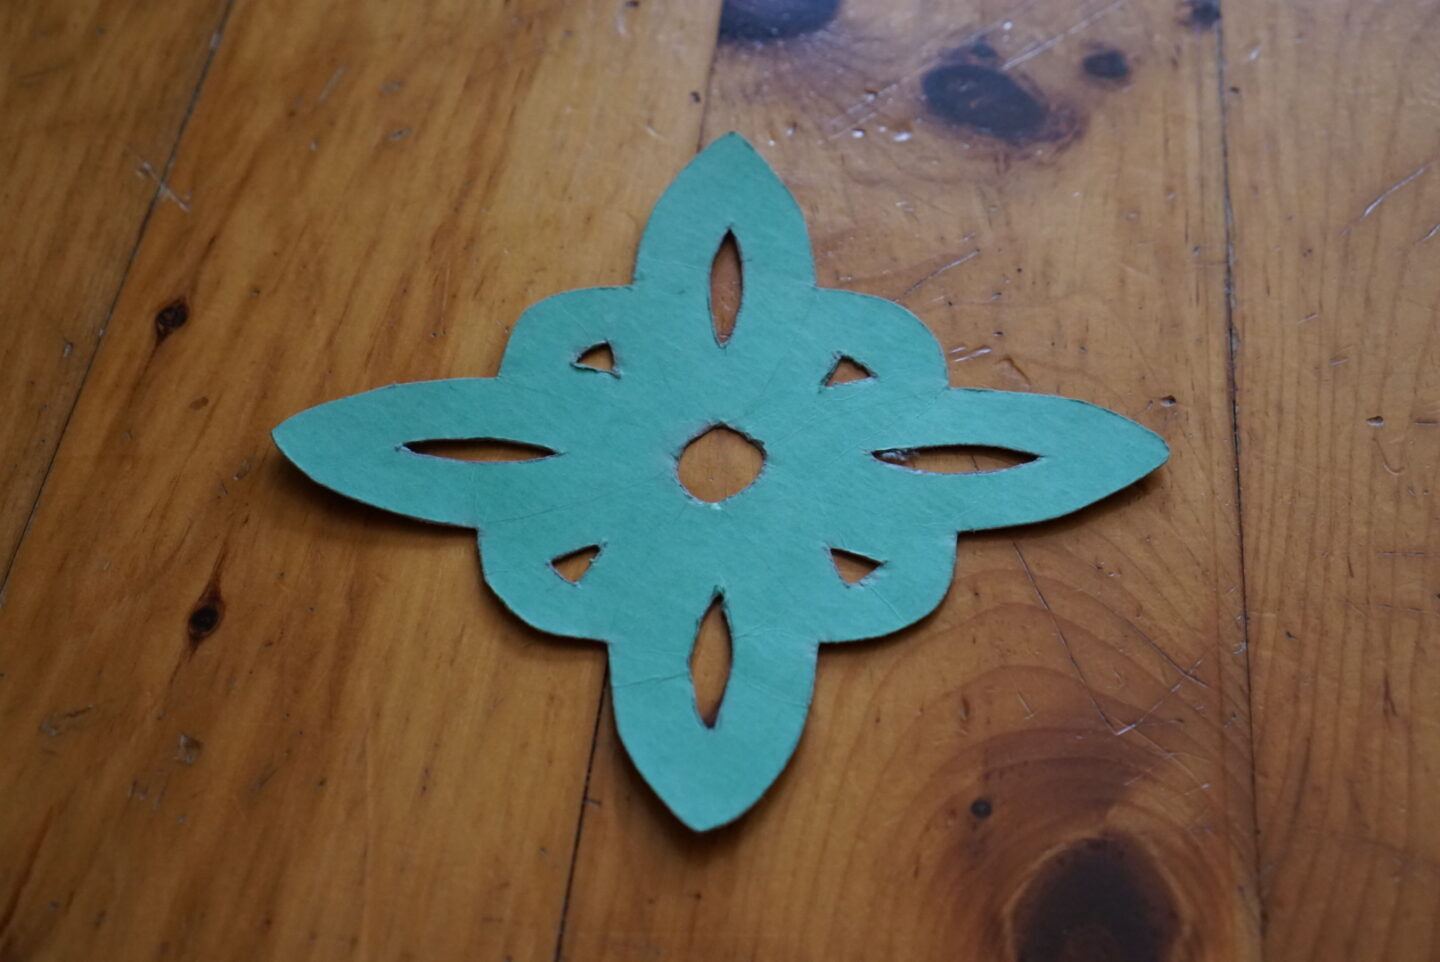
The last block in the quilt is the one in the bottom right corner, known as the Friendship Ring or the Aster. It’s probably related to a very popular block known as the Dresden plate. The Dresden plate pieces usually have pointed corners, and no blank circle in the middle. Dresden plates with rounded ends are sometimes known as Dresden “petals”. You can read a bit more about the Friendship Ring here.
Something that I had never noticed before on my mum’s quilt was that there is quilting inside the Friendship Ring. When I looked more closely, I saw that she had stitched her first and last name and the year she finished it, 1982. Because of that, I stitched my own first and last name and the current year (2023) inside the Friendship Ring on this quilt. (My last name is blocked out below for privacy). It felt wrong not to include my grandma somewhere. Between Sue and Sam, there was a lot of blank space, so in that space I quilted some other letters. I stitched “pieced by Betta [last name] 1982”, and it made me really happy to be able to have her name live on this quilt along with my own. It’s also nice to be able to show the span of years involved in sewing this quilt from start to finish.


The blocks we haven’t looked at yet are the blank ones that don’t feature any piecing. There were four different stencils for those blocks, and I traced those and stitched them in those blocks. You can see the stitching better on the back of the quilt now that the chalk has been washed away.


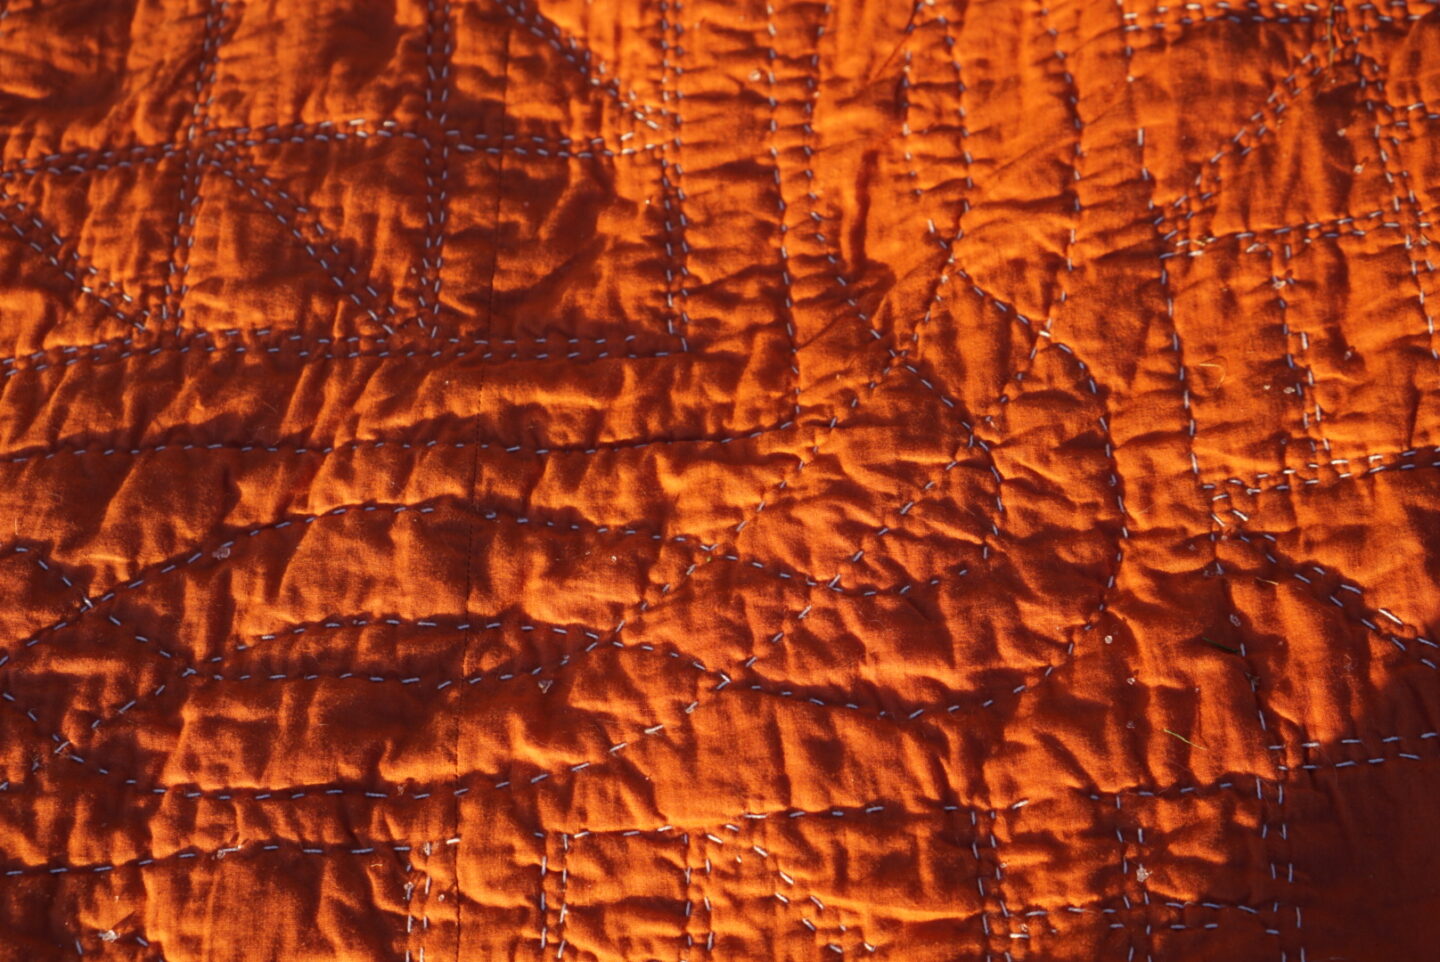
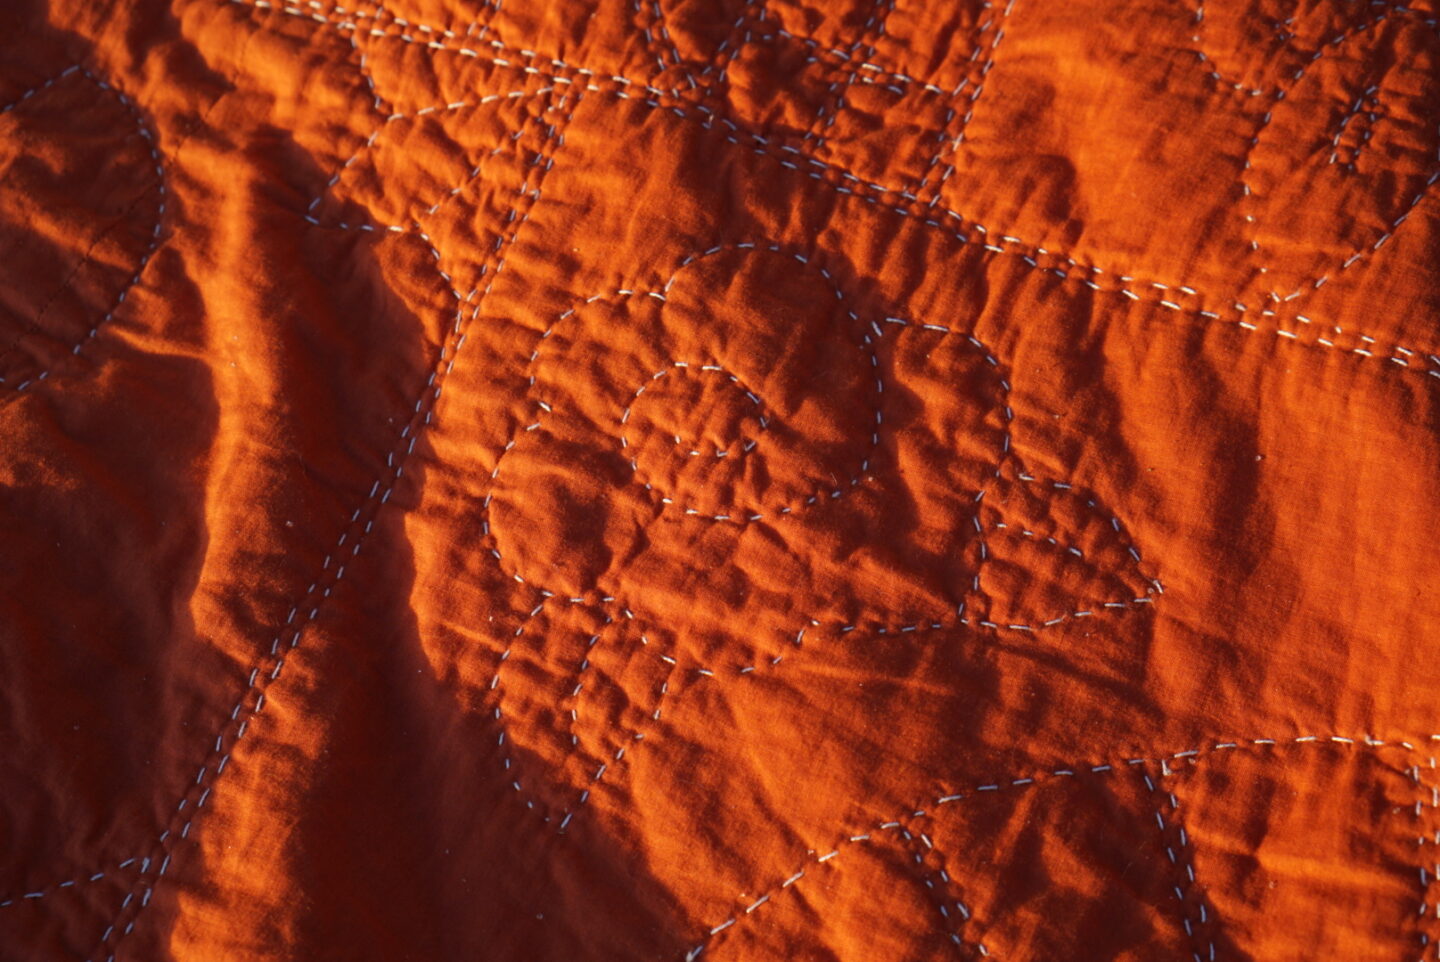
Finally, we have come to the outer border. This featured the more narrow cable stencils. In order to avoid moving the quilt hoop any more than necessary, I had all four threads going at the same time. I just moved my needle between them as I either ran out of thread or got to the edge of the hoop. You can see that process below a bit.

And then it was time for binding. I was lucky that there was a bit of extra fabric left from trimming the backing on the quilt, because I had no way to get more matching fabric. I had way more than enough to make the binding for this quilt. I sewed the strips on by hand, because I knew that’s how it had been done with my mum’s quilt, and because it felt wrong to use a machine on this quilt when every single other stitch had been made by hand. I used a backstitch to sew on the strips, and then my usual invisible stitch to sew down the binding on the back of the quilt.


The quilting was finally done! After many months of work (and 40 years), the quilt was finished. But my journey was not. Because as you saw above, there was quite a bit of dye bleeding from being stored in a humid place for 40 years. And I was determined to get it out so that the quilt was as excellent as it possibly could be. But I was terrified because I had just spent hundreds (thousands?) of hours on this project, a project that had huge emotional value and couldn’t be replaced, and the internet was telling me that I needed to put it into the hottest water I could find. That process will be the subject of the third part of this series!