
More than a year ago, I bought a bundle of seeds for nine different dye seeds. I intended to plant them in summer of 2021, but forgot to start the seeds early enough and then ended up moving in July so THAT didn’t happen. But I sent a digital calendar reminder for February/March of 2022 and that spurred me to actually take action this past summer! I initially started with three different plants, which I’ll talk about below, but ended up focussing on persicaria tinctoria, or Japanese indigo. This is the first of two posts about the process, and will focus on growing the plants! The second post will focus on the dyeing part.
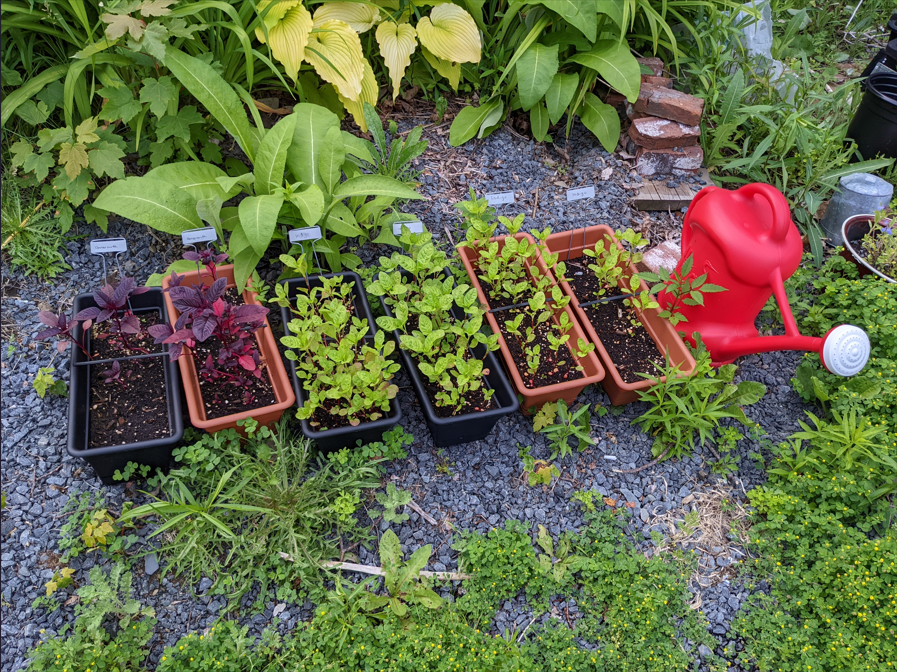
I bought my seeds from The Love of Colour, which is a Canadian company. They have lots of amazing things for natural dyeing on their Etsy store. This is the bundle I originally bought. It comes with nine different types of seeds, but I decided to plant only three varieties for my first outing. I planted woad (which makes a light blue), amaranth (pink), and indigo. I followed the guidelines in terms of starting them inside a number of weeks before the last frost. My great grandfather always said you should count on the last frost being around the time of the first full moon in May, which contradicted the internet a little bit but turned out to be much more accurate to the Nova Scotian climate! That wasn’t surprising to me, because that branch of my family has lived in Nova Scotia since the mid-1700s so they have a huge amount of oral knowledge that has been passed down.

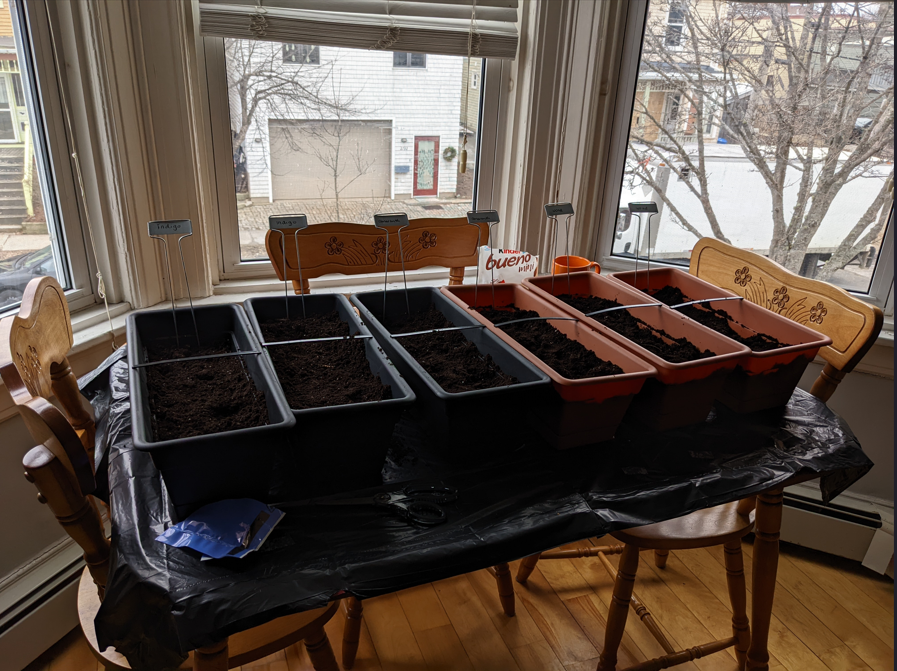

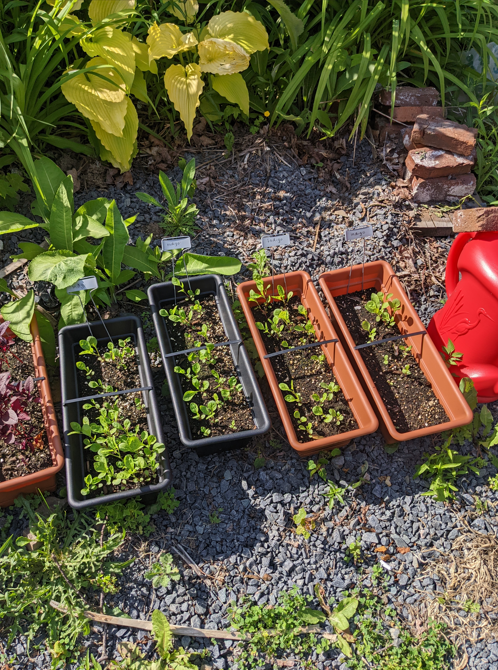
I started my seeds in these long trough planters because I knew I wouldn’t be transplanting them into an outside bed. The plan from the beginning was to just move the planters outside to the shared backyard space behind our apartment building once the risk of frost had passed. As you can see above, we have giant bay windows in our apartment, so there’s lots of light. But, for plants that are not houseplants, it wasn’t enough light without a growing light. The timeline indicated on the seed packets in relation to the last frost was WAY too much lead time, as well. They grew so quickly and got so leggy that they had no structural stability, and I couldn’t transfer them outside any sooner because frost was still happening overnight. I planted the indigo originally in mid-March, six weeks ahead of the last frost, but it was too early. The woad especially (not pictured) was so leggy that it looked like pathetic vines trying to grow horizontally across the soil. (Leggy means that their stalks get so long so fast without enough substance so they can’t support the top of the plant). I tried putting them outside immediately after the risk of frost was gone, hoping they would bounce back, but besides the amaranth, they did not. After about a week, I ended up dumping them out and restarting. I decided to ditch the woad, since it also makes blue, and focus on indigo. I ordered two new packets of indigo seeds from The Love of Colour (you can buy them separately in their store) and had the planters outside from the get-go. By that time, it was early to mid-May. I think a lot of these timelines will change depending on your climate/geographical location. I’m in the northeast of Canada, in a coastal area.
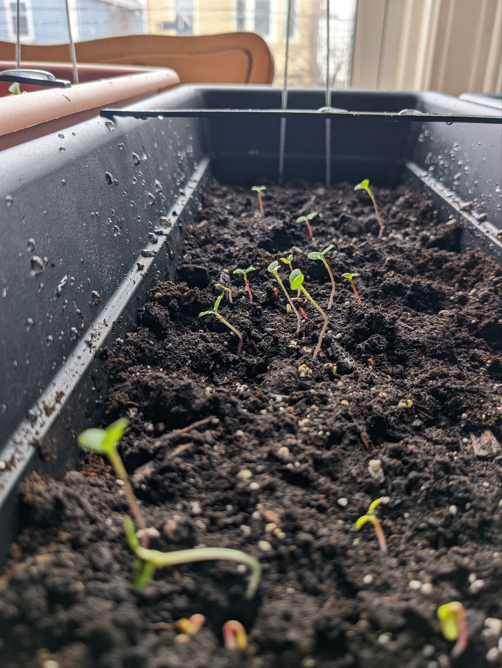
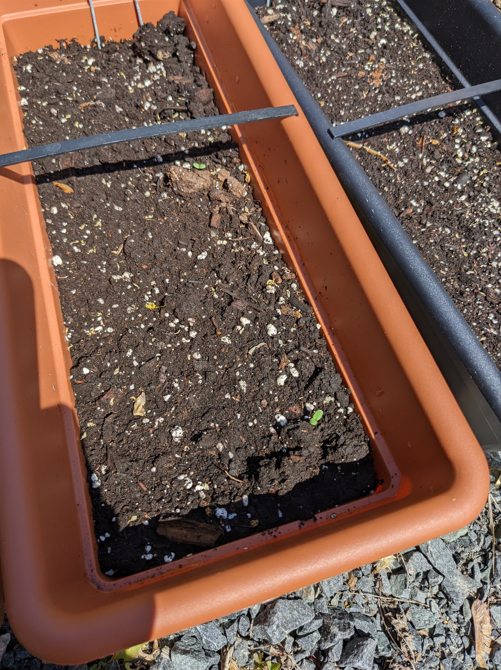
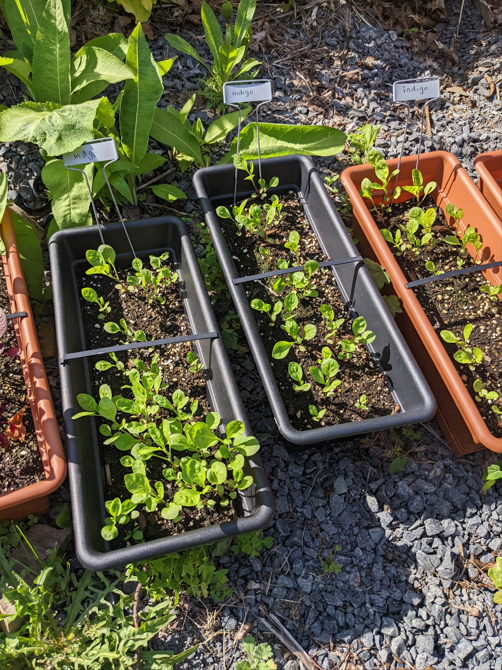
As you can see below, the indigo did much better after it started directly outside. I started off watering it once a day, keeping the soil moist. I wasn’t particularly precise/fussy about what time of day I watered the plants, I just made sure that the soil didn’t get dry. I used a general flowering plants fertilizer in the water, but I don’t know whether or not that had any effect on the growth. You can see the progression of the growth over the course of May and June!
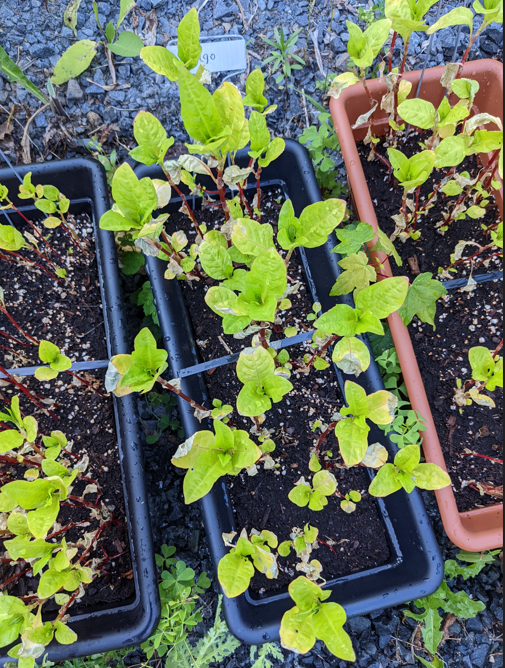
At the beginning of July, I went on a two week trip, which meant I was away from the plants. This two week period coincided with Nova Scotia deciding to get extremely hot and sunny with virtually no rain. A lovely and helpful friend of mine lives nearby and was watering them once a day when she walked her dog. The thing is, I think maybe it was the fact that they were getting bigger combined with the big change in temperature and sunlight, but they got a bit yellow and crispy. You can see it in the two photos below. But, it recovered totally fine and ended up thriving! I ended up increasing the watering frequency to 2-3 times a day, depending on the weather. They are very water-loving plants! I kept that level of watering for the rest of July and August, but toward the end of August I tapered back to once a day and they seem to be fine. If they aren’t watered enough, they quickly make it known by looking very wilty and mopey. They basically become Eeyore. If you grow your own indigo, you will understand how obvious it is that they are sad once you see it!
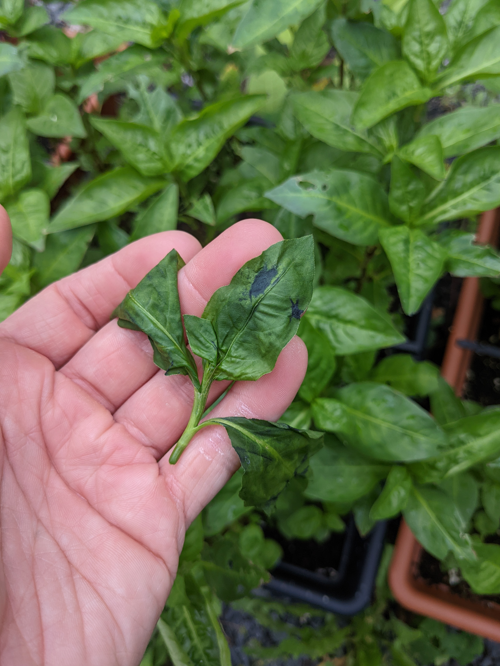
The indigo plants continued to grow well through the rest of the summer, getting bushier and bushier! Most sources said that you can harvest leaves from it once the indigo is around 3 feet tall, but mine didn’t really ever get that tall so I was kind of winging it when it came to harvesting. I decided to only harvest the top half of the plants, basically. I took the big leaves that seemed substantial. There’s a bunch of dyeing methods for indigo, like SO MANY. I have a really great book that I’ll talk about in the upcoming post about the dyeing process, but in short, I decided to go with a dyeing method that used dried indigo leaves so that it wouldn’t be so urgent to start the dyeing process after harvesting. You can see in one of the photos below the biggest sign that the leaves are ready to be harvested. The precursor substances to indigo are contained by cell walls within the leaves, but if you crush or bruise a leaf the cell walls get damaged and the precursors can combine. If the leaves are ready to use for dye, you’ll be able to see blue spots as it combines and gets oxidized!

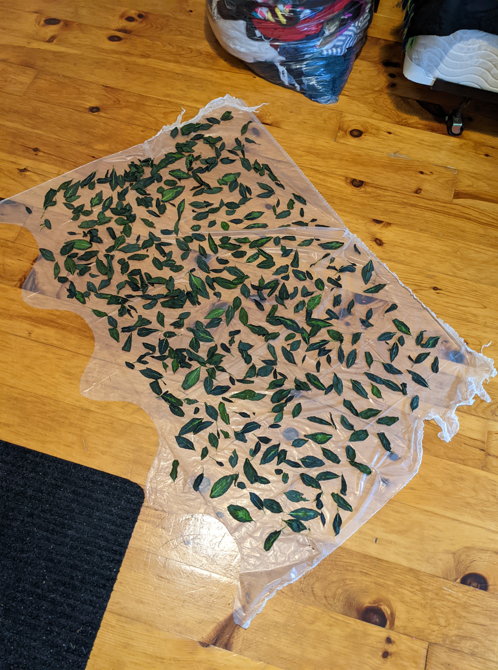
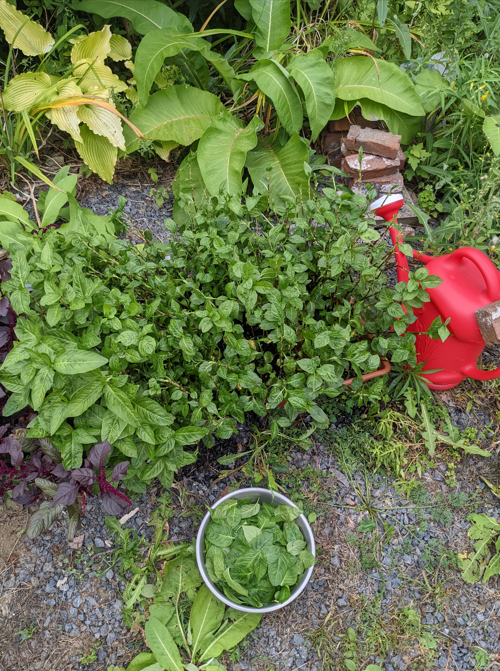
You can see how much of the indigo plants I harvested during my first attempt below. I worried that I’d taken too much, but they rebounded fine! I lay the leaves out inside to dry on plastic sheets, and they took a little longer than the estimated 24 hours because of the humidity levels in Nova Scotia at the time. As they dried, they turned darker and blue-ish! I did a second harvest about a week later, a couple days before my intended dyeing day, and that time I was able to dry the indigo outside. It went MUCH faster, taking less than 4 hours in direct sunlight. I would recommend drying it using that faster method if it’s possible for you, because the leaves seemed to get a teeny bit musty when drying so slowly inside.


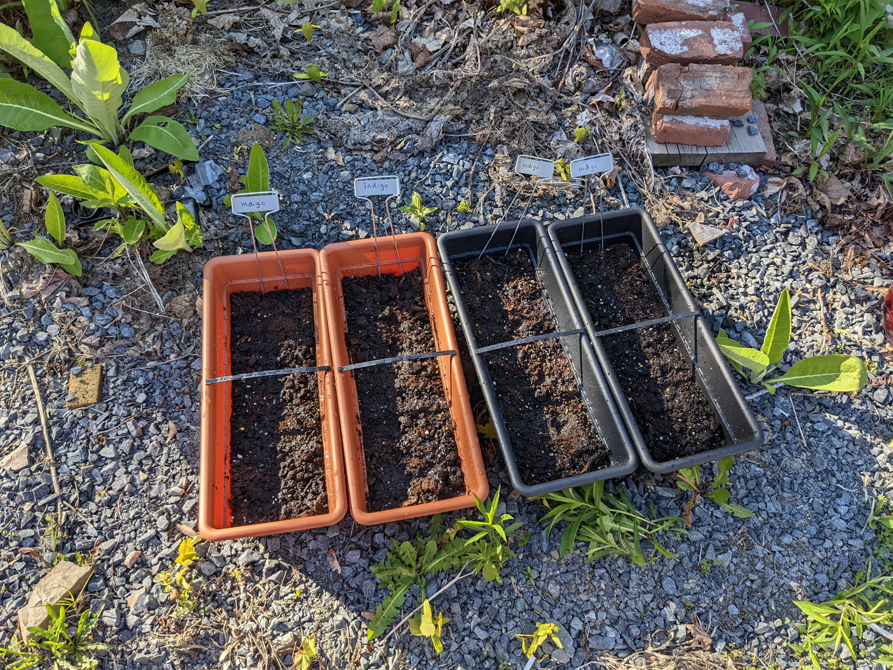
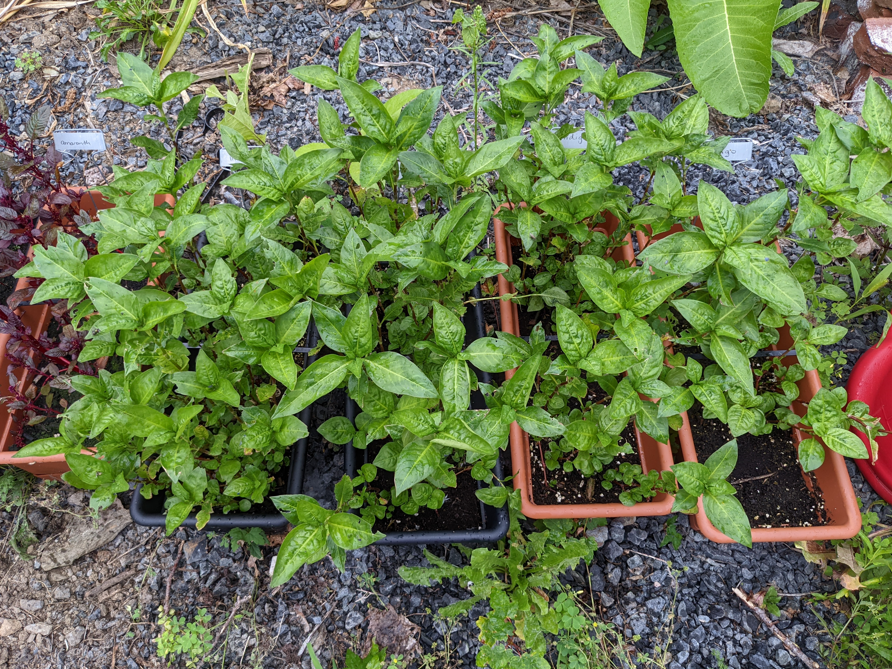
The photo below shows the current state of my indigo plants, following a harvest I did a couple days ago. As you can see, the leftmost planter has much bushier plants than the other three. I am not harvesting any more from that planter, as my intention (and hope) is for those indigo plants to reach full maturity and eventually go to seed so that I can gather seeds for next year! When you harvest the indigo leaves, it’s generally recommended that you do it before they flower. Apparently the dye in the leaves becomes less potent if the plants reach the flowering stage. I got all the guidance for the growing, harvesting, drying, and dyeing of indigo from this amazing book by John Marshall. I highly recommend it!
And that’s all I have to say about the process of growing indigo this summer! It was incredibly fun and exciting, and honestly pretty magical to see it all unfold from little seeds to eventual fabric dyeing. Stay tuned for my upcoming post about the actual dyeing process! I’ll link it here once it’s up. If you have any questions about the process of growing indigo, I’m happy to answer as best I can in the comments!
That is SO COOL!!!
Author
Thanks!! 😀
Hi Megan,
Thanks so much for your article on your experience in planting Indigo directly outside. I just wondered if you pre-soaked your seeds before planting?
Author
Hi Helen! I didn’t pre-soak my seeds before planting them, but I heard after this growing season that it’s something that a lot of people do. But I didn’t! Hope that helps!
Thanks Megan for your response. I was wondering also if you had any experience with your Indigo plants self-seeding? I didn’t think it was a thing, but last spring I had one Indigo plant pop up in a bed adjacent to the one that I had a few Indigo plants in the previous year. I wasn’t sure it was an Indigo plant as I hadn’t planted it there, but decided to leave it as the leaves were looking like those of an indigo plant. It turned out to indeed be an indigo plant. This year, I am seeing small seedings popping up around where I had planted an indigo plant last year. I am hopng they are indigo plants as I will have literally dozens! I will be taking some pictures as they grow and, if you are interested, I can get back to you once I confirm that they are indeed indigo plants.