
A friend alerted me a couple months ago to a big “buy 1m, get 2m free” sale at one of our local fabric stores, so I went the next day. I ended up picking up some ribbed swim fabric and a piece of neon pink mesh, and I was thinking I’d try to make my first bathing suit as well as a swim cover-up! For the price of $15 for all the fabric, the stakes were not high. I decided on the Cottesloe for the bathing suit, and had zero plan for the cover-up…

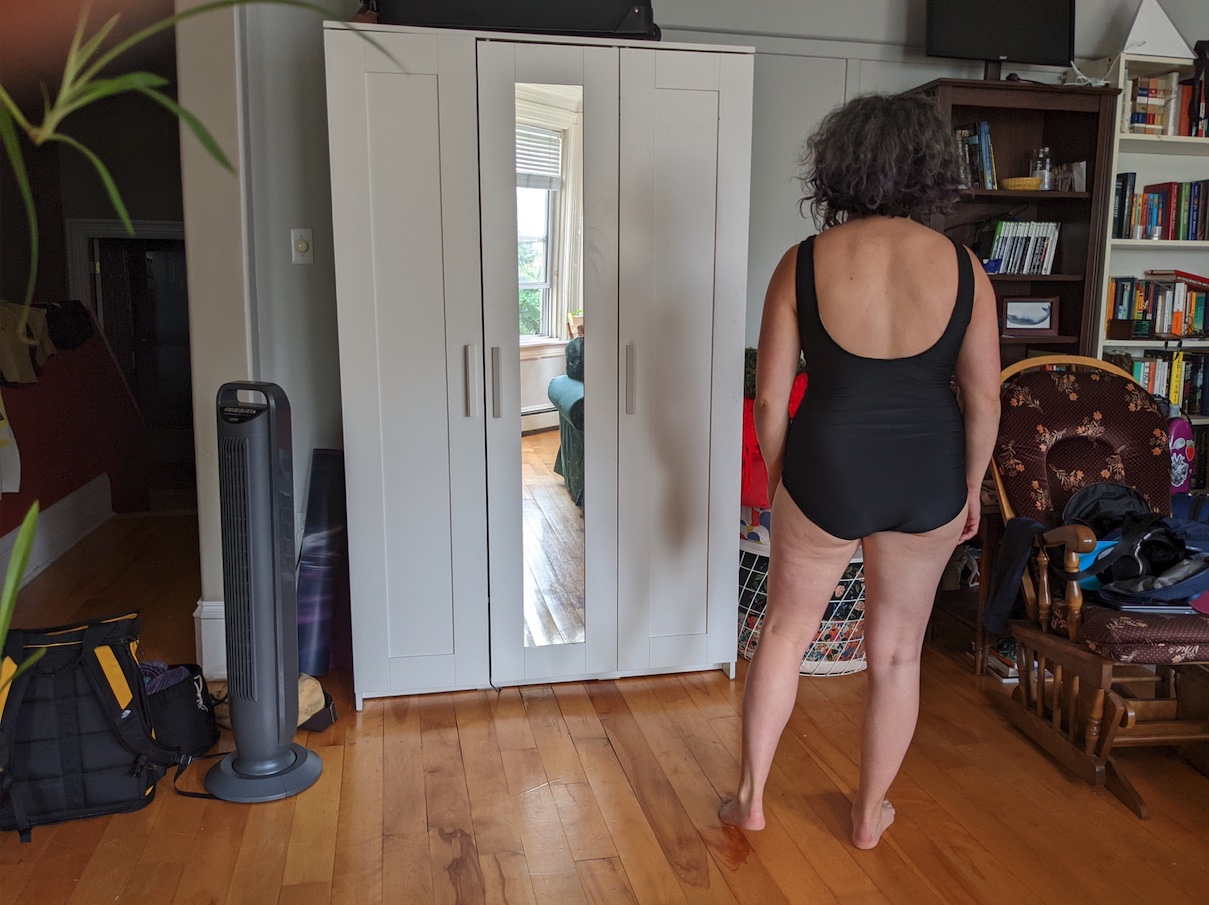
As you can see, the Cottesloe turned out pretty well! I made the one piece version with the higher back scoop and no ties, and I really like the style. To be honest, right after finishing it, I was not loving it. It felt very plain and boring, and not my usual style. I think this was heavily coloured by the fact that I did not enjoy sewing this AT ALL. Not any part of it. I mean, aside from the fact that I didn’t have to do seam finishes and only had to cut out four pieces of fabric (there’s a piece for the crotch area and a built-in shelf bra). The angst started with the shelf bra. I’ve never made a shelf bra before, and I had no clue where a good place was to put the foam cups. I had these pre-made foam cups that I’d gotten from my mum because she extracted them from all her sports bras and tops quite a while ago since she doesn’t use them. We have the same size boobs, so I was hanging on to them until I found a good use. This WAS a good use. The shelf bra turned out fine. But I did so many strange things in order to try to figure out where I should actually sew them. Since the fabric is stretchy, I was having a very hard time holding it in an appropriate place on my body while also putting a cup on my boob and pinning it in place. There may have been grunts of frustration. I ended up sewing the bathing suit up minus one side seam so that I could get a better idea of how it was going to lay on me and also not have to hold so many things at once. This worked much better, and I’m honestly pretty happy with the location of the cups! They’re comfy!
I finished sewing the body seams on my Cottesloe. And then we got to the elastic for the neck, armholes, and leg holes. I am someone who has sewn elastic before. I don’t hate it, I just prefer it in small quantities. And with less slippery fabric than ribbed swim knit. The whole finishing process of this suit, which I did know was going to be the case, was sewing the elastic in. I don’t mind the method used, but it was just too much for me. I was not having fun. And it kind of sucked that this HAD to be the last phase of sewing the Cottesloe because that’s how bathing suits are constructed, so it left me with a grumpy haze about the whole project even though I hadn’t minded some aspects of it.
Anyway. I don’t think I’m going to be sewing another bathing suit any time soon (she says, while thinking about the fact that she has had notions and fabric ready for the Closet Core Sophie for more than 2 years and should really actually sew that…). On the off change I make this again, the size was good (12) but I think I’d shorten it at the top of the straps a little bit. Everything feels like it sits right, but the straps are just a tad loose for my taste. I’m not sure if I will do the Cottesloe again though – I wear a lot of one piece swimsuits but it’s for athletic swimming and I usually prefer a racerback. I think if I decide to sew a bathing suit again, it will be pure fun with lots of prints and zero intention of using it to swim laps. All this to say, I DO recommend the Cottesloe pattern! It was a good pattern to dip my toe into the bathing suit world. I just wasn’t feeling excited about it on me. Until I made this frothy neon pink mesh thing that you’re about to see, and then somehow the combo made me feel rejuvenated about the whole project?
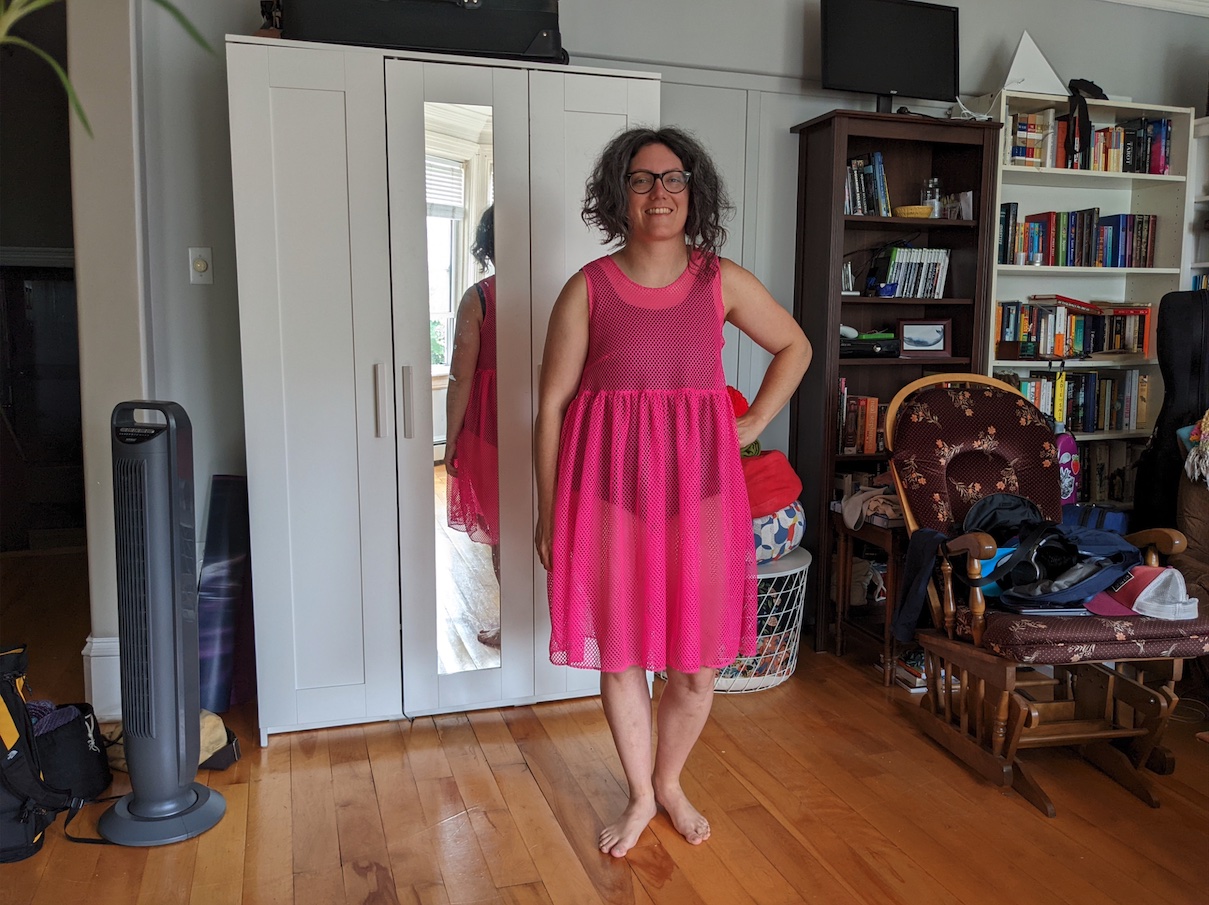
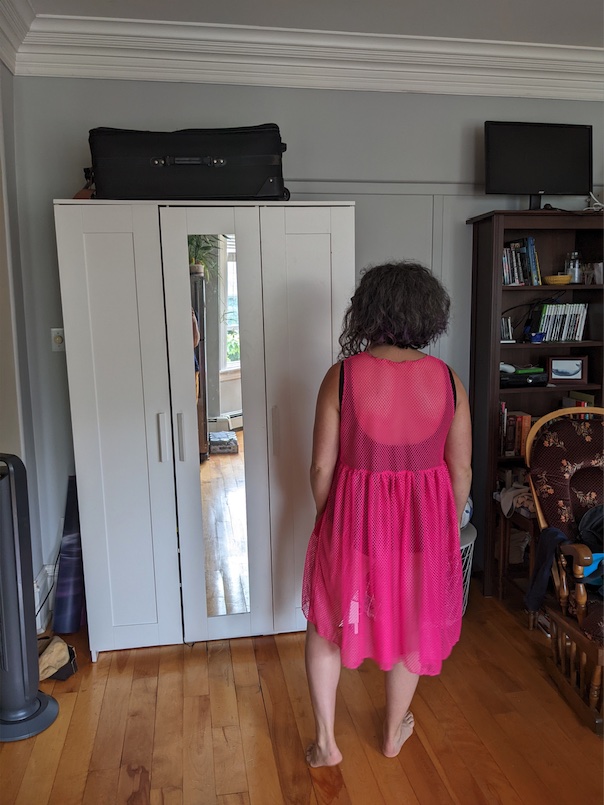
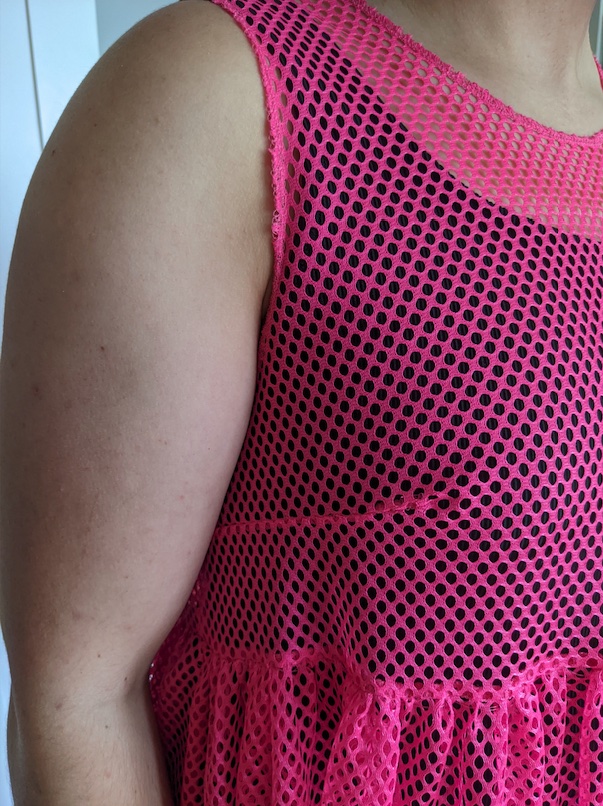
Okay. I will be the first to say that I had zero plan with this cover-up. I had no pattern in mind. I had never sewn with mesh before. I just bought this fabric because it was on sale and it seemed really fun and exciting and a worthy experiment. I had a vision of a tank top style dress with a gathered skirt, so when I started working on this I went through my pattern stash to see if I had a good base tank top to use. I settled on the Ashton top, which I’ve used for a dress hack in the past. I went up a size after trying on my existing Ashton top, because I wanted it to be more flowy for this project. I used the cropped version and then cut it off at the lengthen/shorten lines. I was very unclear what I was going to do to finish the arm and neck areas, because I knew it would be visible from the inside of the dress. My initial plan was to overlock the edges and then fold it under and stitch it down. I’d seen this finish on a friend’s RTW tank top when I was mulling this project over in July. Once I’d actually overlocked the edges, I decided I actually just wanted to leave it as it was. I wasn’t really sure how a regular sewing stitch, zig zag or otherwise, would manage to hold on this mesh, and the serged edge seemed fine to me. And muuuch less fussy than folding it over. I didn’t buy this serger thread for this project, I’d already had it on hand for a pair of jeans I made for a friend who specifically requested that he wanted neon pink serger thread. It worked out perfectly! I also used my serger to sew the darts, which felt like a wildly incorrect thing to do at the time, but actually turned out really well!

I cut two 24″ long width-of-fabric pieces of fabric for the skirt, then realized I had no clue how to gather it. Like, if I sewed a long basting stitch like usual, wouldn’t it just…go into the holes and not actually hold anything to make the gathers? I pondered this while I made dinner. I ended up using the big chunk “sewing” needle that I use for seaming sweaters when I knit! It has a blunt end, so it was easy to use. I threaded it with a double length of regular pink sewing thread, tied the ends to one “bar” of the mesh on the top corner of one of the skirt pieces, and got sewing. I used the mesh holes as a guide for where to put the needle through, and just wove in and out of the holes until I got to the other side. This worked surprisingly well! I had to use wonder clips instead of pins to attach the skirt to the bodice. Up until this point I hadn’t been using pins at all, but it seemed necessary with all of the gathers. I pinned it on, except the second I started to sew it, all the pins started flying out ALL OVER THE FLOOR. Turns out, even if you think you have stuck the pins through actual material and not mesh holes, they are not really that securely attached and will just fling out at you. You’ve been warned. So I dug out the wonder clips that I usually use for quilt bindings, and they worked great! I attached the skirt using my serger as well. I didn’t do a “real” hem on the skirt, and just overlocked it like I’d done with everything else.

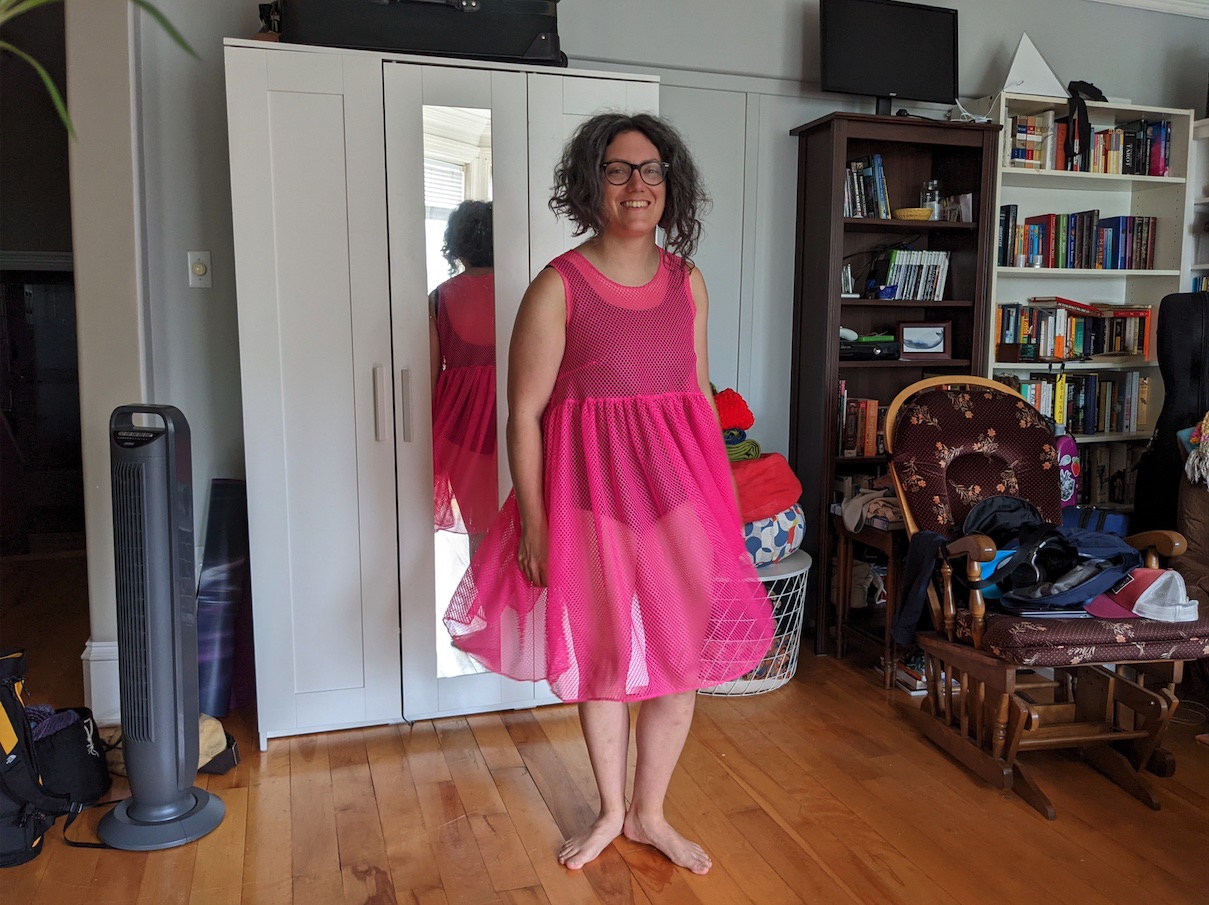
Once I tried this on as a combo, I LOVED it. It’s so swishy and fun! I love that you can see the bathing suit underneath. Will I be rushing to make another Cottesloe right away? No! Will I be making more of these haphazard swim cover-ups? Also no! But I’m actually pretty inspired to make an Actual Outfit version that’s inspired by this. I’m thinking maybe a bodysuit and an over-dress made of silk organza or something? I’ve never sewn with silk organza. I’ve heard it’s…an adventure. But I don’t regret sewing my first bathing suit, so I figure I should probably at least give organza a try as well!
