
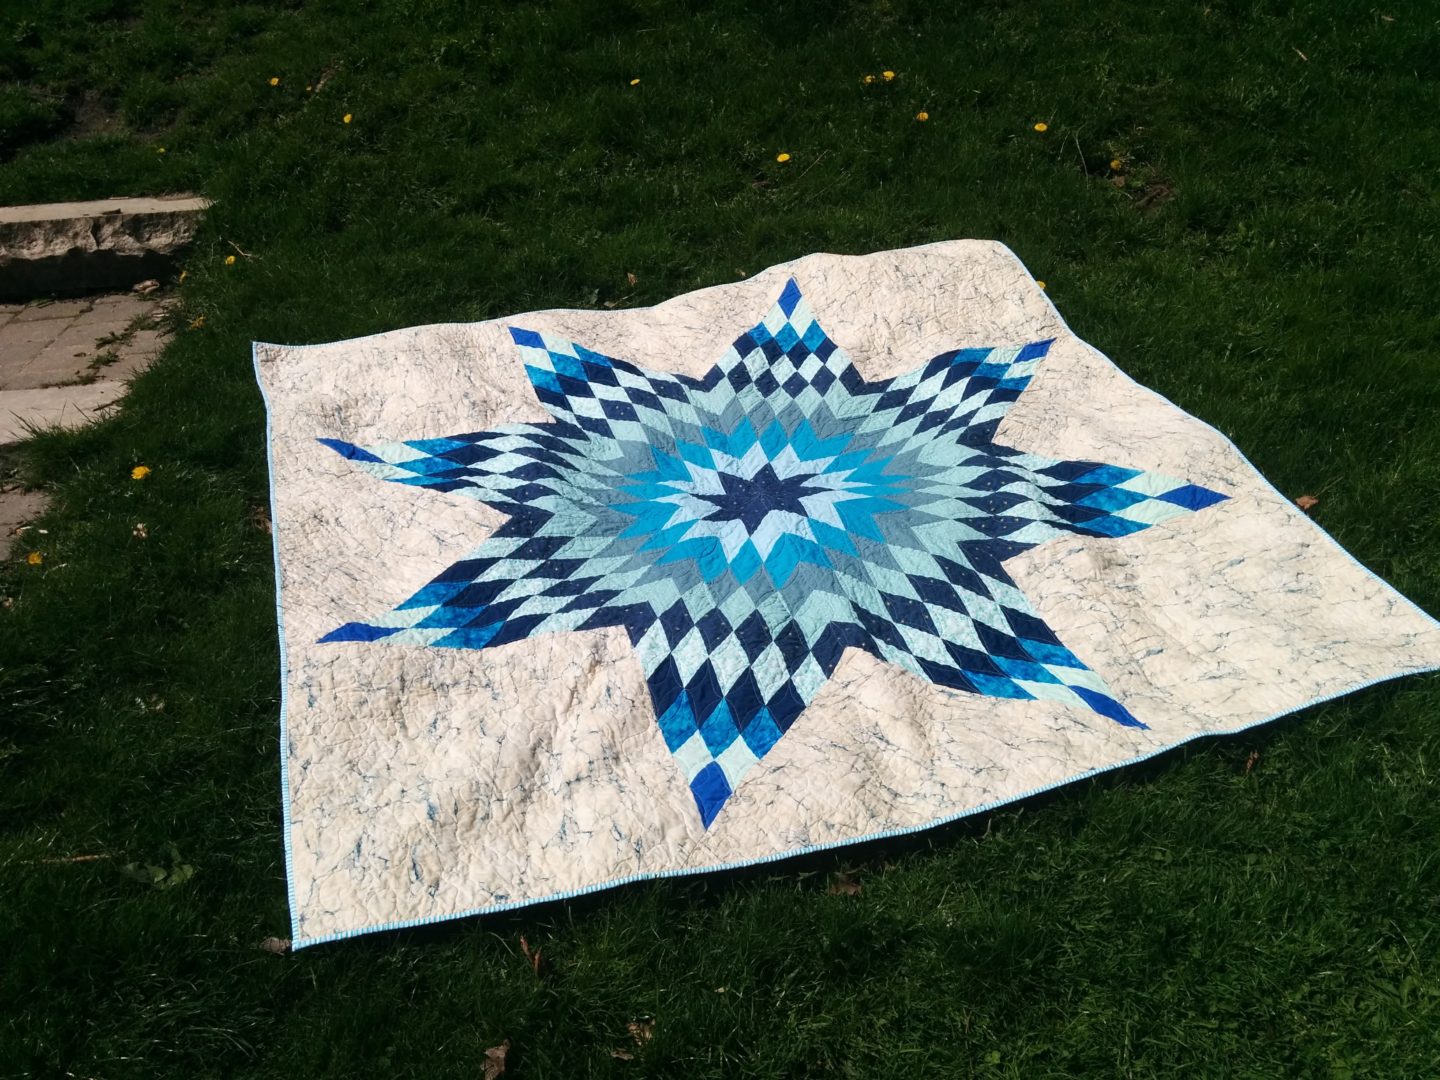
I was looking through my Instagram the other day and I came across a post I’d made in April 2017 with a single photo of a giant lone star quilt I’d made. It made me realize that I’d never actually shared any properly good photos of the quilt, and I wanted to talk about the whole process as well! So here we are! This was a case of me not knowing enough about lone star quilts to be appropriately intimidated, so I dove in without fear and came out with something I’m really proud of to this day.
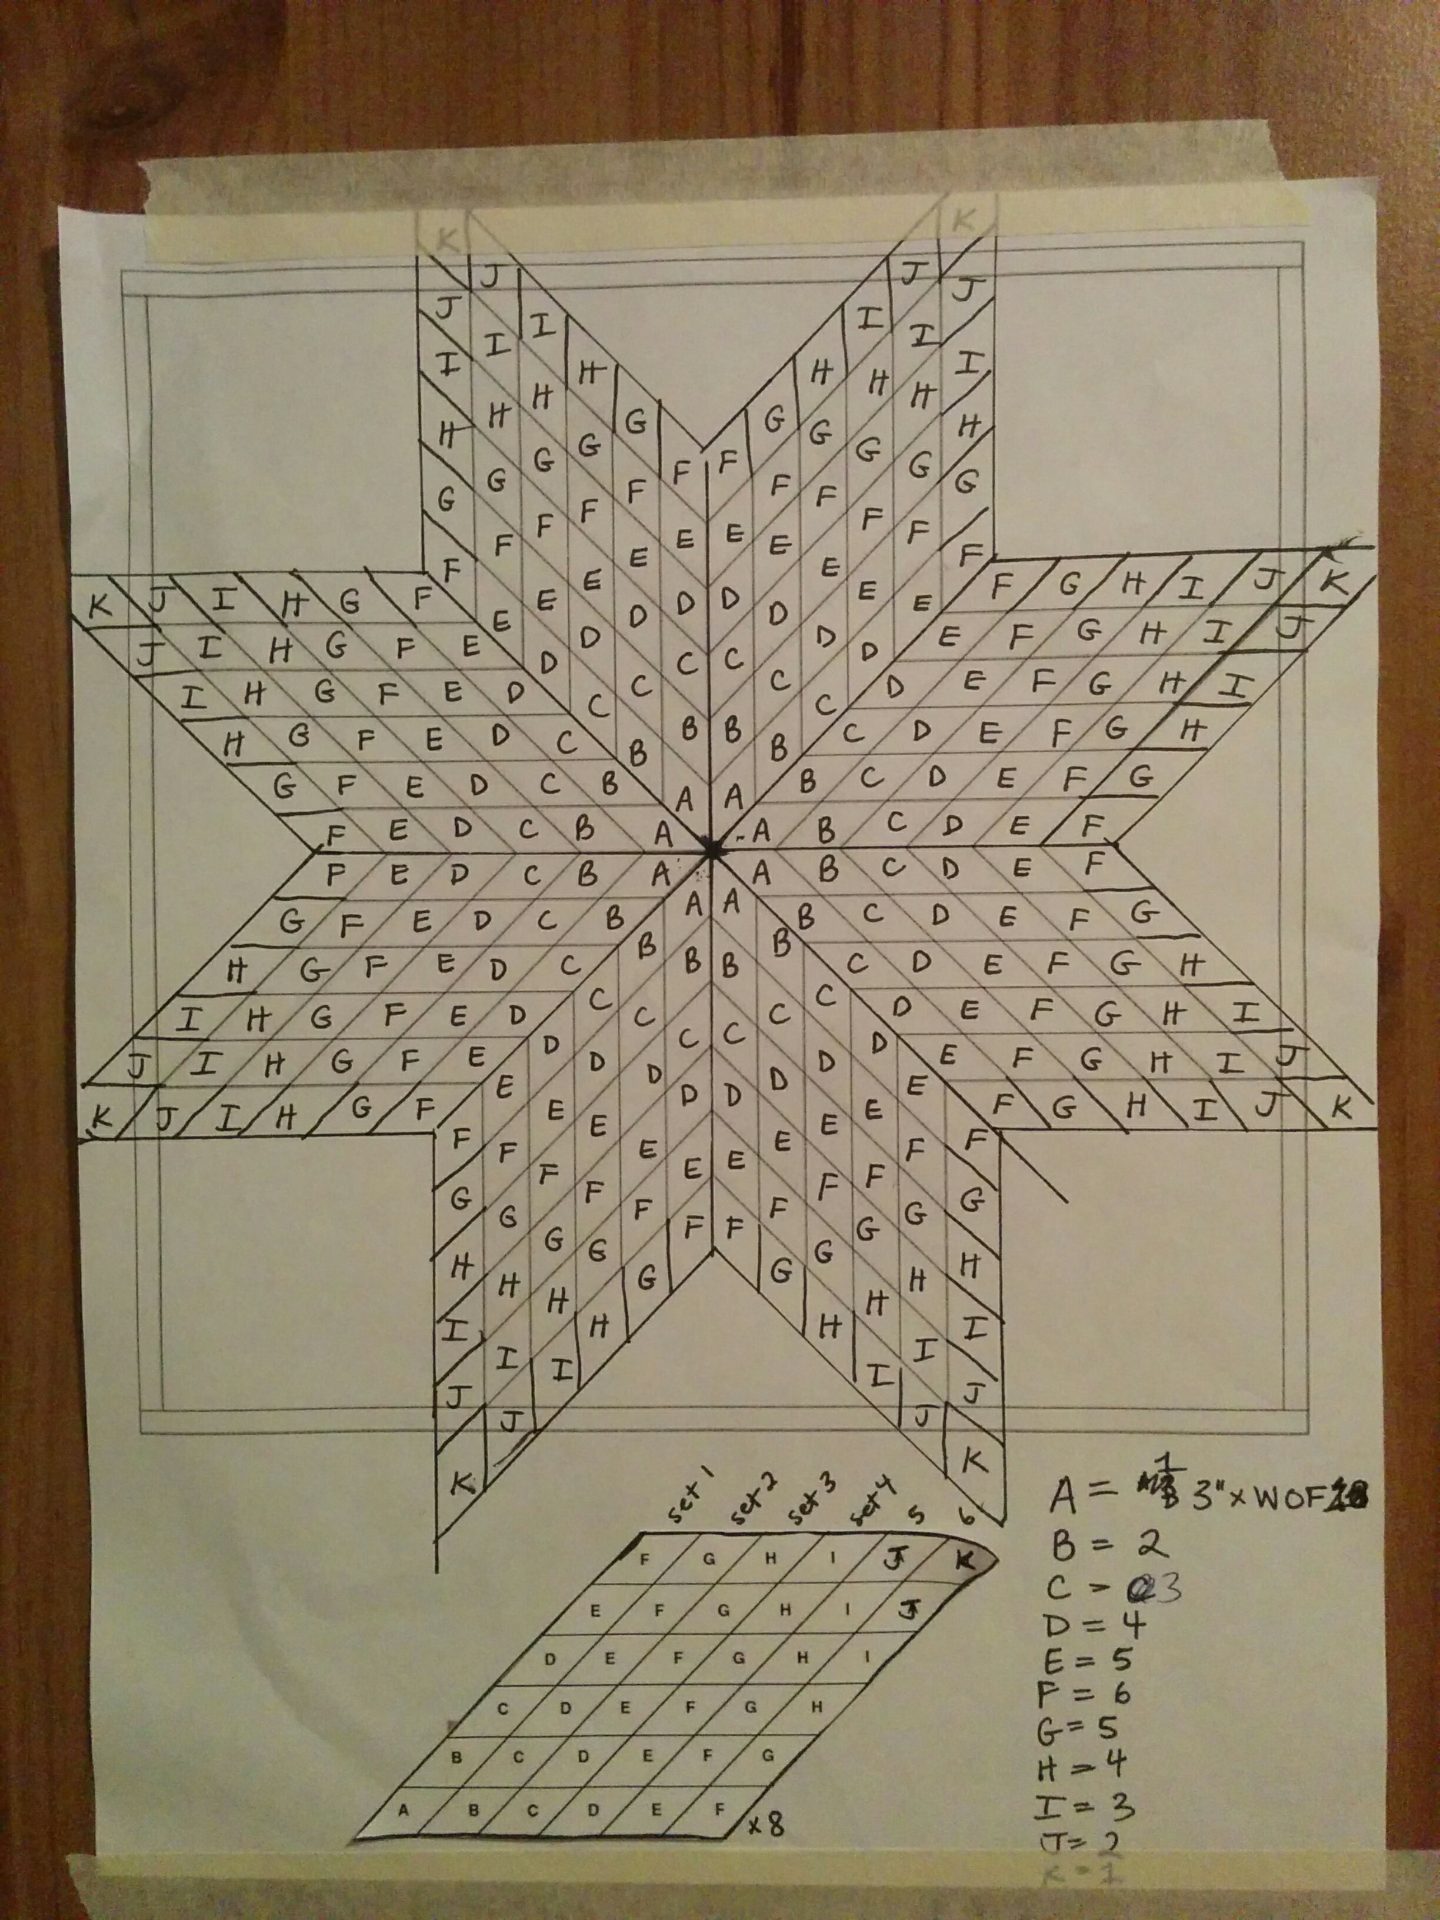
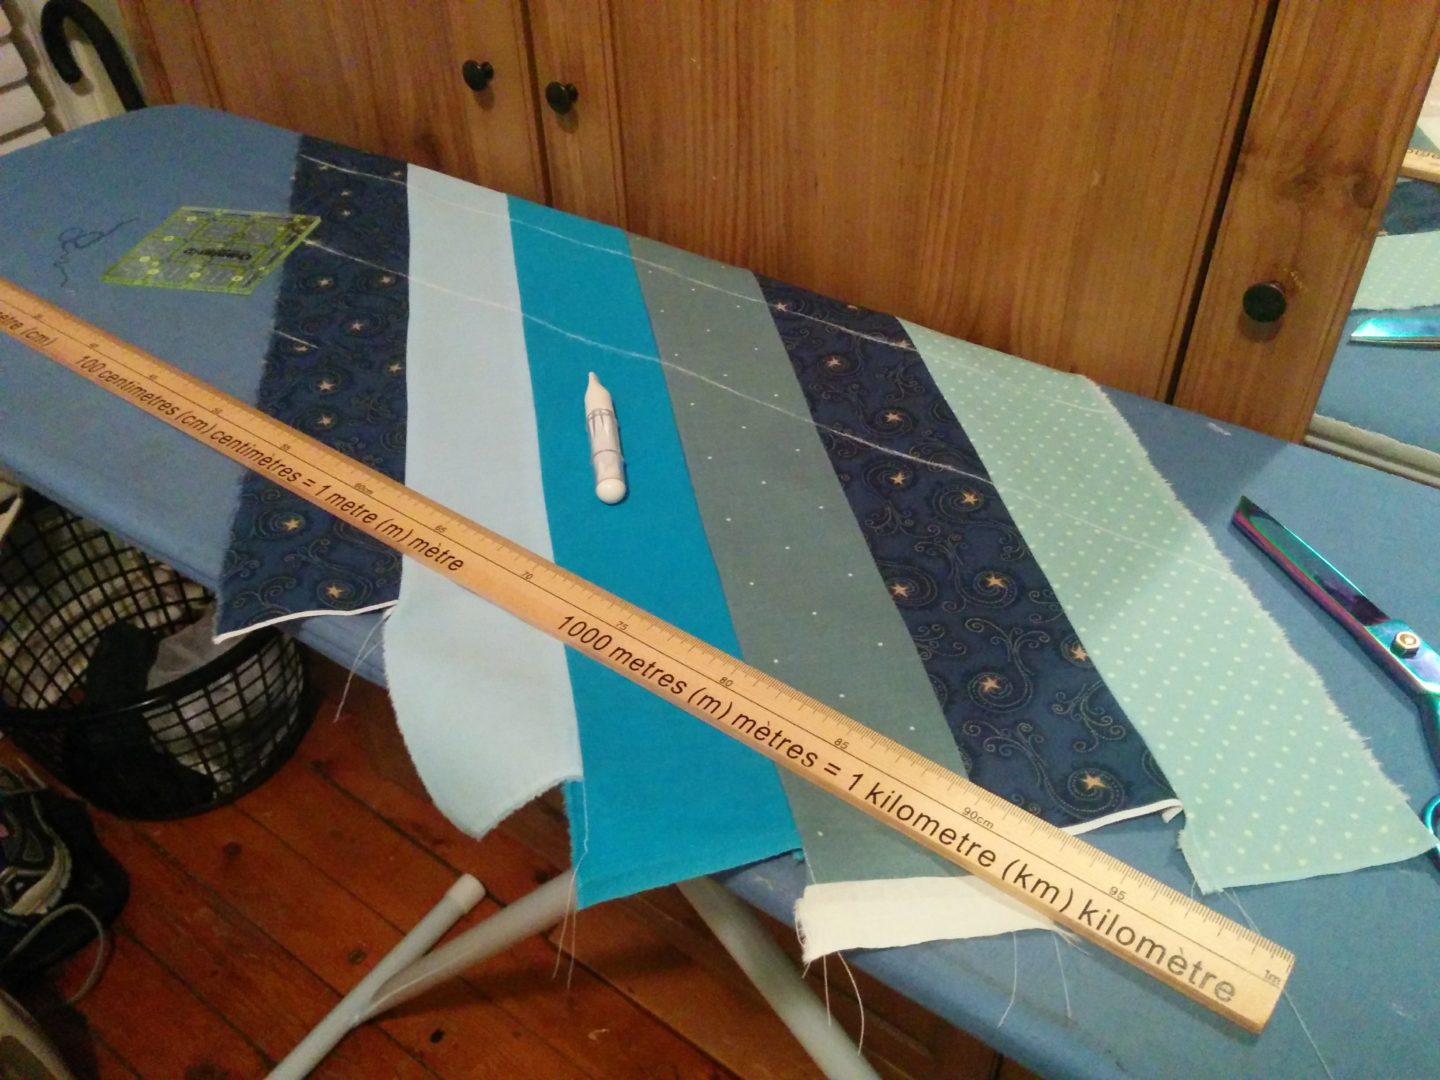
Honestly, starting this quilt was a brain twister. There wasn’t actually a pattern for this exact iteration that I could find online, so I was kind of winging it. See above re: no fear. My starting point was this two-part tutorial. For the template you see below, I just image-searched for “lone star template” and it came up. It’s still boppin’ around the web but I couldn’t find a good link to point you to – just do the image search like me and it should pop up for you! Anyway, it wasn’t the size I wanted so I had to extend the template out as you can see below. I was going for the 36 diamond panel as shown in this resizing tutorial because I wanted the quilt to be king-sized. The dimensions are all in that handy tutorial, so I didn’t change anything from that. Because I was using stuff I already had and not buying new fabric, I had to base my fabric placement on the amounts I had of each. As you can see from my scribbles below, some of the fabrics need more strips than others, particular what I’ve labelled as F since it is the only one that appears six times across the diagonal of each 36 diamond panel.
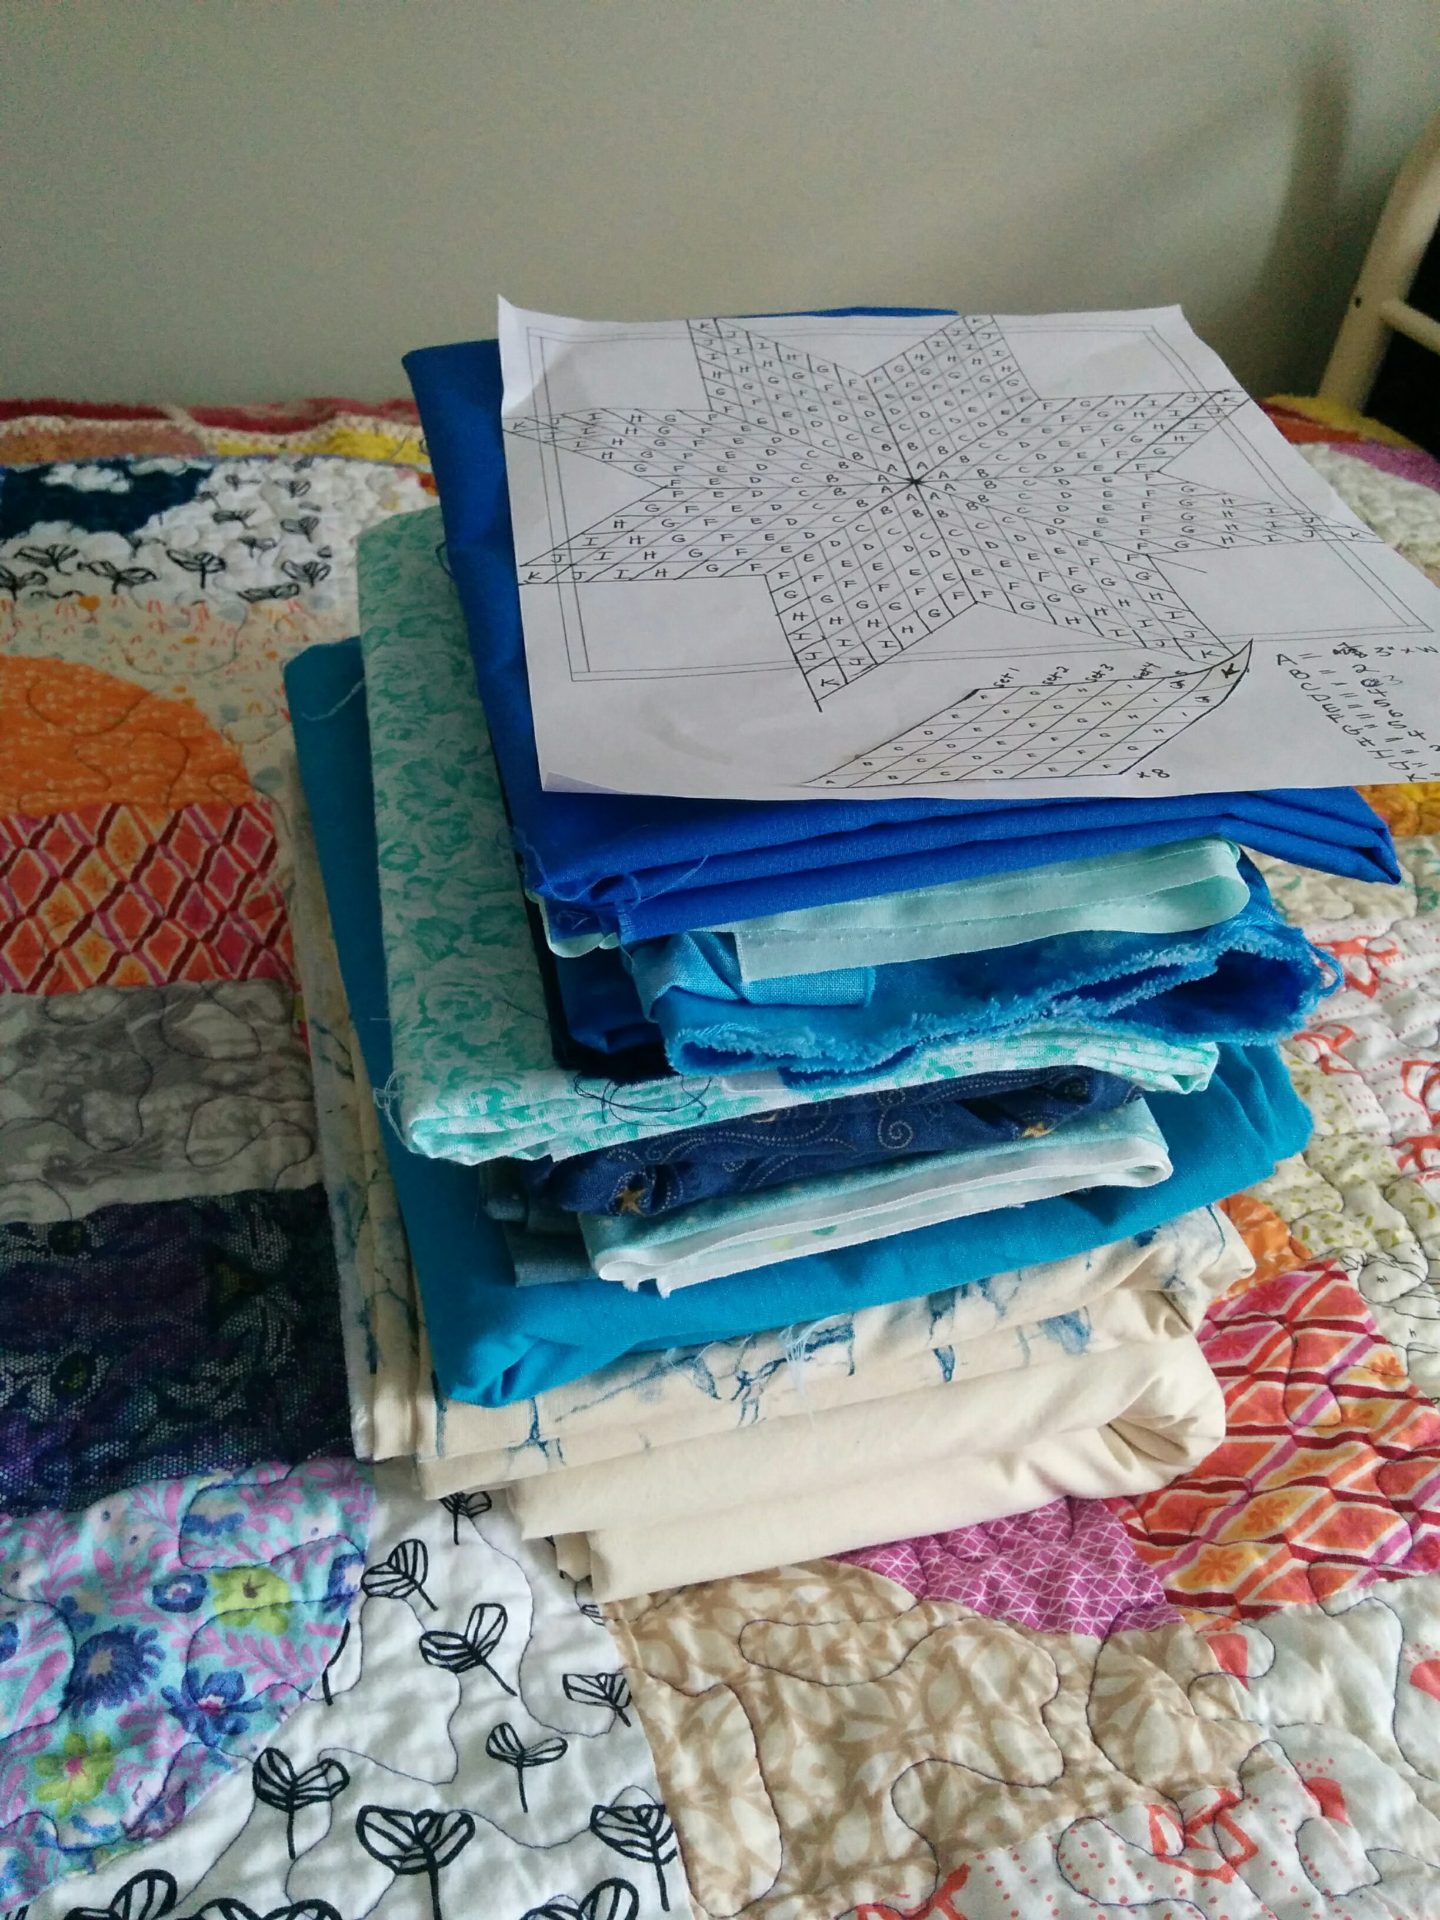
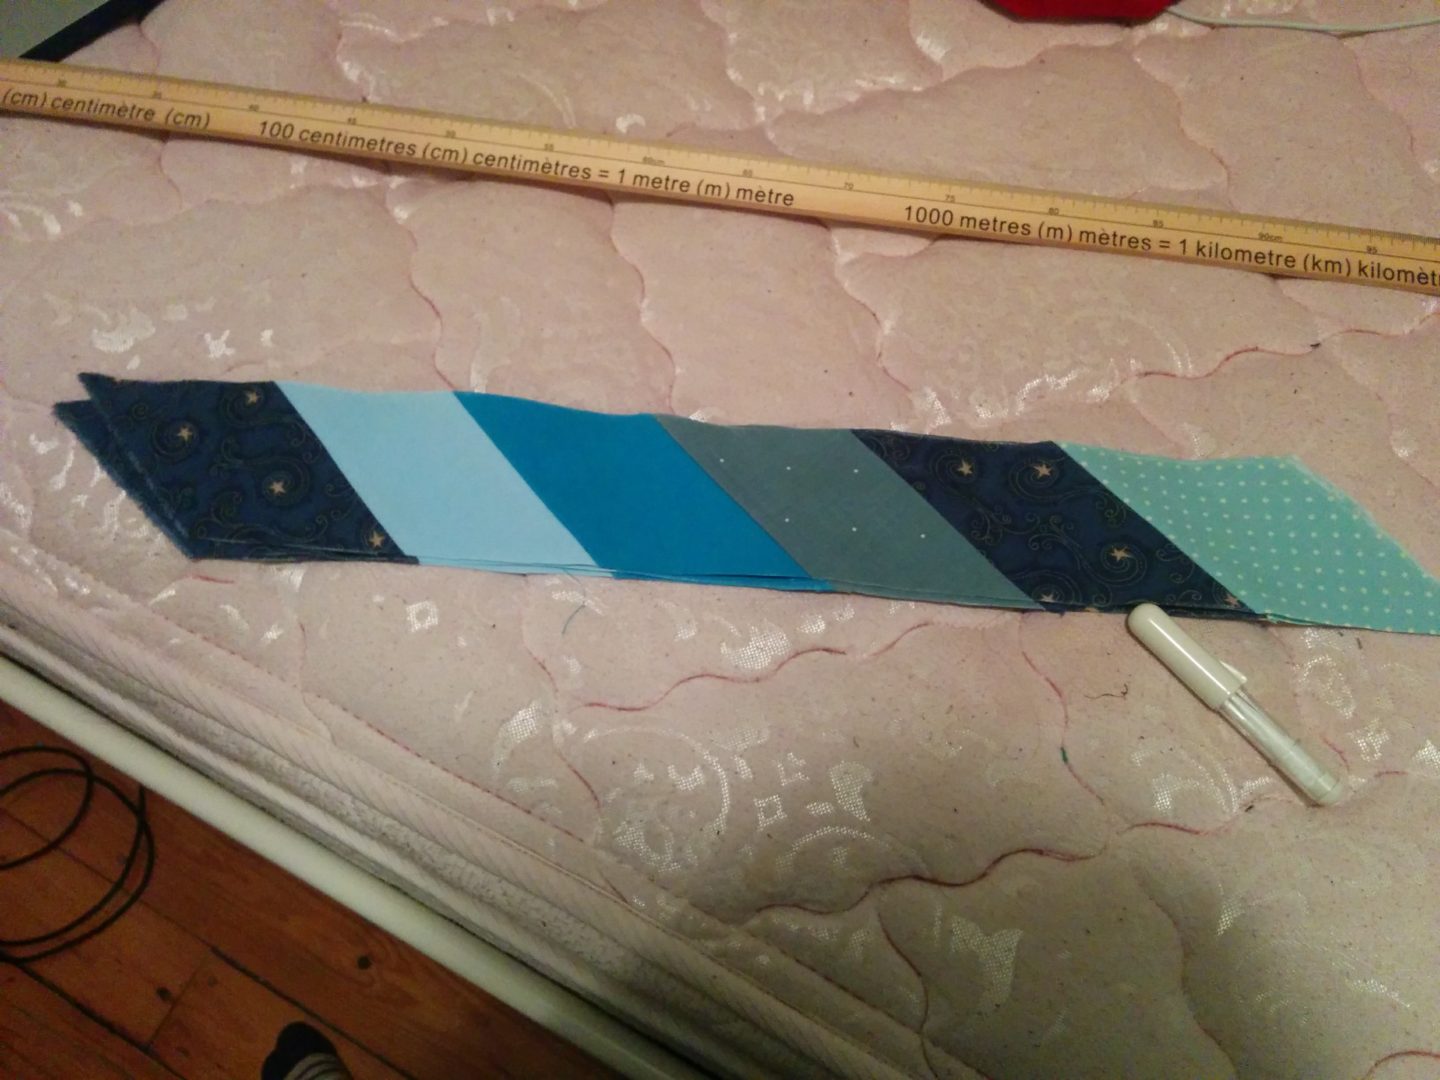
I actually made this lone star for a gift – it’s no longer in my possession! I did my Masters of Music in double bass performance and had the most wonderful teacher for it. I wanted to give him something to express my gratitude for how he’d shaped me as a musician, but didn’t have a huge budget. I DID however, have a good amount of time to spend on it. All the fabric used in this quilt was stuff I already owned. I didn’t buy anything except for batting, binding fabric, and the quilting thread. I had the background fabric for the top in a big chunk of yardage and had no purpose for it, I had a lot of blue scraps from other things (including my paternal grandmother’s destash), and I had a big length of plain muslin that I was going to use for actual muslins of garments, but decided this was a better use. You can see part of the piecing process down below – I didn’t take very many process photos because I didn’t have a blog at the time and was too in the zone to even remember anyway. If you’re interested in the actual how-to, I’d recommend heading to the tutorials I’ve linked above.

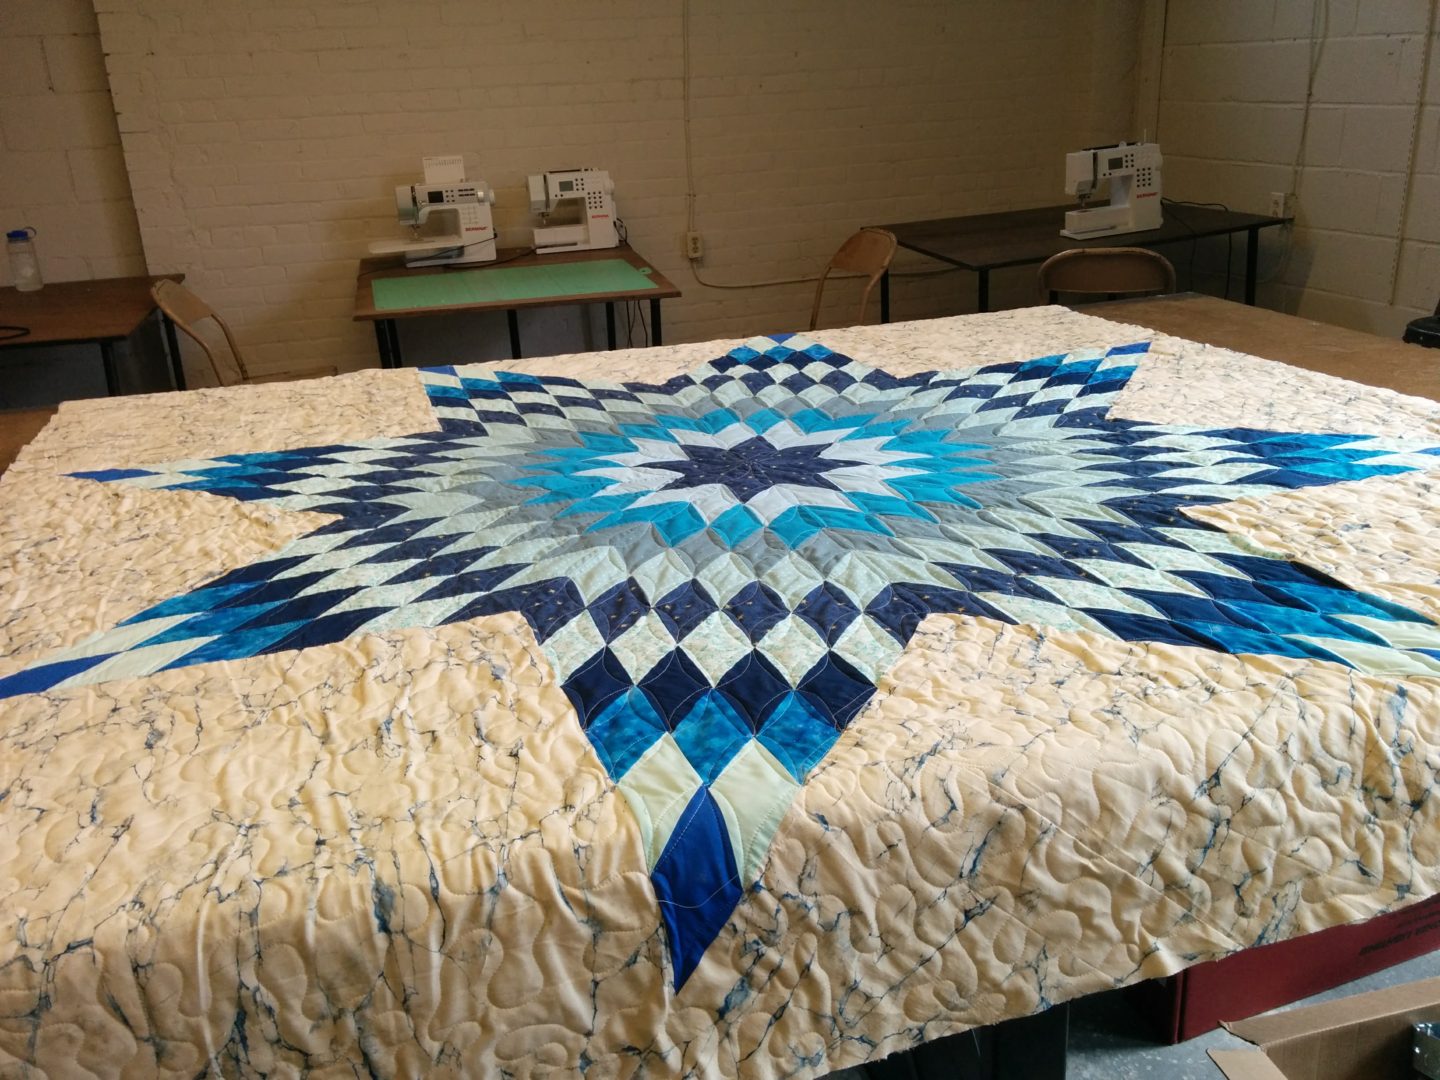
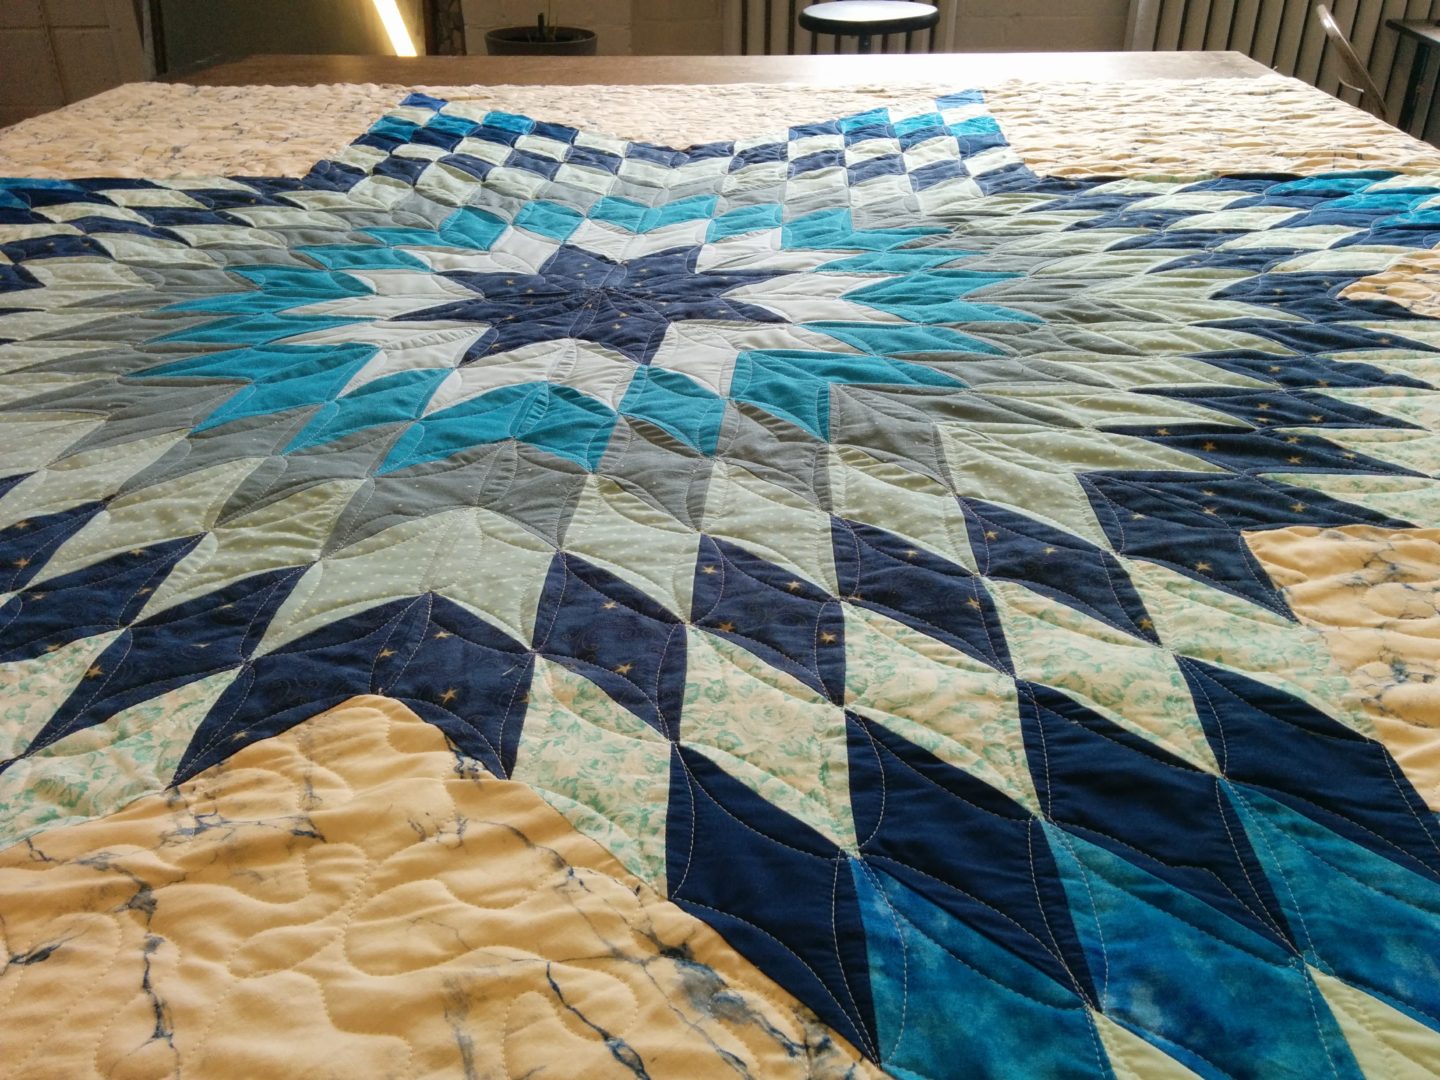
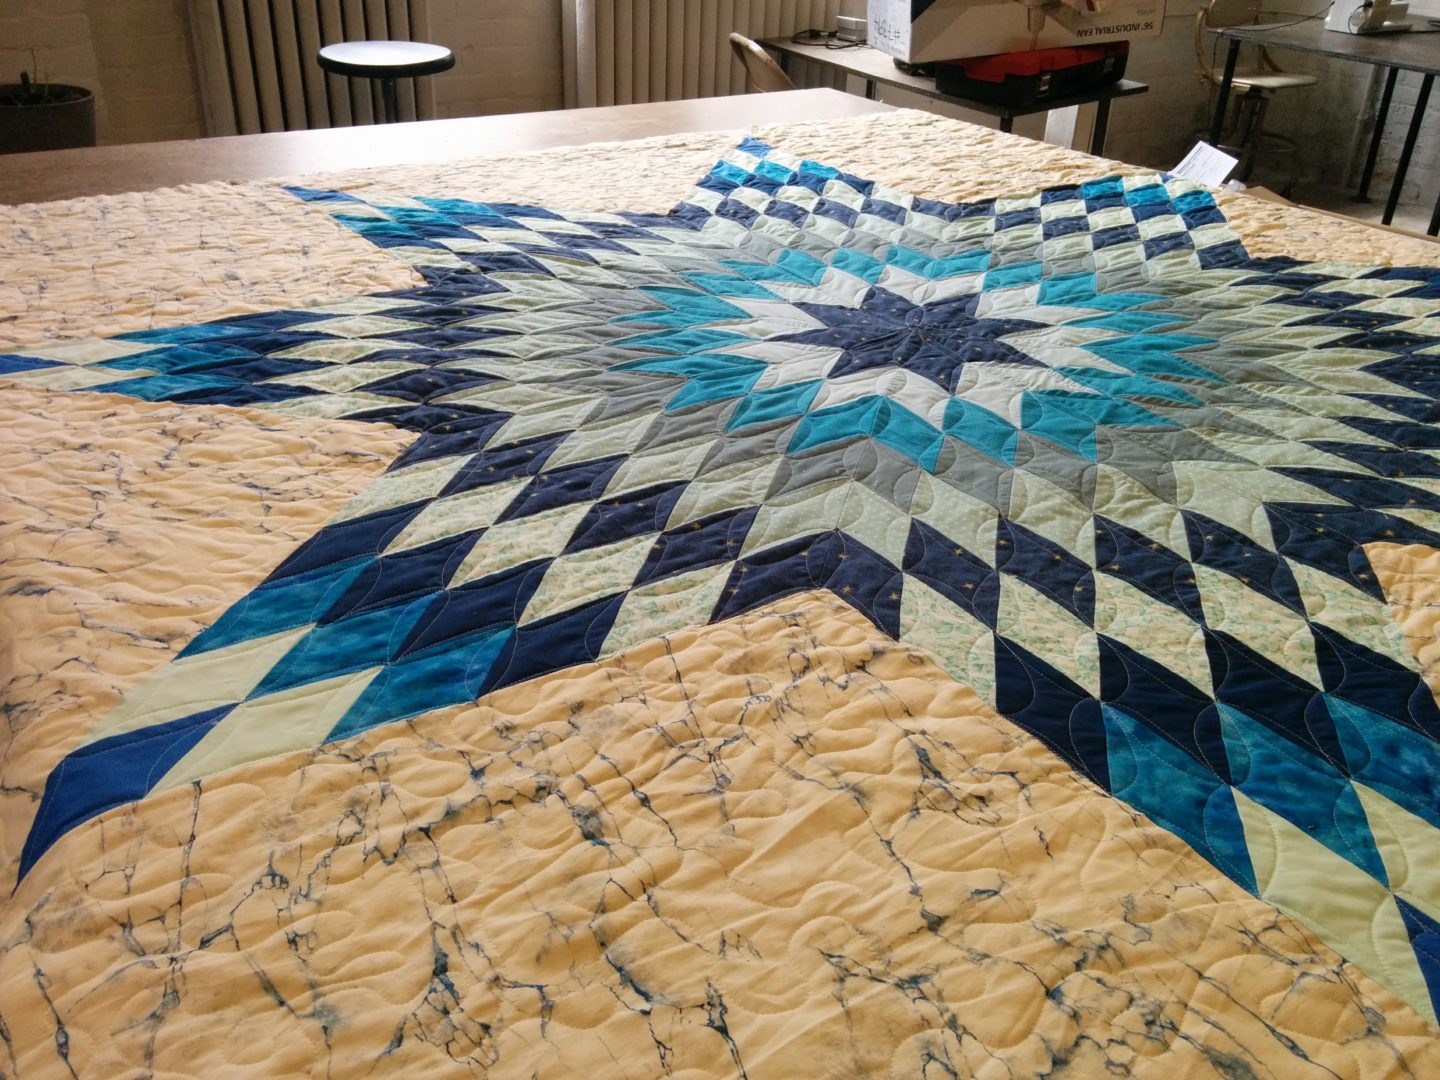
The thing I did spend a bit of money on was a class on long-arm quilting at the workroom and then rental time on their machine. I wanted to be able to do specific quilting instead of an all-over pattern, and let me tell you I had NO desire to wrestle a king-sized quilt through my little home sewing machine. I’m very glad I did, because I was able to do a repeating pattern to emphasize the diamonds of the lone star, and then did stippling on the background sections. I mainly did stippling because I’d done that meandering recurring shape of line before using my own machine to free-motion, so I was more comfortable with it than learning something completely new. It took a bit of internet research to figure out how to make the pattern I wanted inside the diamonds. The thing with quilting is that it’s ideal if you can do it without backtracking on your own stitching or having to stop and start – think of taking a pencil to make a pattern and the only rule is that you can’t lift it off the page. Once I got that under control, the only thing that gave me a mental struggle was the transition between the larger 36 diamond units (basically the points of the star). Below are photos of the quilt during and directly following quilting (pre-binding and pre-washing/drying).

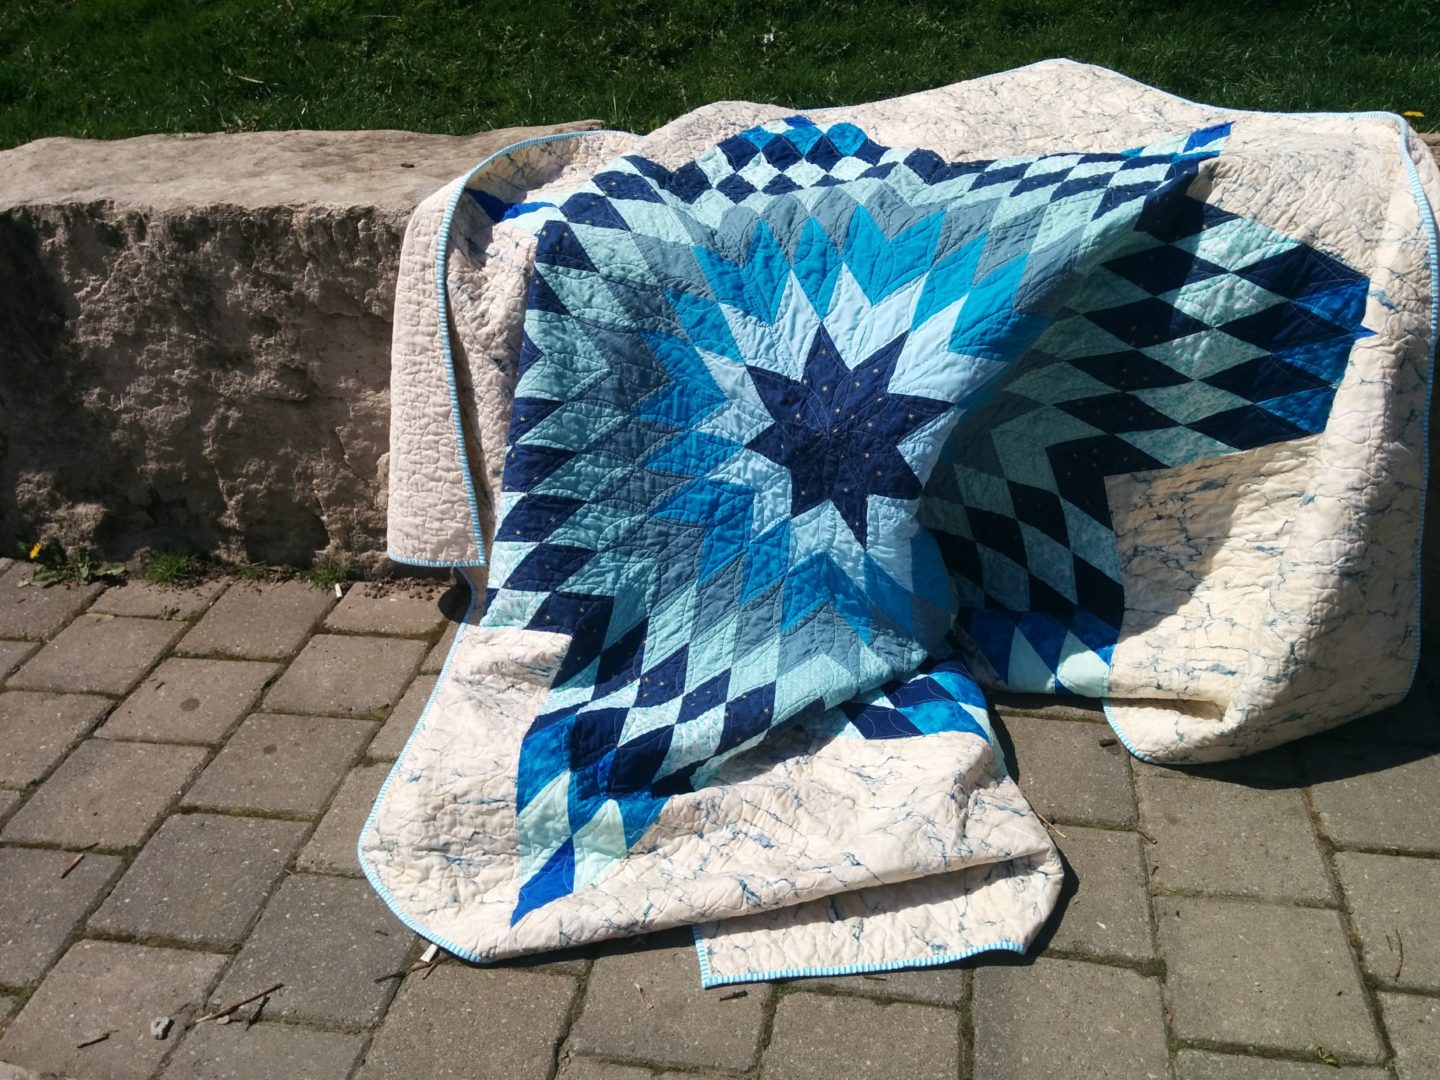
I only have this one photo of the back of the quilt, but I’m super into it. In the past I haven’t always been one for subtlety, but I think I toned it down a bit because it was a gift for someone else. I specifically chose a colour of quilting thread that matched the muslin I was using for the backing fabric. I had to buy thread that was specifically compatible with a long-arm machine (especially since it isn’t my machine), and the spools are giiiiant, so I wanted to get something that was going to work with a lot of different potential future quilts.


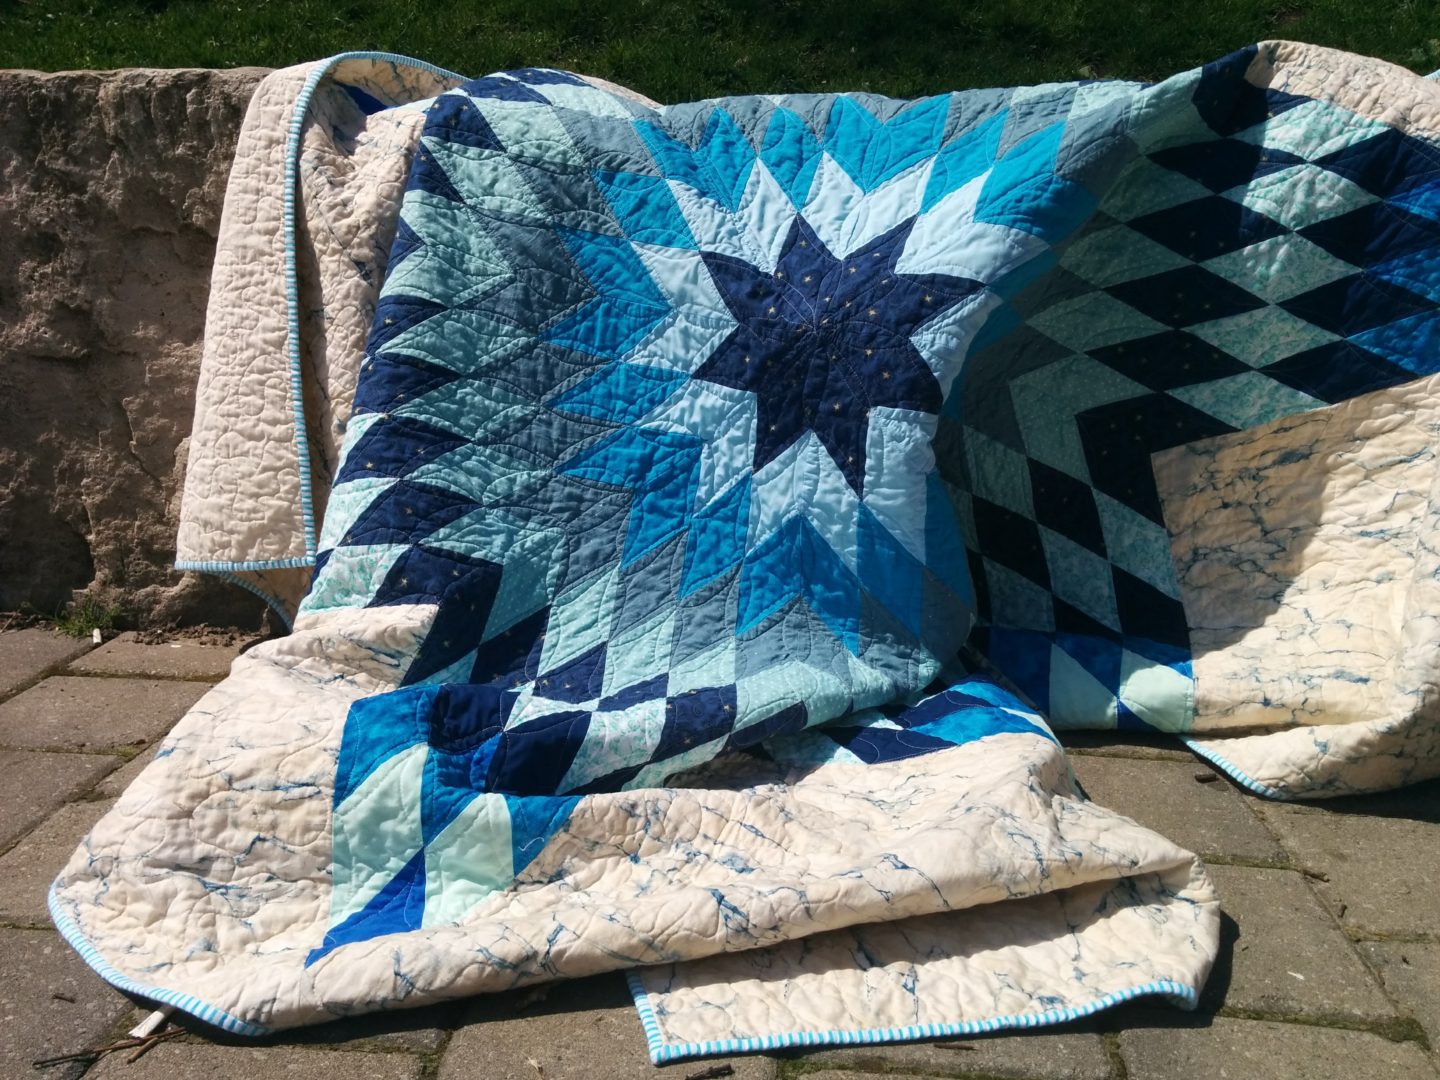
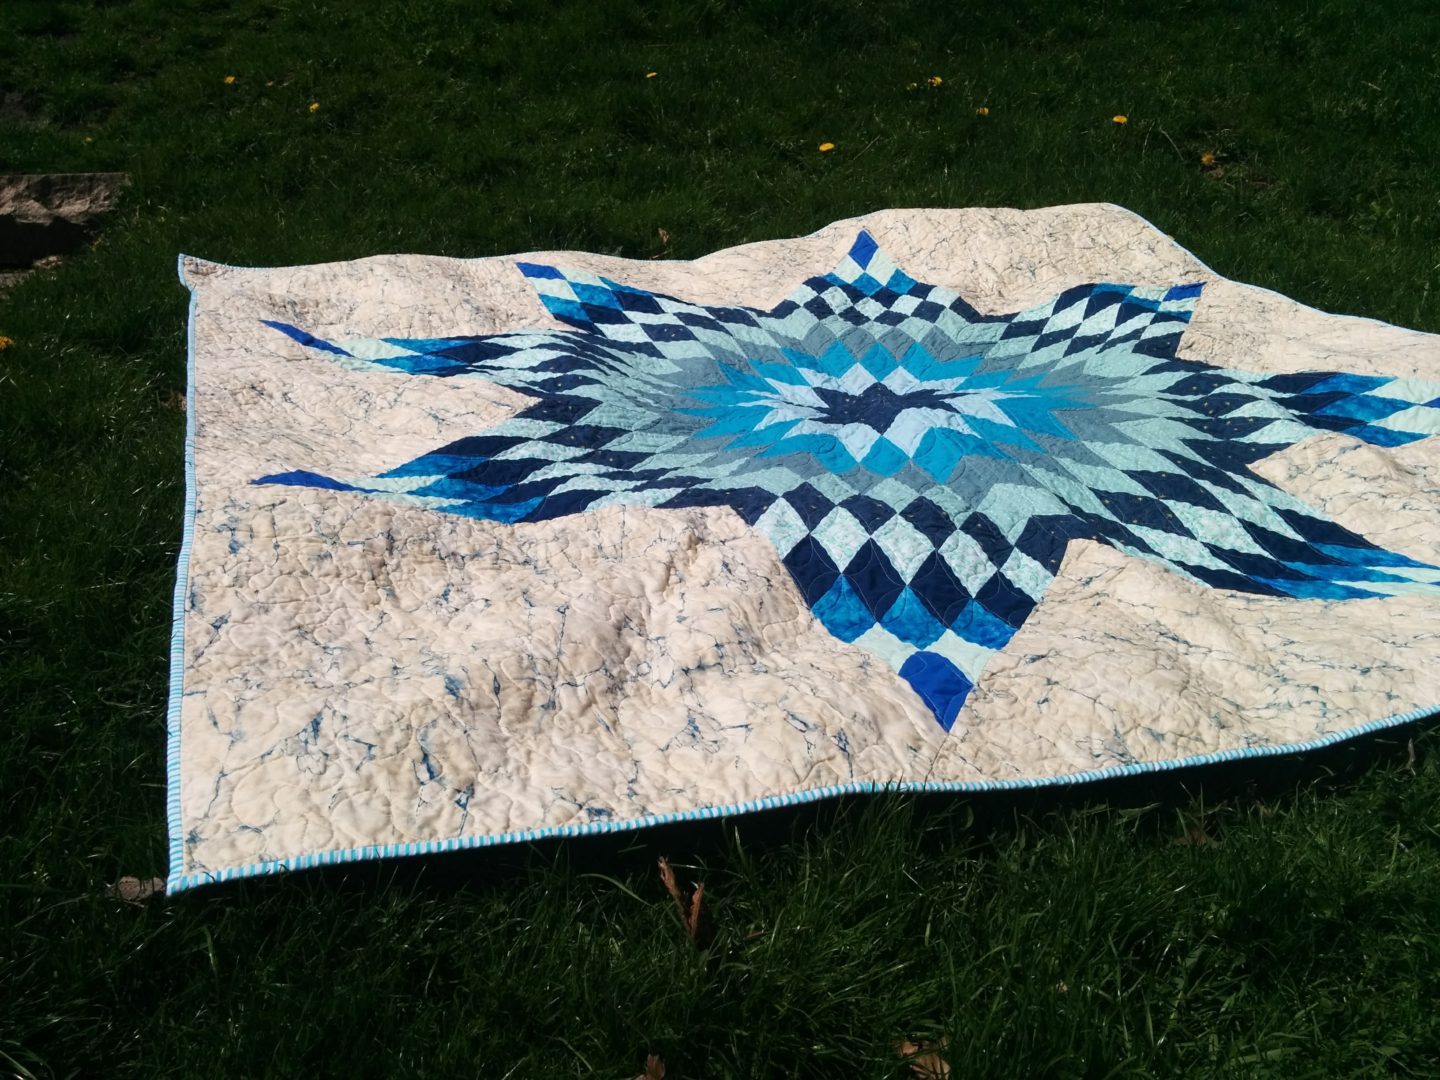
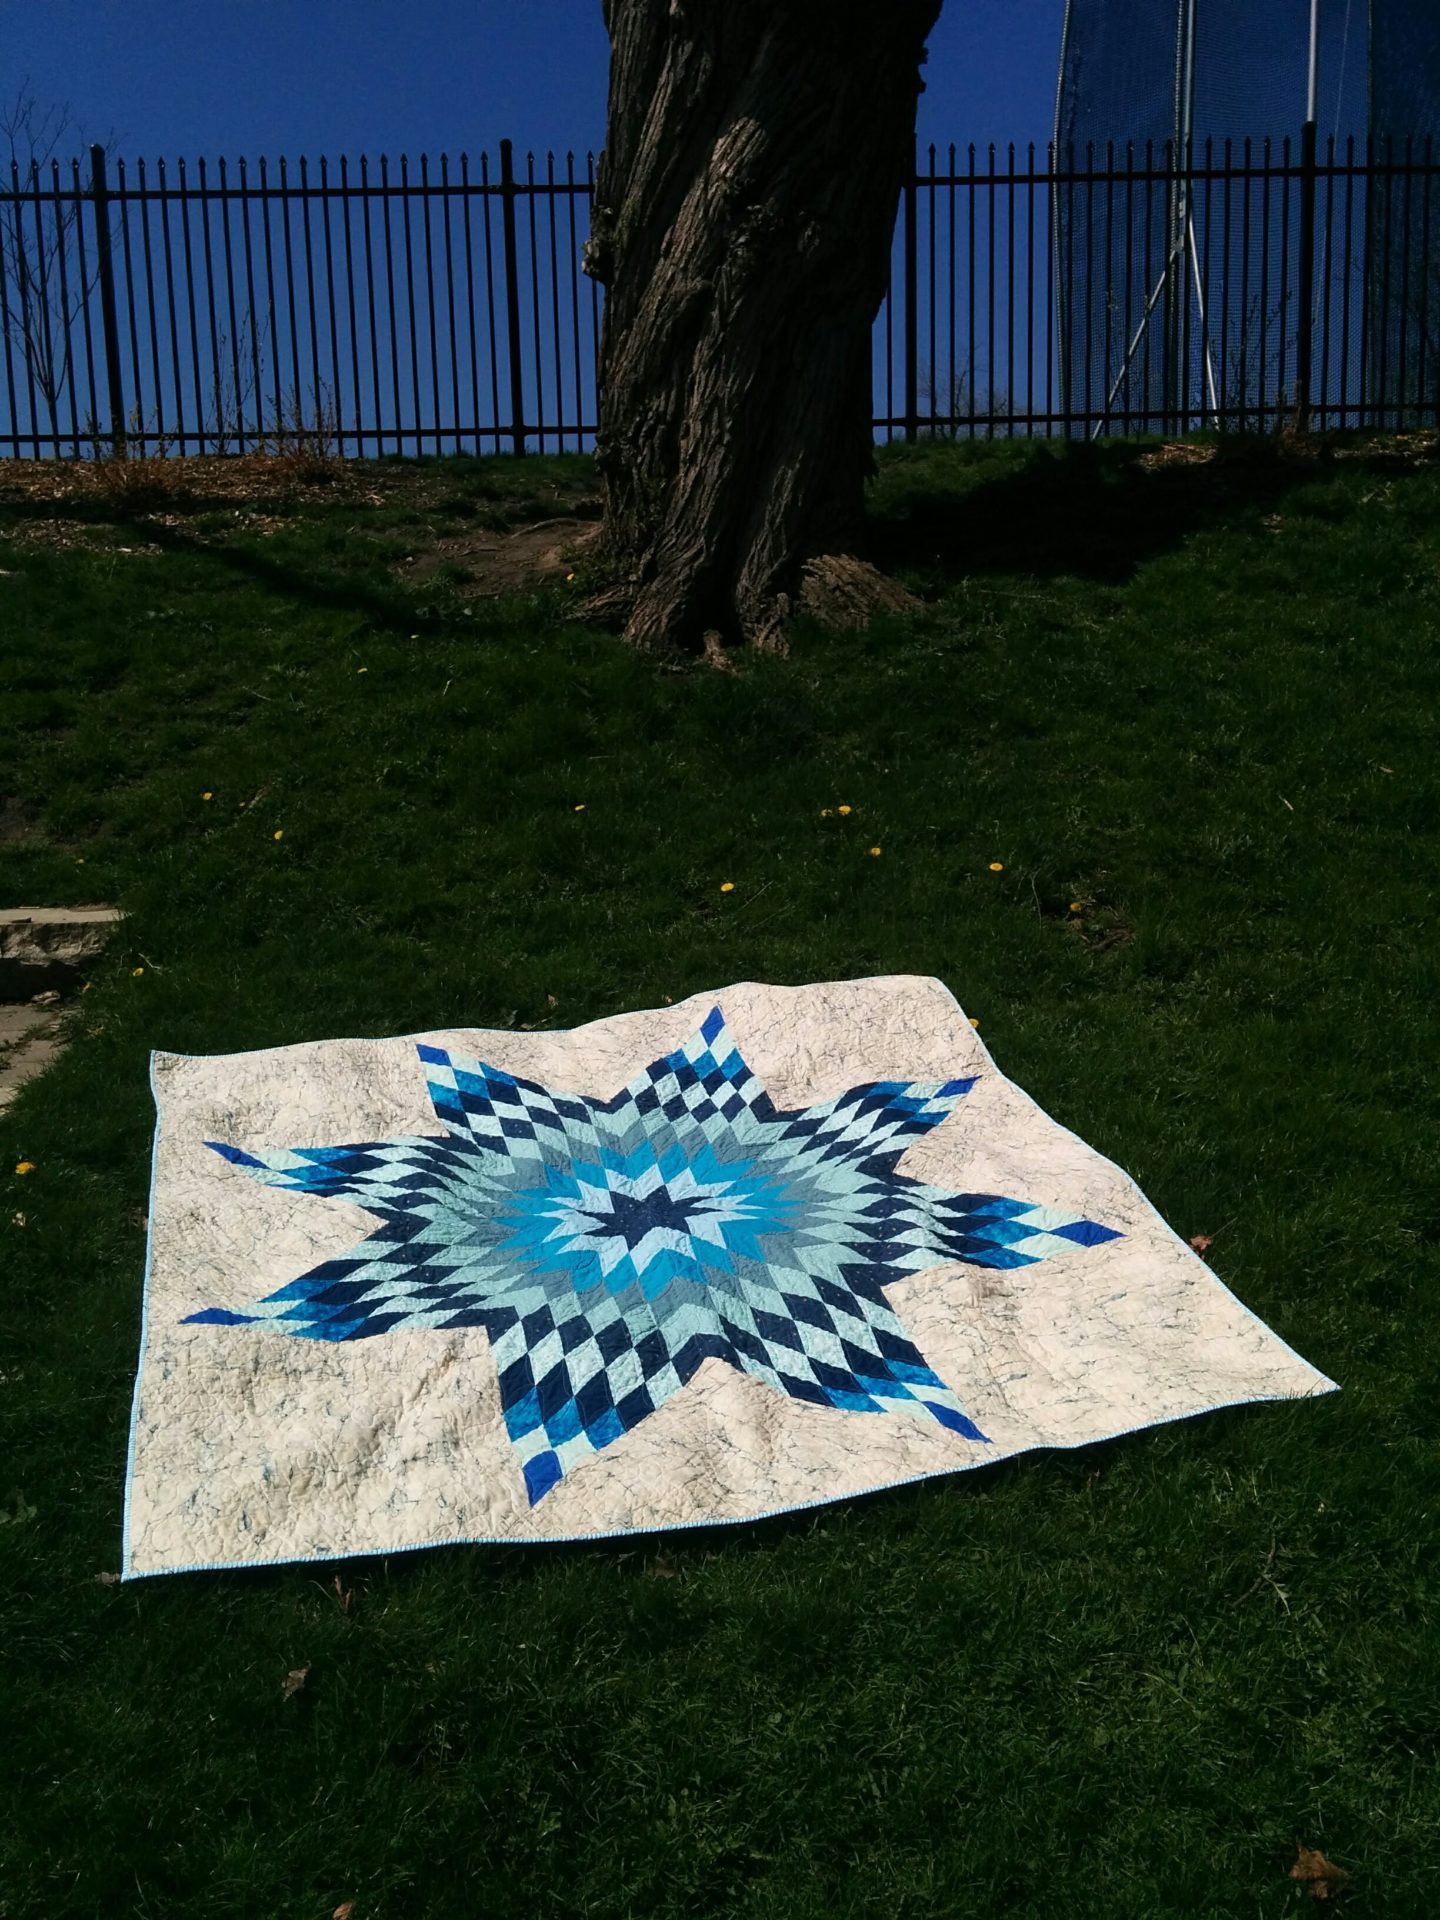
I’m kind of surprised looking back that I took this many photos of the quilt considering I wasn’t very active on Instagram and didn’t have a blog. I think I was overwhelmed with the excitement you get when you have spent a lot of time on something and it turns out even better than you thought it would. This may have also been combined with knowing there was a good chance I’d never see the quilt in person again and worrying that I wouldn’t get a chance to document it. Which is why the photos below of the finished quilt were all taken directly outside the music building immediately before my friend’s final recital at the end of April, 20 minutes before I was going to see my teacher for the last time that academic year. No pressure or anything. Definitely got some funny looks from people walking through campus.

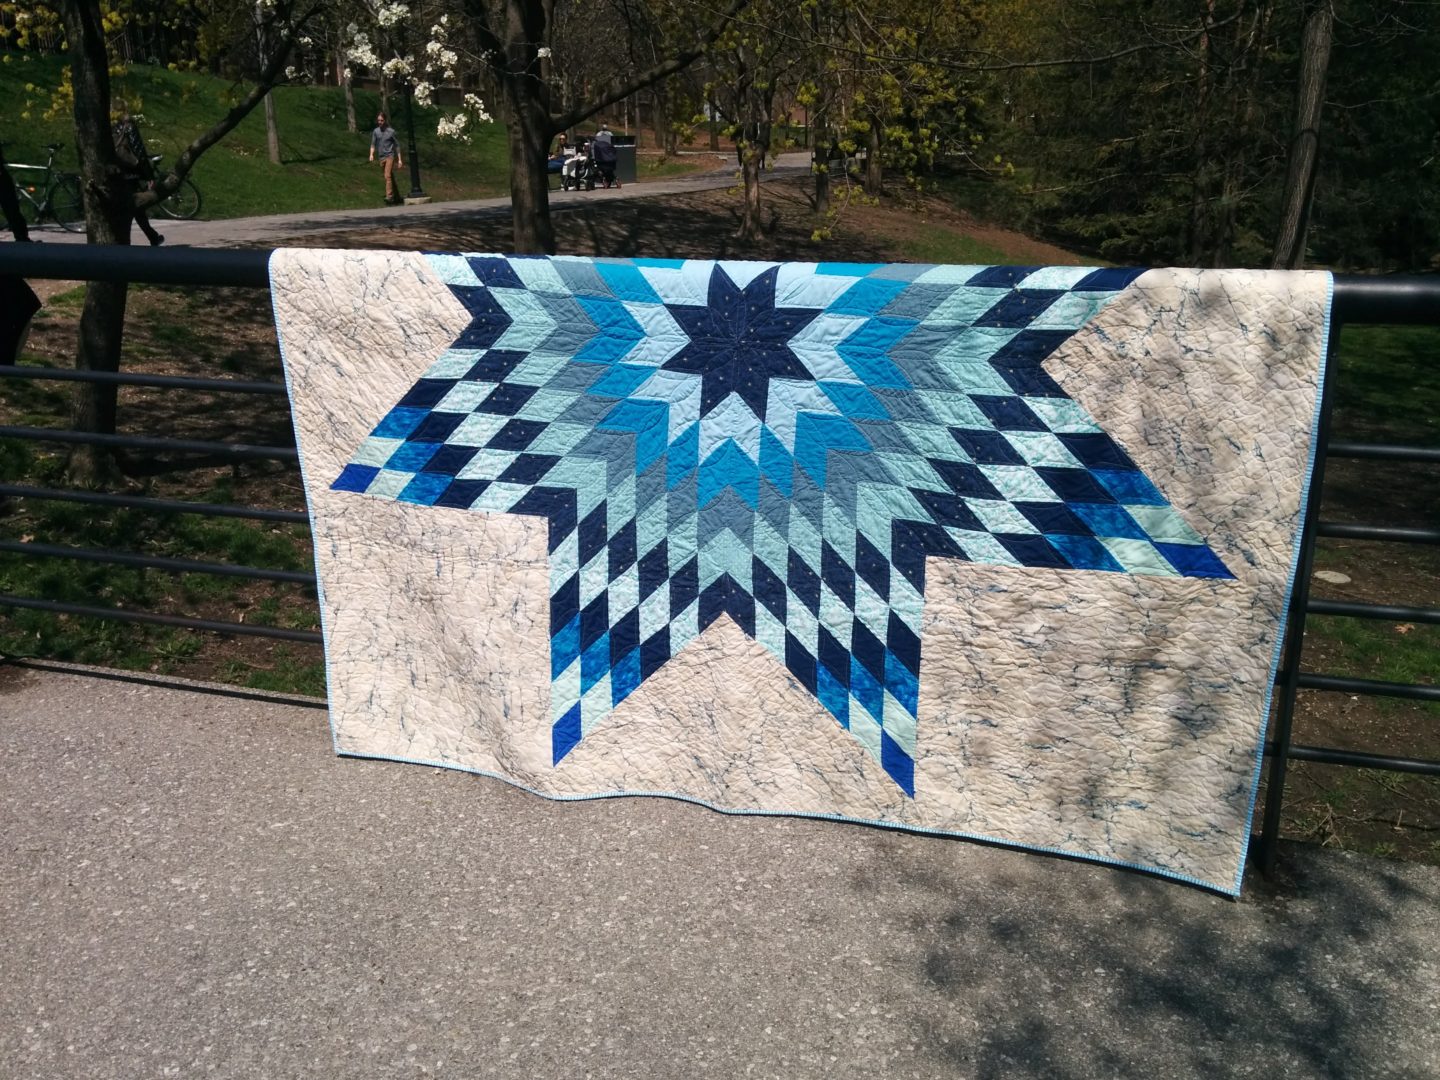
Honestly, the thing that I SHOULD have been worried about was the distortion that can happen because of aaaalll the bias-cut pieces. Which can lead to a hot mess where none of your points line up. Because there are SO MANY POINT INTERSECTIONS. I really should have been much more fearful, my friends. I’m still confused about how I could’ve been so blasé. But I am a Cheaty McCheaterson who fudges things until it looks acceptable. If seam intersections weren’t lining up when I went to sew the strips together (like the ones you can see above in my process shots), I just…stretched them. Along the bias. Because I can. DON’T JUDGE ME. Apparently this could’ve created rippling in the quilt top. I learned that in retrospect from the internet after I’d already finished the entire thing. But it DIDN’T and my cavalier ways paid off because pretty much all of my points are well aligned. And the ones that aren’t, you really can’t tell. Now that I’ve pointed it out, I’m sure you can notice a couple in the photos below, but it’s the level of “error” that I can live with.

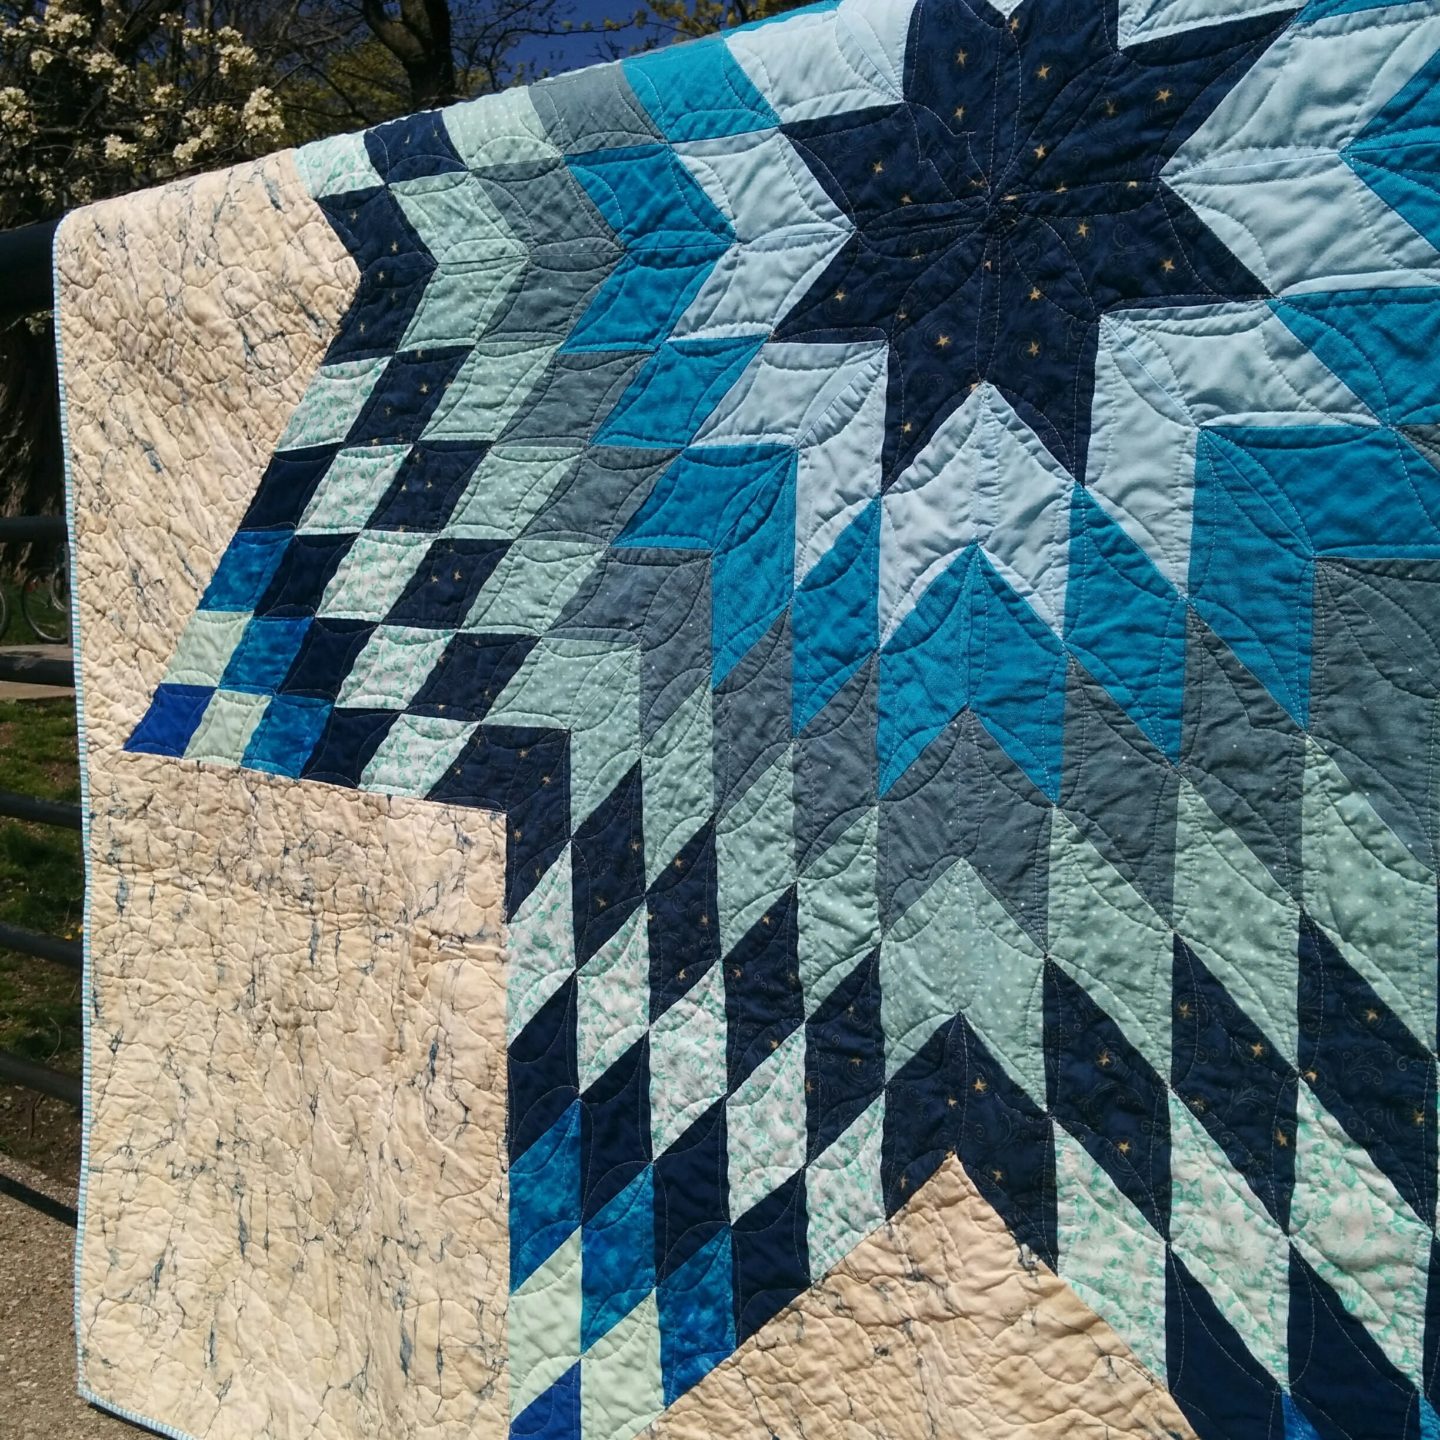
See the corners where the background fabric meets the inner corners of the star? Often those are sewn with Y-seams where you have to sew into the corner from two different sizes and meet in the middle at a perfect pivot point. I would probably have no issue with this now, but conveniently the tutorial eliminates the need for Y-seams, so you can avoid worrying about that if you’re thinking of making you’re own. Which I think you all should. I’m not always one for traditional quilt designs, but I think the lone star is just iconic and kind of want one for myself now that I’m revisiting it. And especially now that I’m more than two years away from the reality of making it – it all seems like an easy breezy time in my rose-colour backwards-looking lenses.
I’ve been feeling a bit of a quilting bug lately. I think it might be time to return to my Violet Craft Elephant abstractions quilt. Does anyone else go through waves of quilt vs. garment sewing? I know a lot of garment sewists don’t really quilt and vice versa, but I find they satisfy very different parts of my brain. I’ve been feeling a bit of a slump with garments lately (honestly, I think part of it is musings I’ve been having on sustainability and producing new clothes lately), so I think going back to a quilt will keep me sewing without forcing it. You’ll probably see some Helen’s Closet Avery leggings on here pretty soon though (if they fit in a non-scandalous way). And they’re sparkly!
Hi,
Love the quilt you, have inspired me to try and make one. I have looked online at a lot of the videos, and I have two questions. On the design you drew up you have the fabric requirements as 3″ wide WOF. Is this correct or should the actual strips be 2.5″? If the 3″ is correct, then do you cut the joined fabrics, on the 45-degree line at 3″ wide?
I look forward to hearing from you.
Sandra
Author
Hi Sandra! I think I must have written that down wrong on the paper in the photo, because I don’t believe I actually changed any of the dimensions from the tutorial I linked to. If you look at that tutorial, I think I did everything exactly as they described. Sorry about that!