I’m excited to discuss and show you photos of the most recent quilt I finished! I love it SO MUCH. I finished it last December, and it’s been living on my bed ever since. I finally got around to taking proper photos of it yesterday, and spent all day being reminded of how much I love it. I mostly sew clothes, but probably once a year I’ll have a quilty urge rise up within me until it’s irresistible and I just HAVE to make a quilt. This is actually only the third quilt I’ve ever made specifically for myself. I’ve made at least 4 that I gave as gifts, and I might be forgetting a couple.
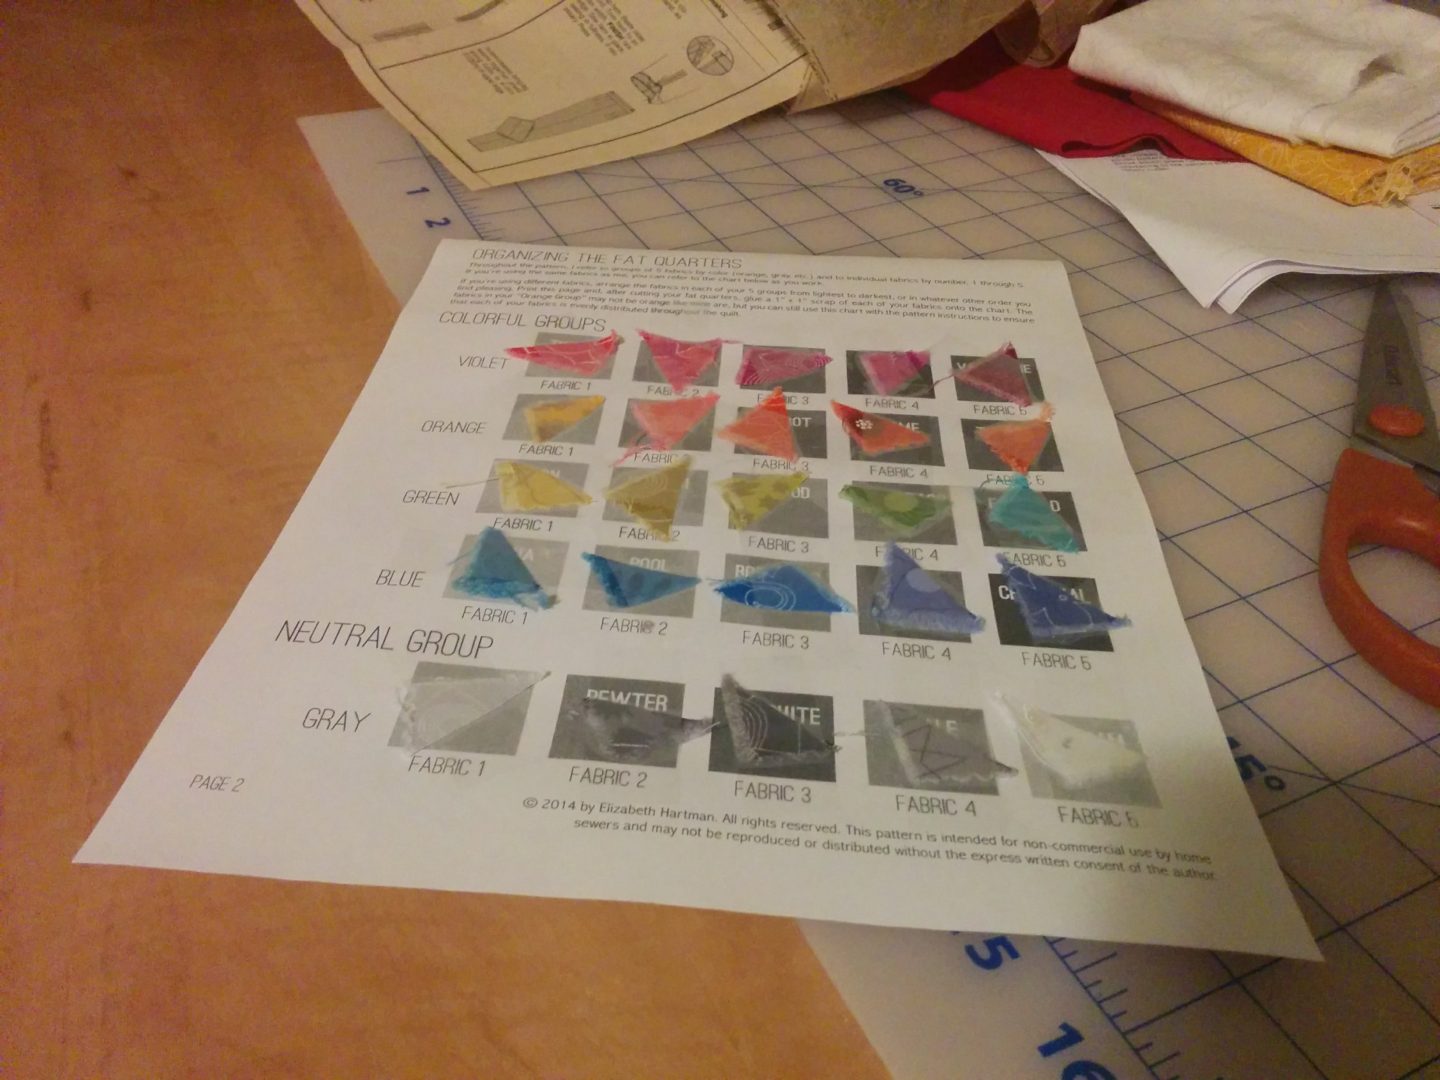
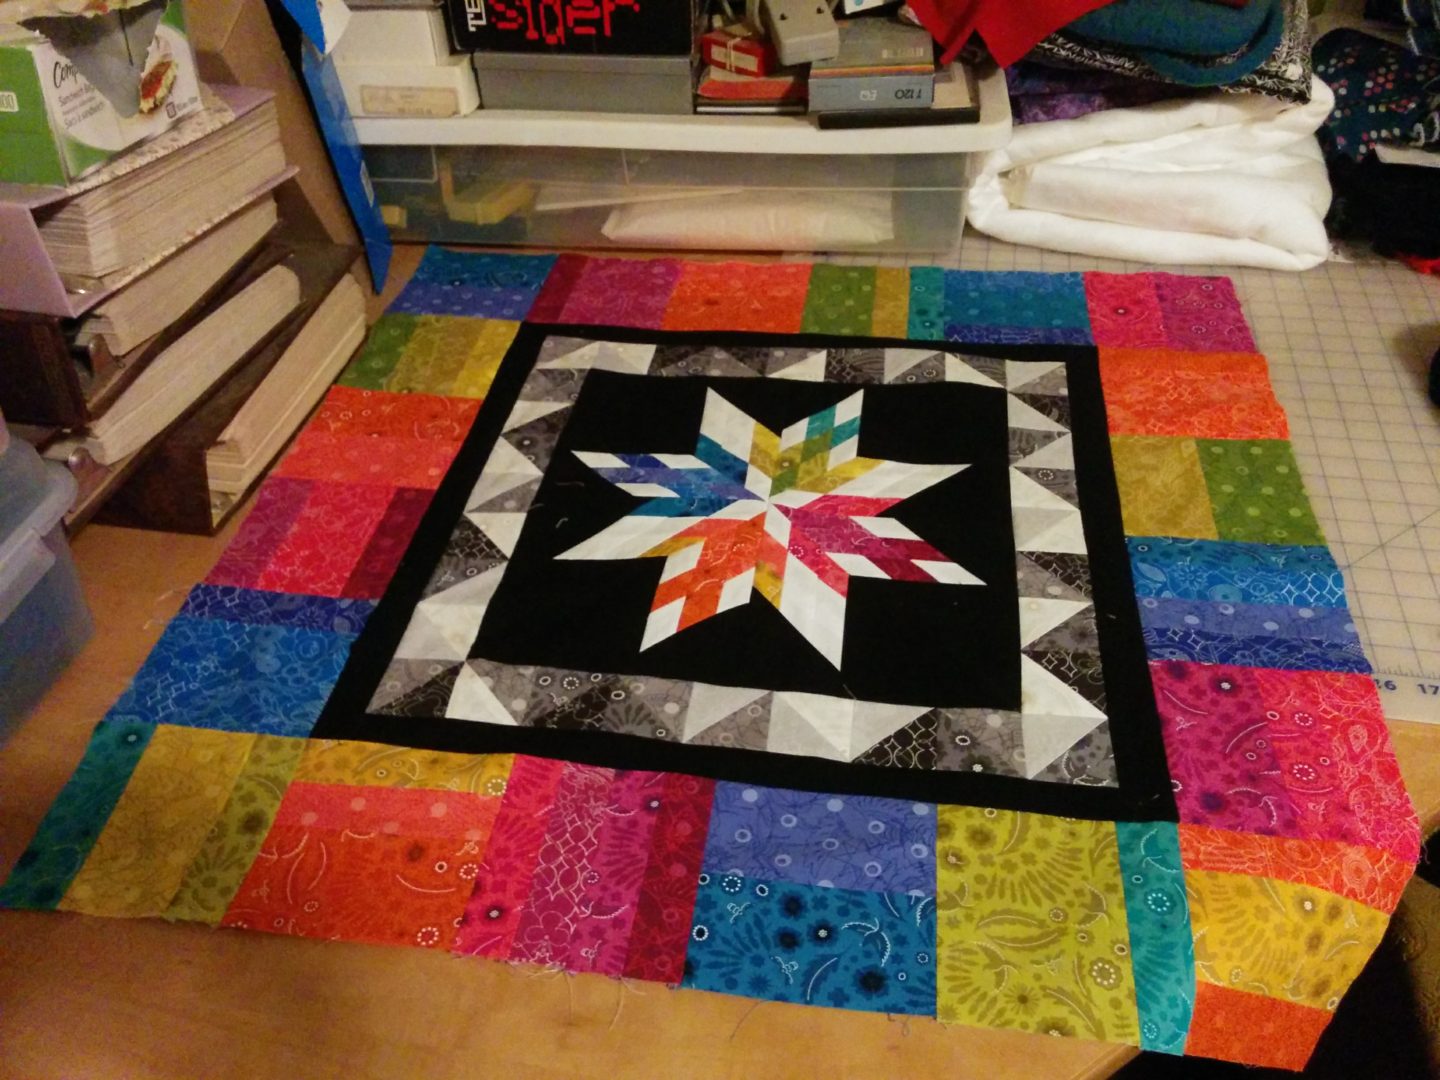
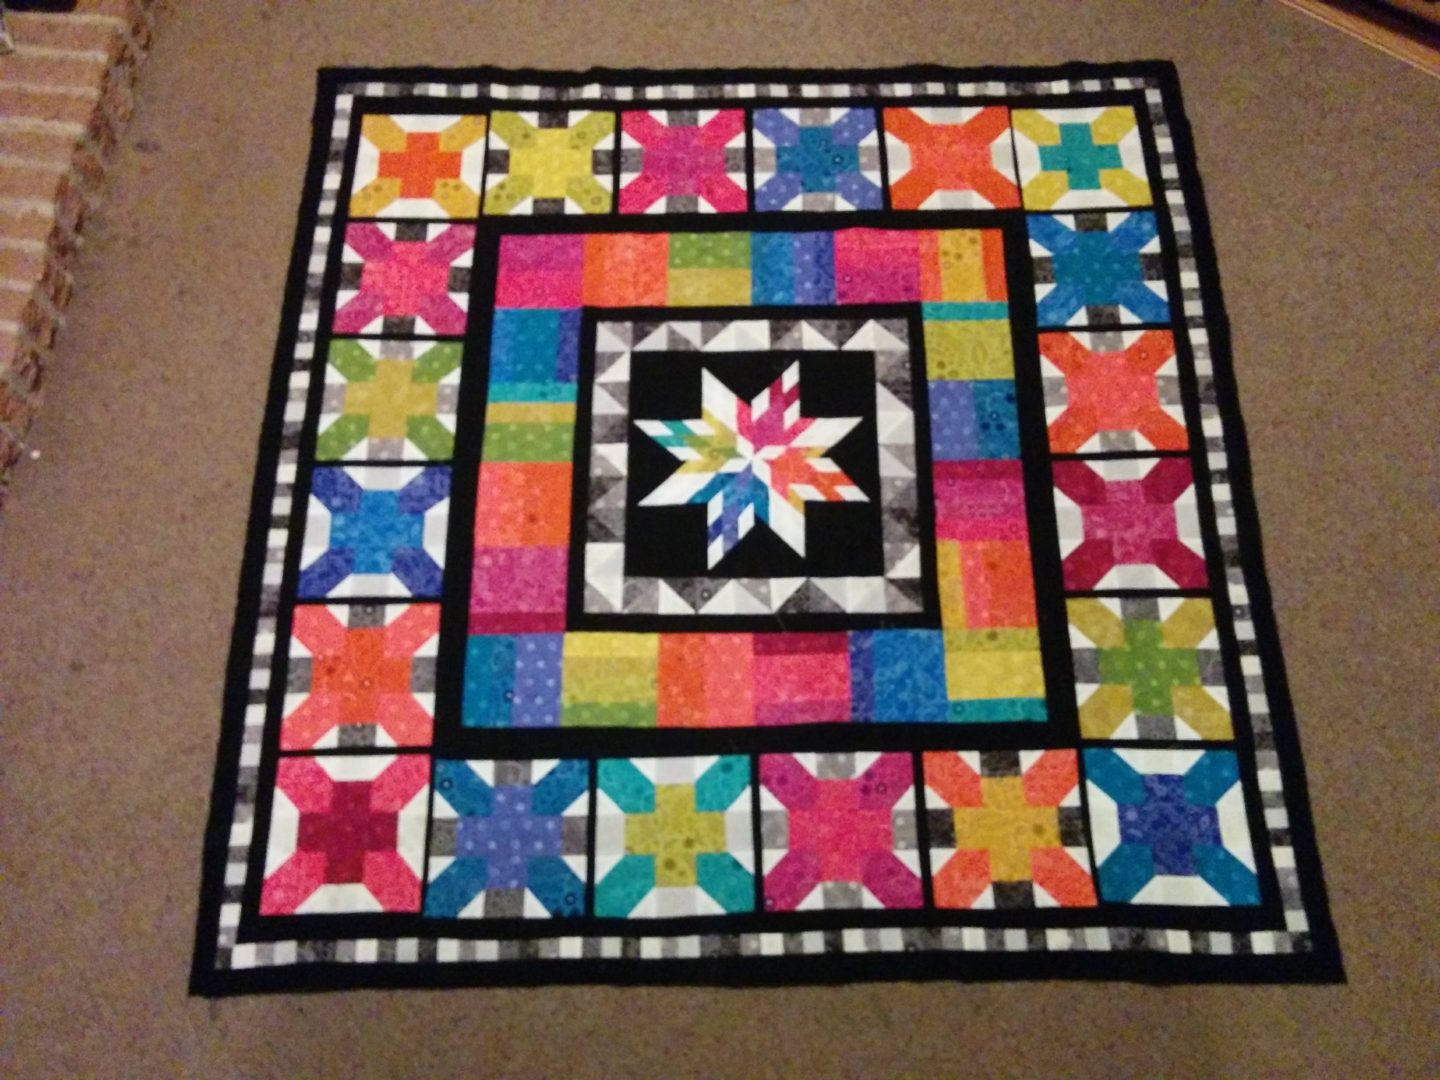
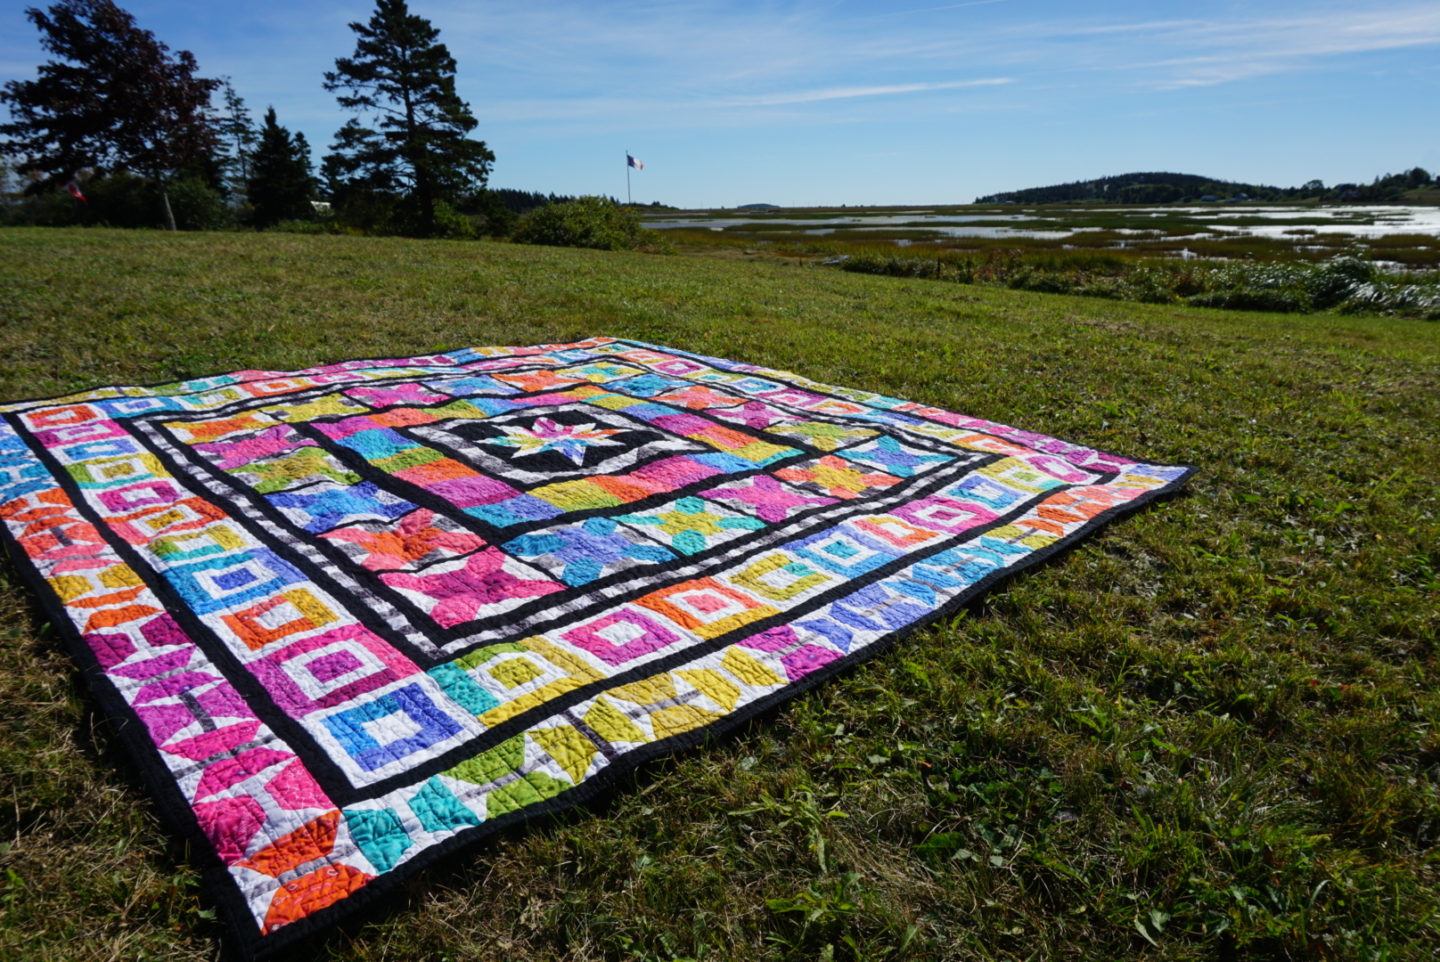
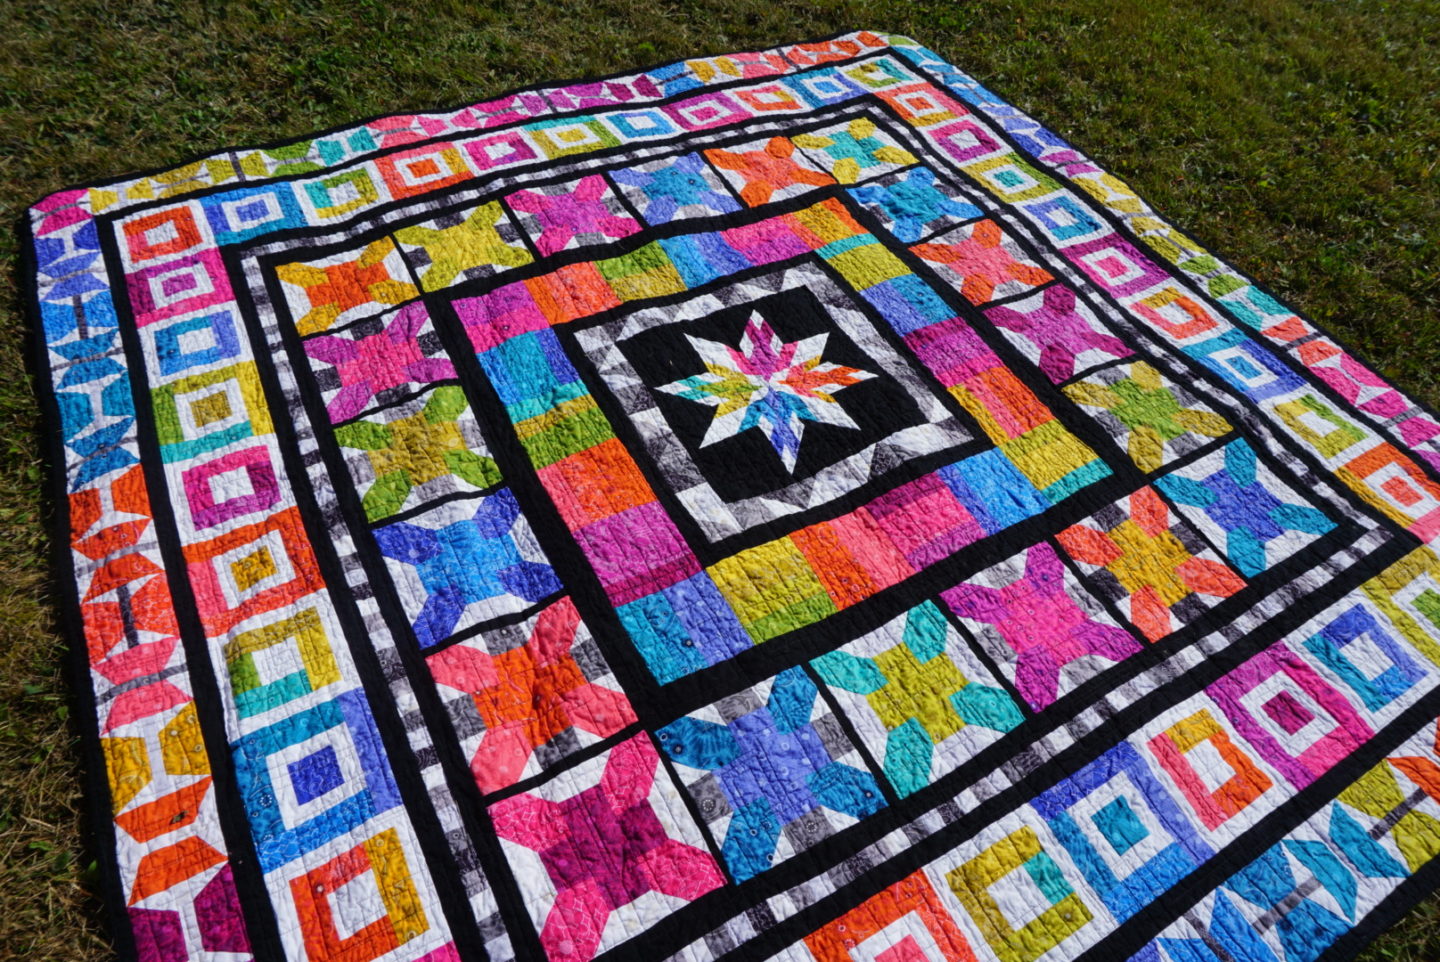
The pattern is by Elizabeth Hartman, and it’s called the Aviatrix Medallion. It’s the second quilt pattern of hers that I’ve made (the first was The Kittens for my sister), and the second I saw the pattern I knew I had to make it. I love how busy it is, how each border is different, how many colours it’s designed for (25! plus black and white), and the overall effect/size. I decided I wanted to use a fat quarter set from one collection/designer for this, and it took me a while to find a collection that had enough different colours in it! 25 is a big number! Luckily, Alison Glass’s Sunprint 2017 collection had 27 or 28 in it, and a bunch of them were neutrals like the pattern asked for. I’ve lusted after Alison’s quilting cottons for a long time now, but never had a project big enough to use as many of the colours as I’d like to, so this was a perfect fit. For the colour scheme, you organize the colours into four colour groups (5 each) and then one neutral group (also 5). Elizabeth Hartman calls the groups “violet”, “orange”, “green”, and “blue”, however as you can see below mine were more like red, orange, green/yellow, and blue. I left out a couple of the colours that were more yellow from the collection, because there was a lot in that colour range to choose from.
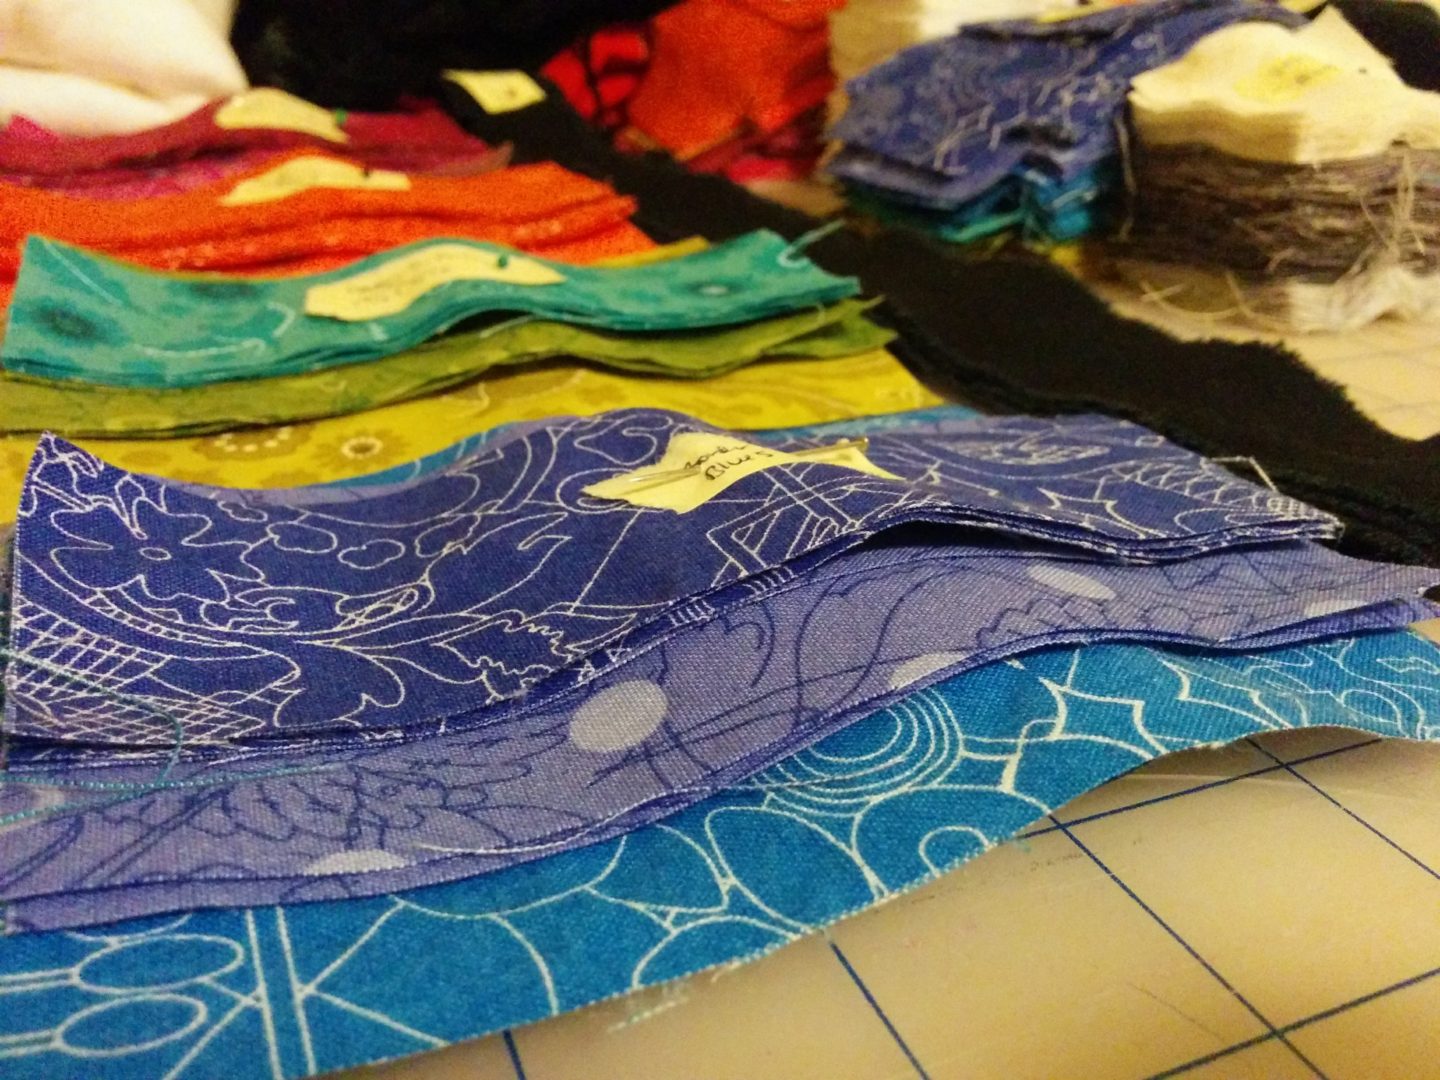
I started cutting out all the pieces on December 12th or 13th, 2017. This was when I was done with school for the term and NEARLY done work. You see, I had given myself a deadline for finishing the top. I didn’t want the project to go on forever, so I forced myself into finishing it. I was going to Toronto for 10 or so days post-Christmas to visit my best friend P, and I made an appointment to use the longarm quilting machine at the workroom while I was there, since it’s a queen-size quilt and I took the course when I lived there so was able to book time on it. This meant I had to finish the entire top (and piece the back from two lengths of fabric) by December 26, because I was leaving early on the 27th. EEK! I finished all the cutting in 3 days, finishing on the 14th of December and starting sewing the same day. I found it was very important with the cutting process to label everything. I don’t know if dedicated quilters have a better system than this, but it worked for me. After cutting everything, I organized it all into columns based on border (border 1, 2, 3, etc.) or medallion. This really did the trick, and helped me feel like was making progress as I sewed, because you’d just slide the whole column over to the sewing machine, lay the combinations out, and chain piece like a fiend.

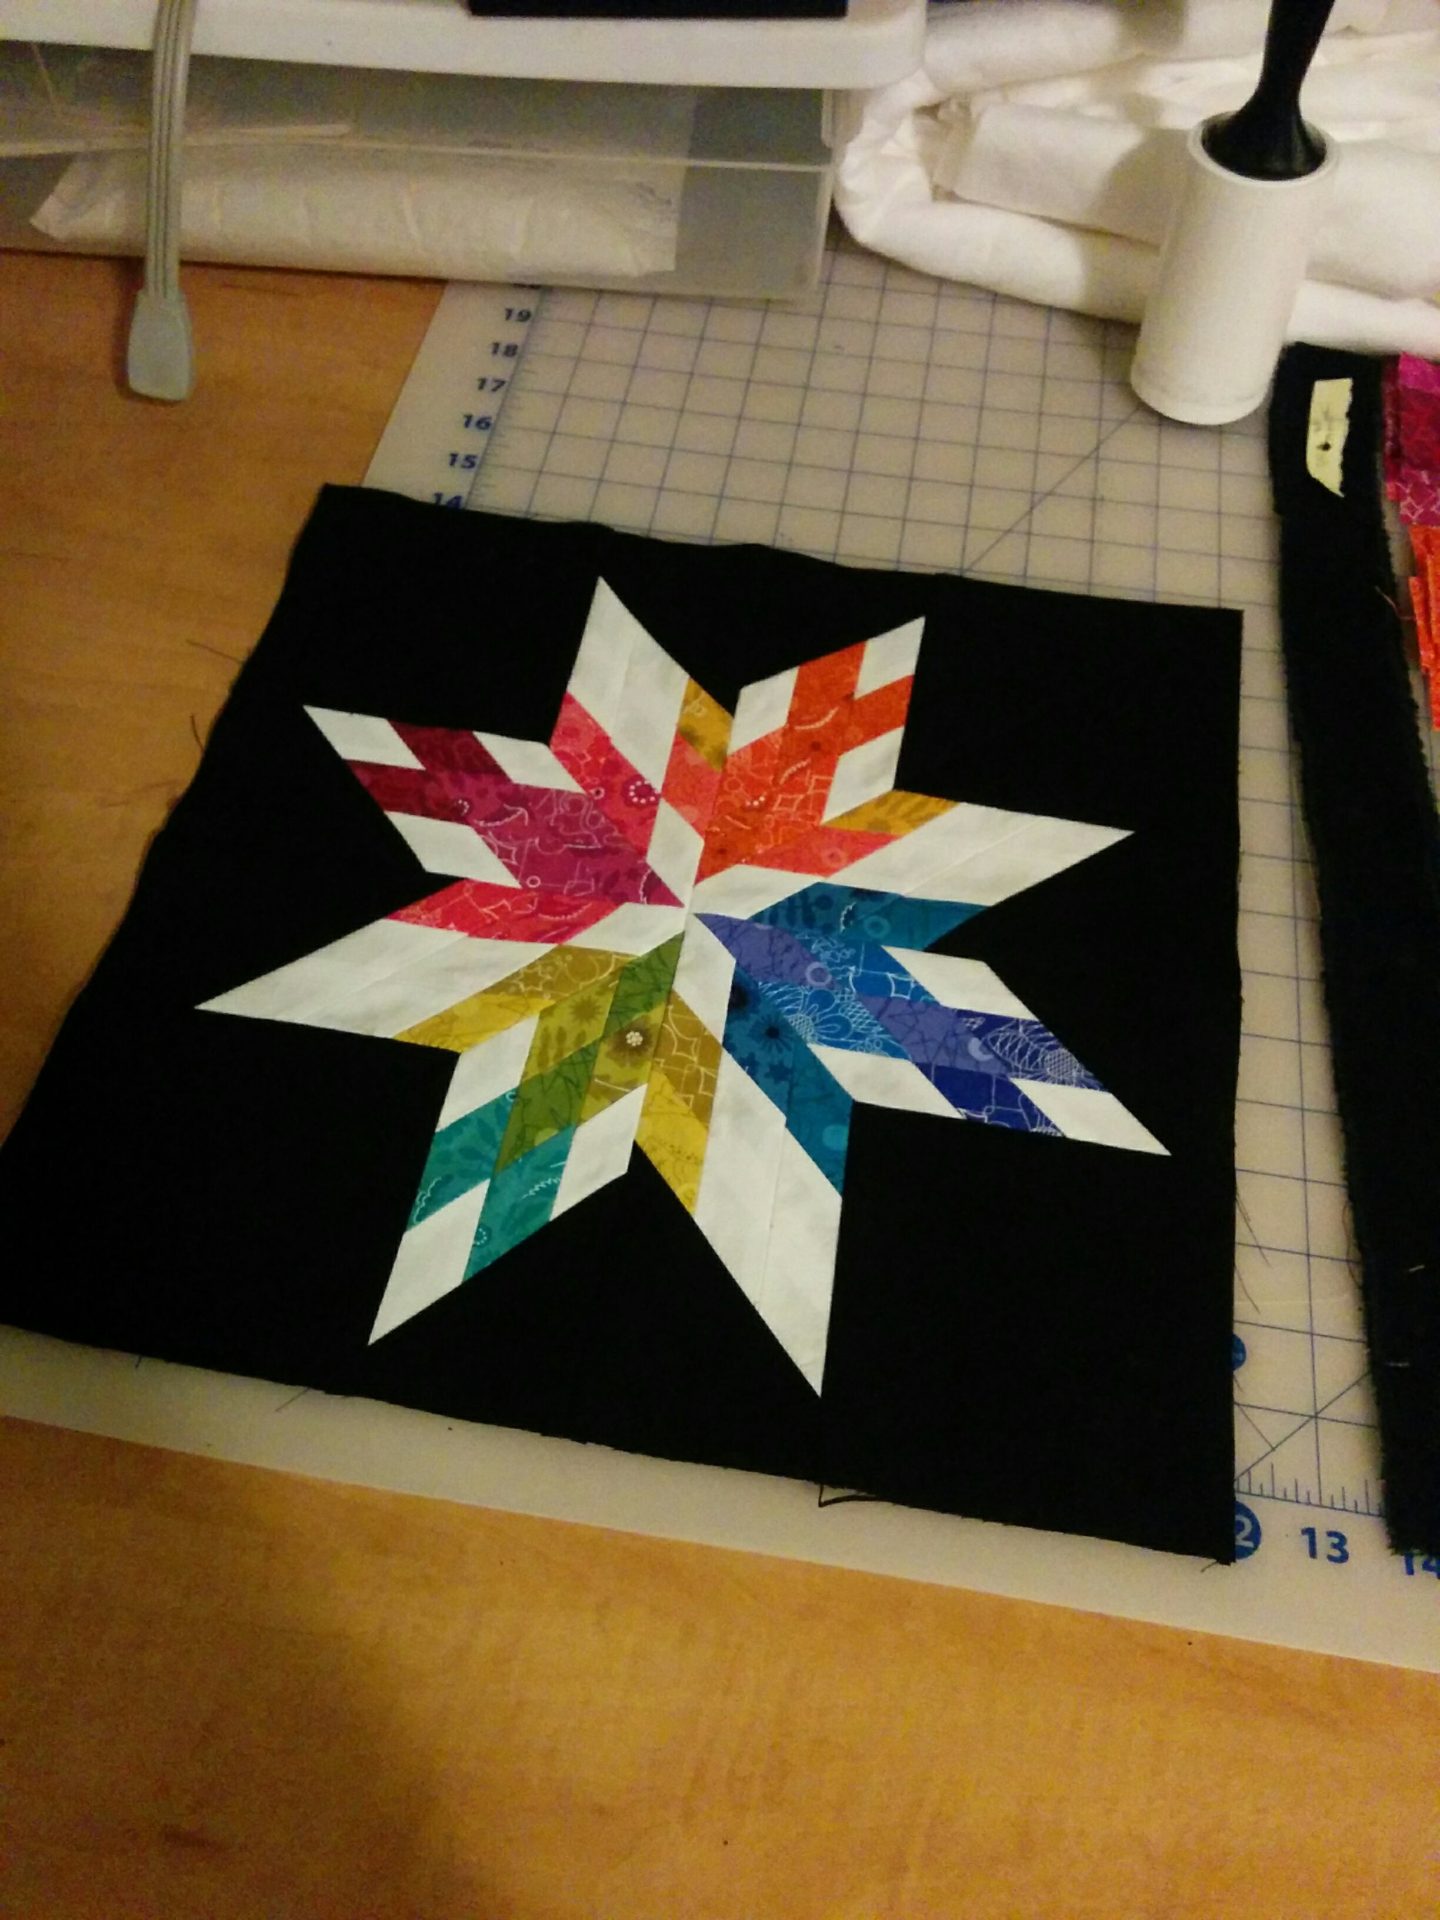
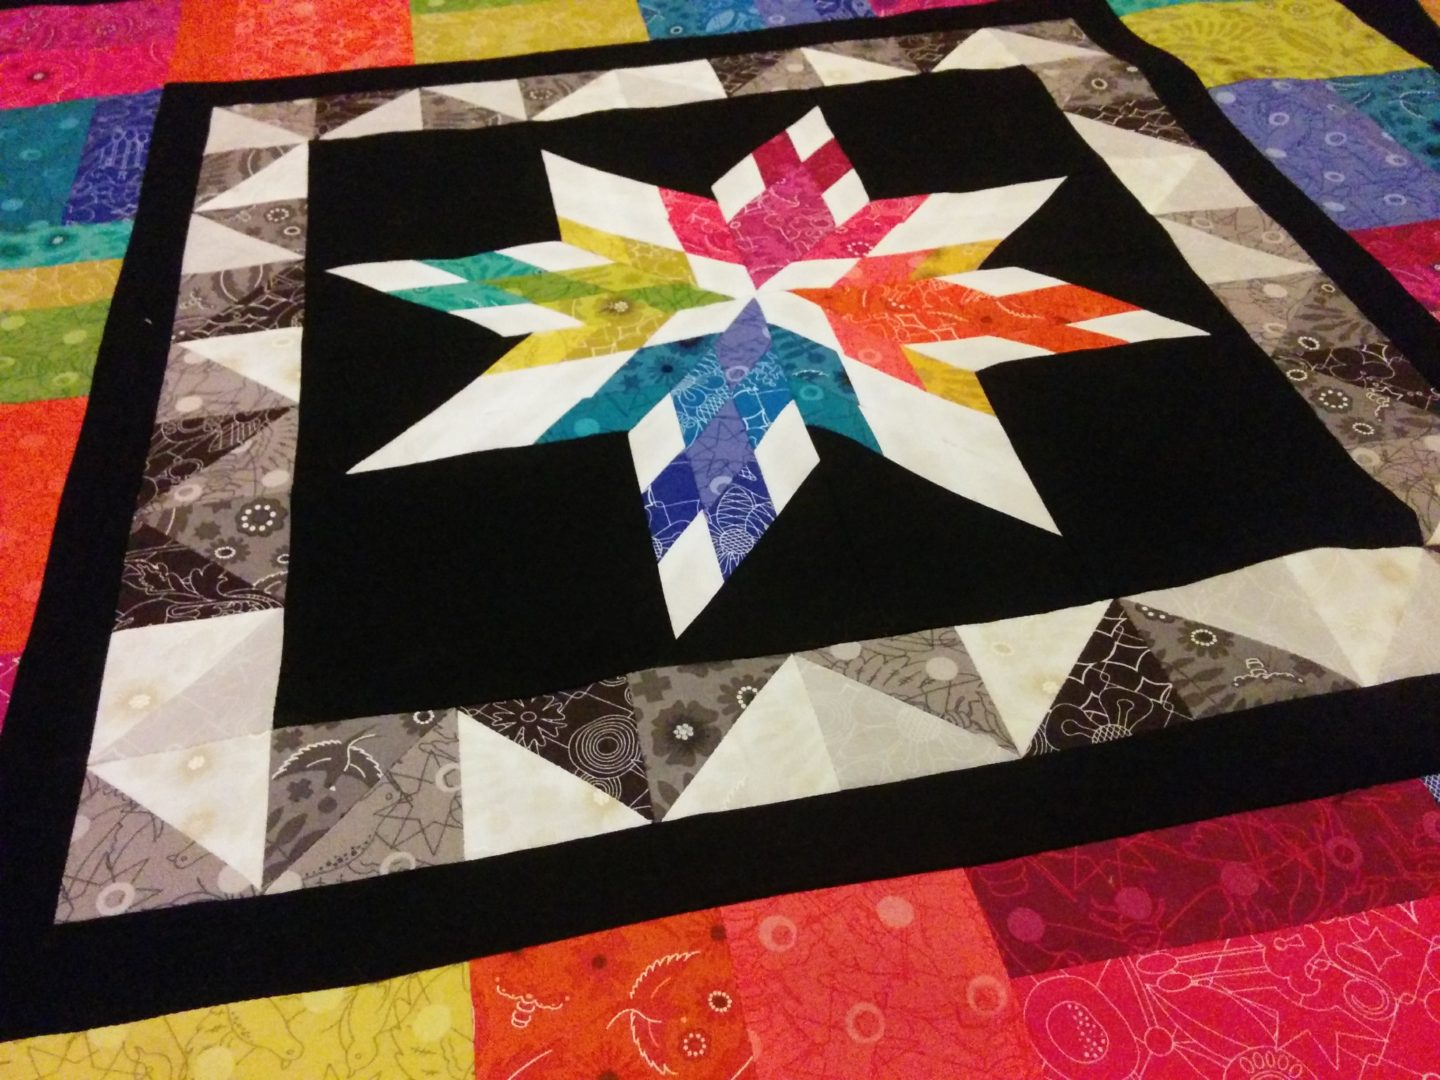
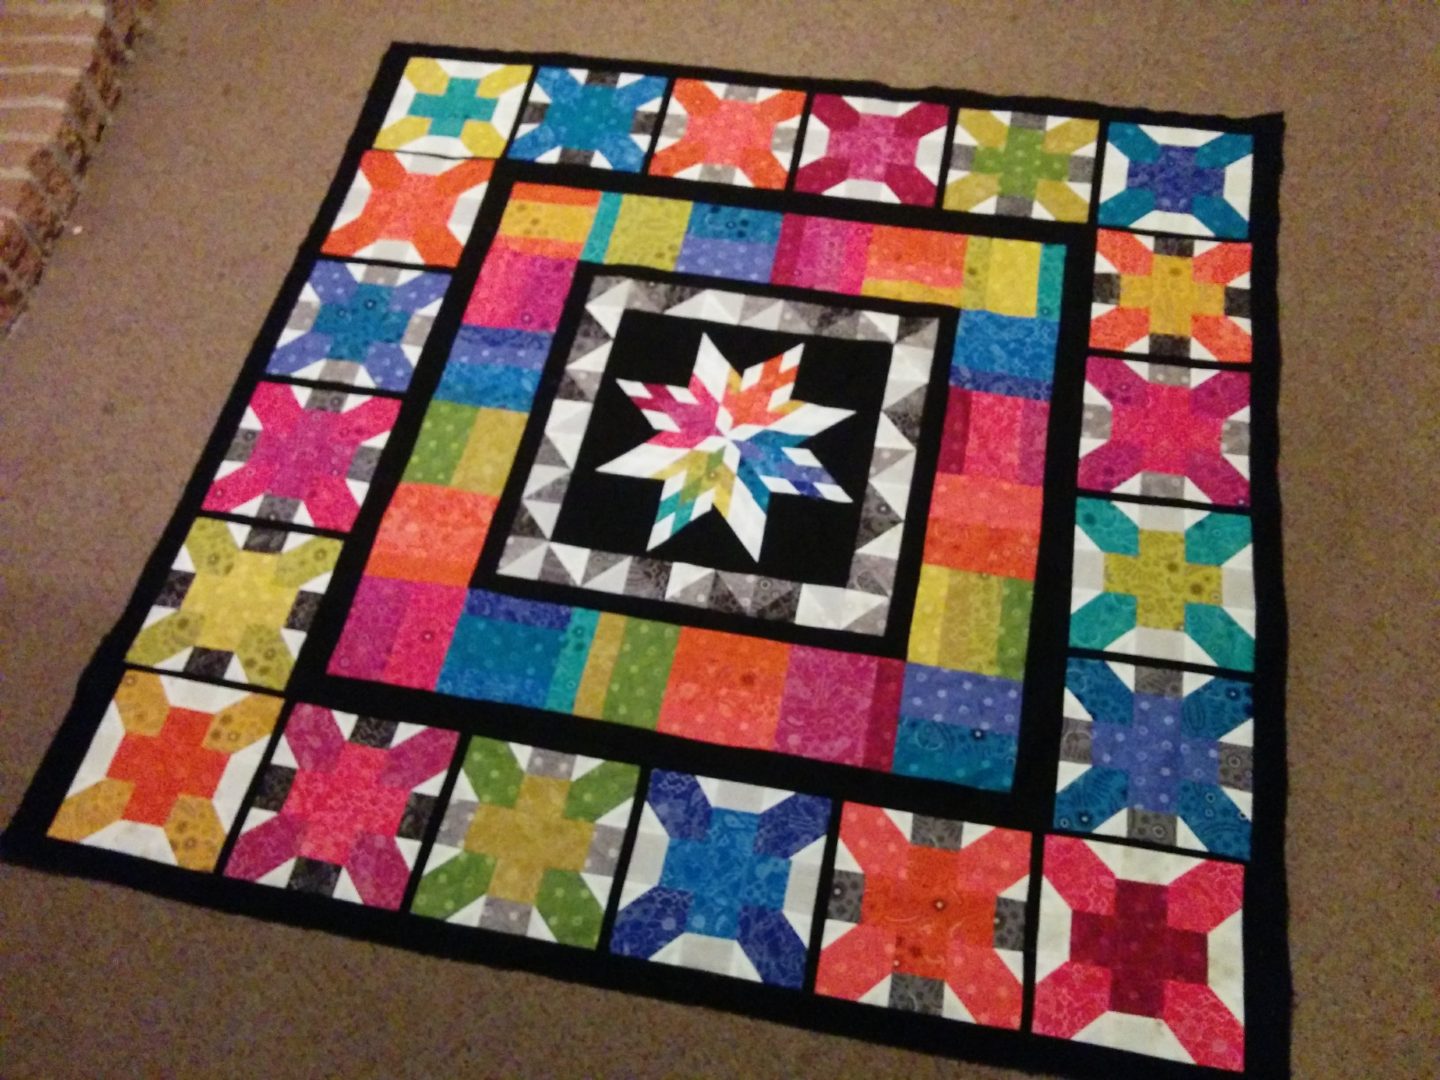
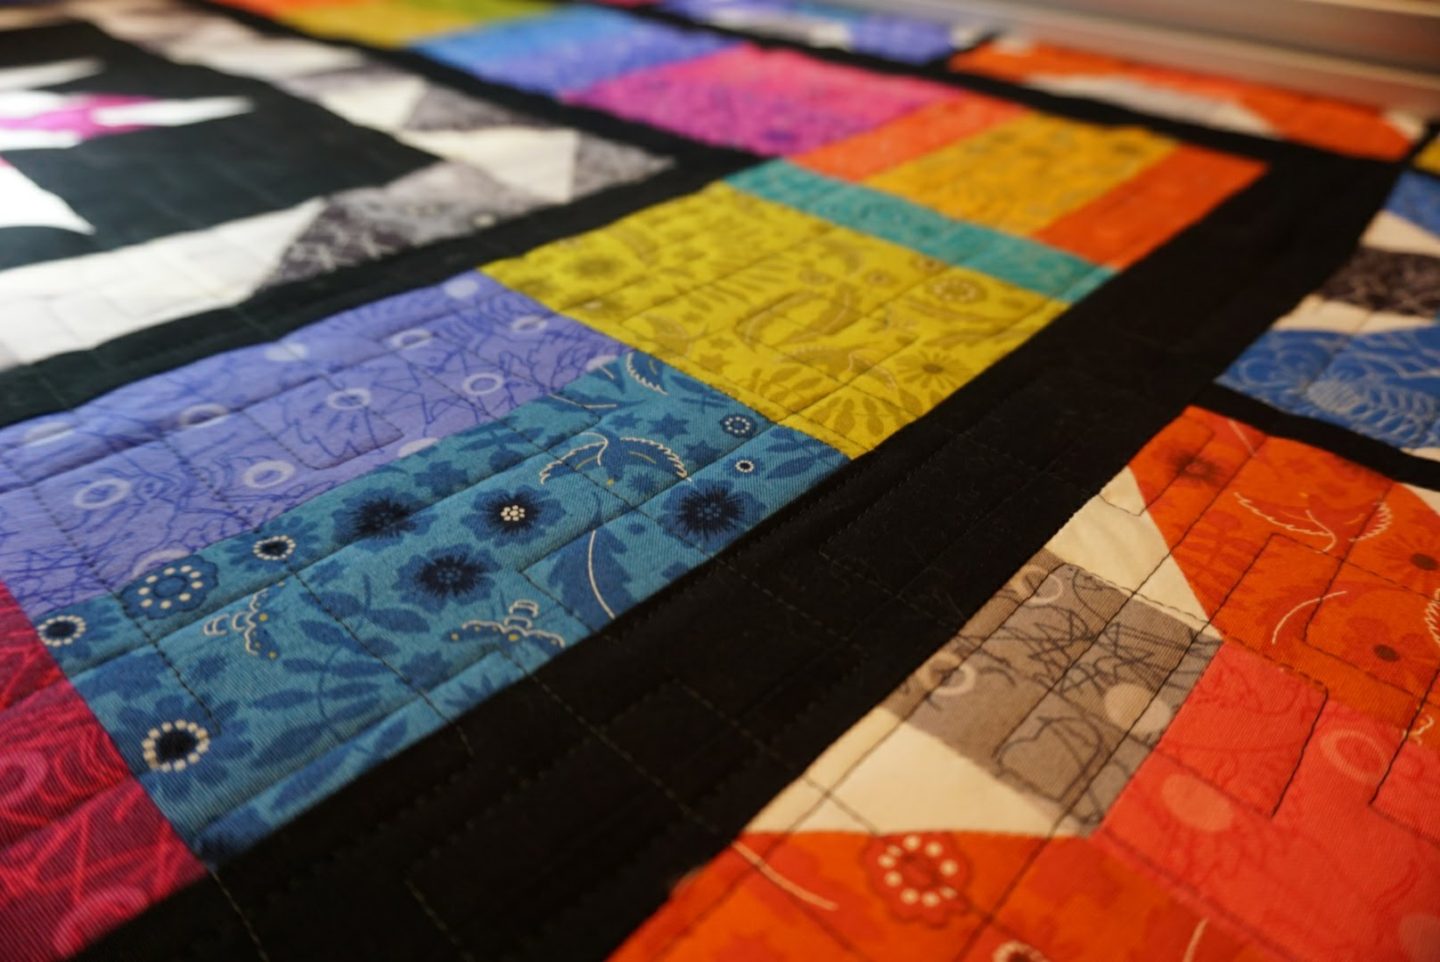
The medallion isn’t perfectly lined up, but I am TOTALLY okay with it. I don’t even notice it now. (I know some people this would infuriate and they’d have to redo it, but I am not that person.) It’s funny because I’ve made a GIANT lonestar in the past and my corners were perfect. It’s one of those things where even if you’ve got experience, things can still go awry! Can you see why it’s called Aviatrix? Look at the four different coloured birds in the medallion! I think that’s so clever. I printed the pattern in black and white so I didn’t realize where the birds were until I’d pieced it, which was a nice surprise. Then I just motored through attaching border by border until it was all done. This involved a lot of late nights and many episodes of mindless TV shows on Netflix and podcasts. You can see the progression below – sorry for the blurriness, I took all of these late at night on my phone camera in my basement! The crazy part looking at the dates on the photos when I was organizing them for this post is that I started piecing on December 14th and finished on…December 20th. The whole thing took me a week. Yes, I am insane. Yes, my back hurt from sewing this much. BUT I WAS SO SATISFIED! Finished piecing, and six days to go before my deadline! (The second from last photo of the progress 100% has the outside border laid out on the floor but not sewn yet, haha.)
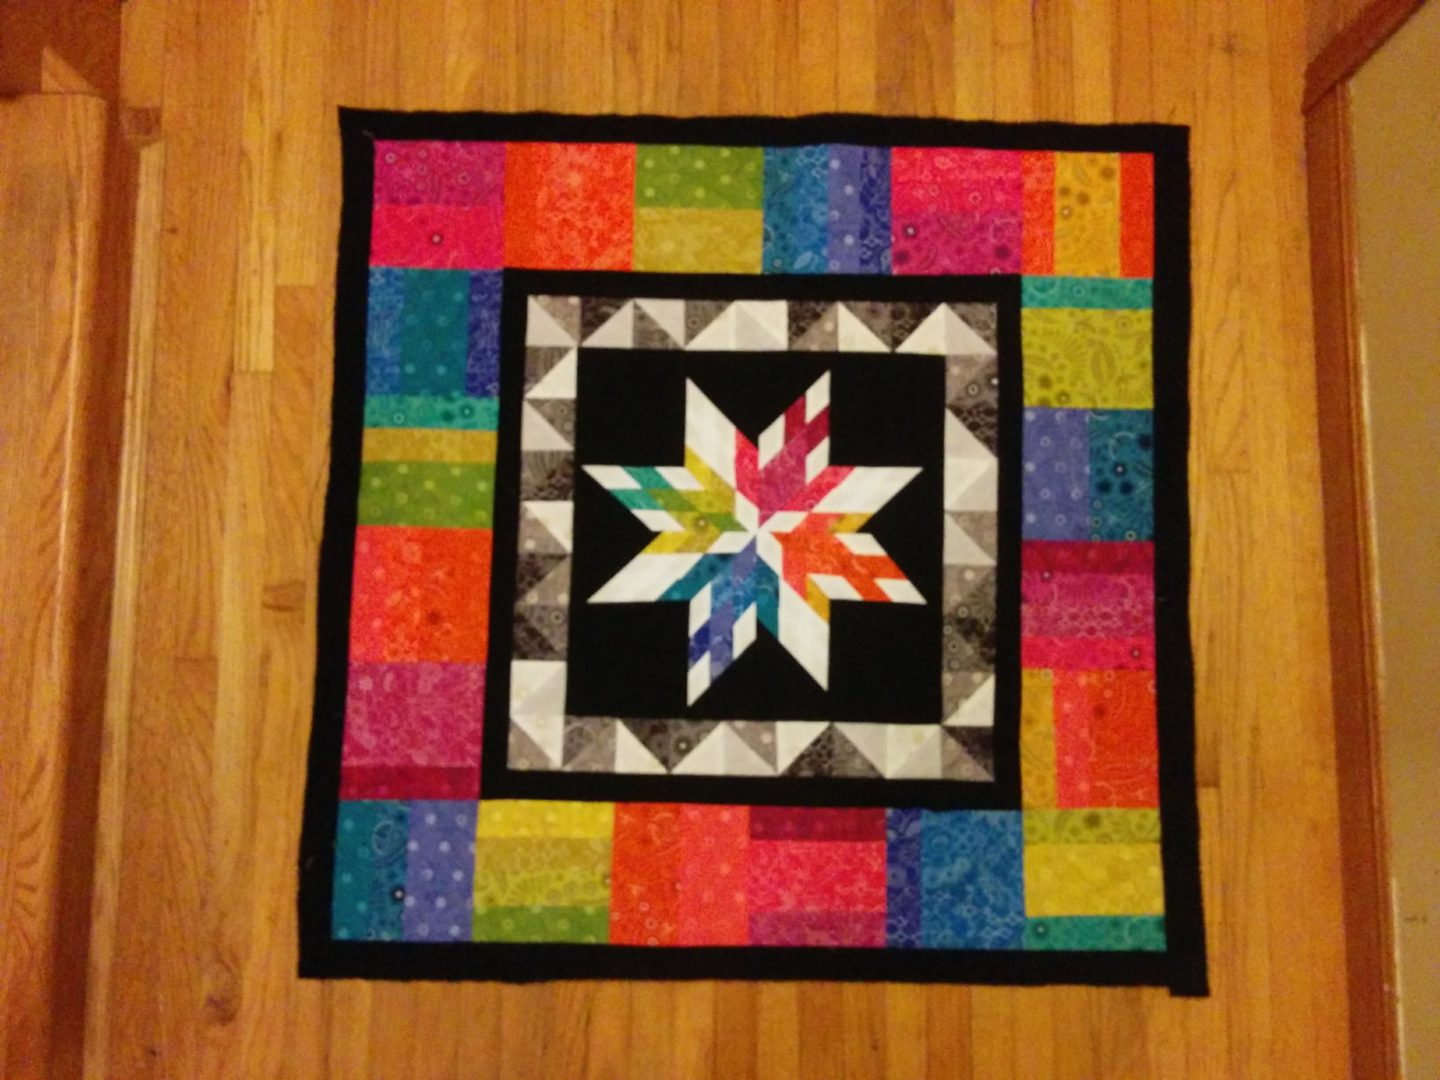
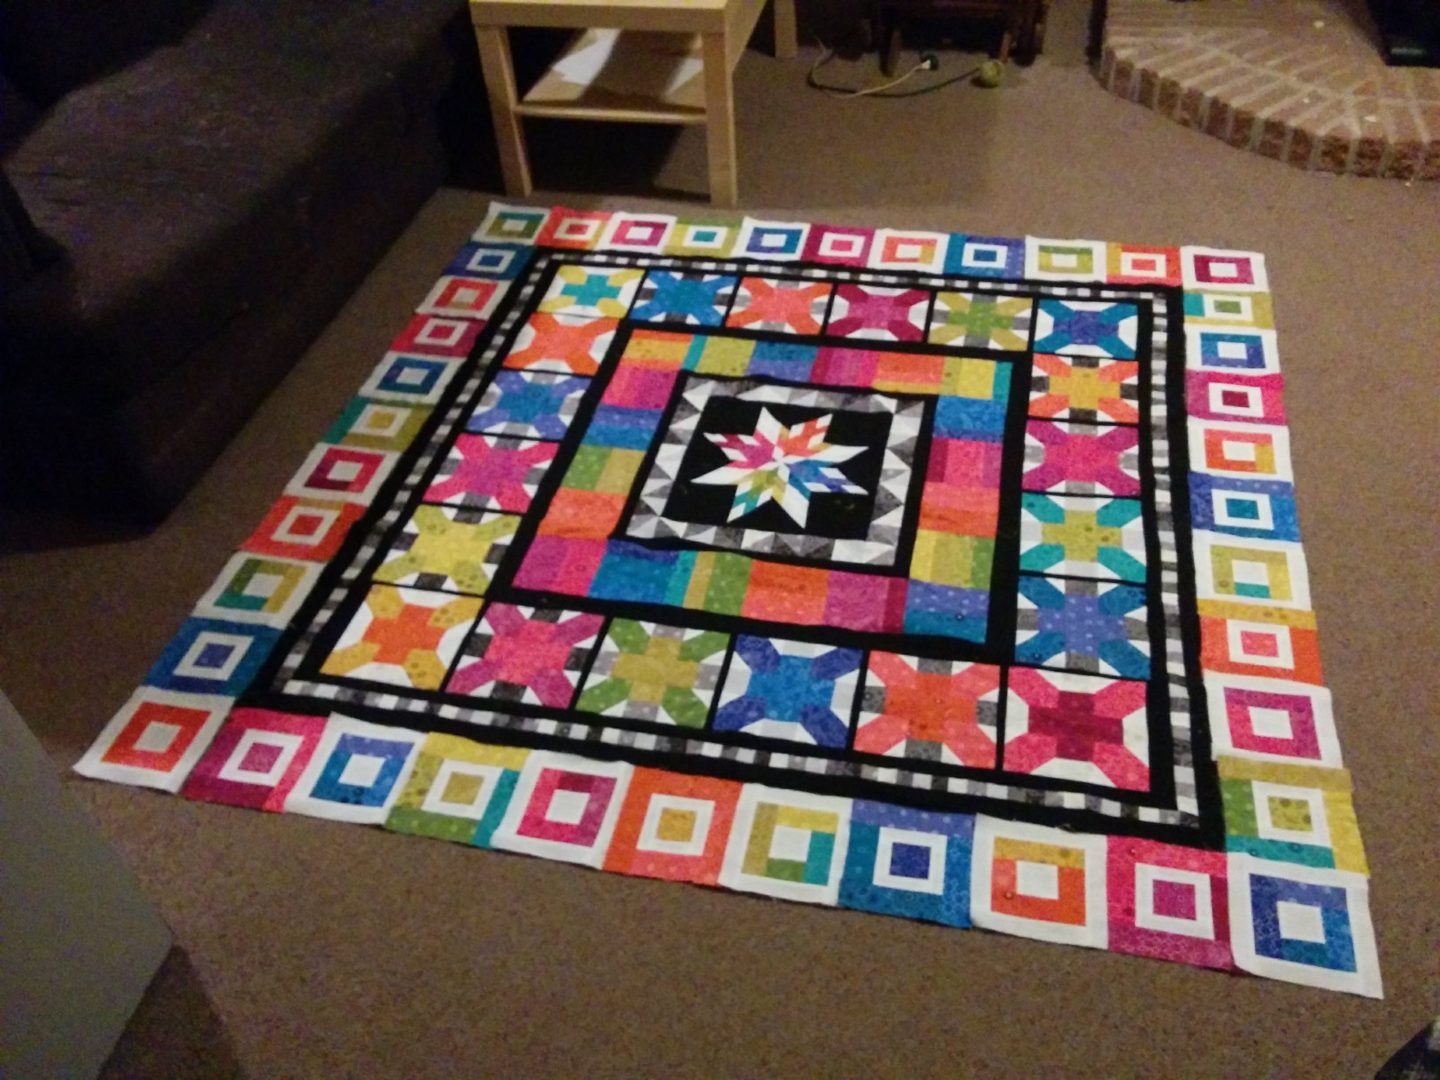
In the outer border in the photo below, those little black strips between the blocks are not supposed to be there. It was very late at night and I was trimming blocks square and accidentally trimmed them to the finished SEWN size and trimmed off all the seam allowances. GAH. So I had to improvise. I don’t think it’s that noticeable unless you get into really intensely examining it, and I don’t mind it. I’m not the most experienced quilter; I think the thing I need to improve on is more accurate cutting. I think the sewing itself is accurate and precise, but when your base materials are not spot on it can lead to errors. Which I will improve on for the next one!

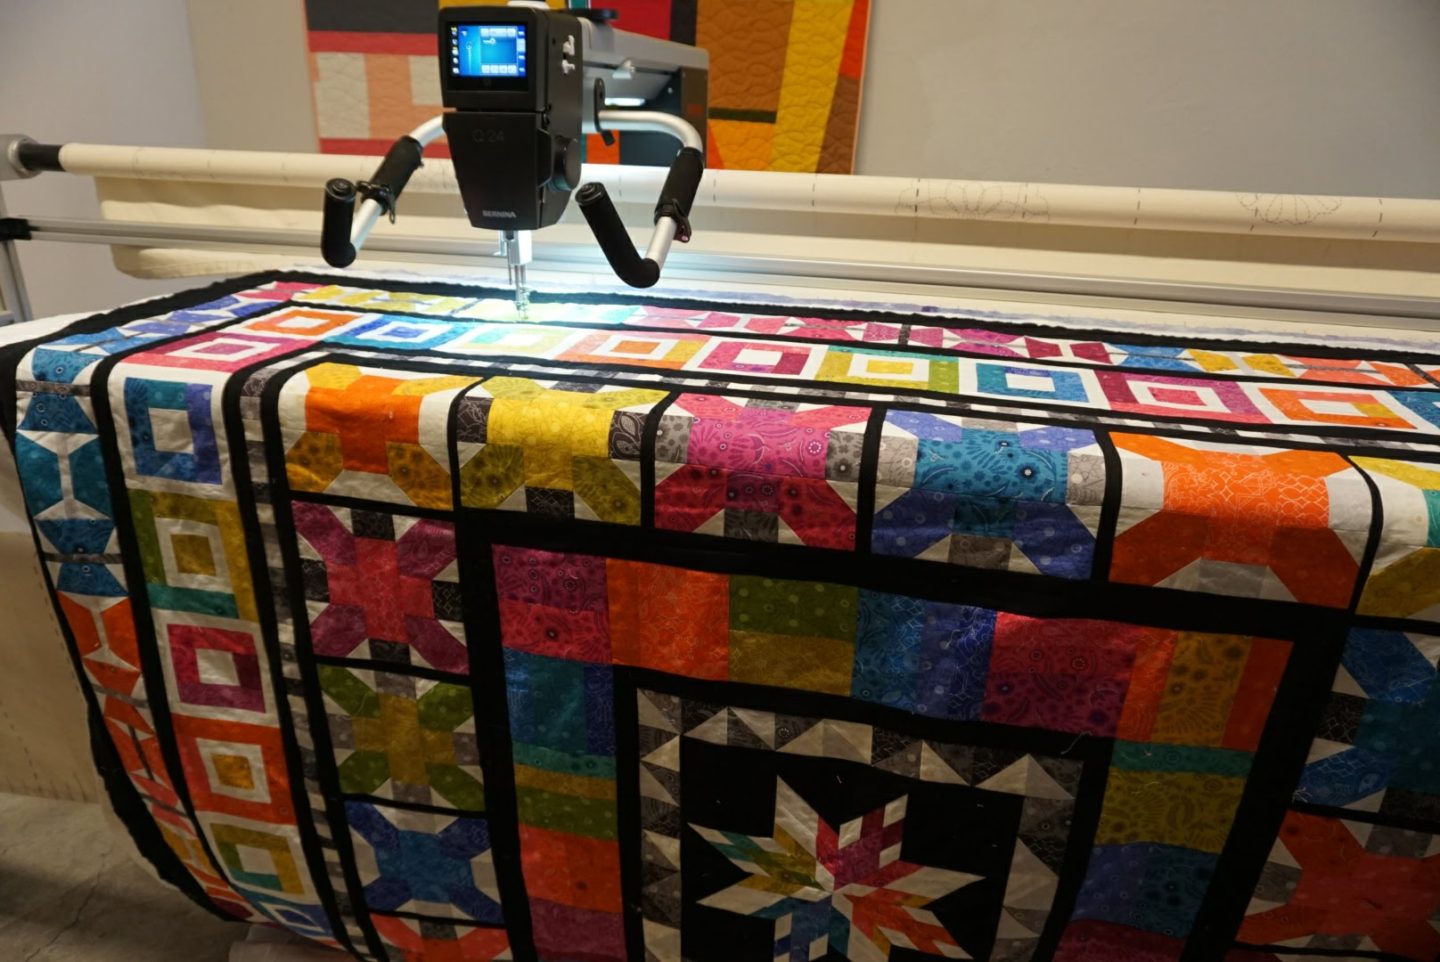
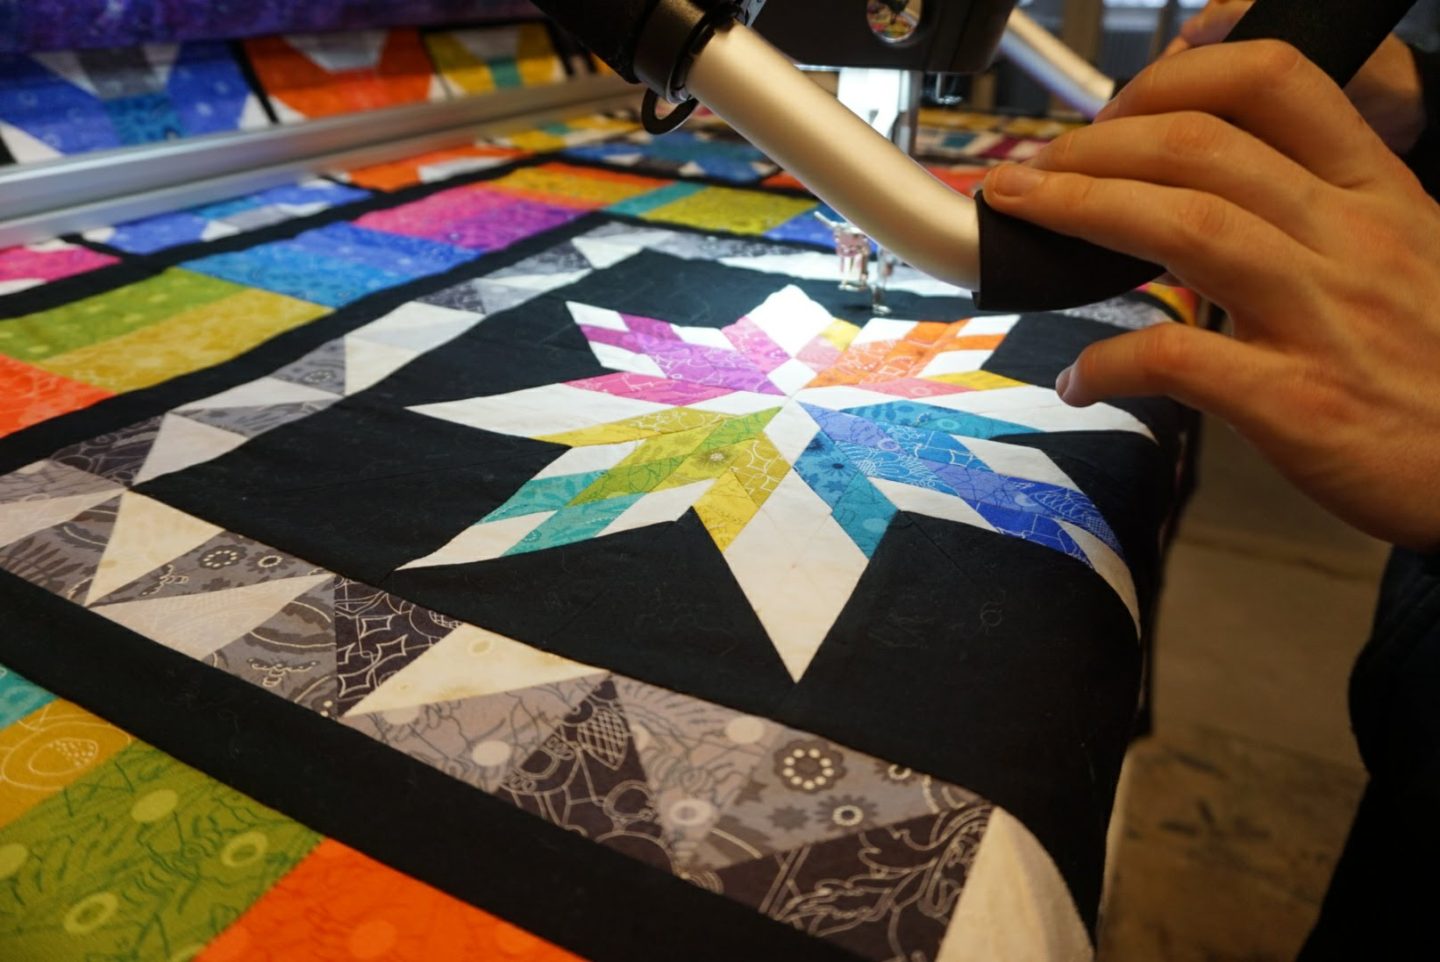
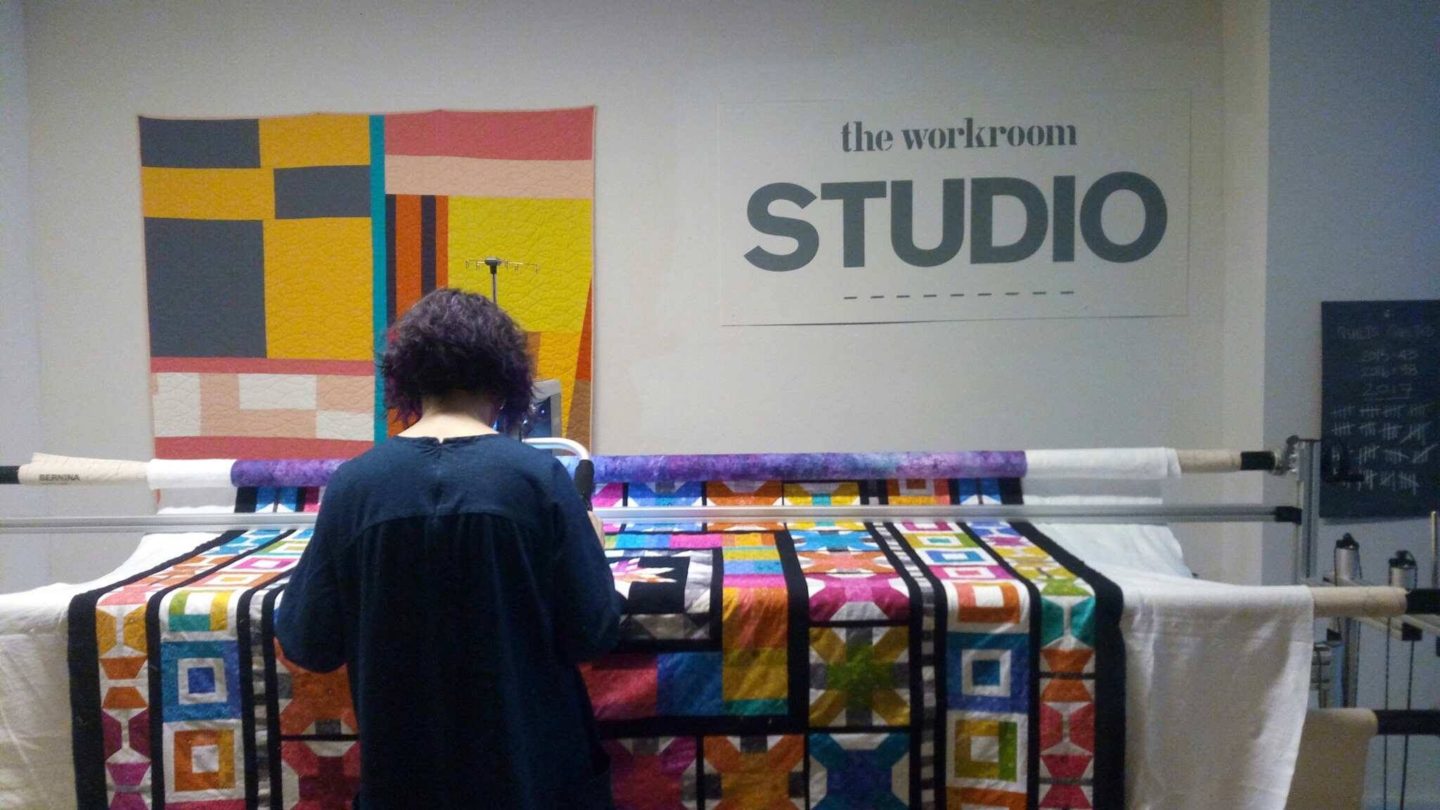
Next was the quilting part! P and I trudged down to the workroom in a snowstorm for my appointment and loaded my quilt onto the longarm. Longarm machines are SO COOL. I took the class when I lived in Toronto which enables you to rent time on the machine, so even though I don’t live there anymore I could still get time on it. If you aren’t a quilter, you are probably having your mind blown that this massive thing is still a sewing machine. There’s a table with fixed rails on it (two of them), and the machine is the giant black thing you see (the bottom deck of it isn’t visible beneath the quilt) and it’s kind of like if you turned a home sewing machine 90 degrees in terms of the arm and needle and such, if you can picture that easier. Except in addition to the two rails on the table, there are also two rails directly under the sewing machine so the rails on the table allow it to move left and right, and the ones under it let it move forward and backward, giving you unlimited free-motion movement. You can also channel lock, which means you prevent it from either going right/left or forward/back and you can make nice straight lines. Generally you would lock it so it could only move right/left, because you can only access one segment of the forward/backward direction of the quilt at once (which will become more clear in a second).
You have to make sure your backing is perfectly squared off, because that’s the part that will actually be attached to the machine. The natural cotton at the top of the photo below is the leader, and you center the back wrong side up and pin it evenly (with many many pins) all along the leader at the top, and also at the bottom. Then, you roll the bottom one until the backing is pulled flat and tight between the upper rails. Then, there are latches that lock them in place and prevent backward rolling. THEN you lay your batting smoothly on top of the backing (part will hang down in the front as seen below), and then your quilt top on top of that, which will also hang down. You tack it in place along the top of the quilt top with a line of long stitches horizontally (channel locking is useful for this step!). And you’re ready to go! It’s great for bigger quilts which can be cumbersome to fit in your own machine. There is a whole industry of longarm quilters who own these machines and you can ship your quilts to them to be quilted professionally. They are WIZARDS. I am a lowly peon compared to them in terms of using these machines. This was only the 4th quilt I’d quilted on this machine, so I’m not exactly experienced.
I decided on an overall pattern of quilting for this, because I knew if I got into a custom design that was tailored to the outline of each border I would be there for DAYS AND DAYS and I just didn’t have that amount of time because I wanted to actually do other things on my trip besides quilt. P took a few turns when I got bored/tired, and his quilting was much more precise and careful than mine. I did a squared off doodle over everything, and he was able to continue my pattern and put me to shame. It makes me happy to look at the finished quilt and know that my friend had a hand in doing a part of it.


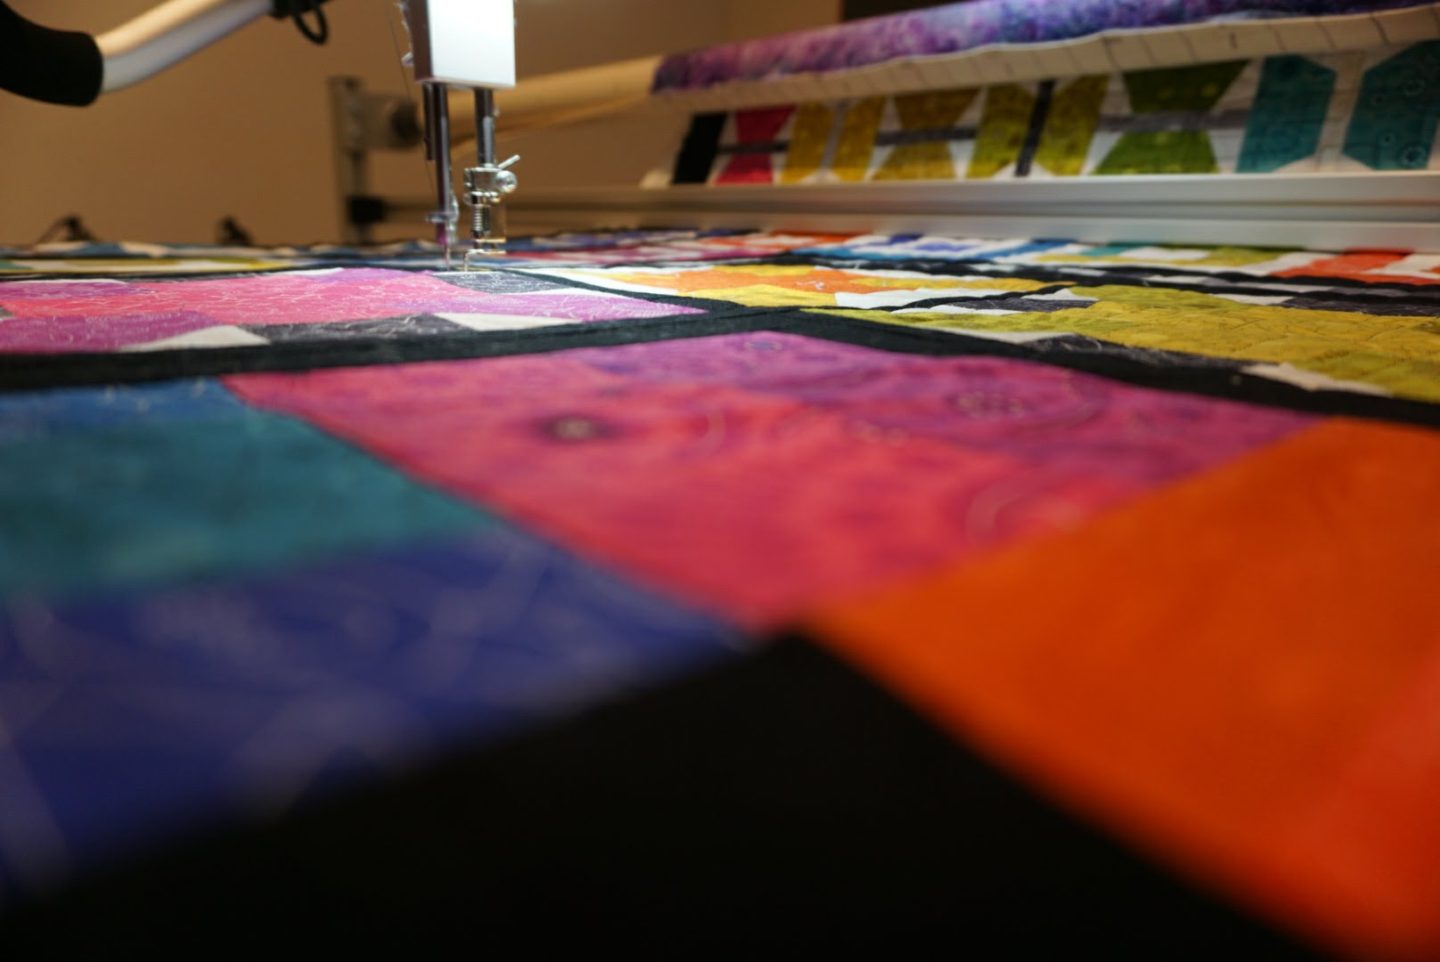
As you can see, this is clearly P’s work and not mine. My corners were not as consistently sharp as his because he had the fear of messing up all my hard work, whereas I would get on a roll and get going quicker and get less accurate. Ooooops.
You can see on the chalk board to the left the tally of how many quilts were done on the longarm each calendar year since they’d gotten the machine at the shop. It was fun to be doing mine very close to the end of the year, since there were so many notches on the board! You can see in the next few photos the finished quilt before it was bound and before it was washed. So smooth and flat!


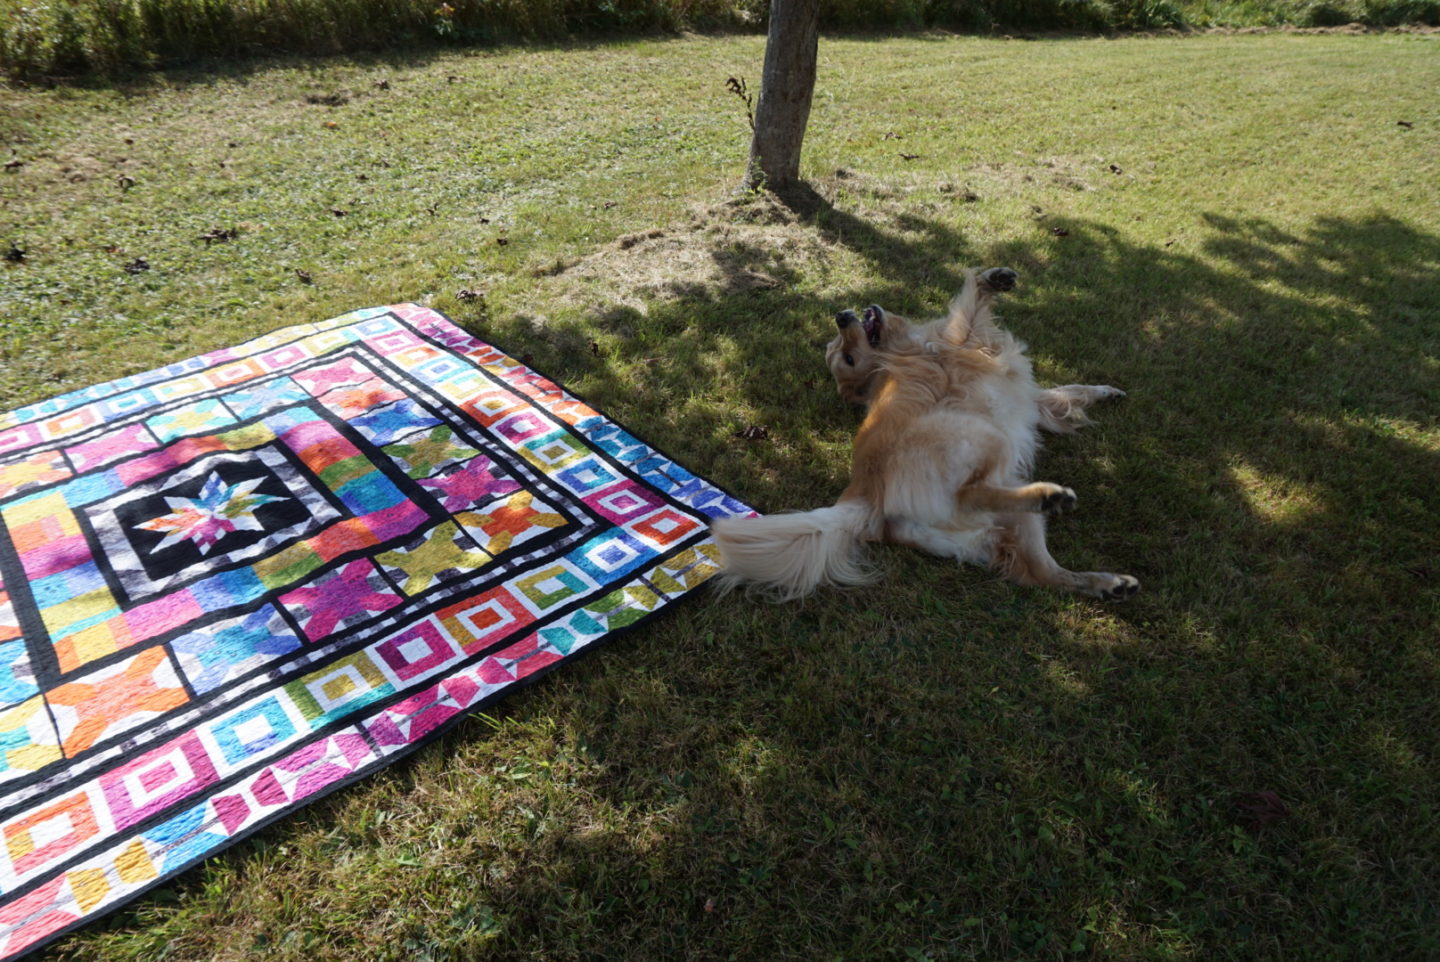
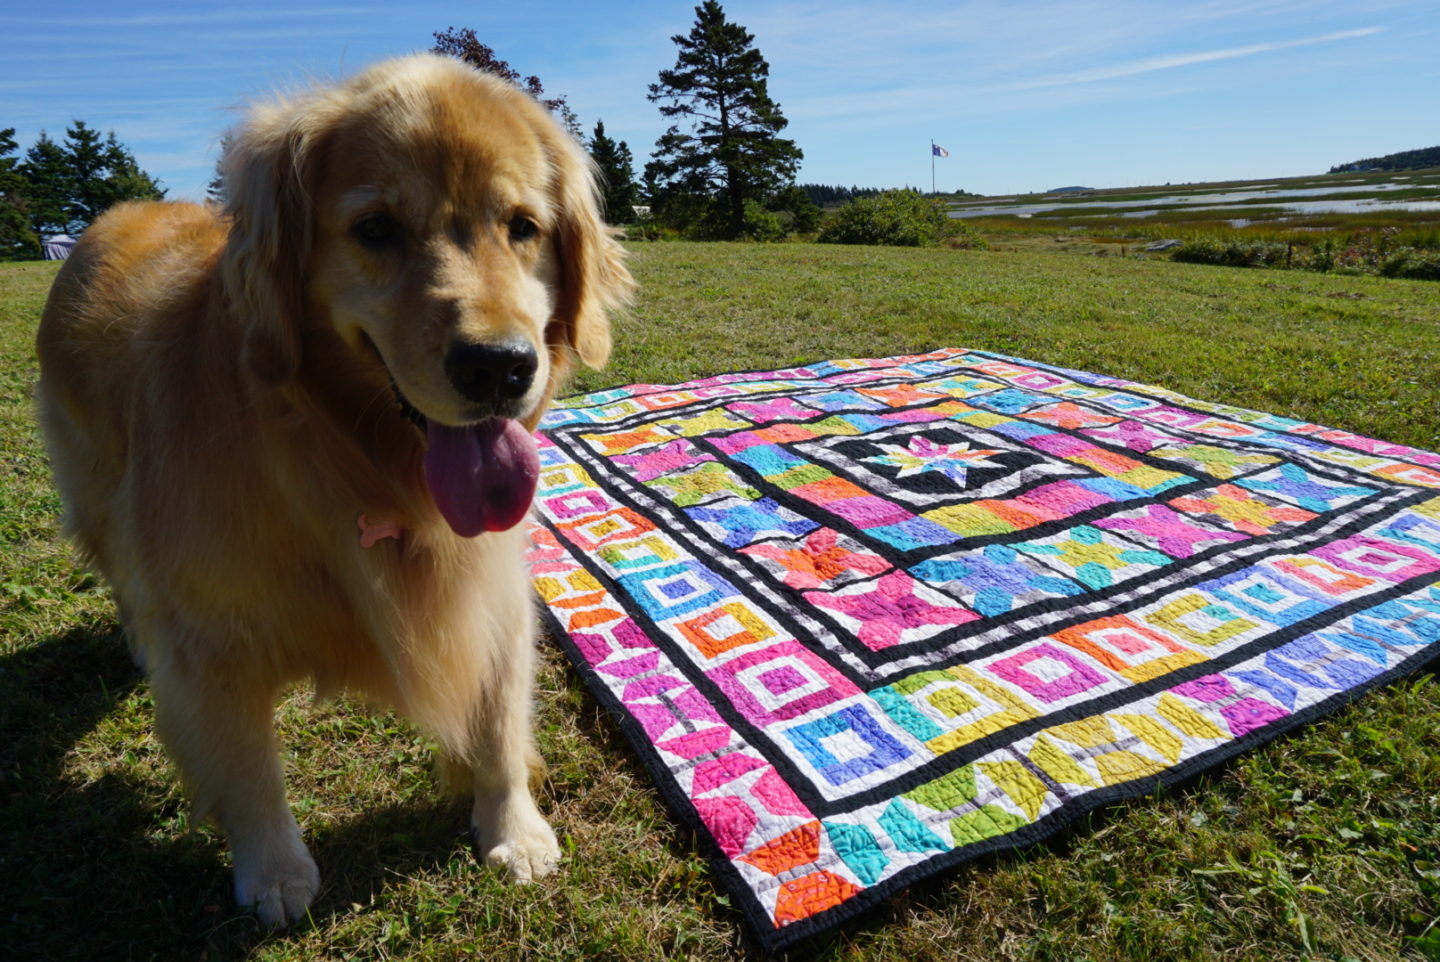
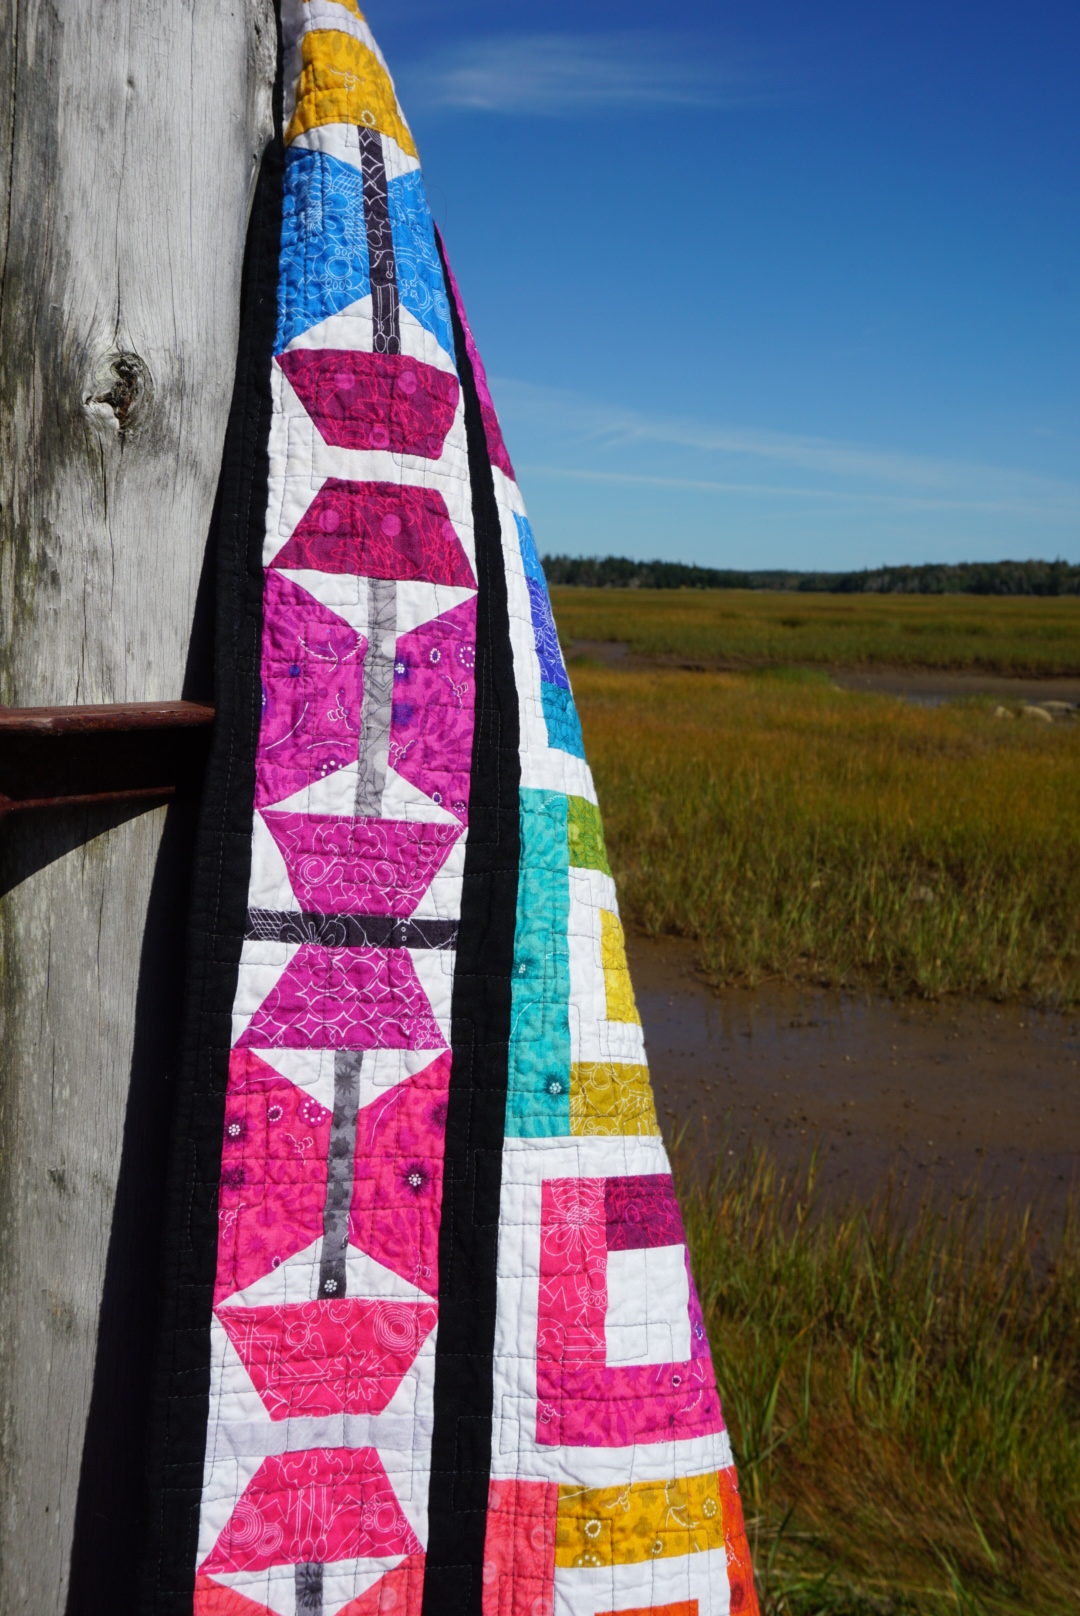
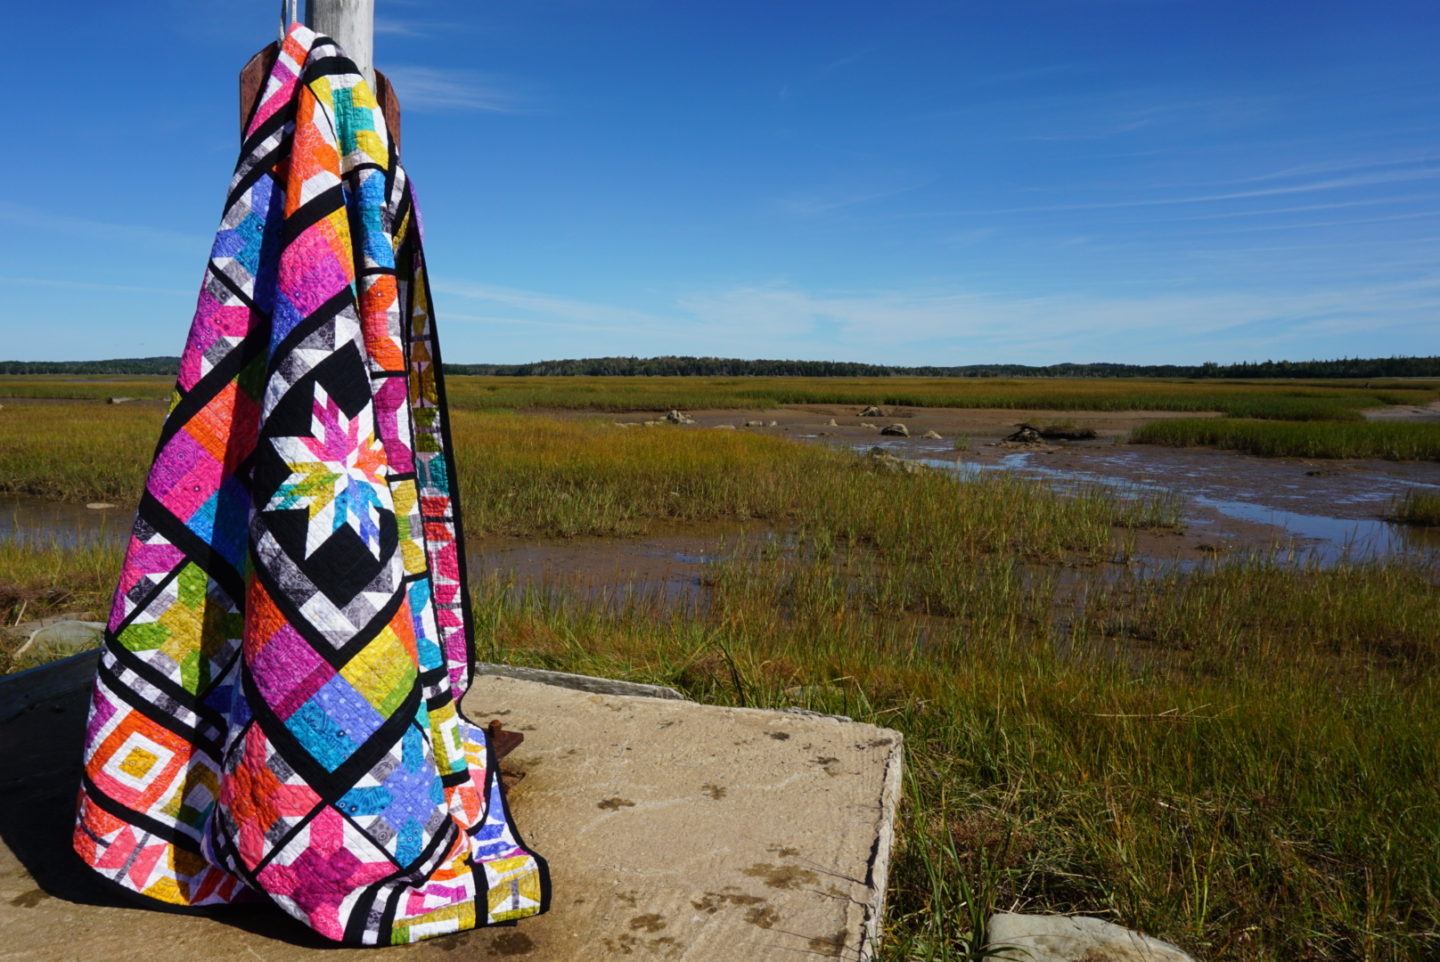
Finally, yesterday we had a BEAUTIFUL day and I headed down to a lot of land by the ocean that my uncle owns to take some nice photos of the finished quilt, seeing as it’s been in use on my bed for months at this point. By the way, it’s Canadian Thanksgiving this weekend! So nice to have Monday off. It’s a peaceful affair here, with family dinner and turkey (although my family’s doing a pot roast instead) – we keep it more separate from Christmas and conduct the weekend with much less fanfare than our neighbours to the south. (No intense shopping!) It was nice to head down to the ocean with my mum’s dog Sophie and get some good photos! Sophie insisted on “helping”, otherwise known as galloping around, trying to the lay on the quilt, going in the mud, and then getting miffed when I forcibly stopped her from getting her muddy paws all over my quilt. But she’s cute. 🙂 I got there right at low tide, so you can mostly just see mud and not water. I love how the bright colours of the quilt look against the muted natural colours.


 \
\ 

 Are any of you readers garment sewers who also make quilts? I’ve gotten the impression that most people who are hardcore into sewing their own clothes aren’t into quilting – is this true? And I’ll let Sophie have the final word/frolick!