Happy 2025! It feels correct that my first blog post of the year is about a project that took me the majority of 2024 to complete. At the end of 2023 (I know, we’re really rewinding here), I had just finished a truly gargantuan project – quilting a full quilt by hand. My feelings about hand quilting really went on a journey throughout that project. You can read details about it here, here, here, and here. In summary, there were times when I hated hand quilting, felt like I was terrible at it, embraced the process, felt connected to my mum and my grandma, felt like I was improving my skills, and in the end, I came away really enjoying the process and felt like I wanted to do a hand quilting project that was mine from start to finish. I launched into that straight away, but in retrospect I think my motivation for hand quilting and that kind of slow project was nearly at capacity, and there wasn’t enough remaining at that time to actually complete the new project. So I stalled out in February 2024 (for very distinct reasons that I’ll get into below) and didn’t get back into it again until I held myself hostage with the project on a sewing getaway weekend with some crafting friends. That began the final push to the end of the project, which I finished on the afternoon of Halloween 2024! Below is a photo of the finished project, a completely made up appliqué design based on historical anatomy drawings, hand appliquéd, hand quilted, and based on top of the Steph Time Side Tie Top. Take a peek. To borrow a TV trope: you might be wondering how I got here. Let’s go back to the beginning of the story!
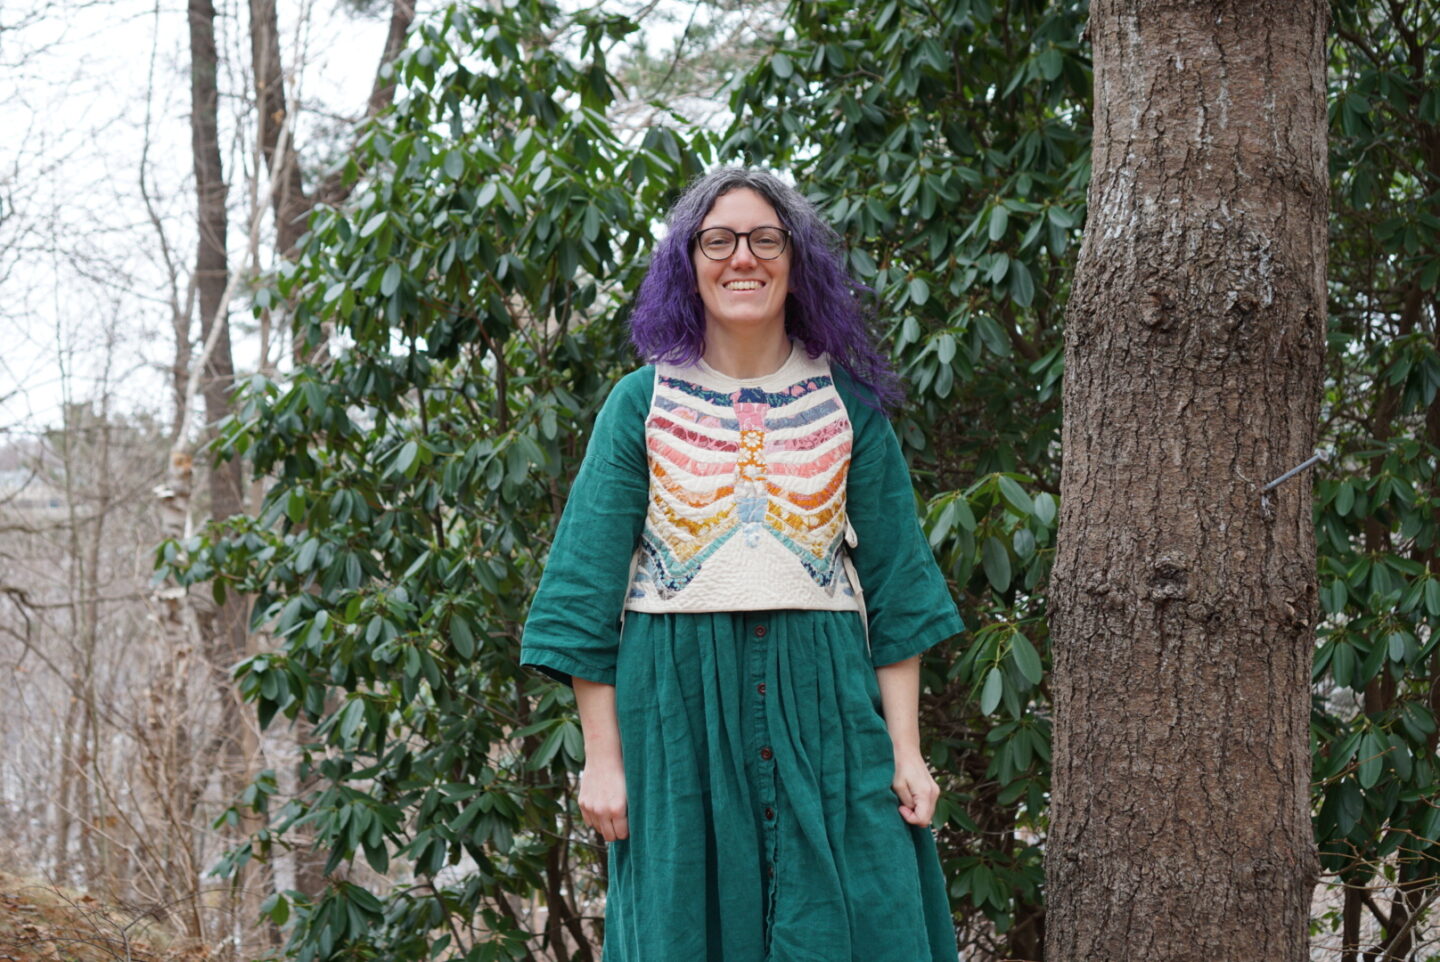
This project began because I had some beautiful fabric scraps that I didn’t want to waste a single piece of. I had made a quilt using the full Unruly Nature collection by Jen Hewett, and I had some bits left over. That collided with a vision I had of a quilted vest with a skeleton design on it. I was also very inspired (and continue to be) by Rachael at @minimalistmachinist on Instagram. She’s been exploring projects under an umbrella she calls “Soft Apocalypse” for a while now, and combining the florals of Jen Hewett’s designs with the hard protection of a bony ribcage felt like my own spin on that.
I stumbled across the Side Tie Top pattern on Instagram and immediately knew that it would be an ideal base for the hand appliqué I was picturing. It already had instructions built in for a quilted version, which was ideal. I didn’t do a muslin to see which size would be best, which in retrospect is terrifying, shocking, and baffling to me. I cannot explain to you why I thought it would be reasonable to do all of the rest of this work but didn’t think it was worth spending the time to make sure it would fit. I’m lucky that it does fit, but there was a time in September/October when I was strongly convinced that I had done all of this for what would turn out to be an ornamental object that I would never actually be able to wear. I’m glad I was wrong!
I did all of the skeleton appliqué design myself, but it was heavily based on a large number of anatomical drawings that I found through Google Image searches. I printed out lots of different options, and ended up printing them at many different scales to experiment with. My partner really helped by holding these pieces of paper up to my torso. I really wanted the scale of the appliqué to be as close to my own skeleton as possible, with the idea that it would line up as much as possible with the location and size of my own ribcage when wearing it. This was not completely possible because I had limitations on how fiddly I was willing to get, but I think I got pretty close. Let me show you all of the images I used as inspiration during the process.
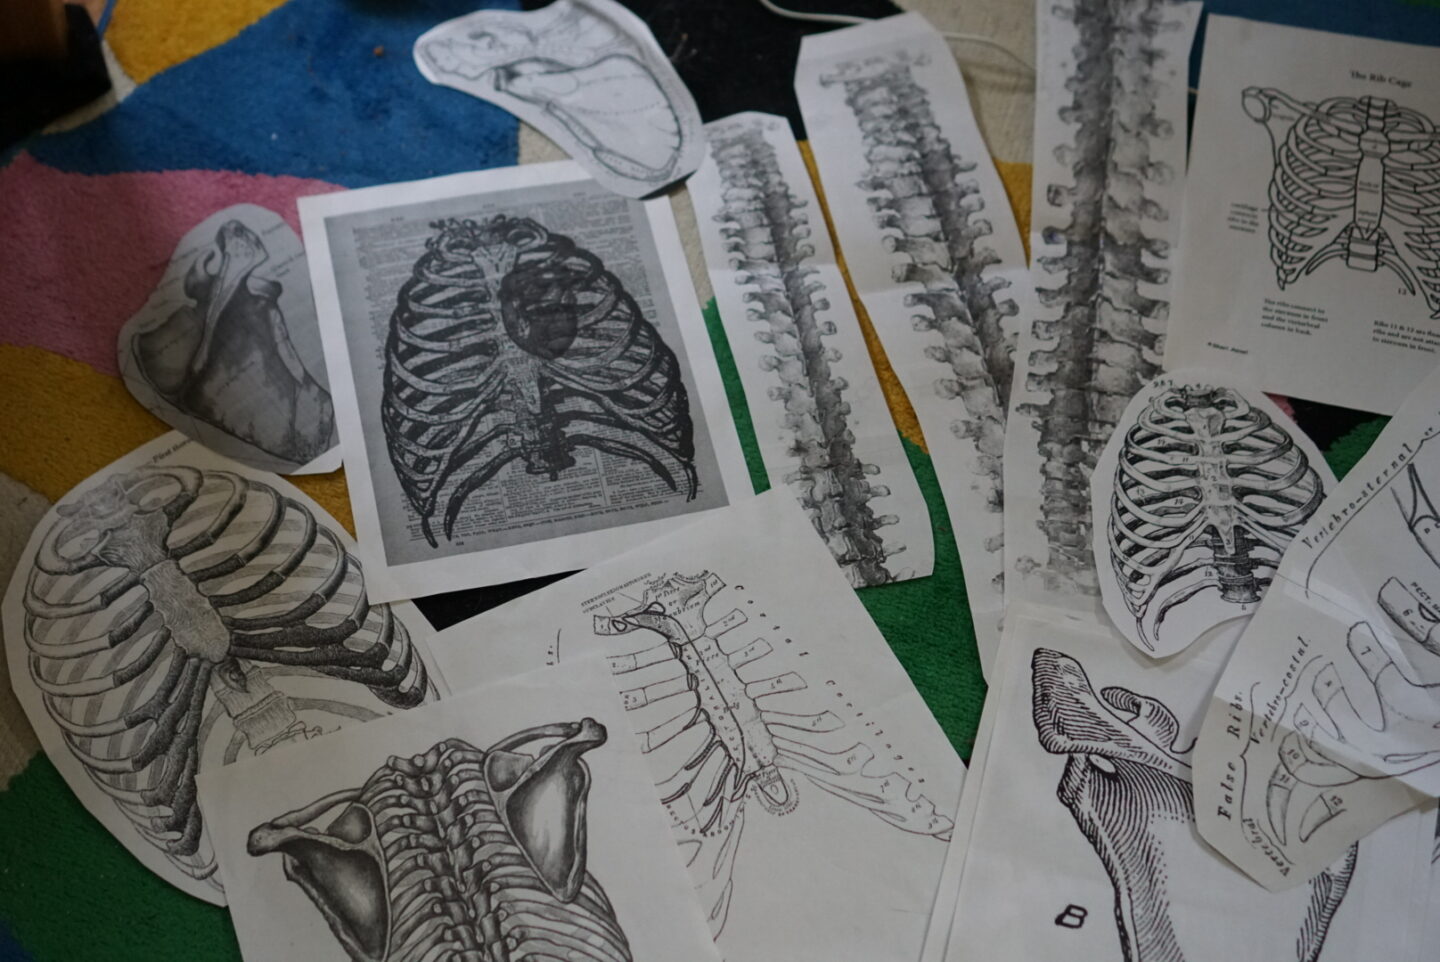
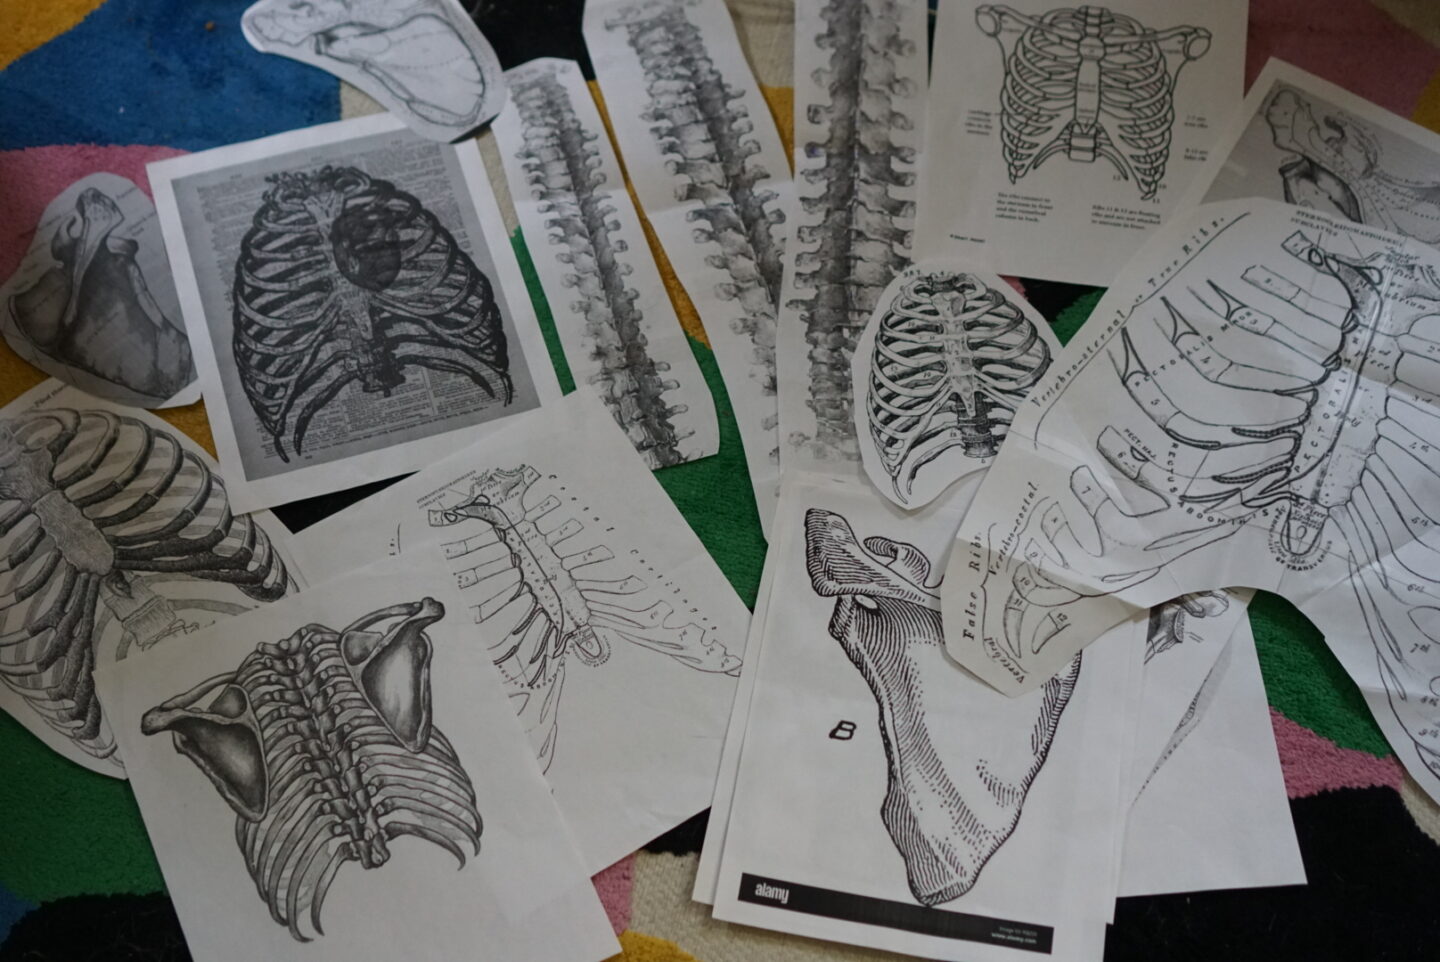
As you can see from the images above, I was playing with the idea of including scapula as a separate layer, but I eventually decided that that would be too cluttered for me. I also didn’t think I’d have enough fabric for that. I used these drawings in combination to hand draw/trace my skeleton design onto a traced copy of the front and back pieces of the pattern. I had the seam allowance drawn in so I could see what would actually be visible. I drew one side of the front and one side of the back and then folded the paper in half to trace it onto the other side so it would be symmetrical. I labelled each part with a letter and a number on the pattern pieces (F for front, B for back, and sometimes a + to indicate whether I was using the piece right side up or upside down for a mirror image). Then, I used those master design pattern pieces to trace a template in cardstock of each piece and a corresponding fusible web template for each.
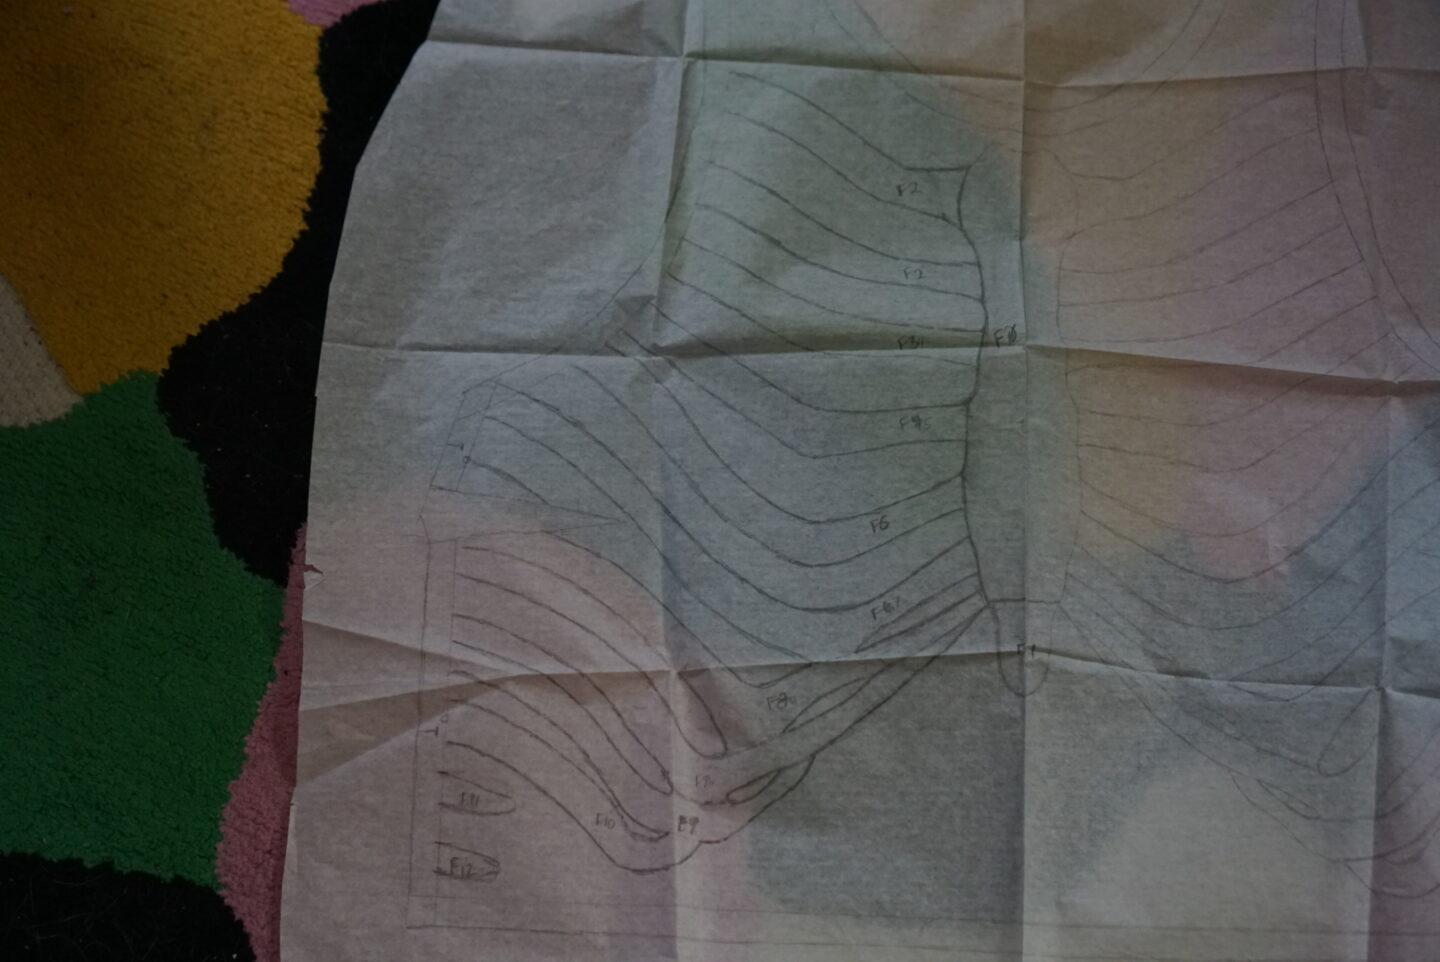
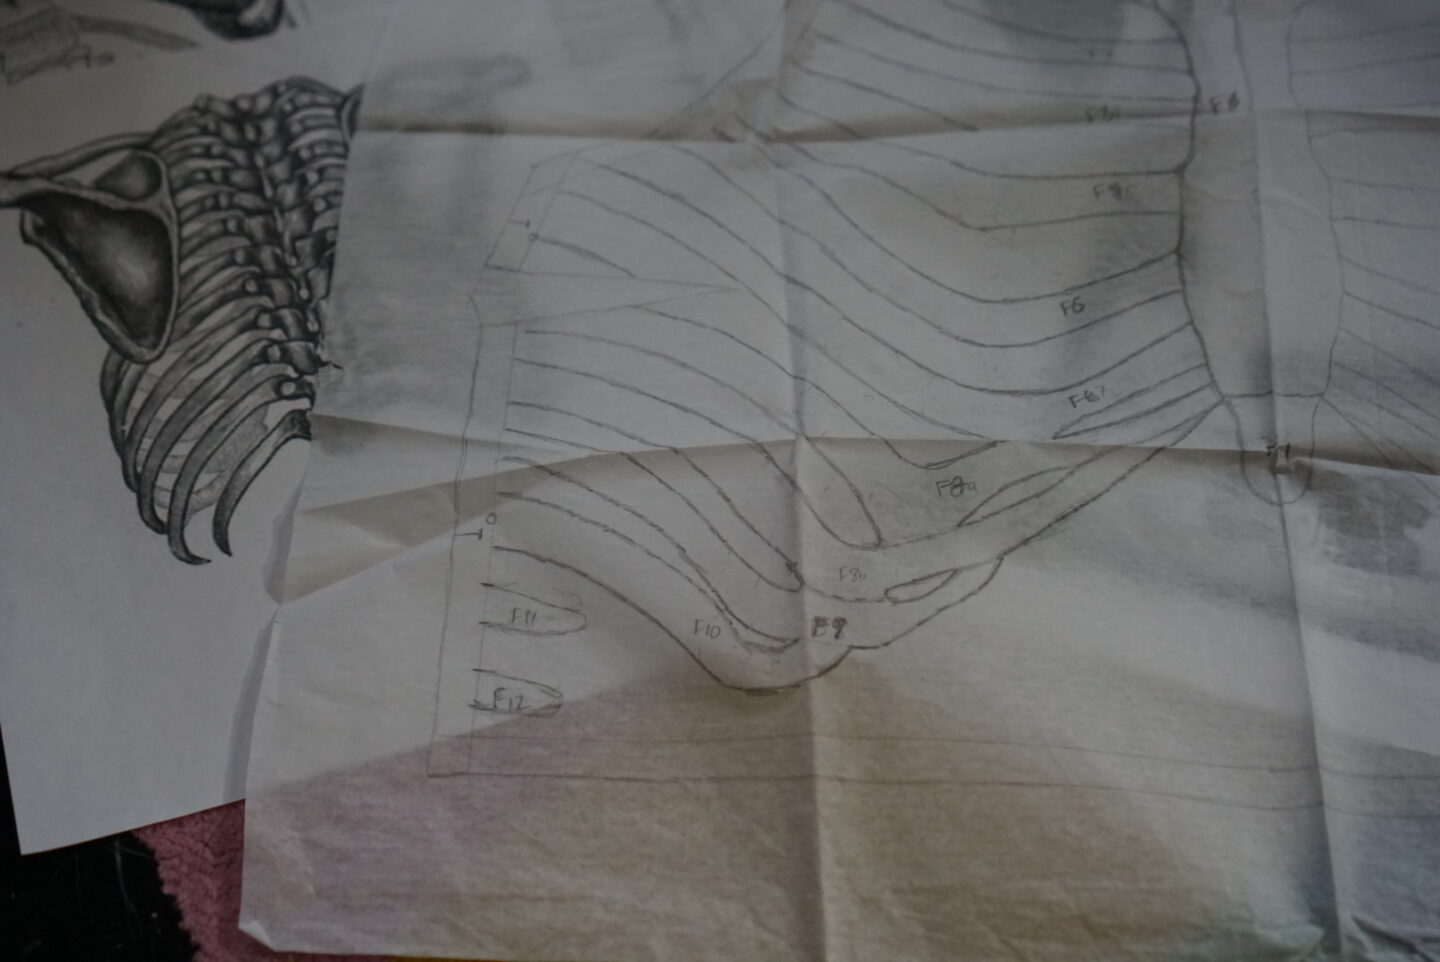
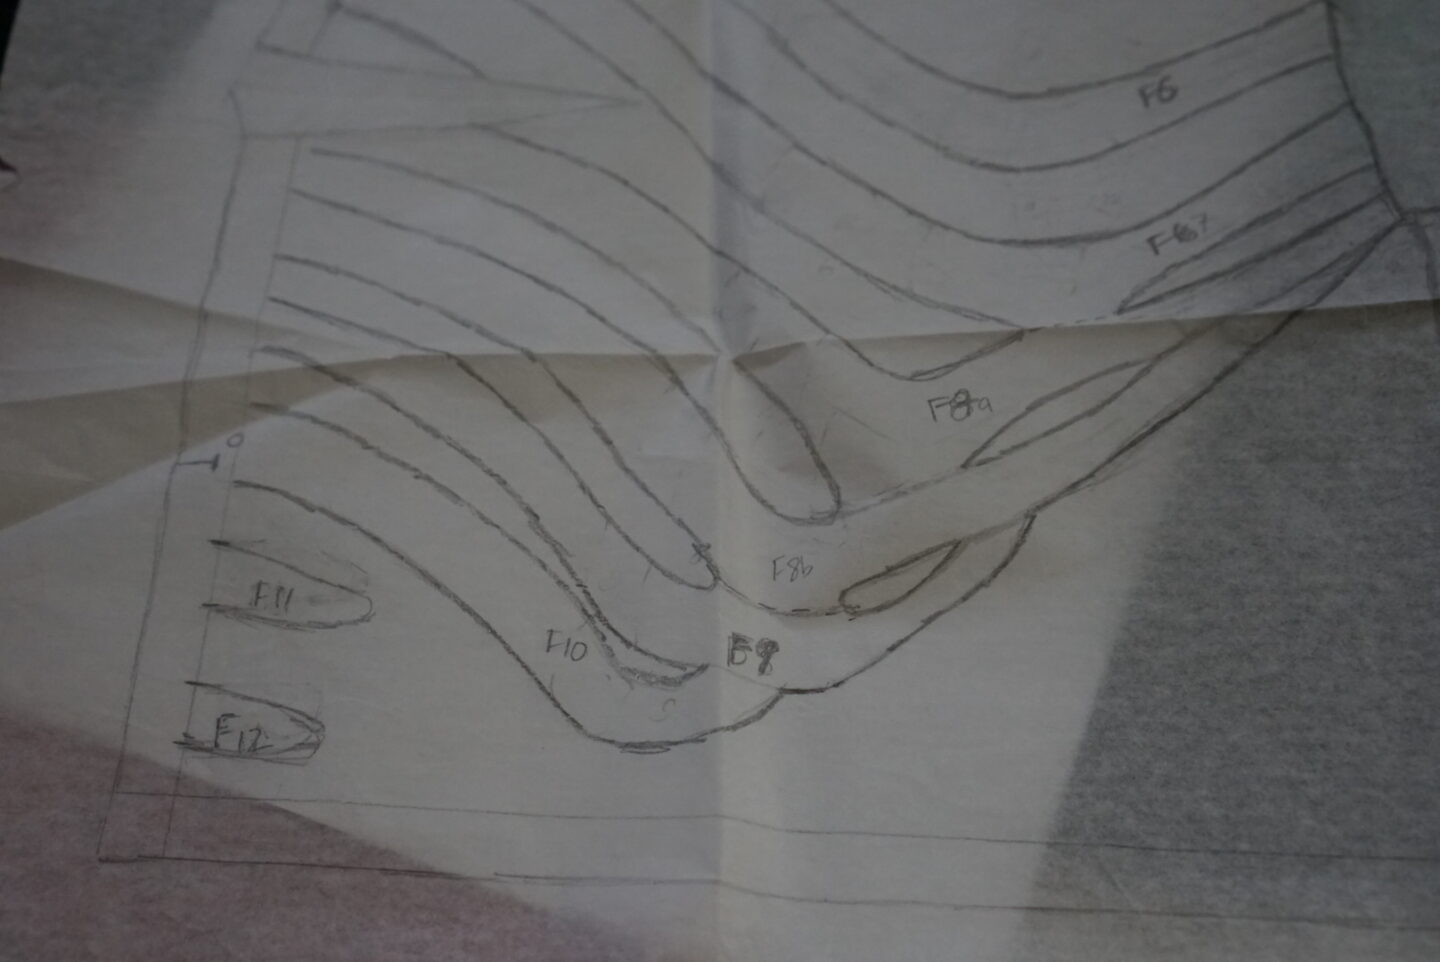
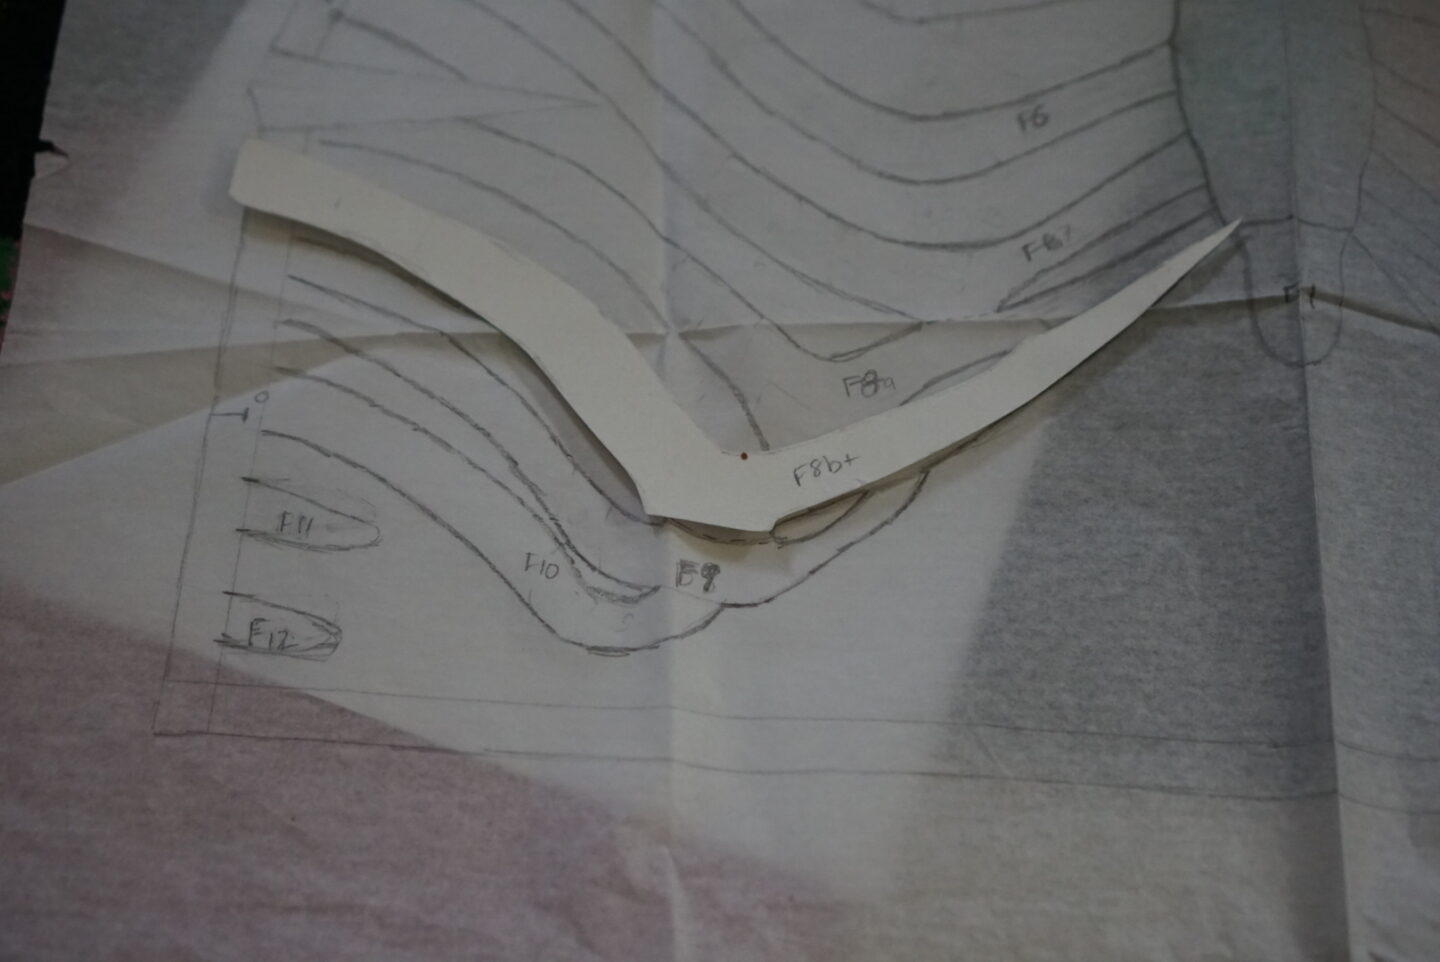
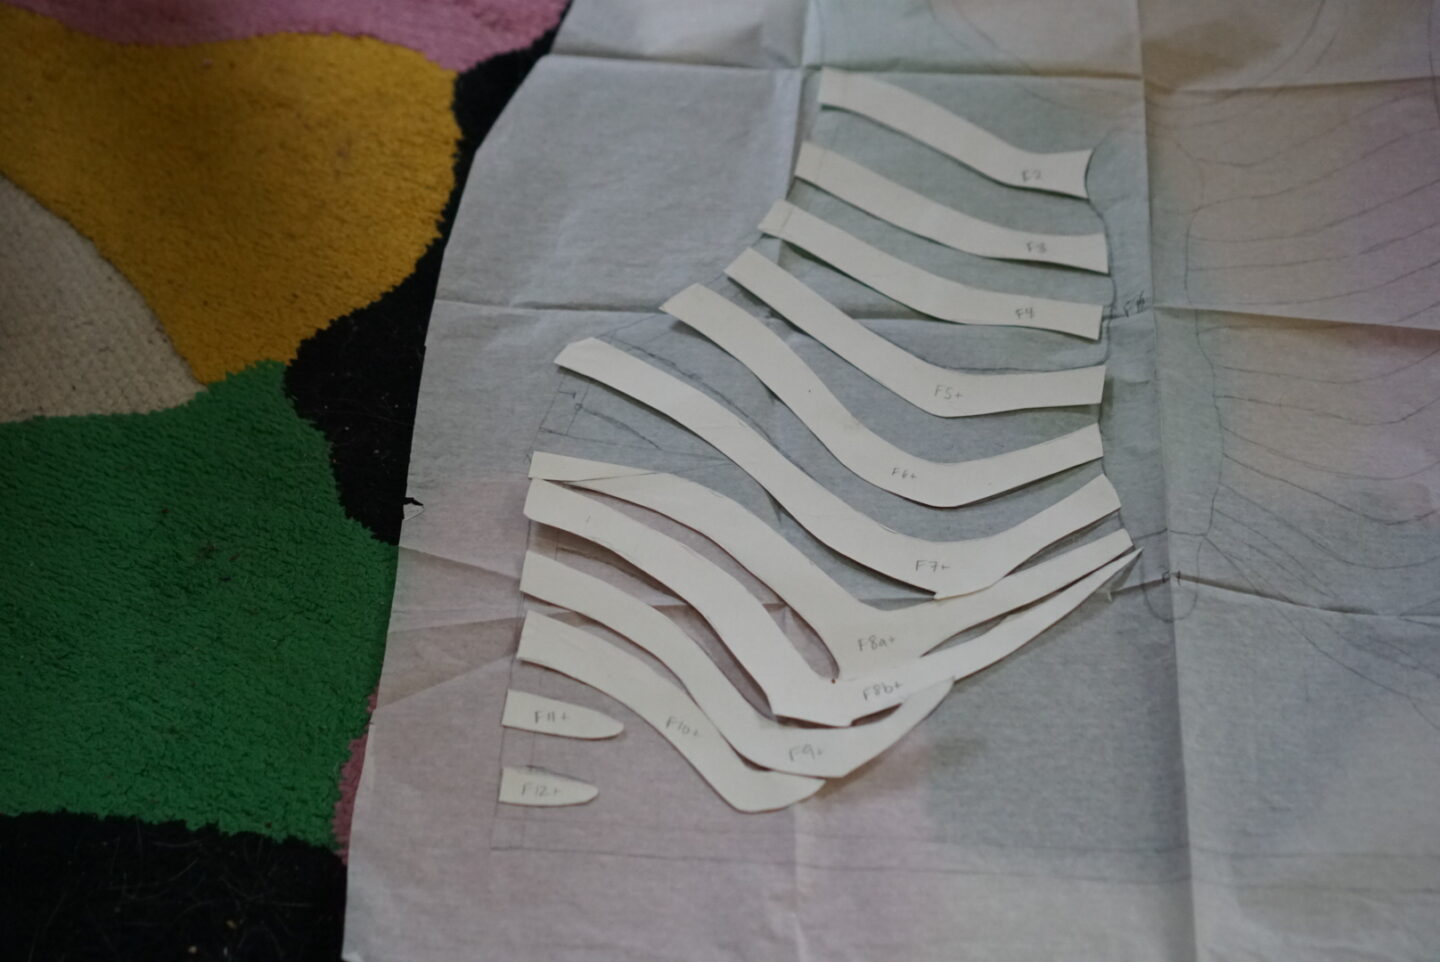
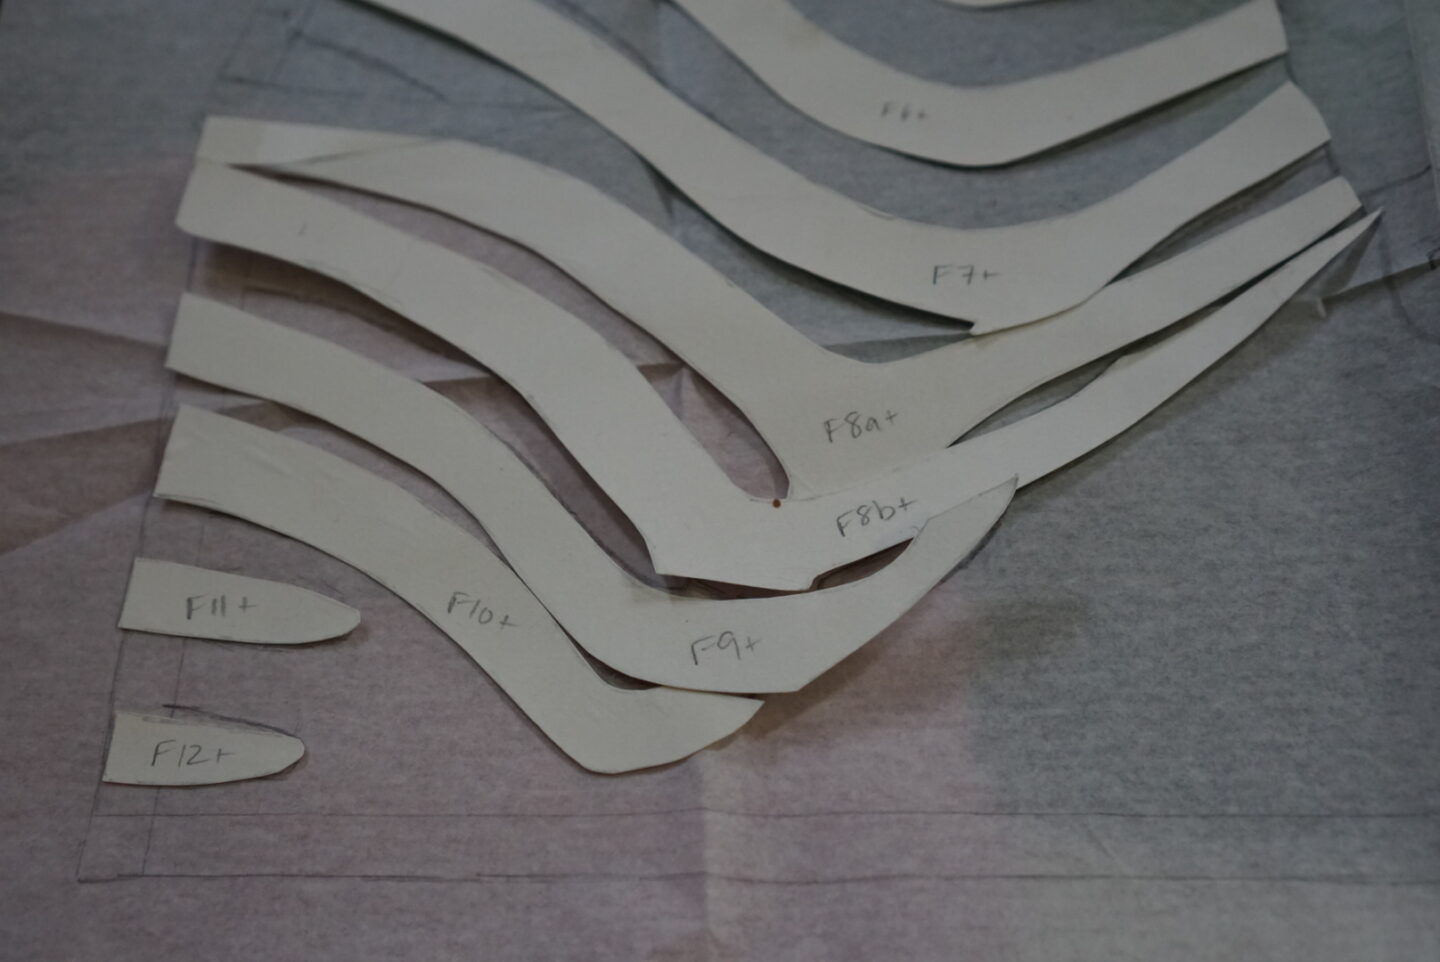
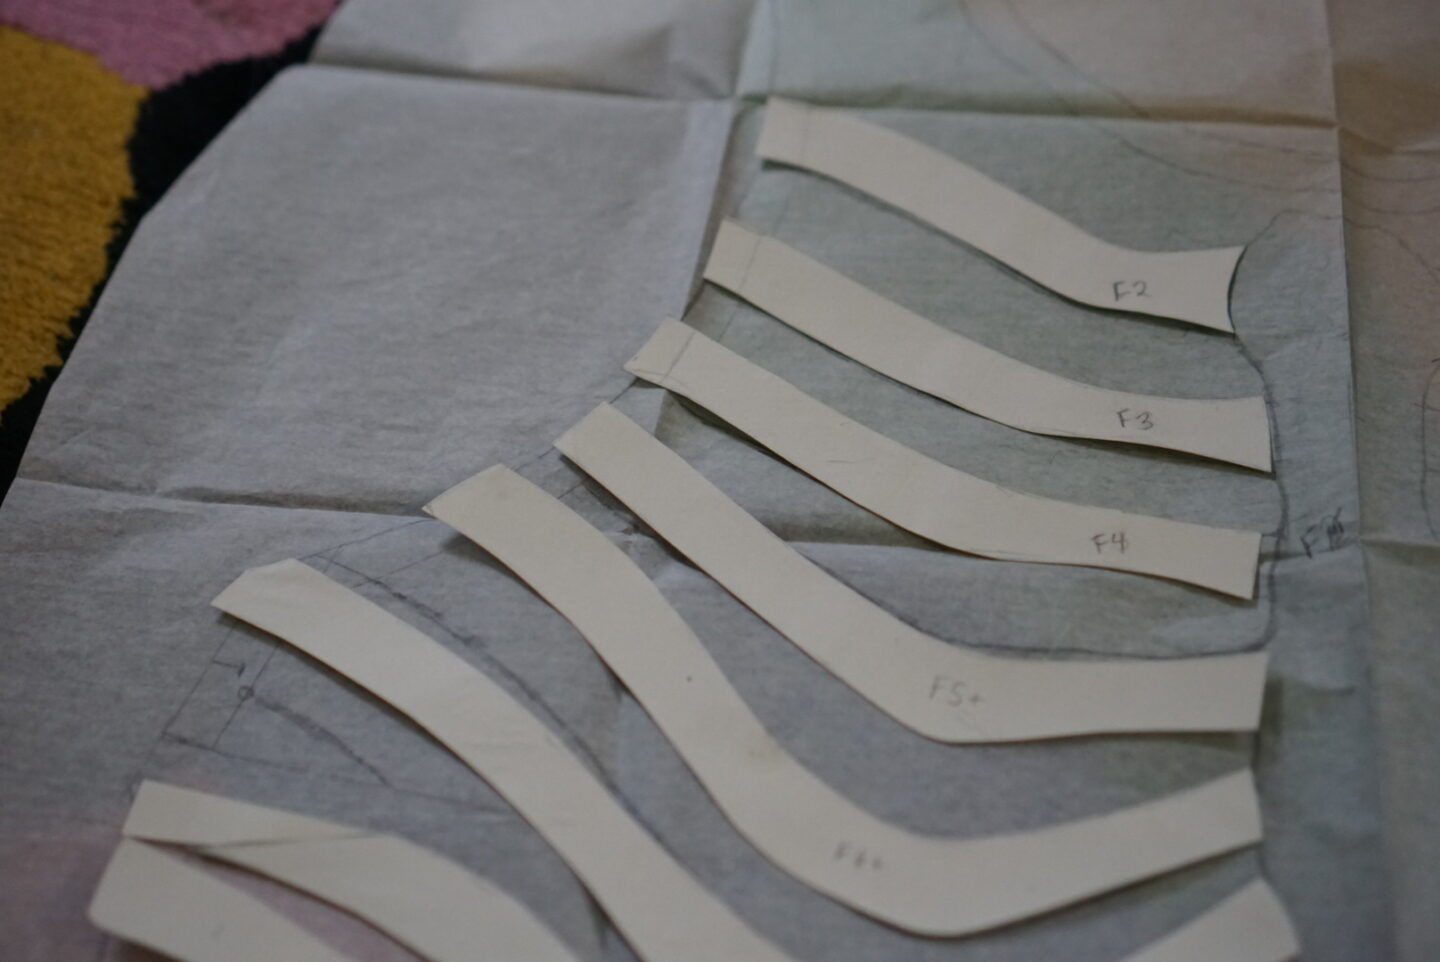
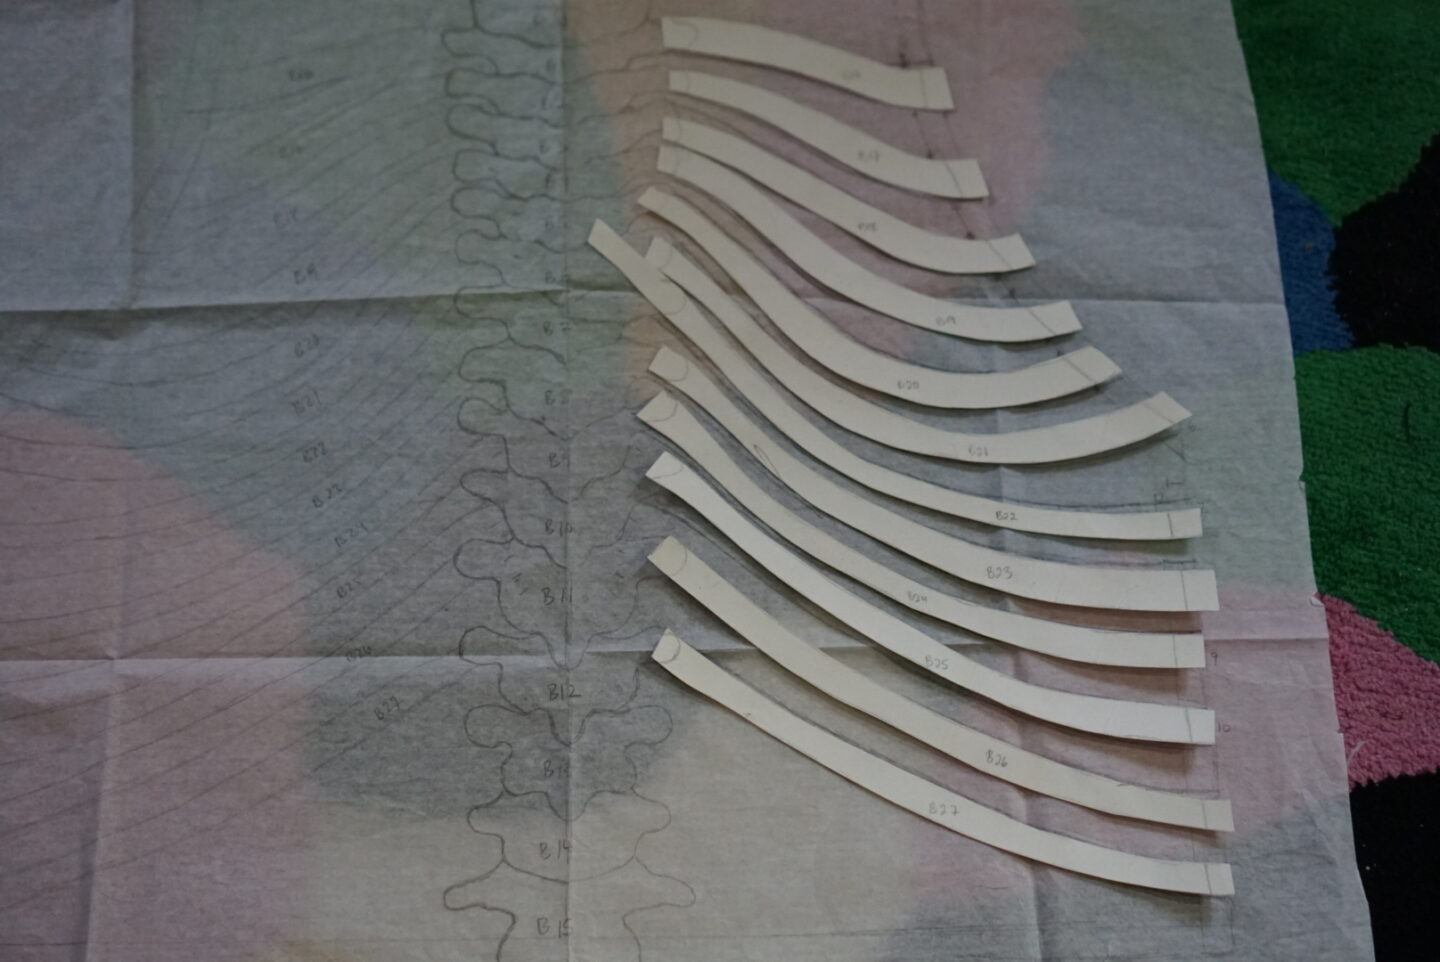
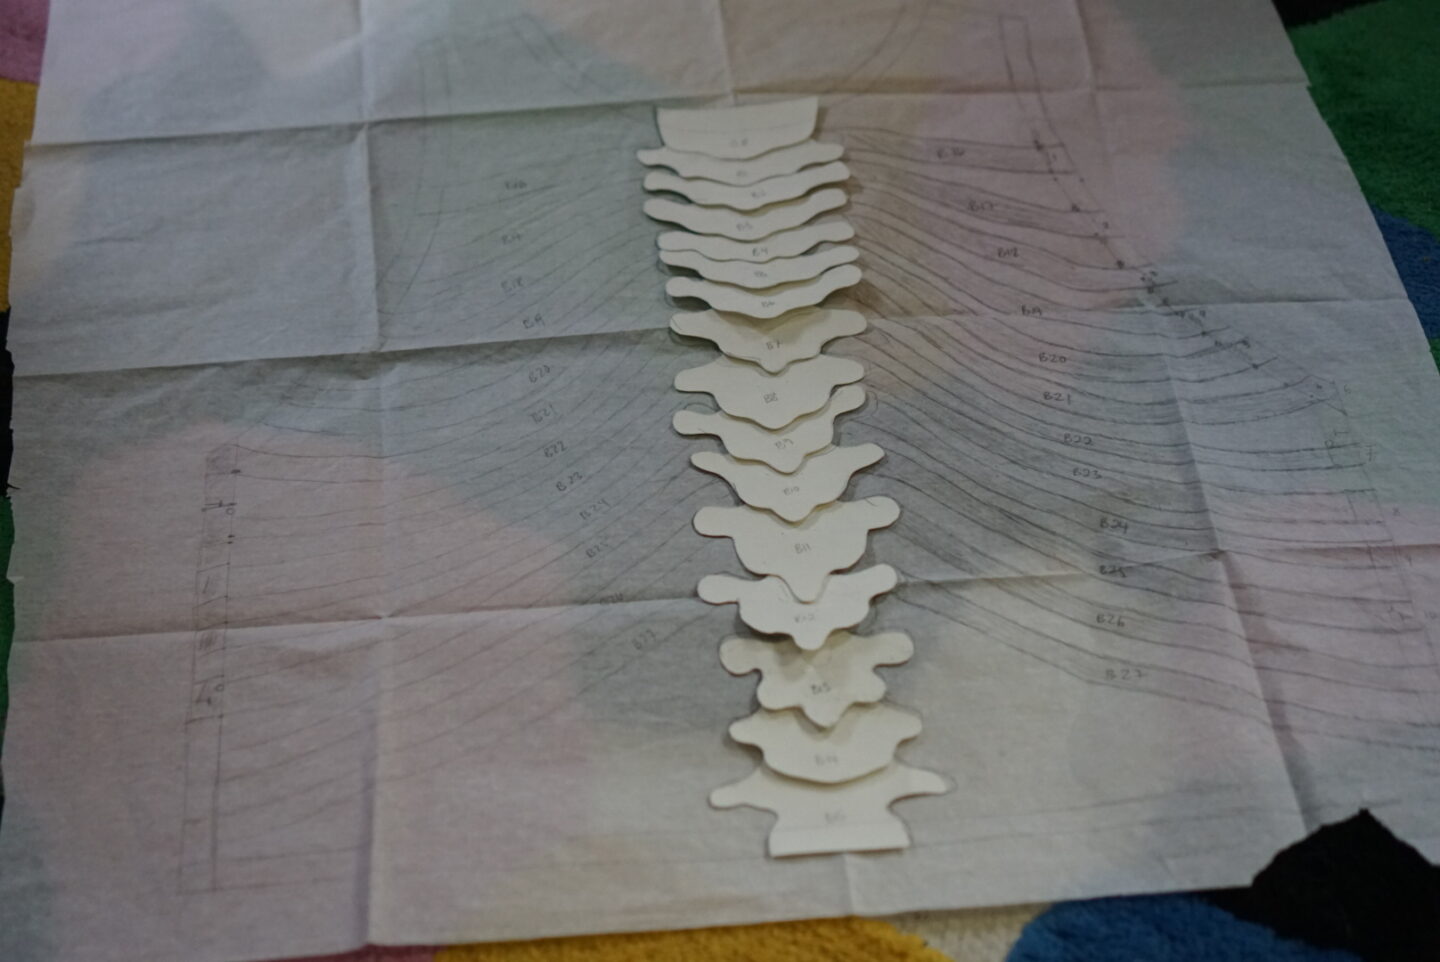
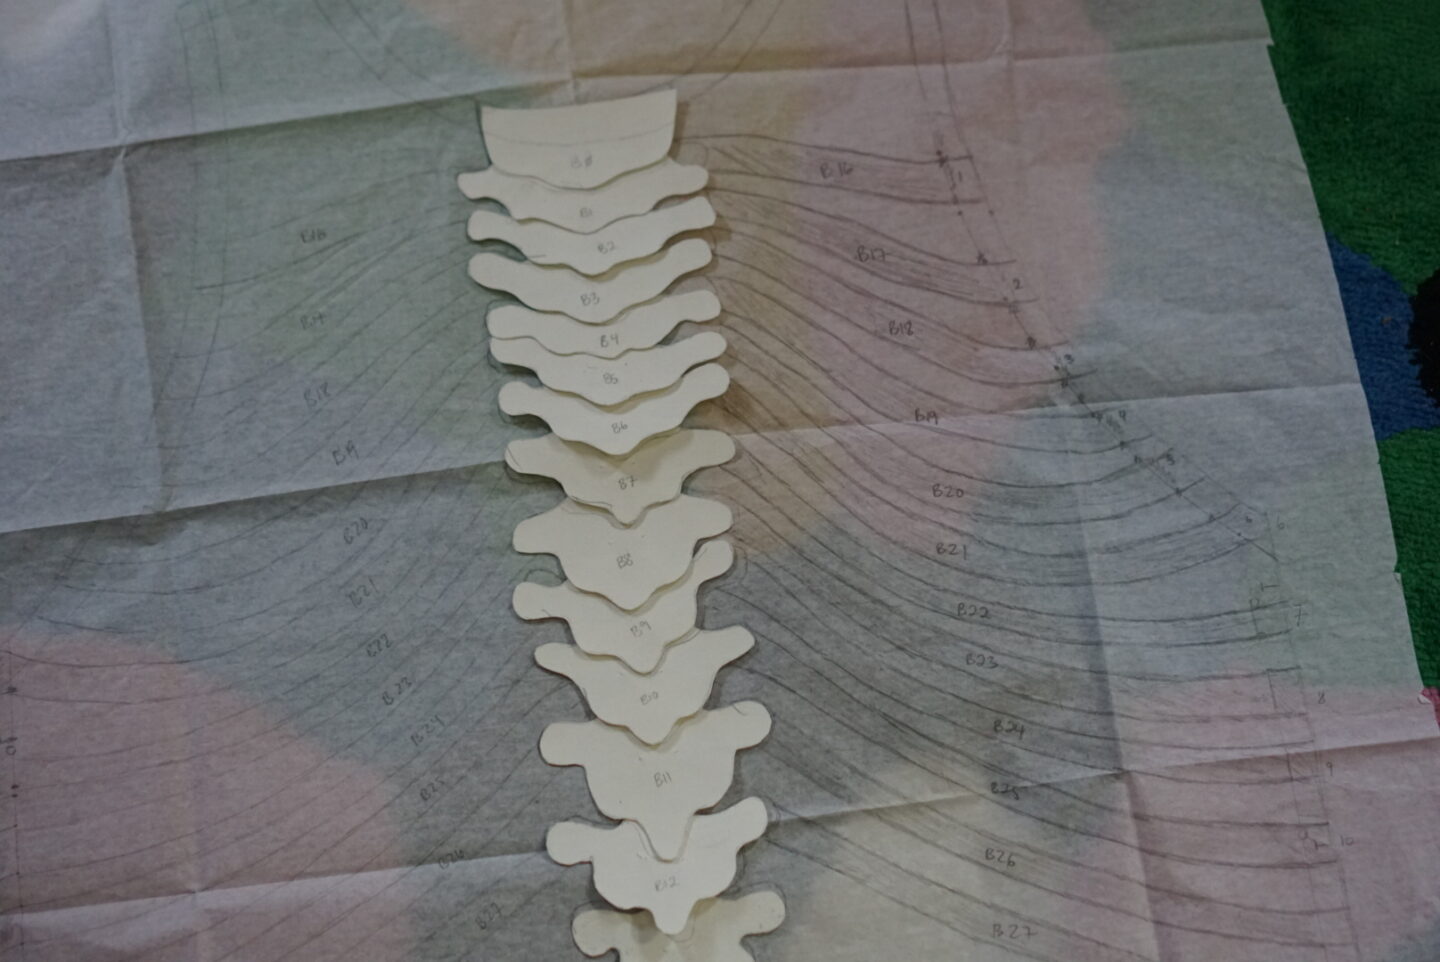
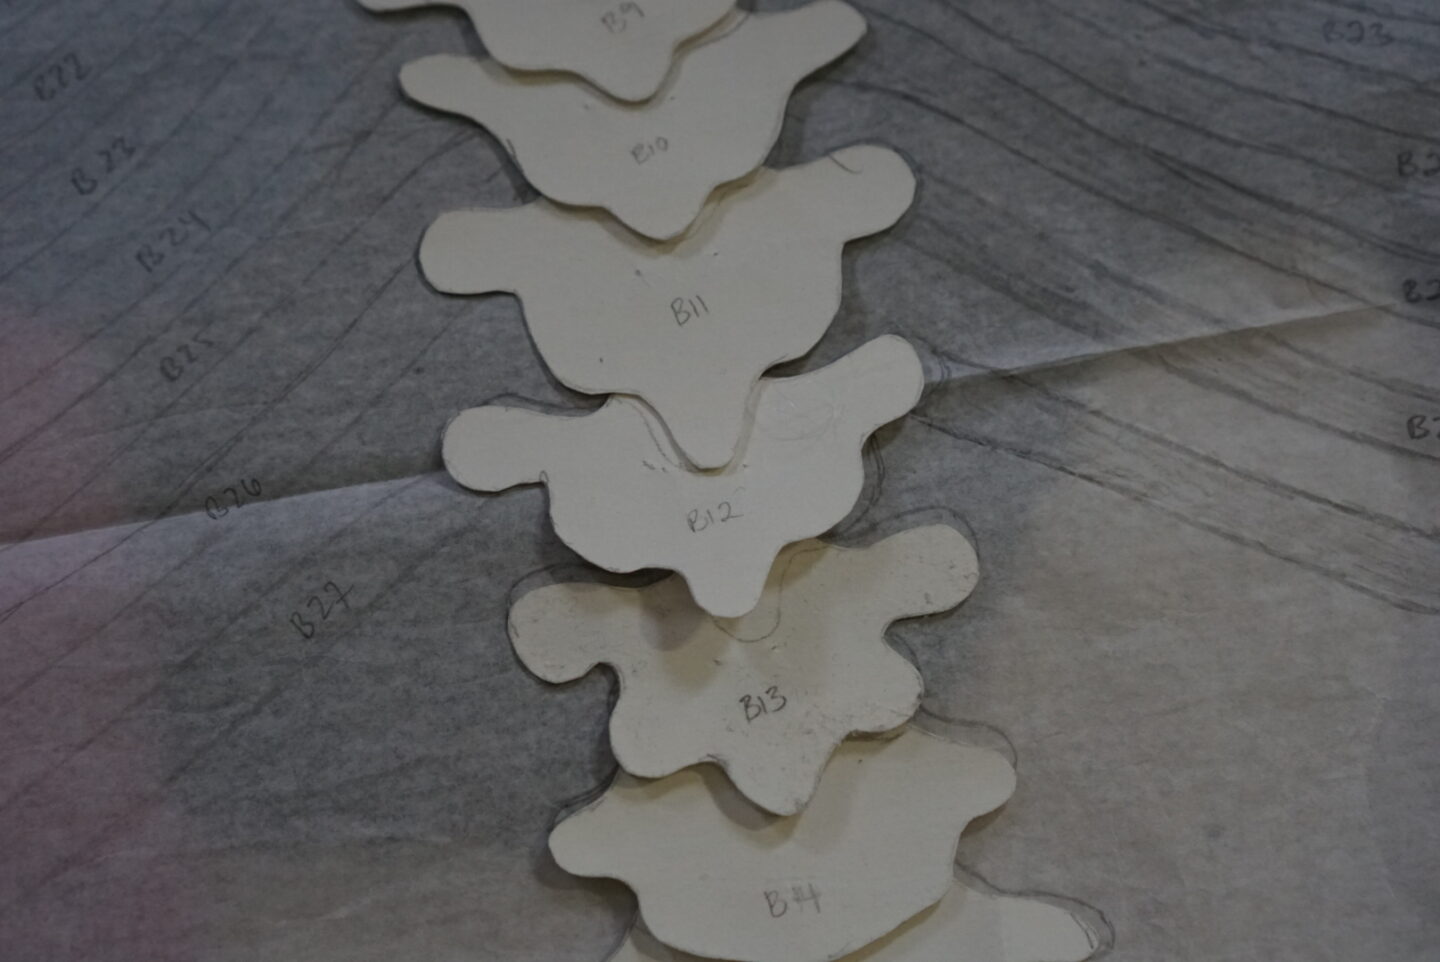
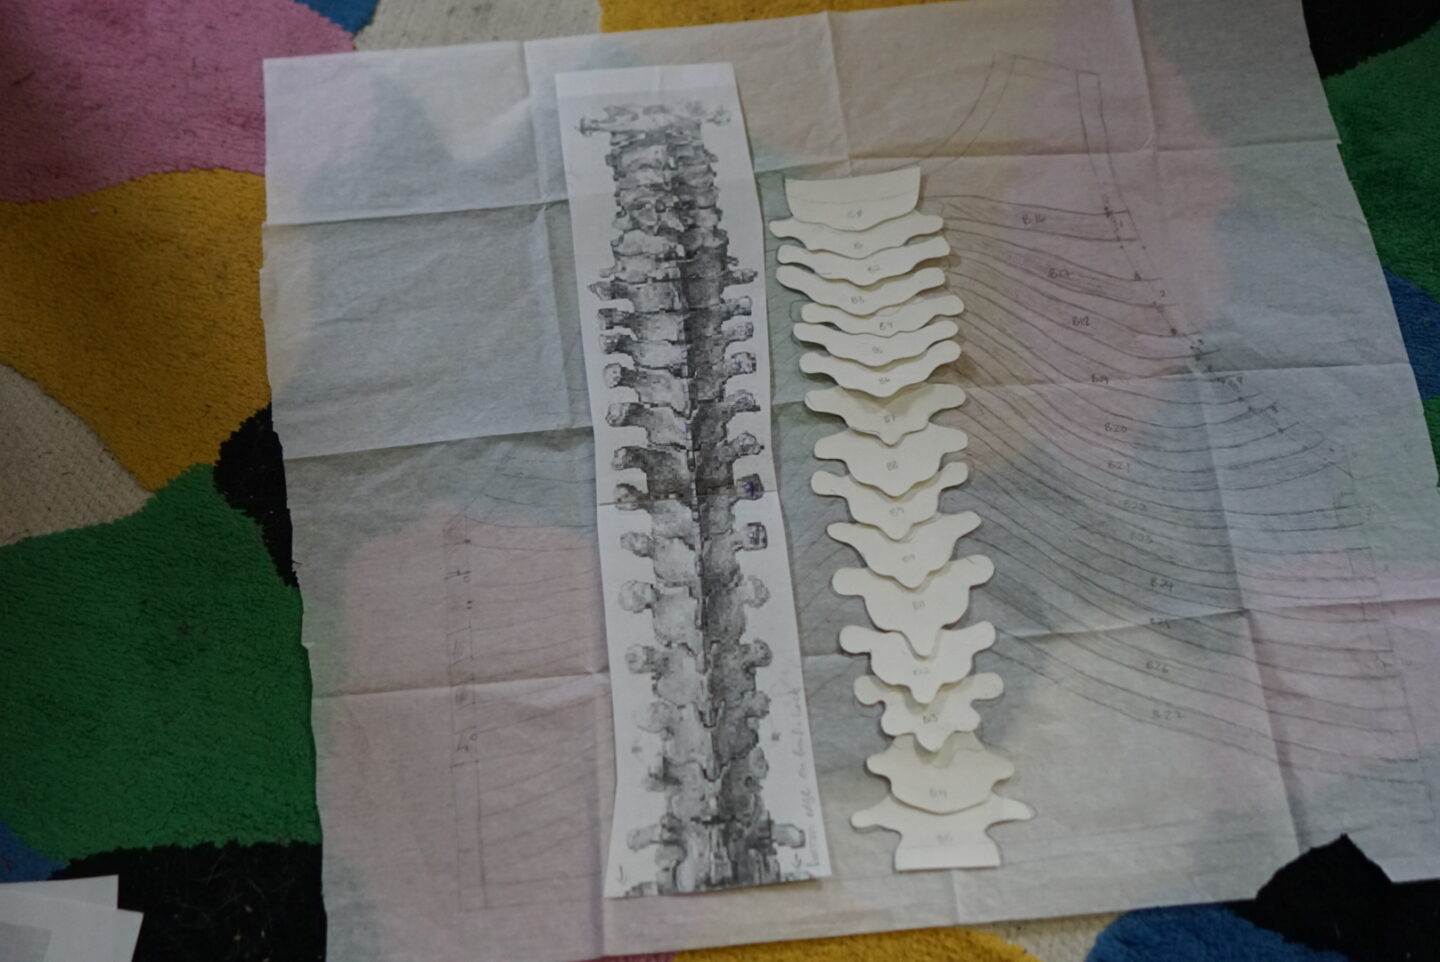
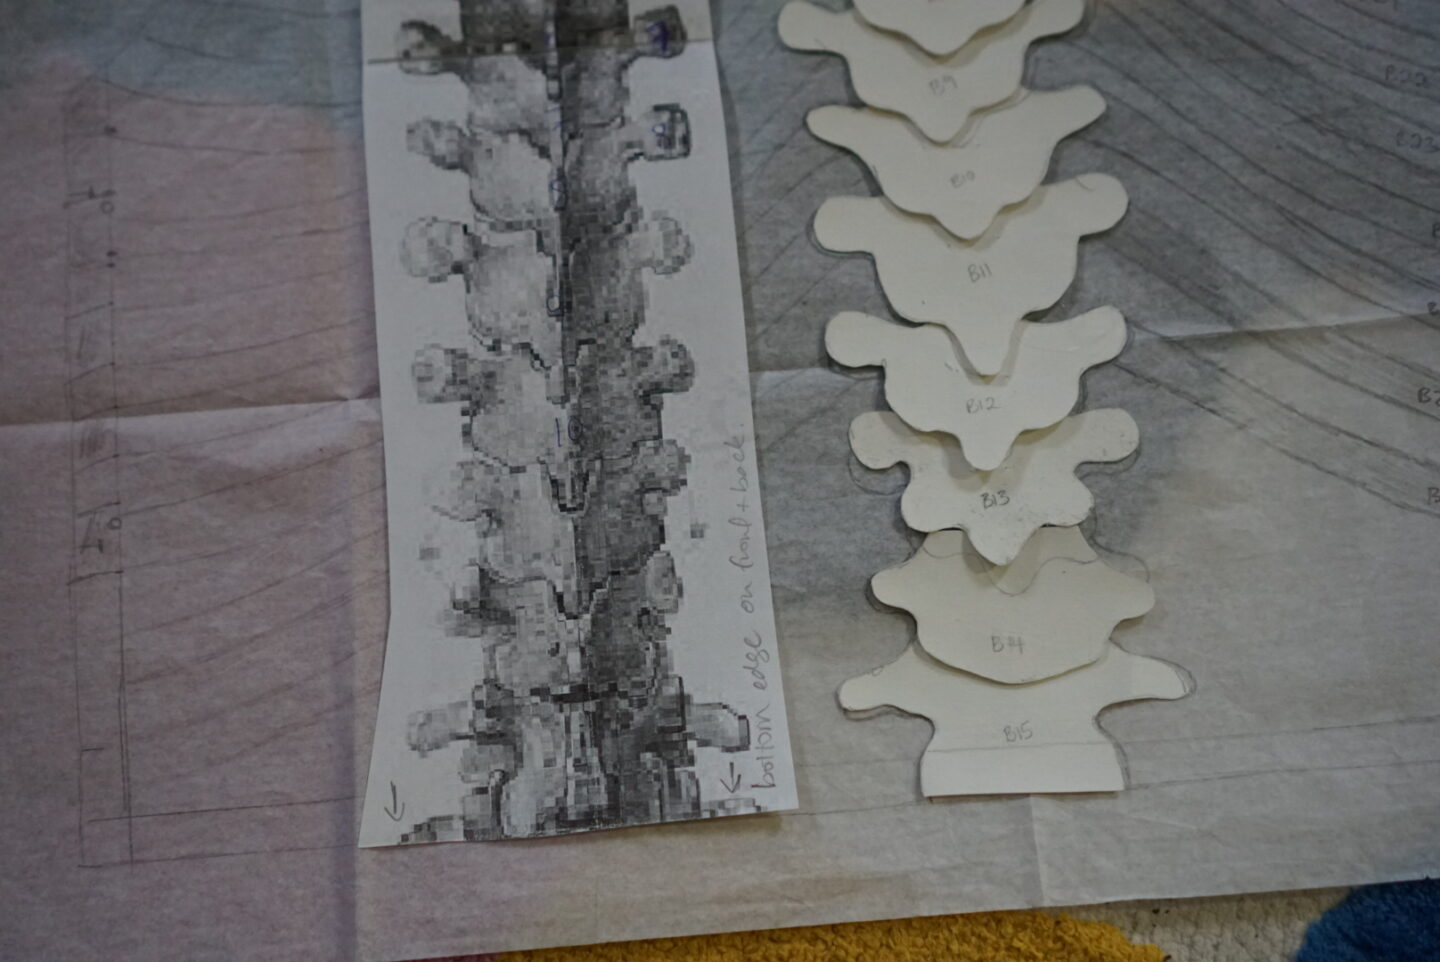
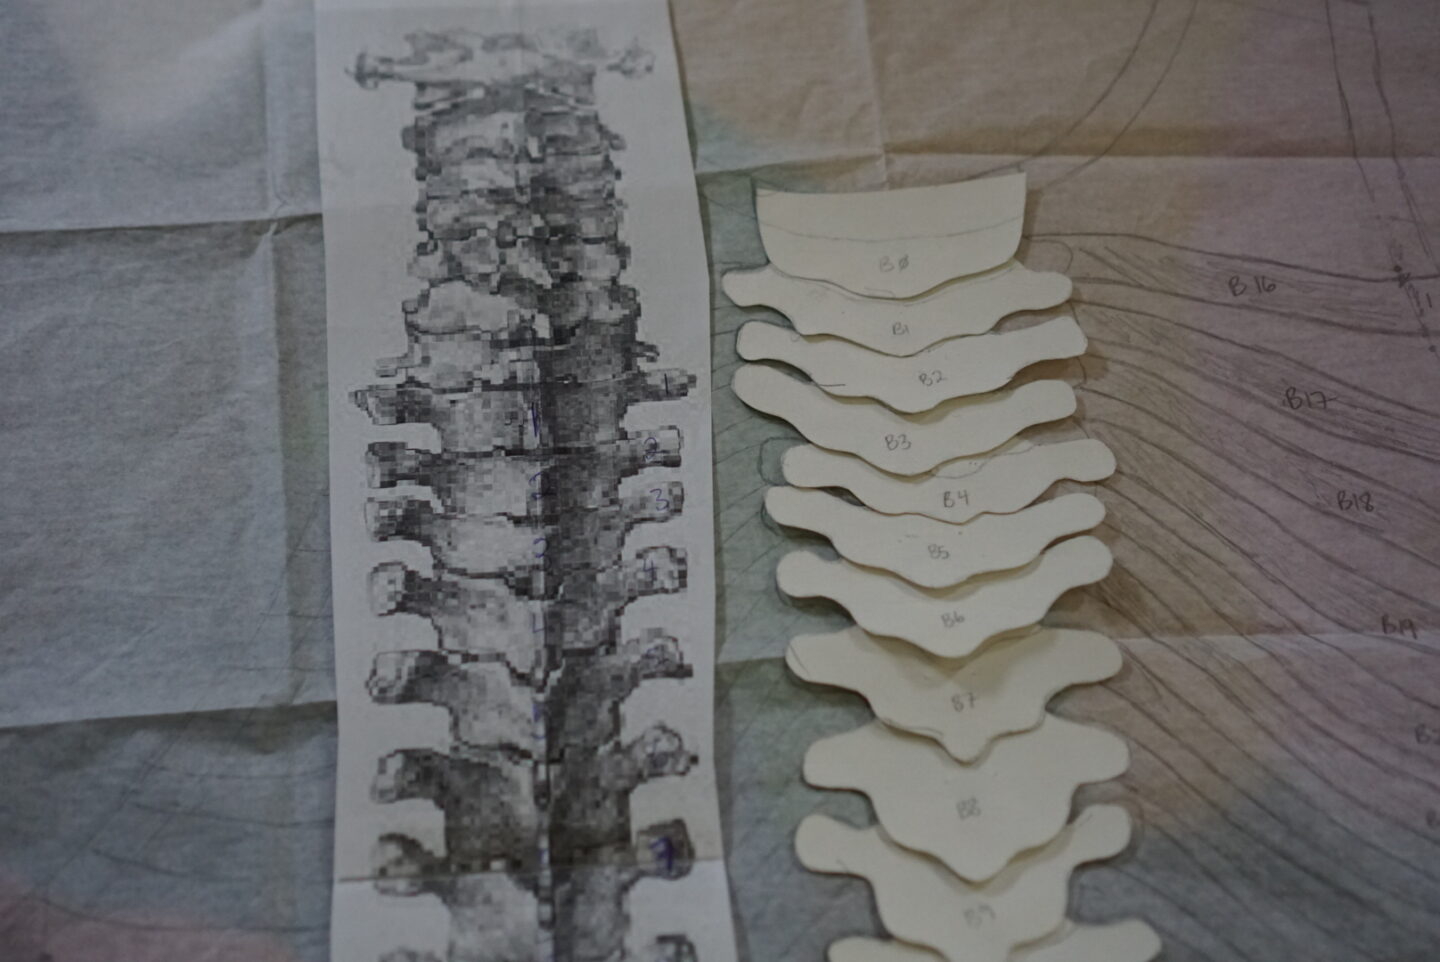
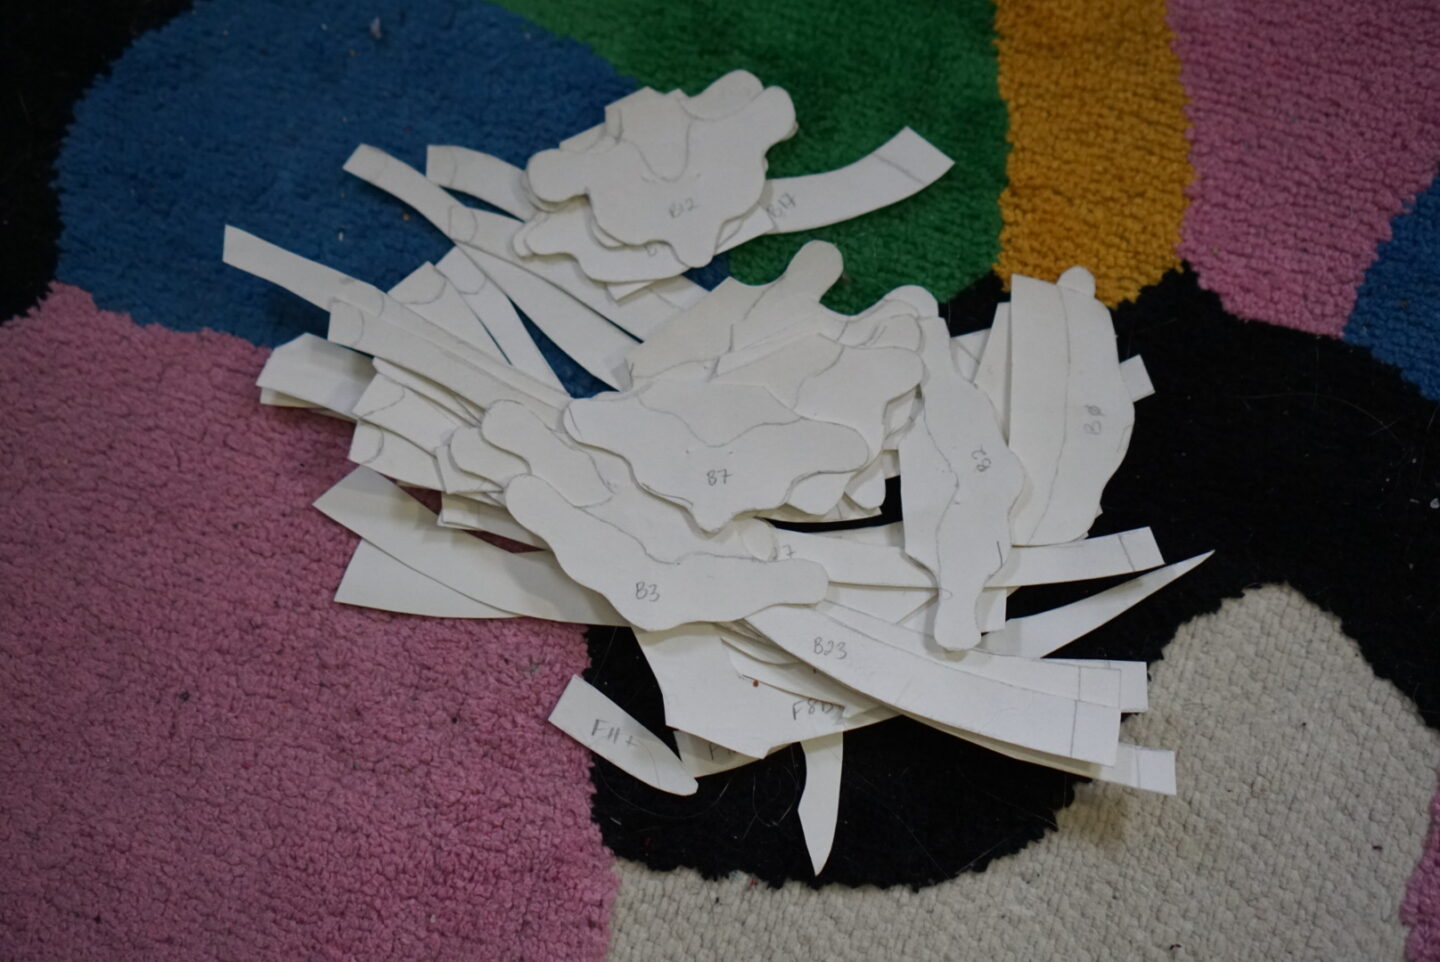
As you can see above, the vertebrae all had extensions added to them that overlapped as they were sewn. I did this so I didn’t have to worry about fussing with the top edge of each one, and so that I knew that it would look continuous even with any skew in measurements during the many phases of tracing and sewing. I used the templates to create strips of fabric that were big enough and the correct shape to accommodate each element. I ended up having to piece together some of the scraps to make this happen. I was still able to maintain the colour gradient going from top to bottom on the front and back, but if you look closely later on, you’ll see that some of the templates contain multiple different prints in a similar colour palette. Once I made these, I ironed on the corresponding fusible web template to each piece. This helped me as a label, but later on served as something to line up the cardstock templates with and then helped me fuse the elements to the base fabric in the process of pin basting for appliqué. Below you can see all of those strips laid out on the pattern pieces prior to being sewn. The sternum was already sewn in the photos below because I’m not very good at remembering to take process photos!


You can see above what my method was for turning the edges of the appliqué. I was originally trying to iron the edges along the cardstock templates, but it was incredibly fussy and annoying and made the fabric fray a lot due to all of the handling. I ended up hand sewing the pieces around the cardstock templates, then ironing them (my clapper was very helpful during this process to keep everything flat with paper inside), and then cutting the threads, pulling them out, and removing the templates. When I stalled out on the project, I had finished all of the pieces for the front of the vest, appliquéd them onto the base fabric, and hand quilted most of it aside from the blank areas. What used up my capacity for the moment was the vertebrae. They are so curvy, and I was having such a hard time hand sewing the threads across the back. It required so much trimming into the seam allowance to get it to curve properly around the cardstock, and was just so so fiddly. I needed a break, and then developed a big mental block about it. I brought a ziplock bag with the vertebrae and my hand sewing tools when I went away for a sewing weekend with friends so that I could force myself into getting back into it while there were others around to encourage me. That helped me get started, and I did a lot of them in the car on the way home as well! Hooray for sewing friends! I also did the quilting in the blank spots on the front of the vest while I was away. All of the hand quilting was done with leftover pearl cotton I had from the previous quilt project. Once I was over that hurdle, I felt excited about the project again and how it looked as it was coming together. The photos below will take you through that process! The pink thread you see is what I used to mark the pattern edges, which helped for basting. I was using chalk markings originally but they kept rubbing off from all of the handling. Chalk worked well for marking the locations on the base fabric when situating the appliquéd elements because it was temporary.


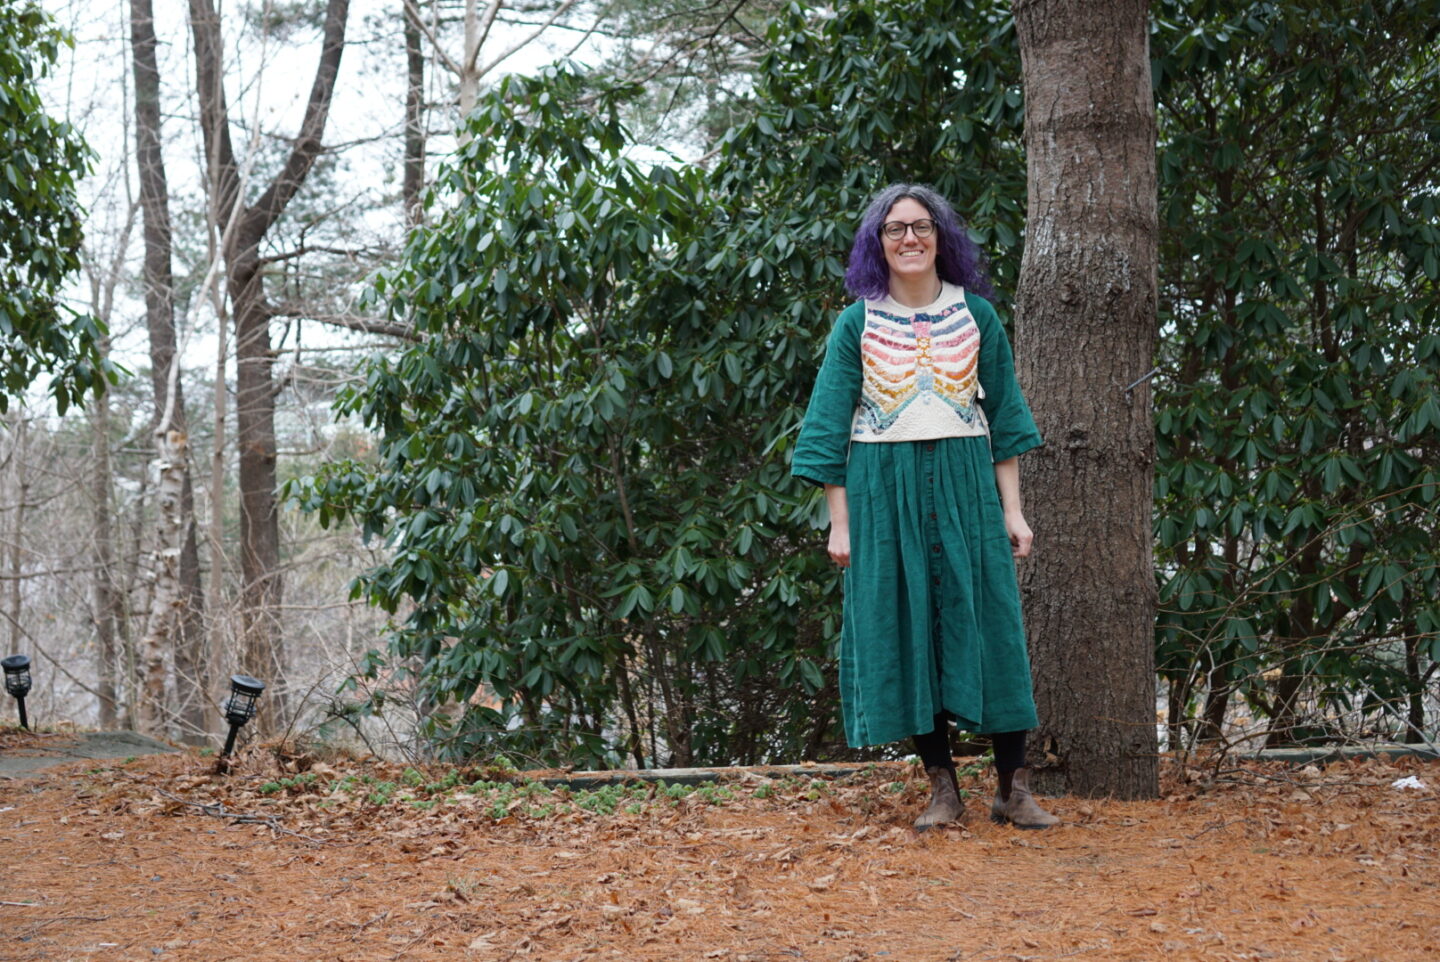
Once all of the appliqué and quilting was done, I did the binding and sewed on the ties and that was it! I used a plain muslin for the binding and ties, which is the same fabric that I used for the base of the vest both on the inside and under the appliqué. I had it already, and it had the warm natural tone that I wanted to go with the prints. For this project, I didn’t have to purchase anything except a package of fusible web sheets. Everything else I already had, which is very satisfying. I still have quite a bit of the hand quilting thread left because I bought a whole box of it when I started the initial quilt project (years ago), so there could be more hand quilting projects in my future. But not for a long time! I need a break! I finished the vest in a frenzy on the afternoon of Halloween in 2024 because I hadn’t done anything to make a costume for work and a skeleton vest felt like a spooky-adjacent thing for me to wear and a good deadline to make me hustle to actually finish this project. I wore it to work that day with my green linen zero waste gather dress, which is the garment I had been picturing wearing it with since the initial idea came to me. I love it so much! It was so satisfying to have finished it! And then holiday concert season happened and I didn’t photograph it because I was so busy. And then it was winter and the light was bad in my house and the sun was never out, and also my camera shutter remote perished. But then! My crafty friends and I had a fabric and yarn swap last weekend. My friend Kate has a very lovely house and yard so I wore the dress and vest and brought my camera and tripod and asked if anyone would help me photograph the project. Kate took the lovely photos you’ll see below, and in return I photographed her amazing finished sweater. Thank you Kate! Here are many many photos because I put so much work into this project and I couldn’t pick any more photos to cut from this post.

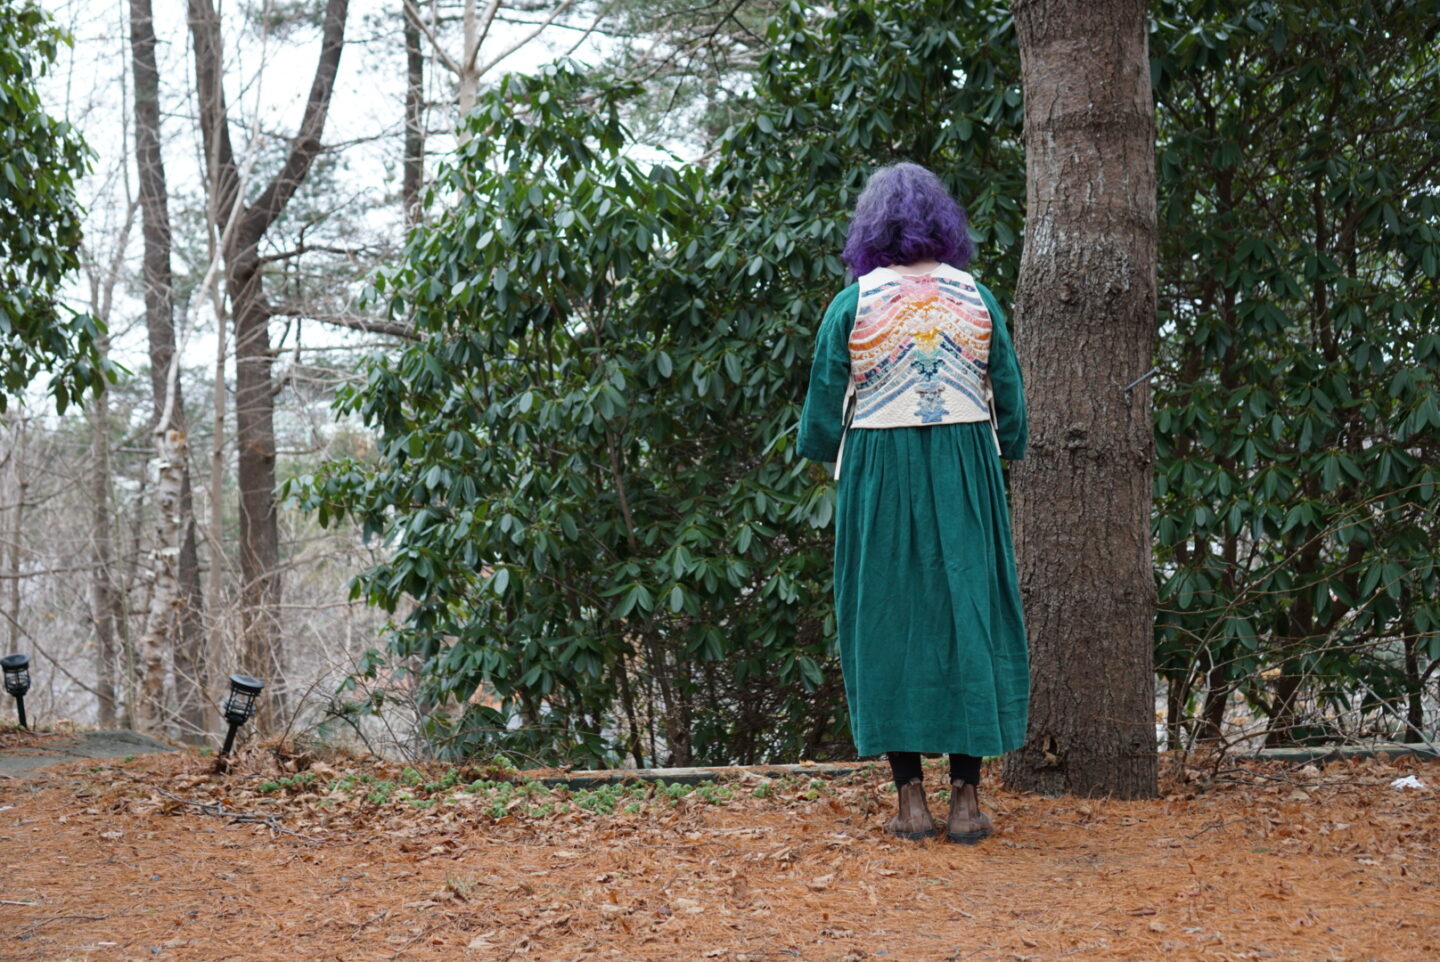
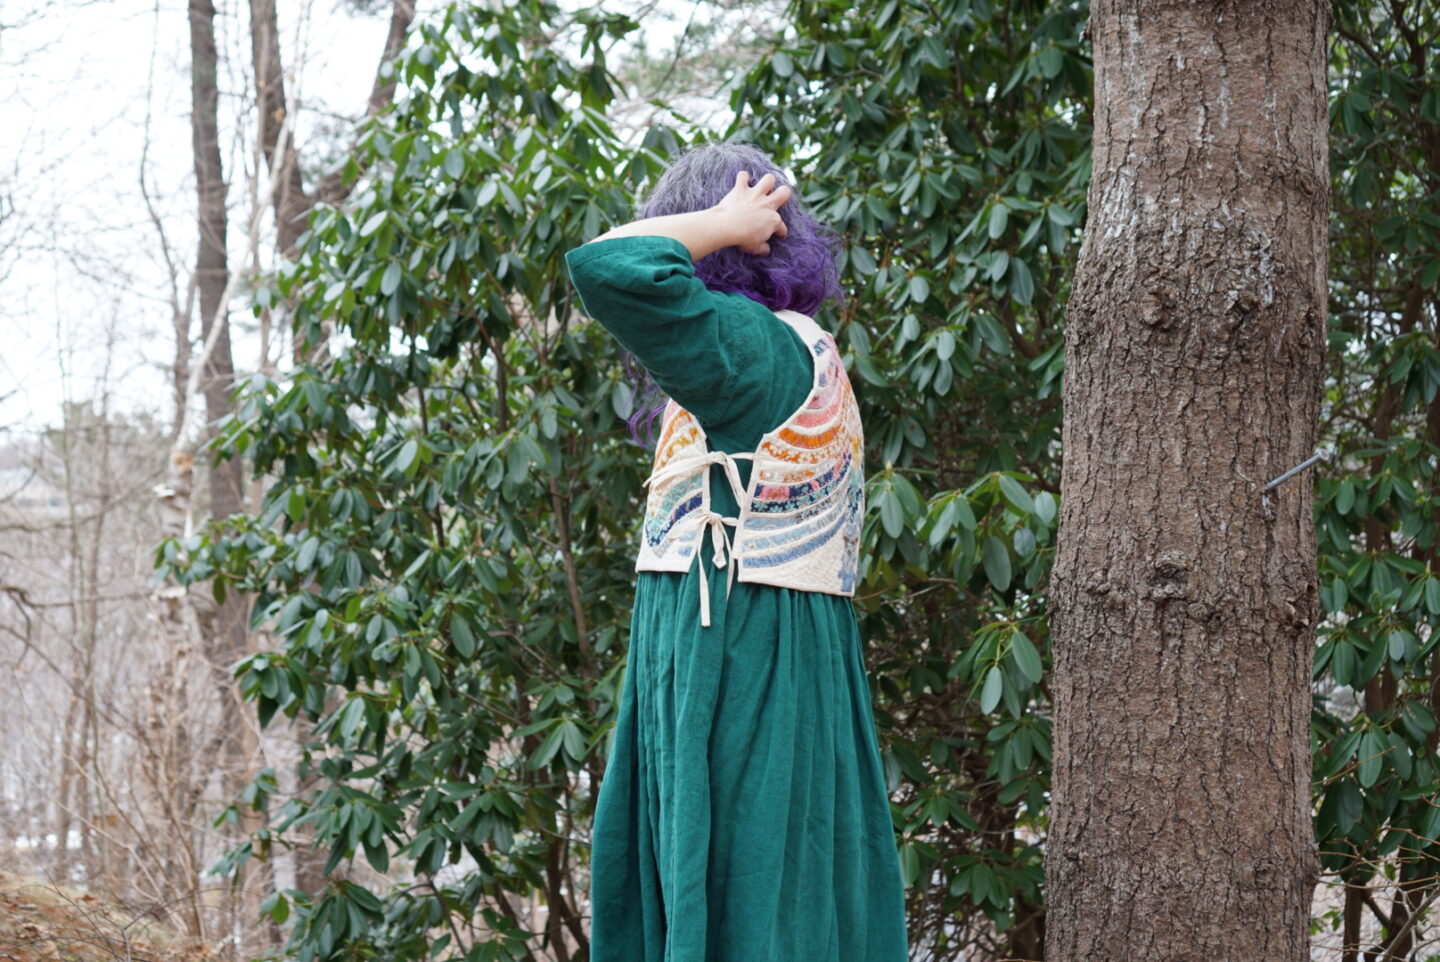
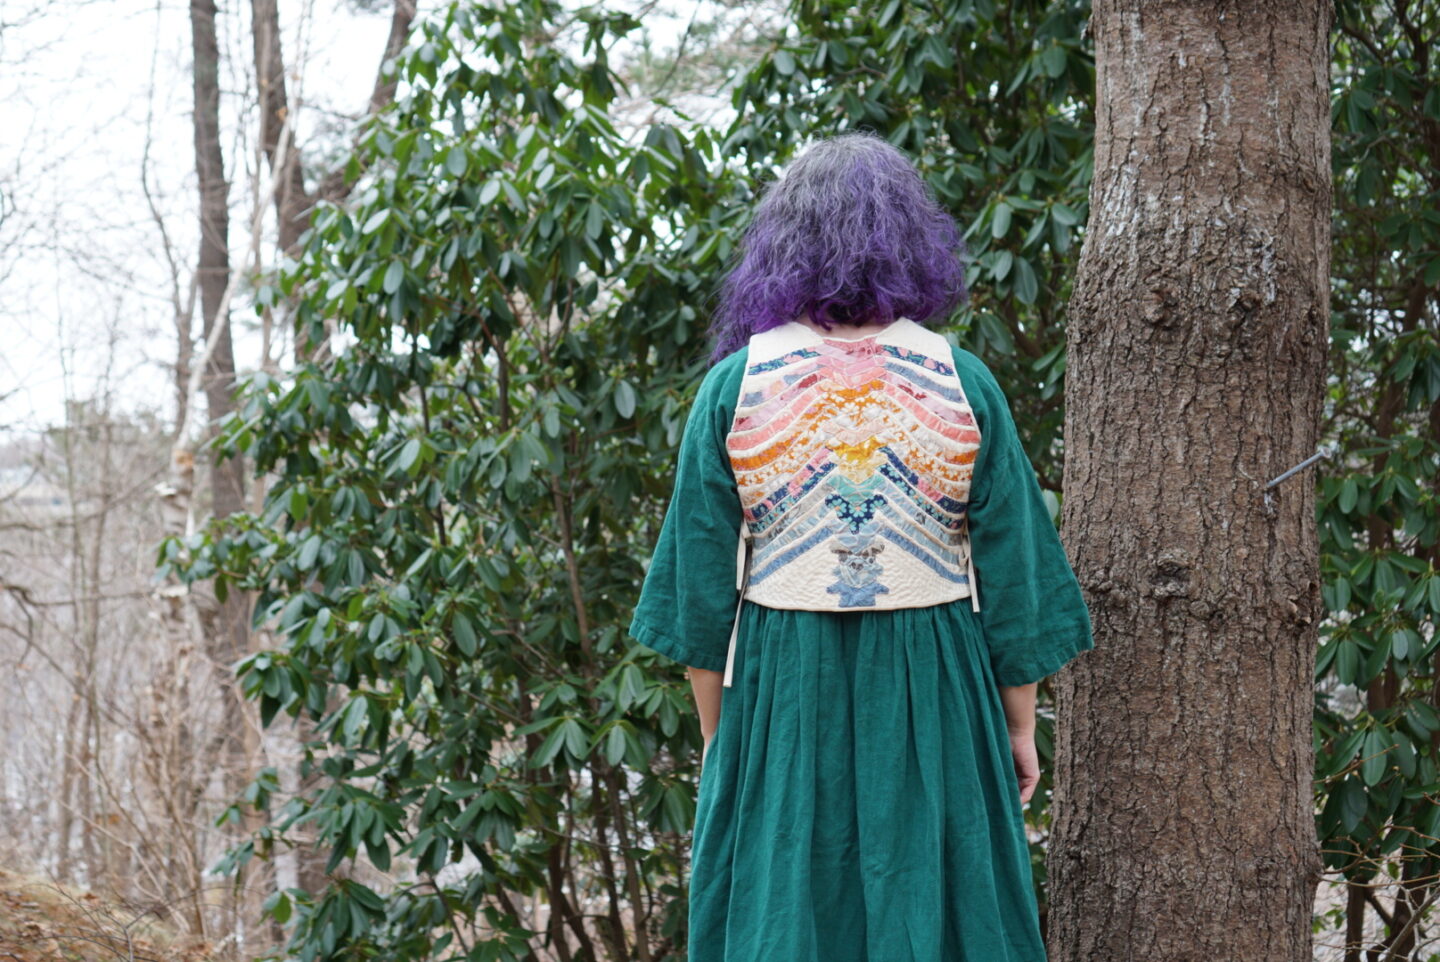
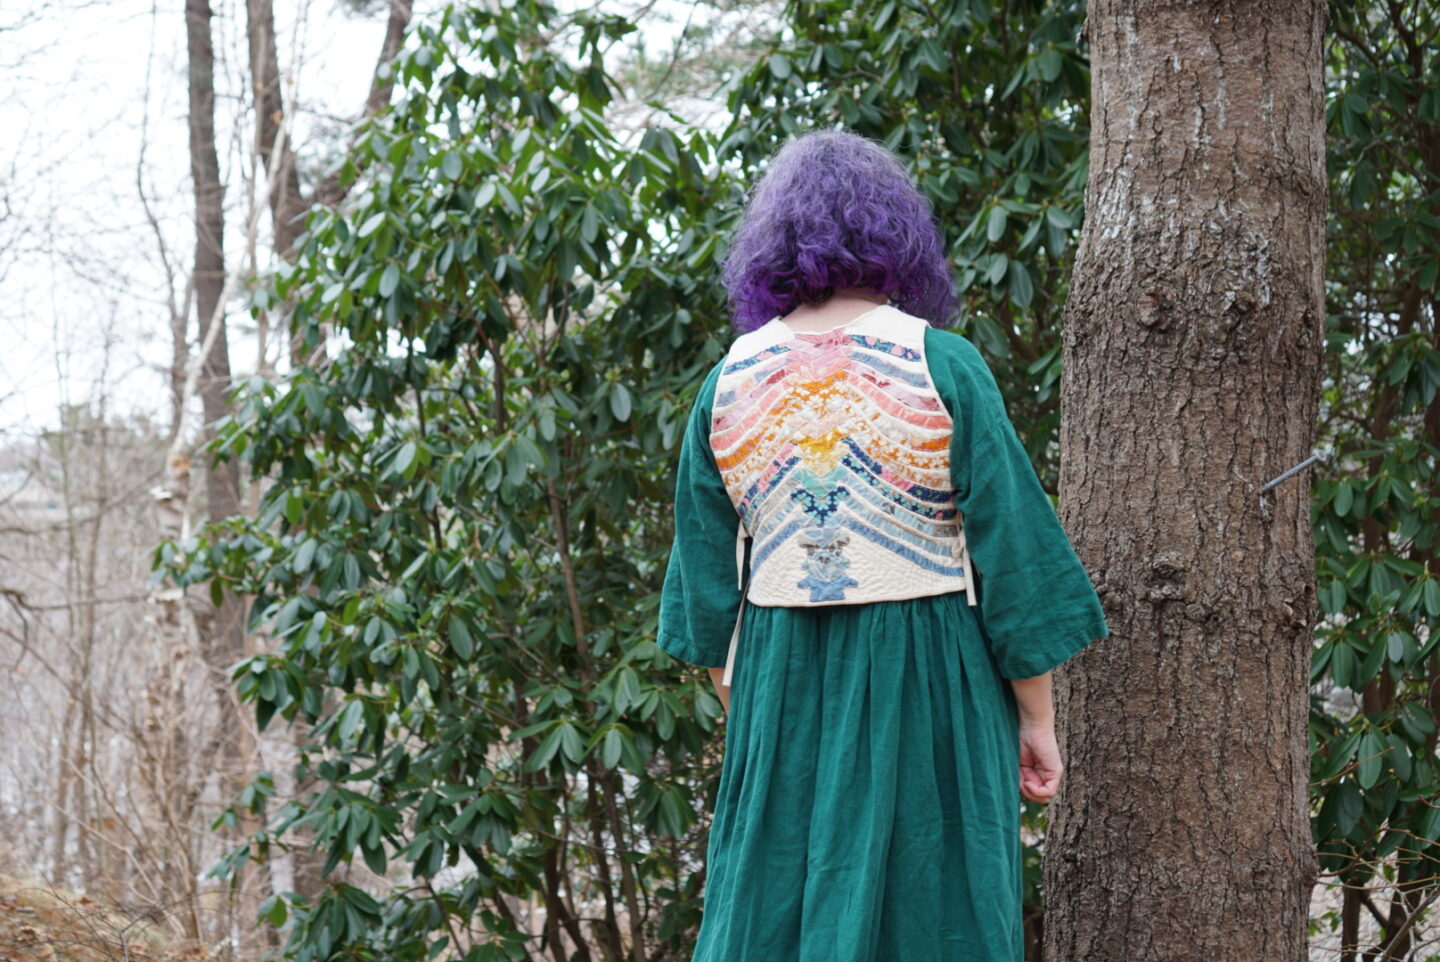
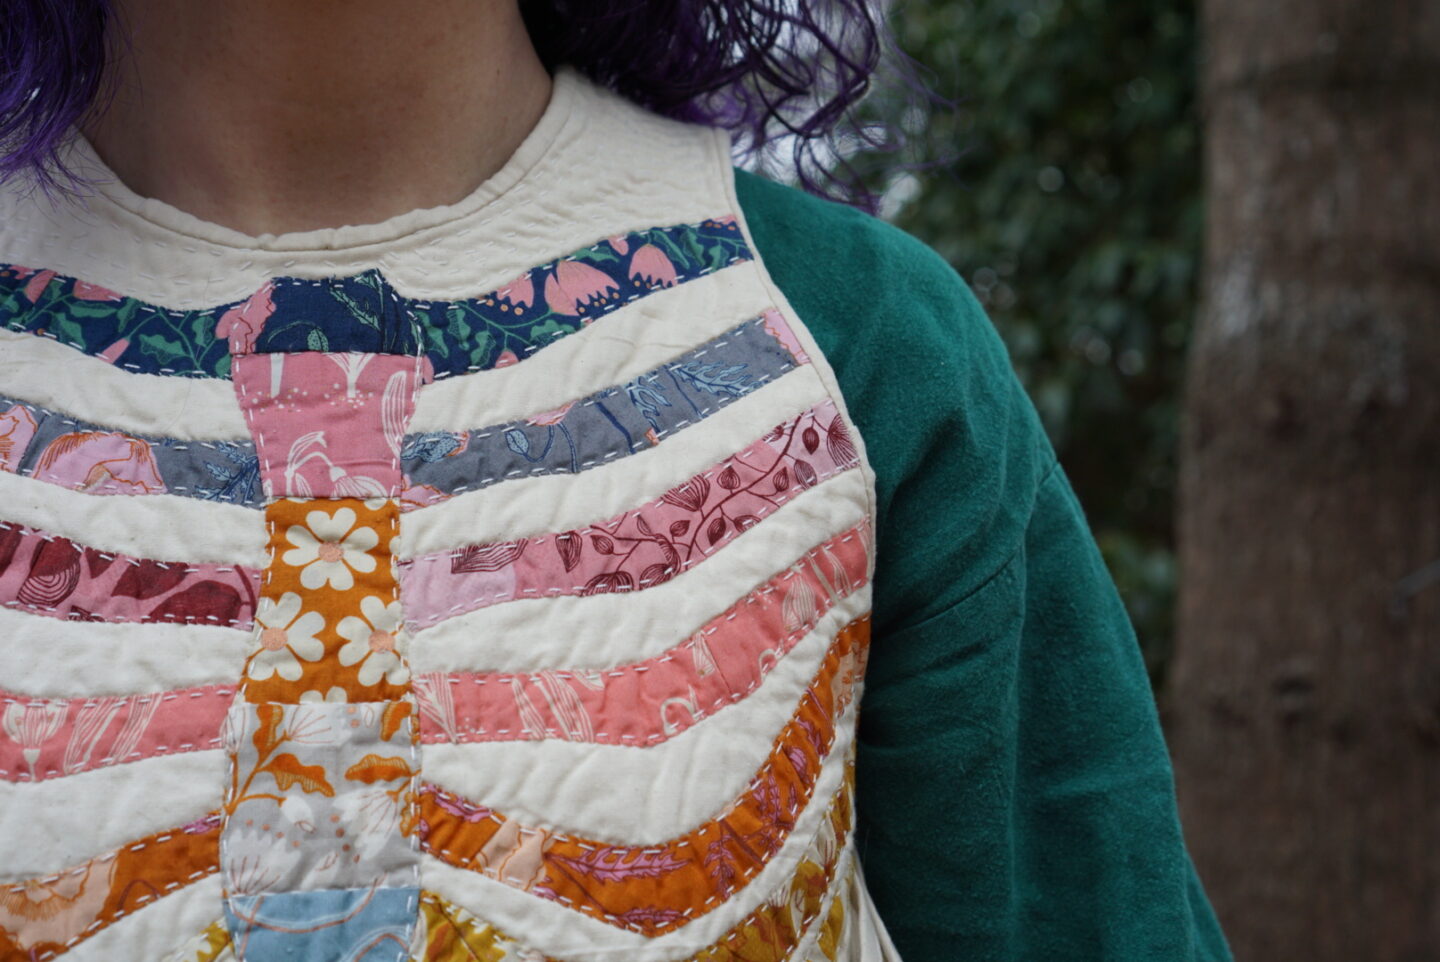
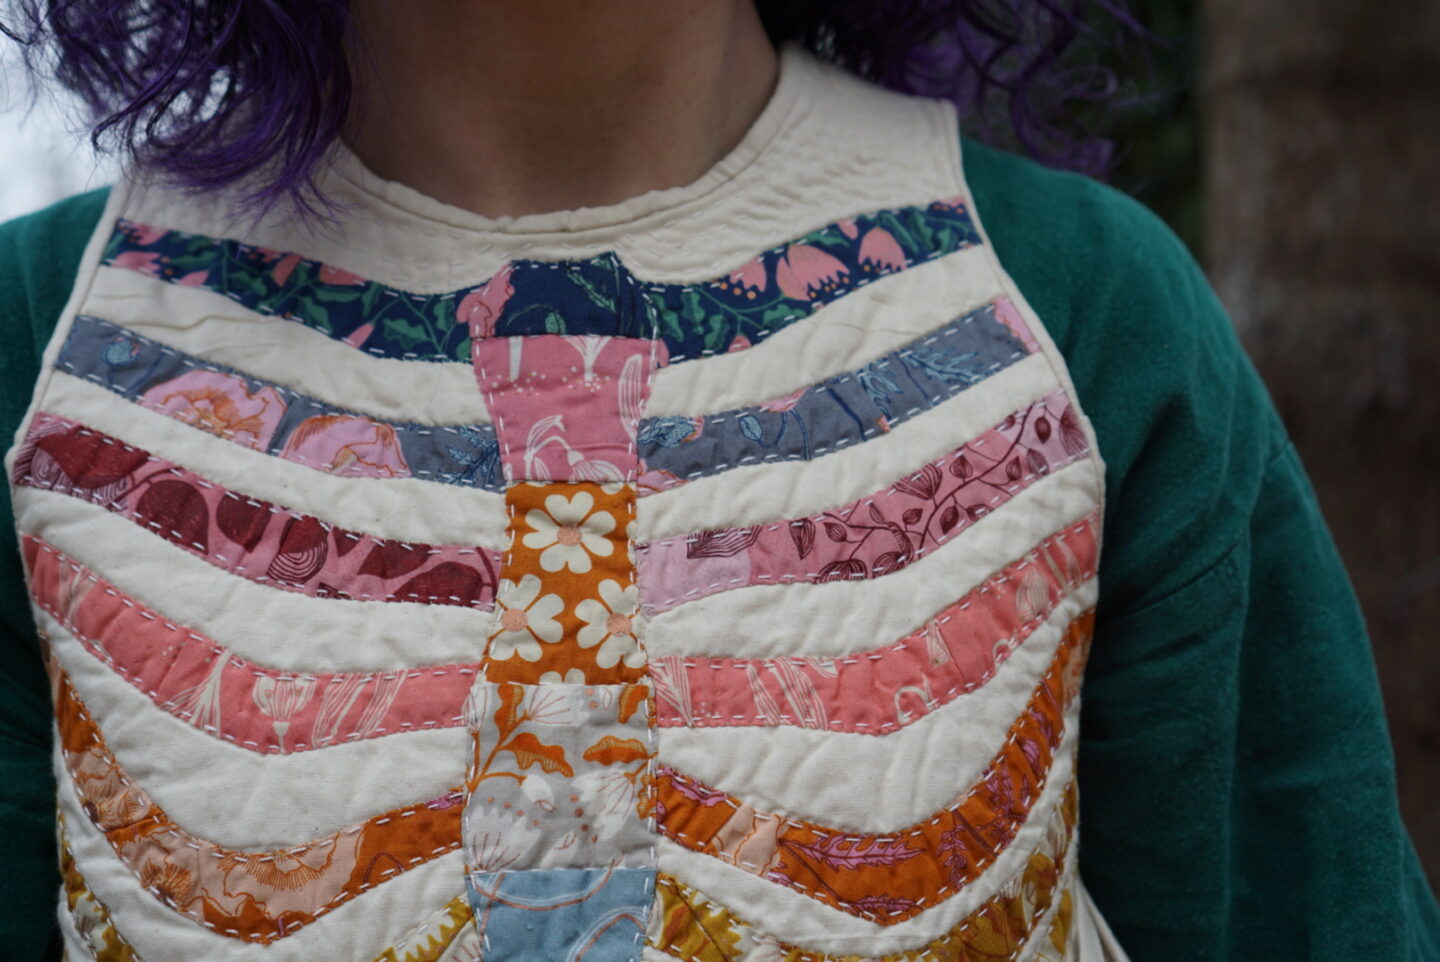
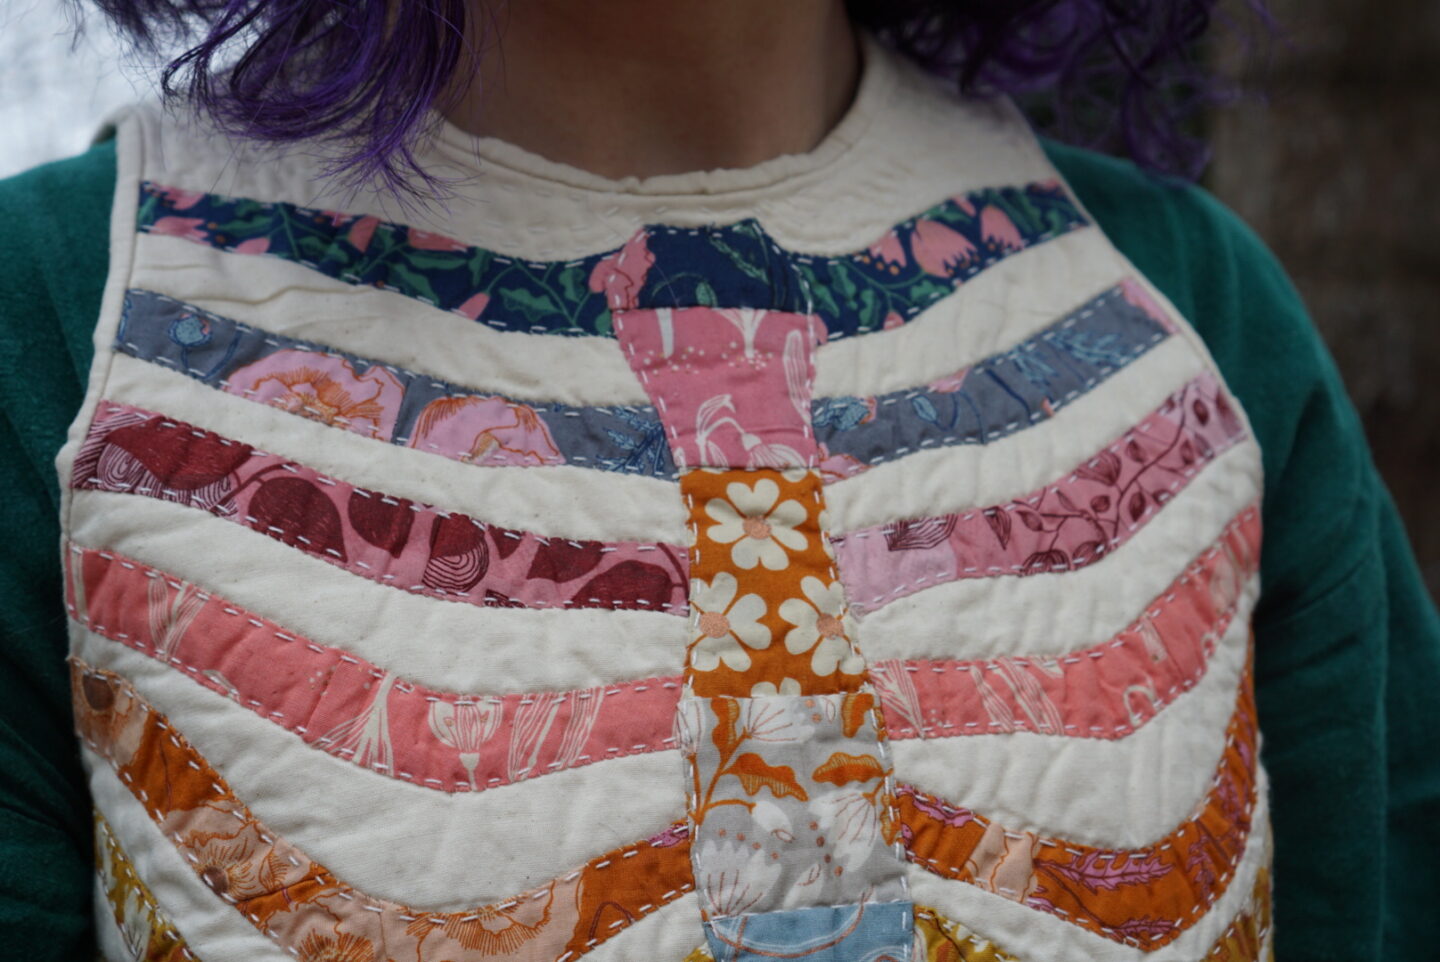
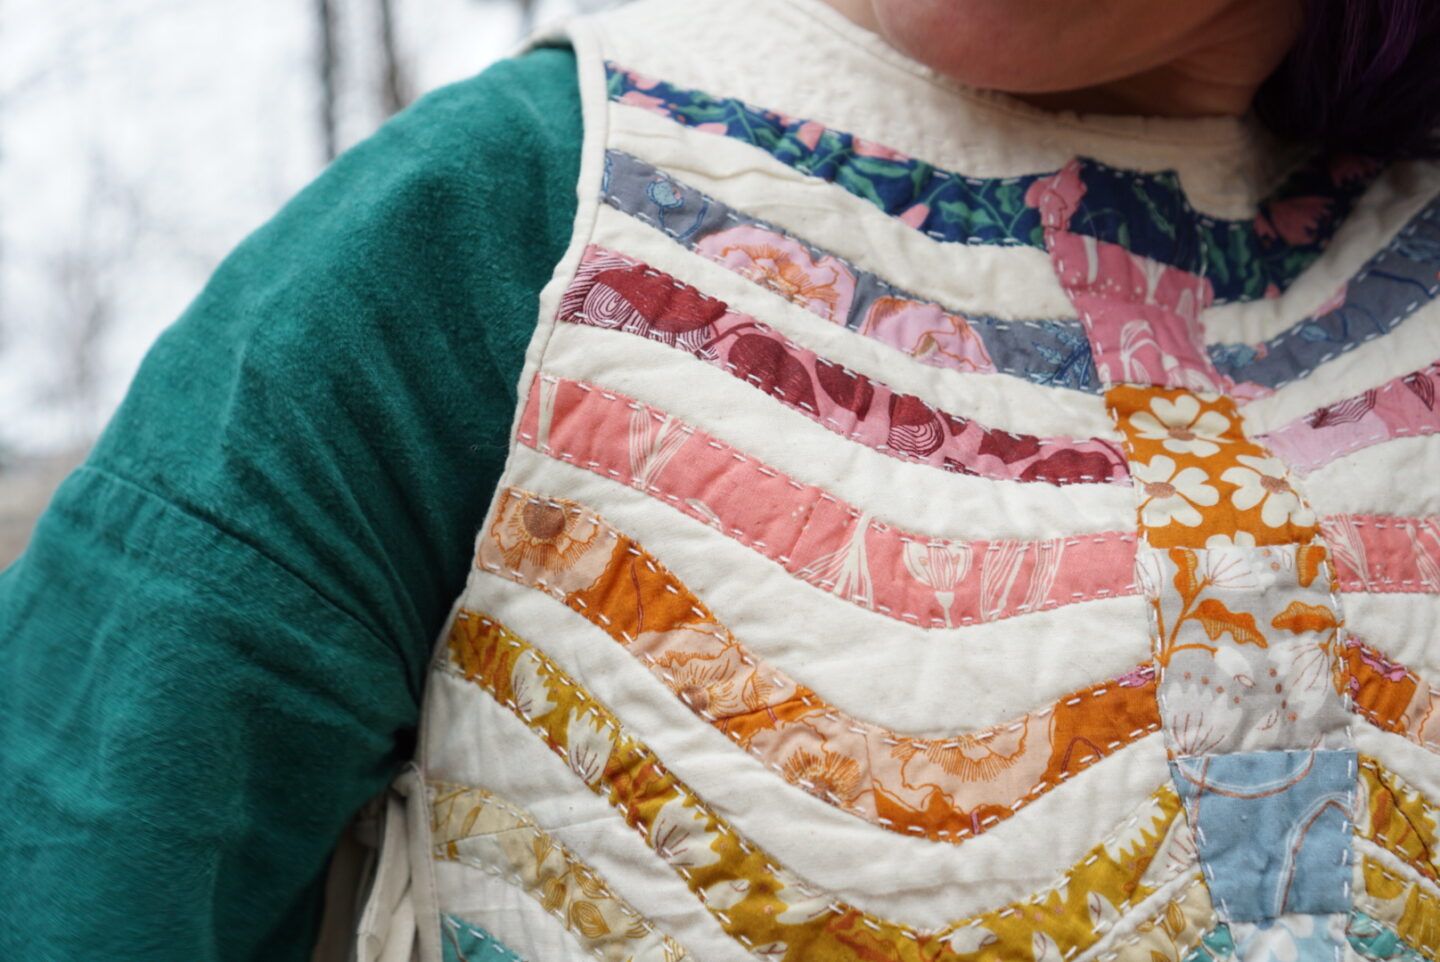
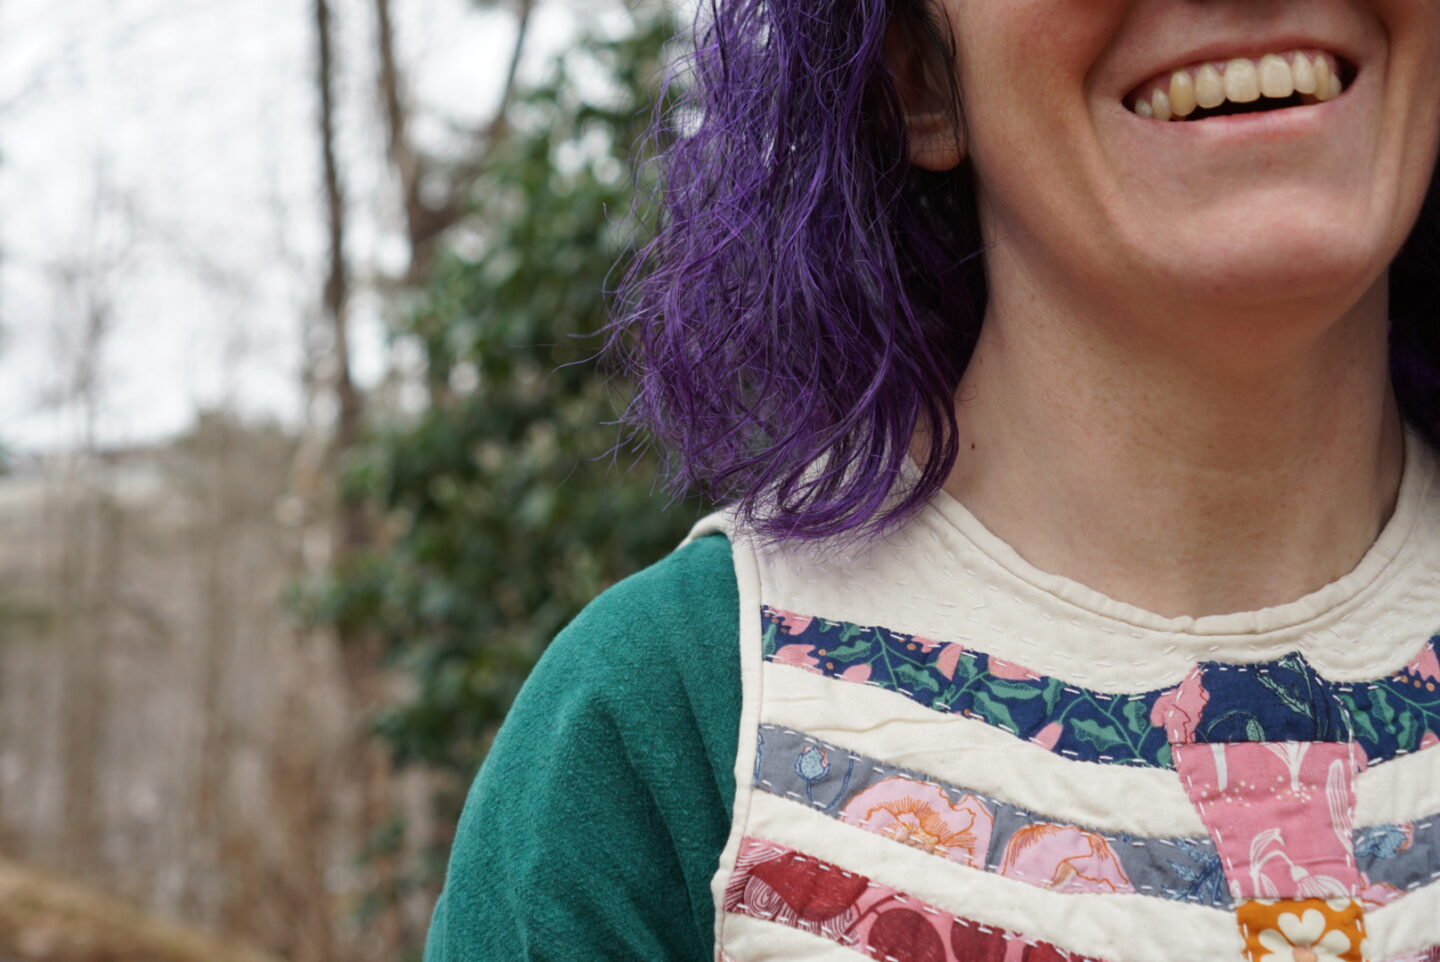
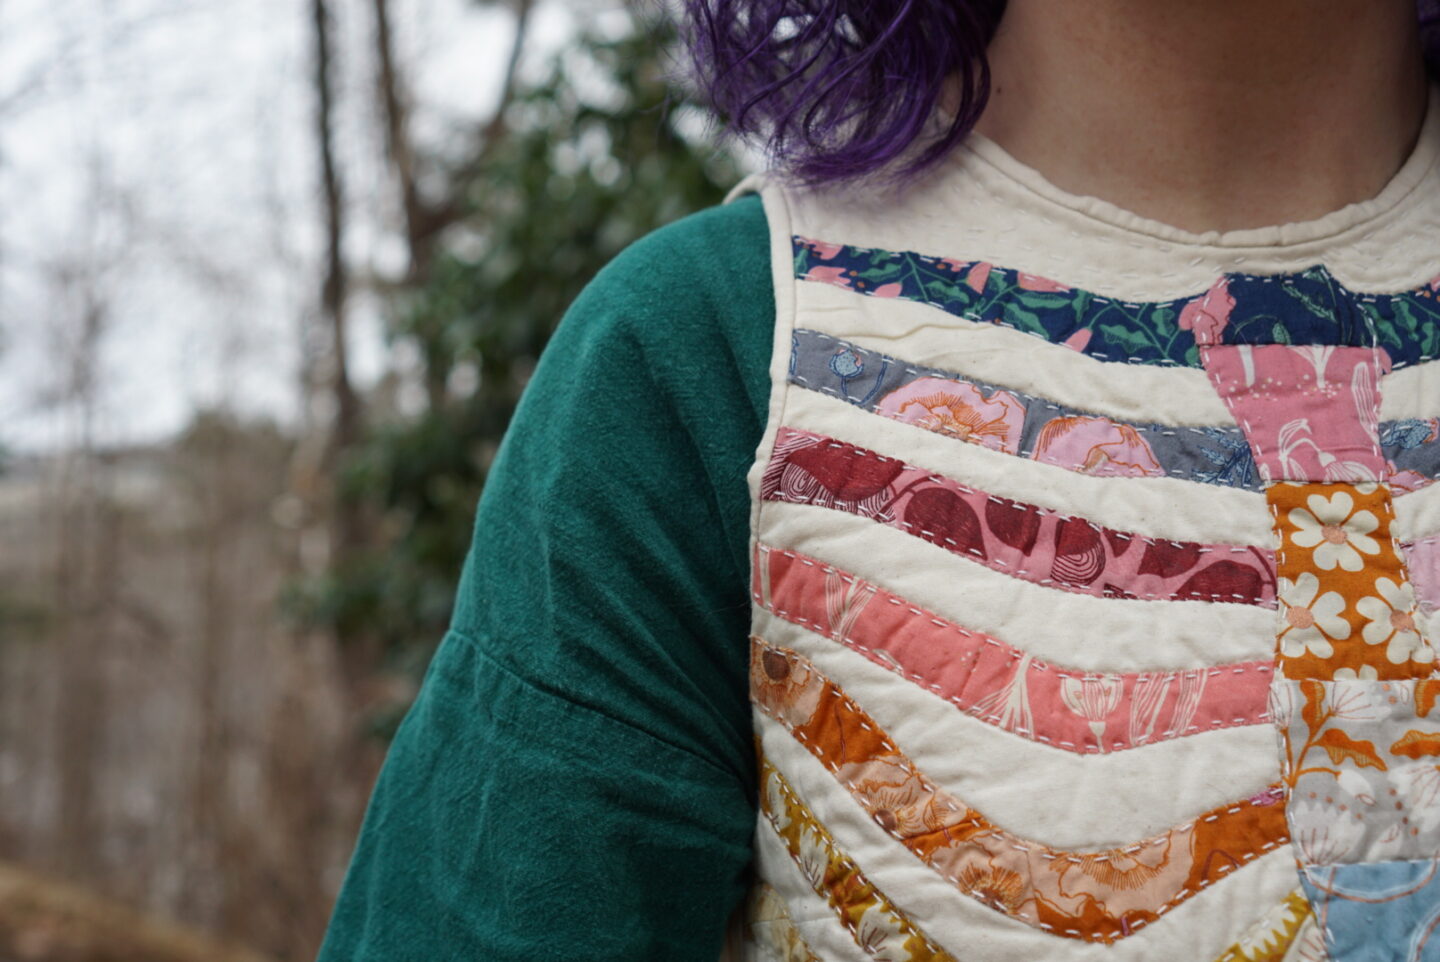
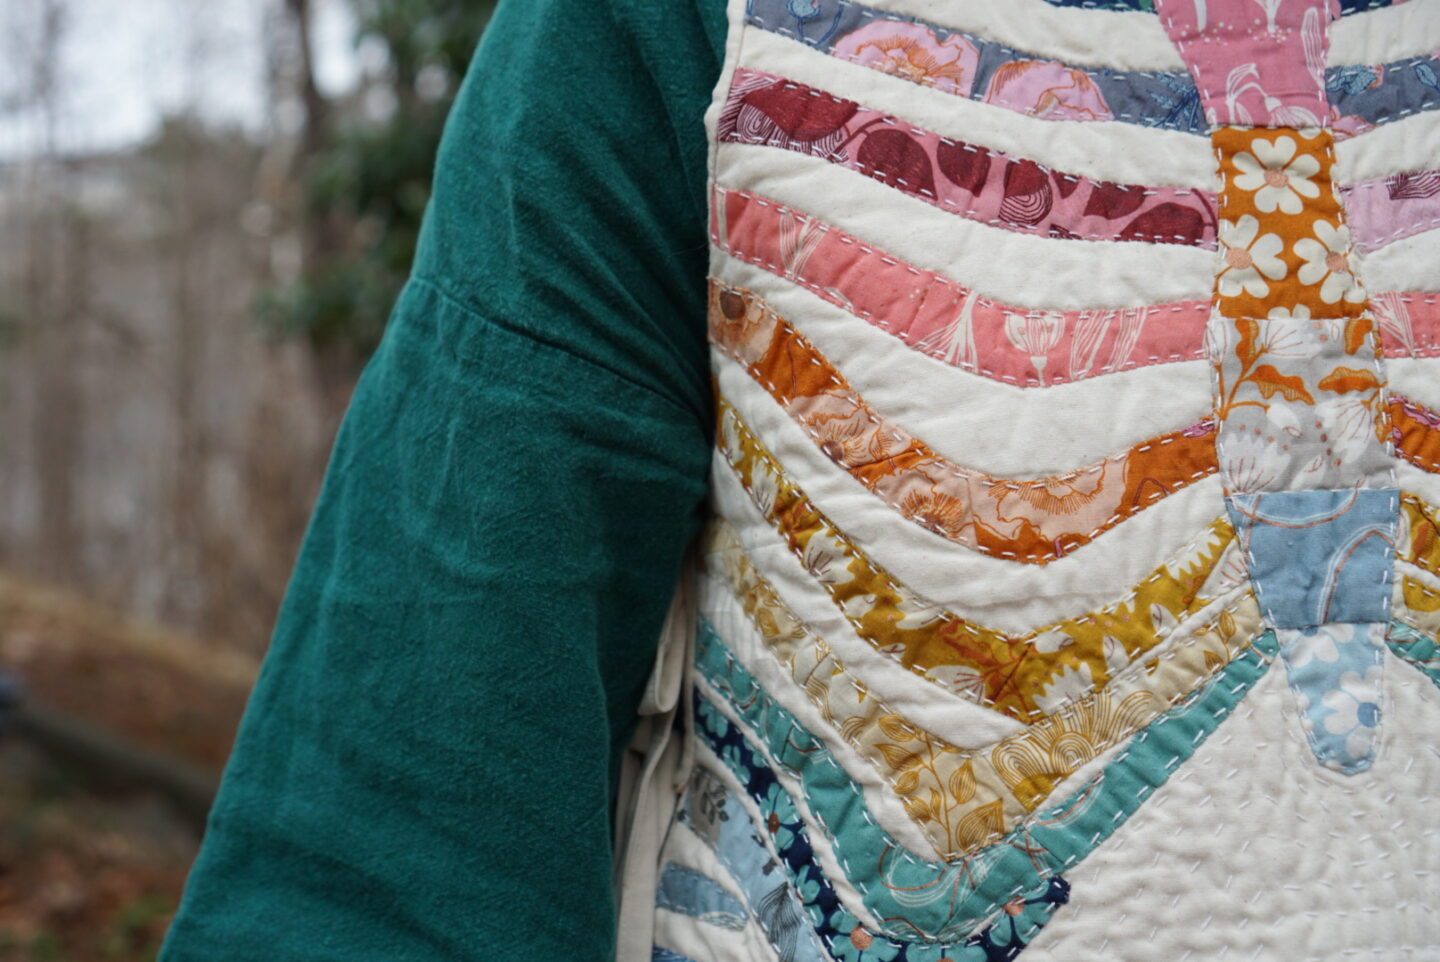
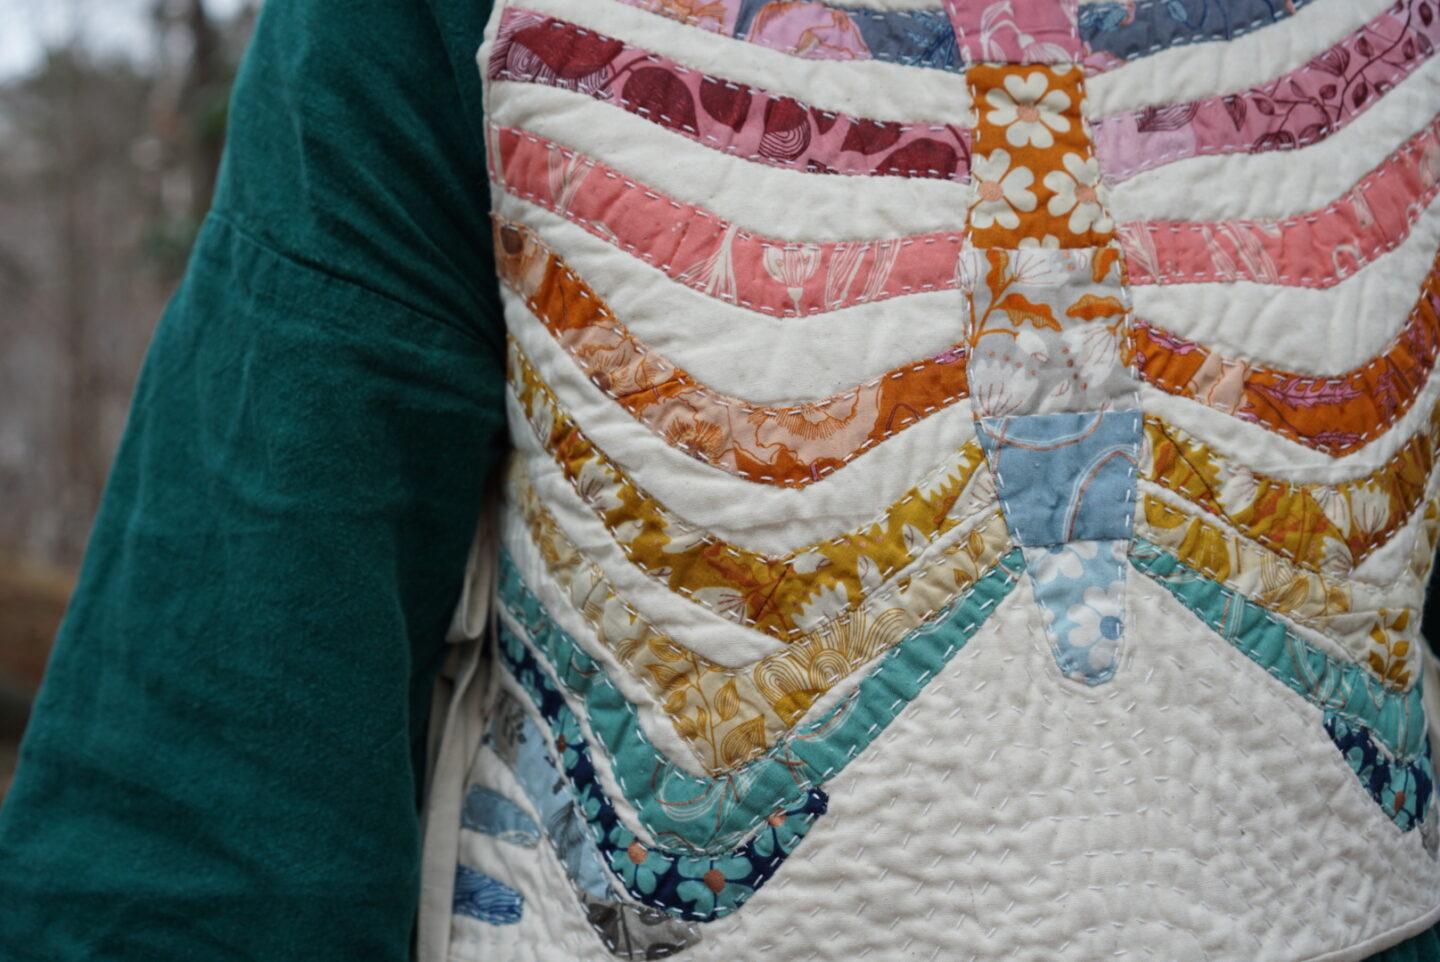
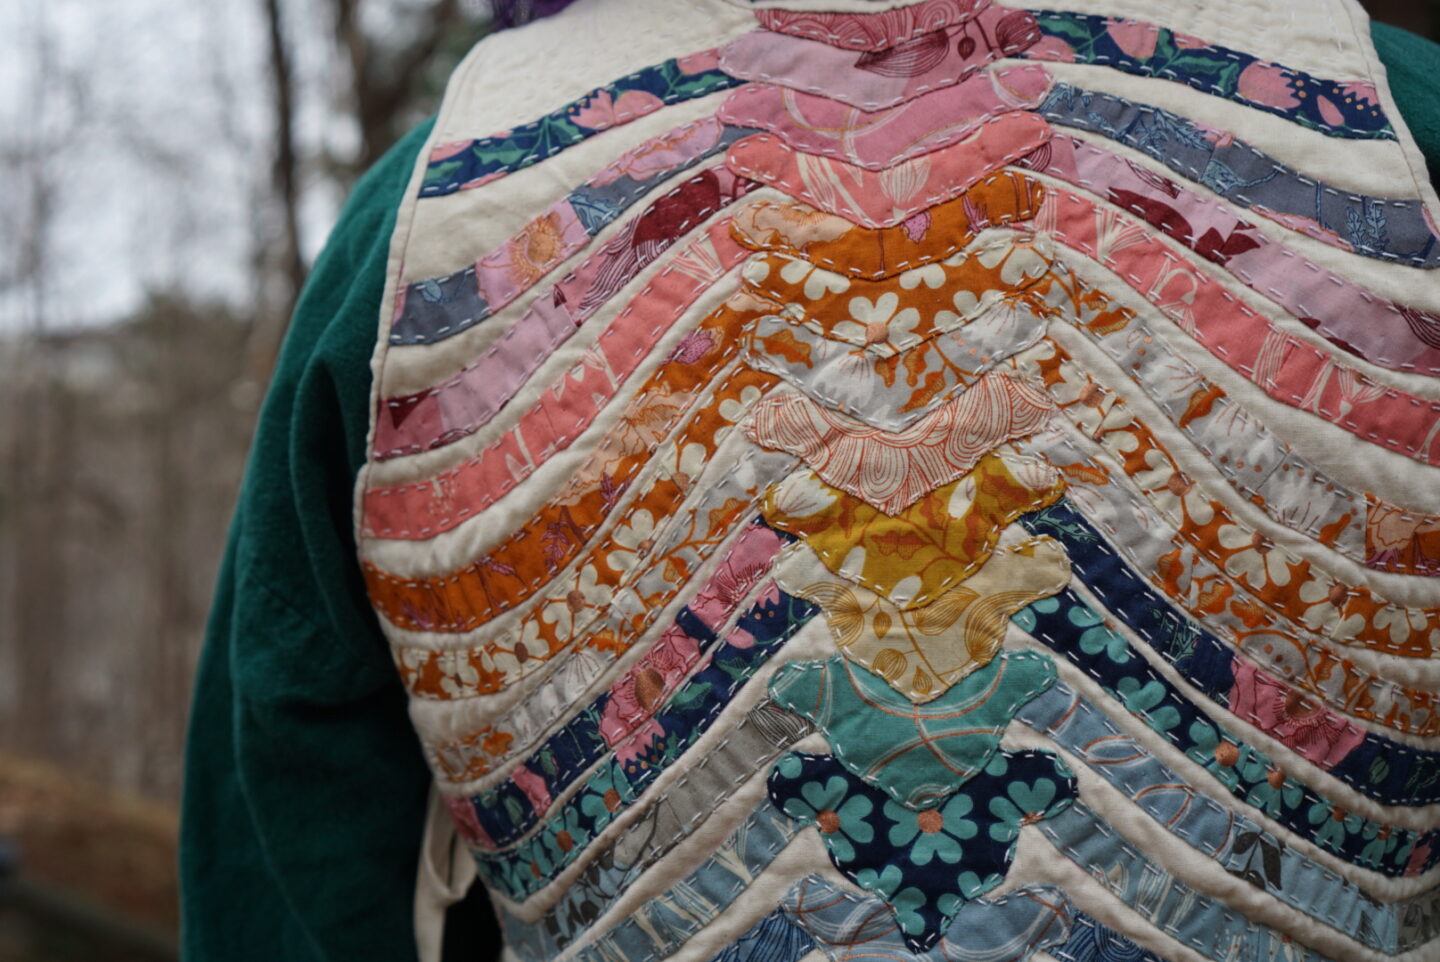
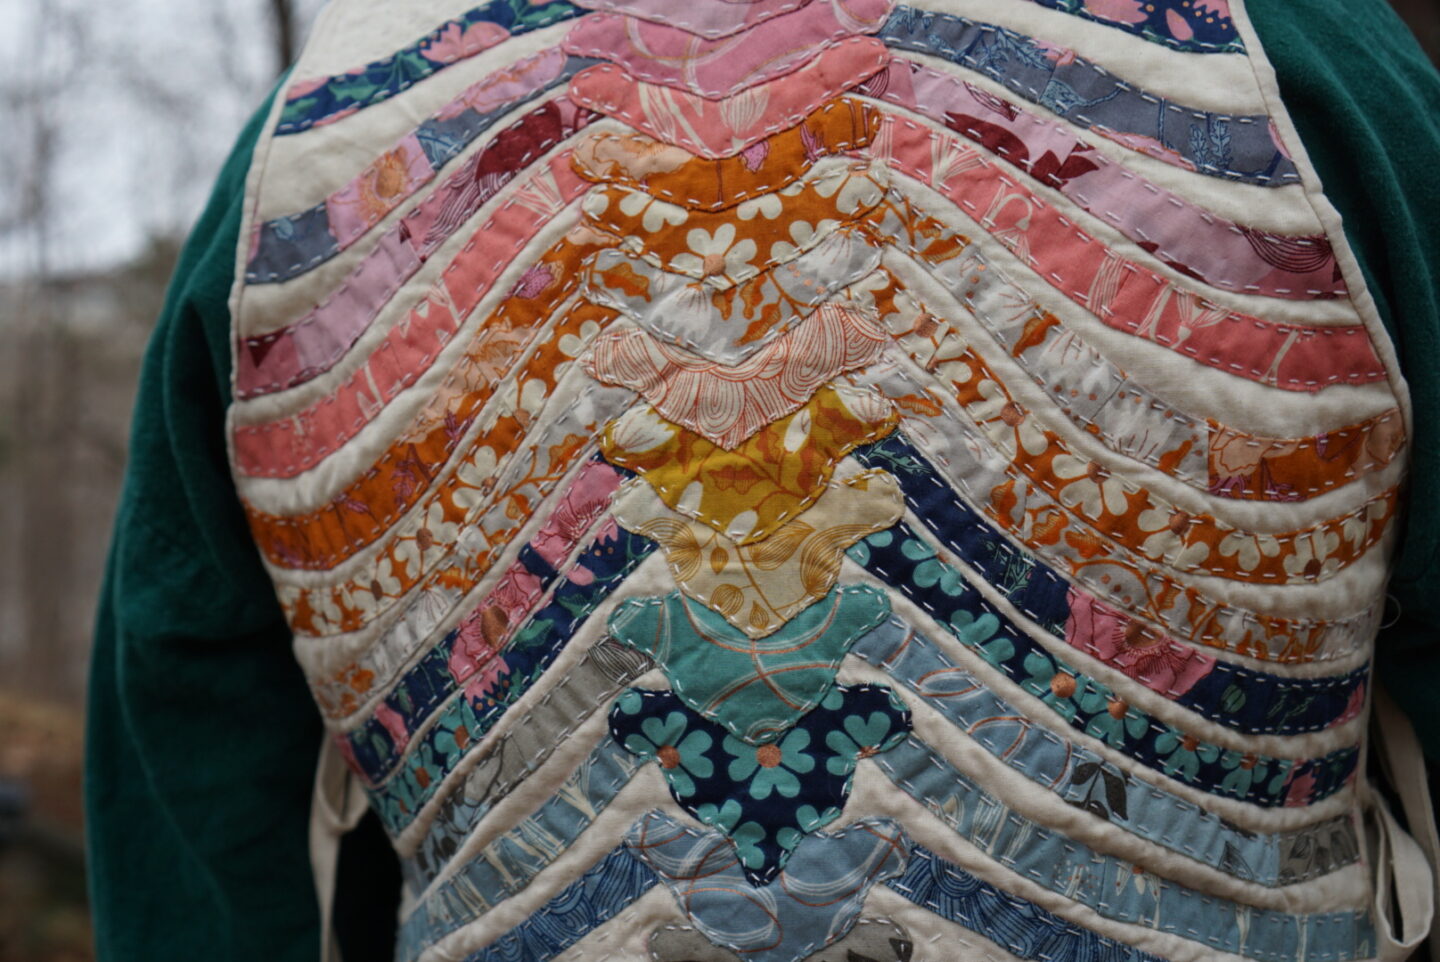
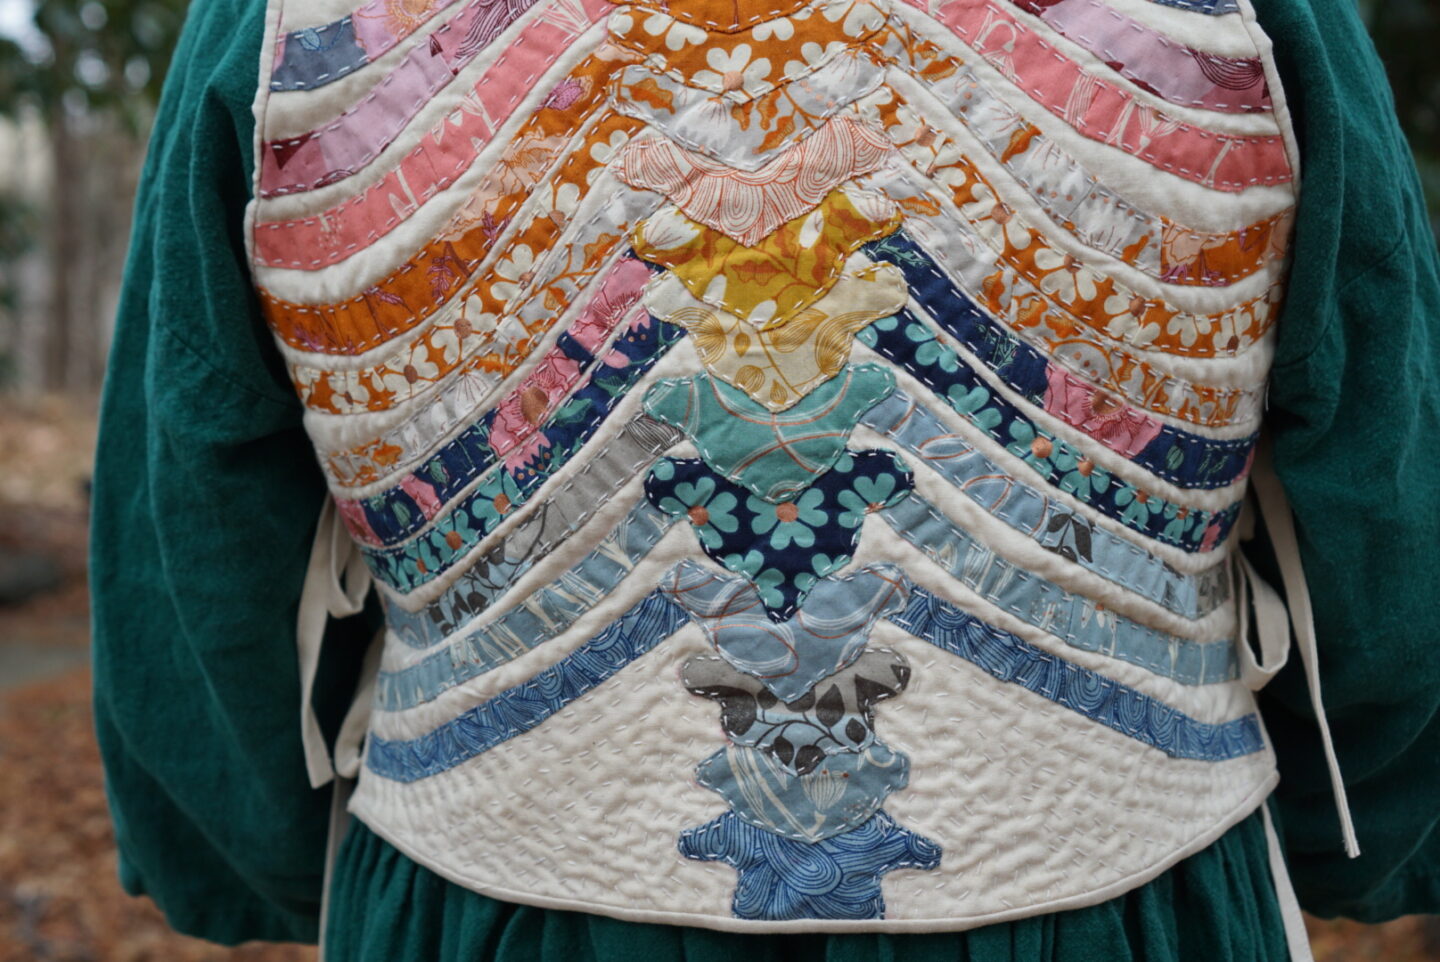
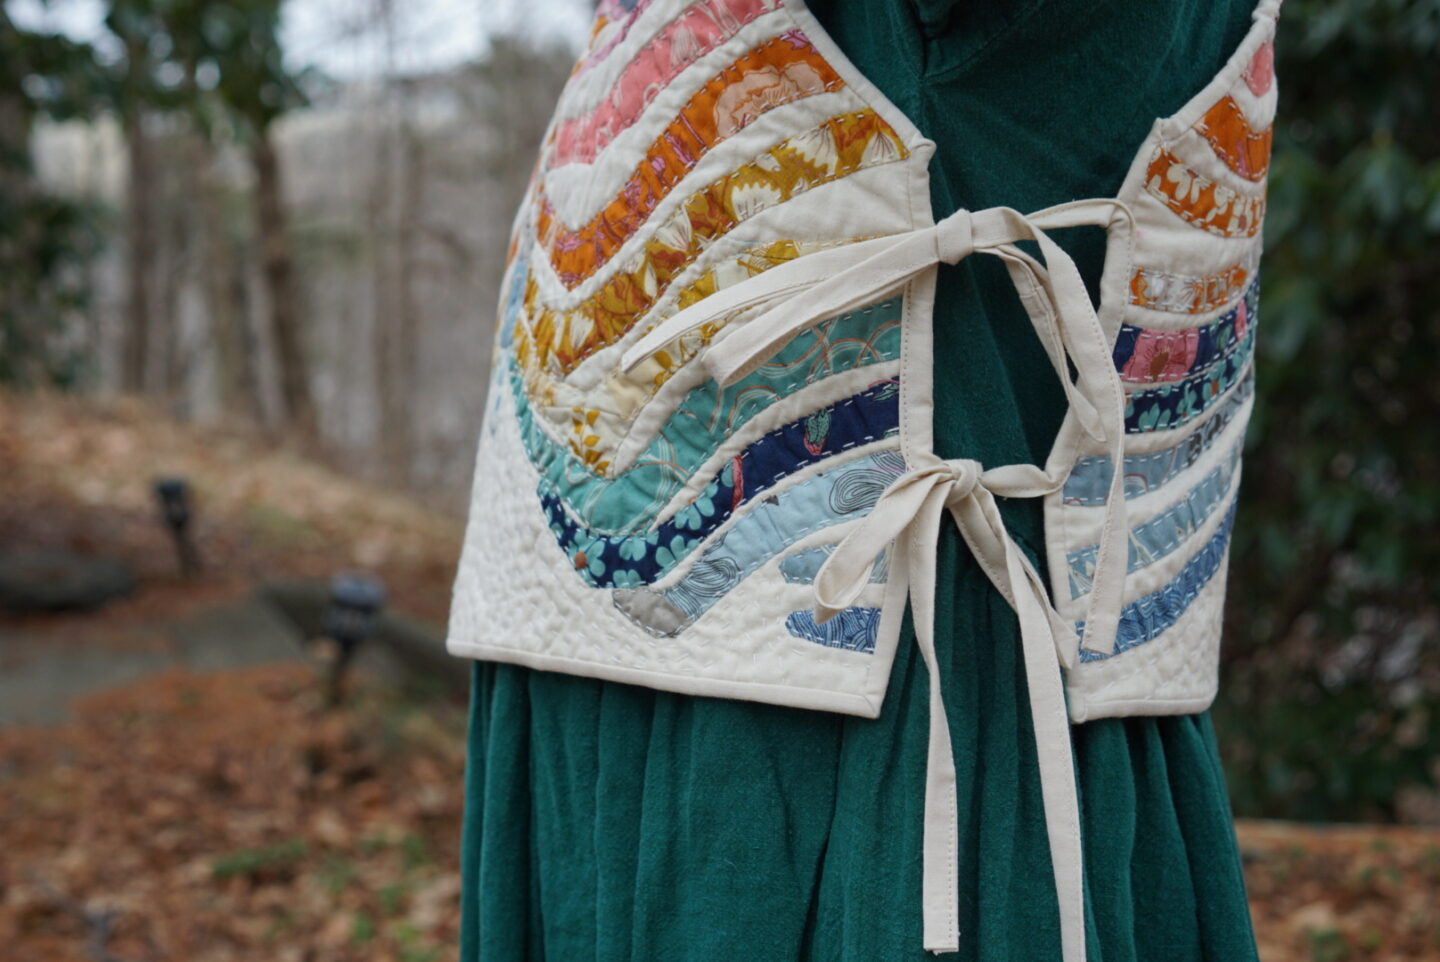
If you made it this far, I appreciate you! I applaud you! Thanks for being here! I’m so happy with this project, and am relieved that it turned out to be one of those things that was a wild idea but turned out exactly correctly and was just as good in reality as you hoped. Because that doesn’t always happen. I’m very interested in quilted vests now, and may make a plain fabric quilted vest in the future using the Side Tie Top pattern, but for now I am giving quilting a break. I want to make garments that take less than a month!
