
I had a rollercoaster of emotions with these two ornaments. I started off feeling proud of myself for trying out new skills. Then I had a lull. I binge-sewed. I stayed up too late. I despaired of it ever being finished in time. I finished the first ornament and squealed at how cute it was. The cuteness (and now having a bit more practice) propelled me into a speedy finish of the other ornament, most of it done in front of the recipient (my mother) while lying to her and telling her it was for a friend of mine. The recipient is over the moon about these two cuties. It all turned out well, and I have learned a lot. But phew! I am wrung out!
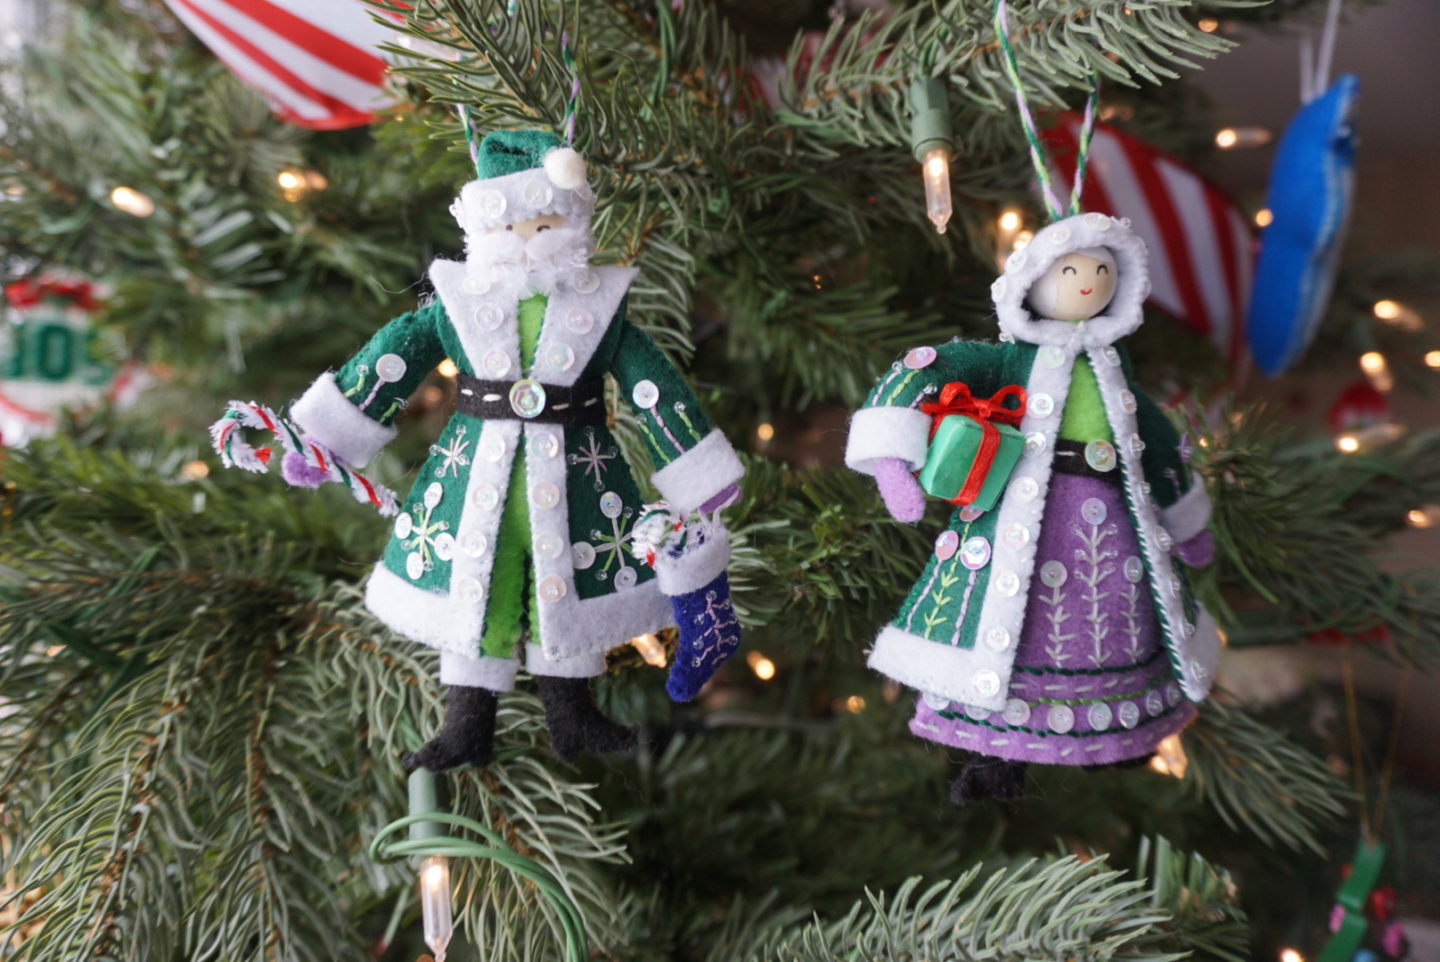

The ornaments in question are the Santa and Mrs. Claus ornaments designed by Larissa Holland, over at mmmcrafts on Etsy and Instagram. I’ve been following her for a few years and always had dreams of making one of her ornament designs. But I’d never embroidered anything or beaded anything in my life. I obviously know the basics of hand-sewing, but I knew nothing about any embroidery stitches and I’ve never used a sequin. I knew I was going to have to look up so many different things and I got a big mental block thinking about how I was incompetent and the ornaments would turn out mediocre and I’d have spent loads of time on a thing that I was not happy with. I don’t know what propelled me over this hump, but at the beginning of November I took the plunge and bought the patterns on Etsy. In order to keep the momentum going, I bought all of the materials the same week (although forgot a few weeks later once I actually started sewing them that I’d been unable to find certain things and then had to make do – more on that later!).
The main reason I thought maybe I could handle making these ornaments was because of the process Larissa uses for transferring the templates and designs onto the felt. She has you use this water soluble stabilizer that you can theoretically print right on with your home printer, and then you stick it onto your felt sheets and it shows you exactly where to cut and where all the sequins and stitching details should go. I say “theoretically print” because my home printer is a 15+ year old laser printer that refuses to double sided printing even when it’s in the best of moods, so it valiantly tried to scoop a stabilizer sheet from my paper drawer before immediately gumming up and flashing me a red light. What I did instead was print the templates on regular paper and then trace the shapes and designs onto the stabilizer with a pen, holding it all up against a window so I could see it properly. Once that was done, it all felt a lot more manageable. Since I’ve made quilts before, the amount of pieces I had floating around for the ornaments didn’t feel unmanageable. There’s also a few extras included on the template sheets in case you lose them, like I did with Santa’s teeny tiny moustaches bits. I’m pretty sure they washed down the sink, to be honest.
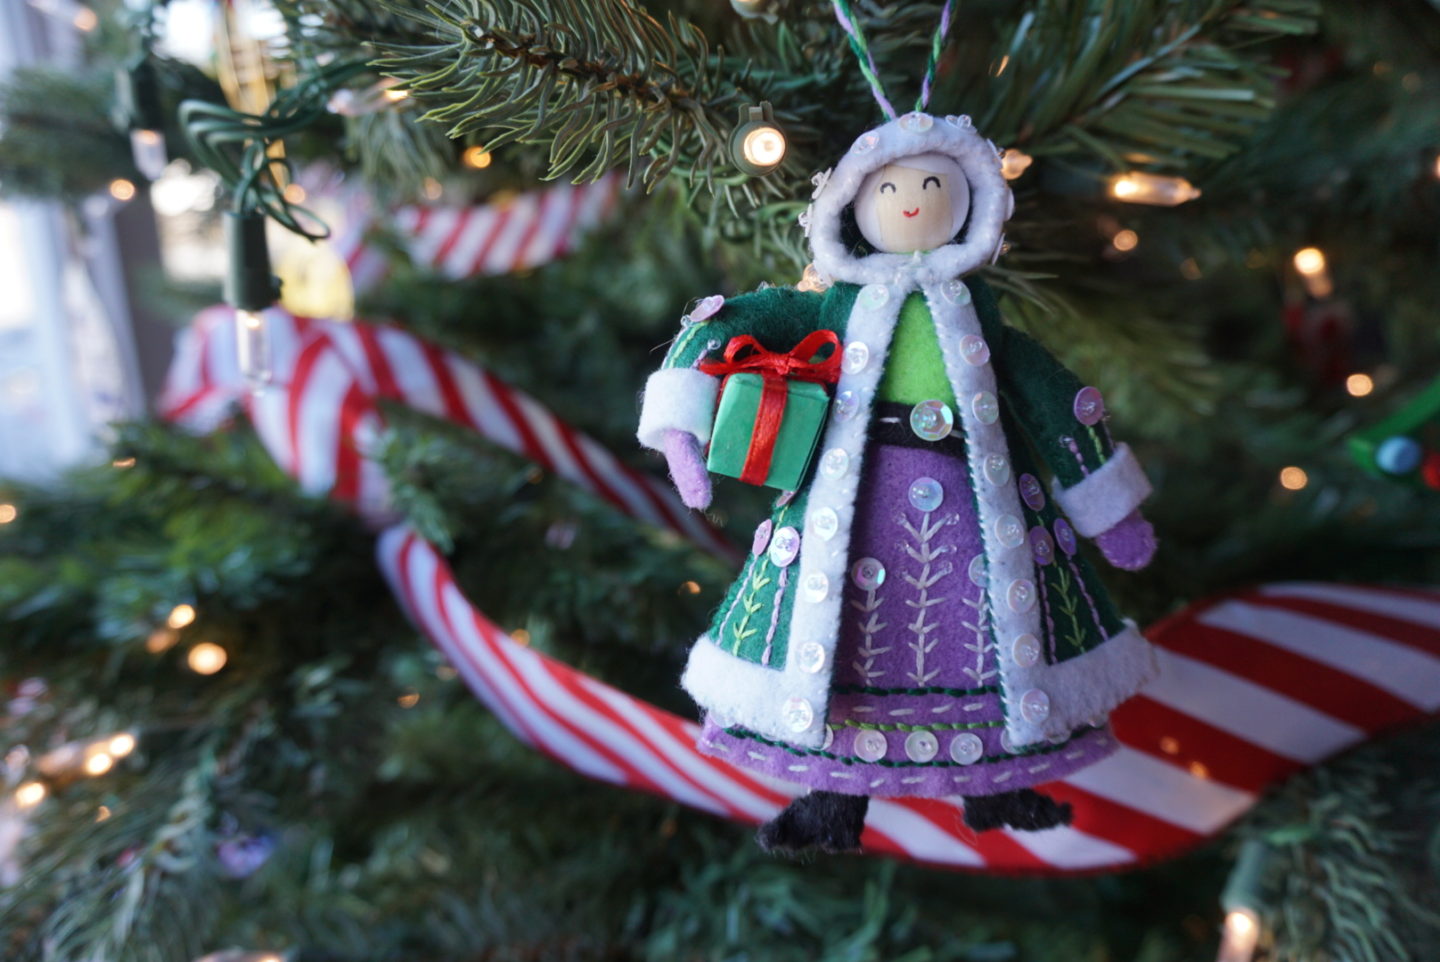
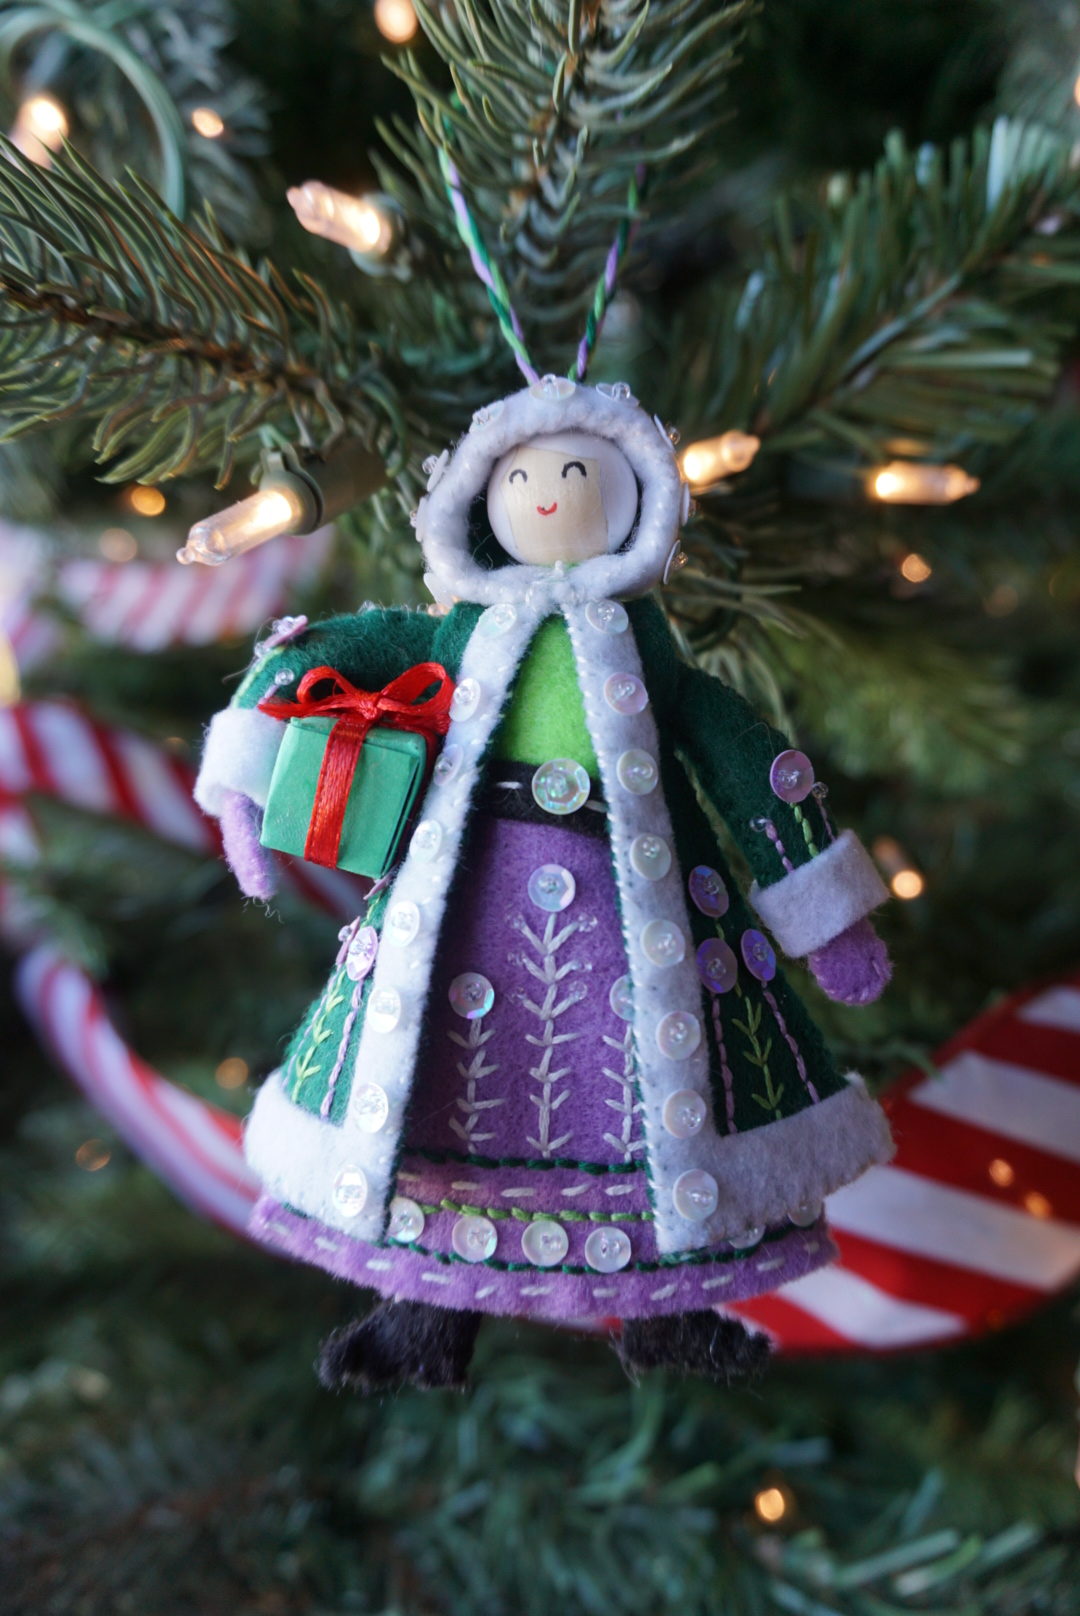
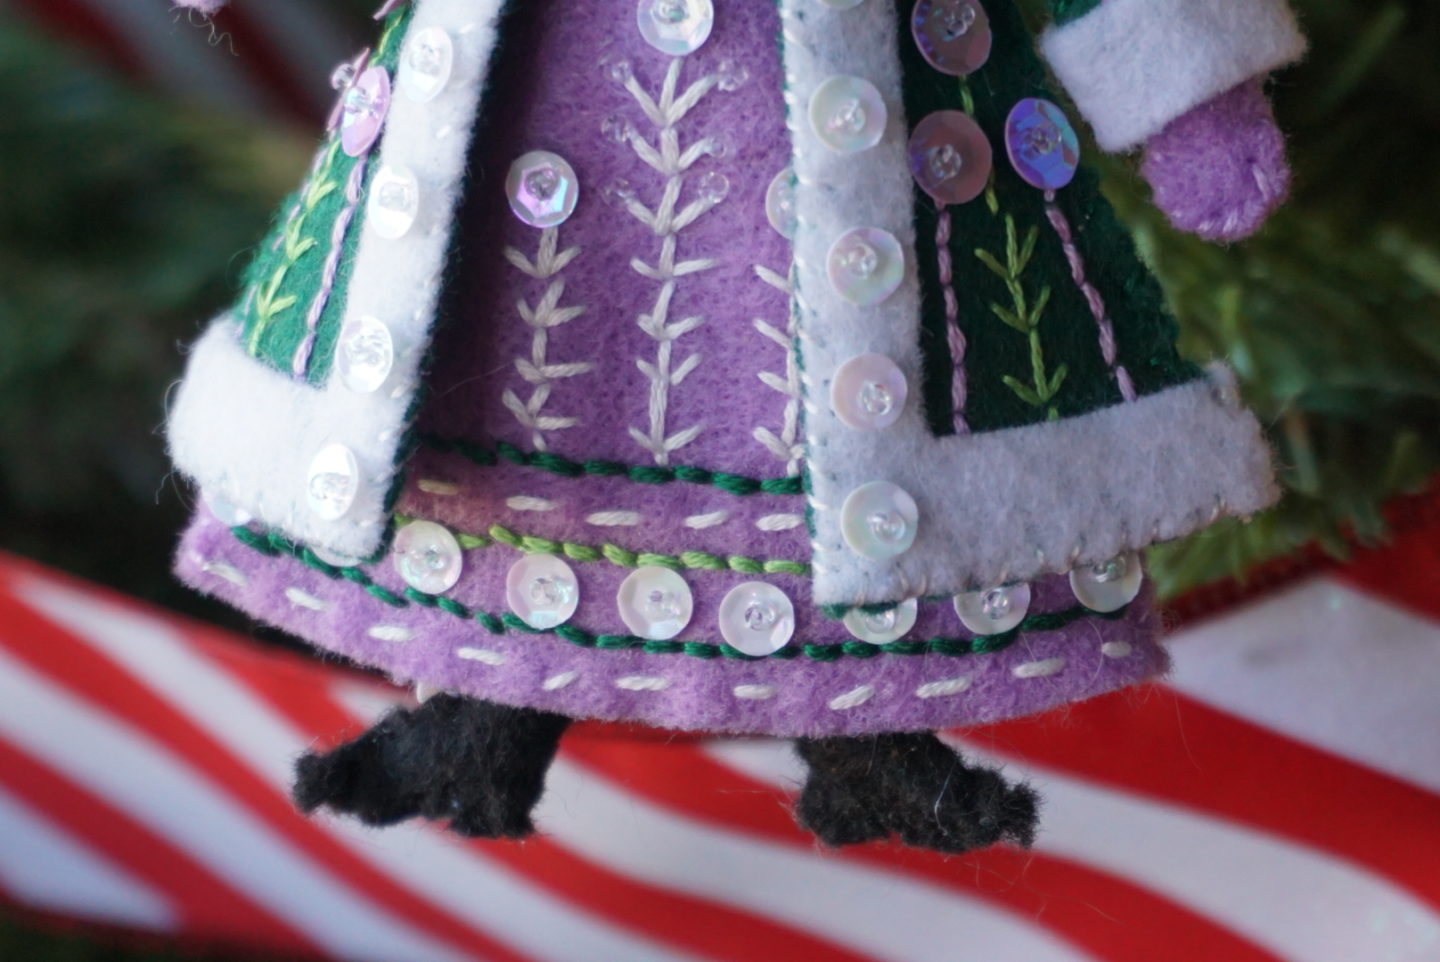
Let’s talk about the Mrs. Claus ornament first! She’s the first one I completed. For both of these ornaments, I was super disciplined for once and actually did all of the piece preparation before continuing to any assembly. I did all the embroidery and beading and sequins, and I definitely improved as I went along. I also started to let go of the idea that things were going to look as perfect as my sister’s embroidery. I have no idea why I was even attached to this idea in the first place because I have never embroidered and she is a literal professional embroiderer! Once you have done all of the details on each piece, you cut them out along the outlines and then soak them in water for 20 minutes before rinsing the stabilizer off completely. They then have to dry. Mine dried pretty quickly because I could not find wool felt anywhere and despite her instructions ominously telling me not to use anything else besides wool felt (or cotton pipecleaners, later on) I went with what I could find and it’s just acrylic felt which didn’t hold much water if I patted them with paper towel. Something that helped me keep things organized was having the paper template sheets out and laying the felt pieces on top of the corresponding outline once it was dry.
I started off initially with the thought that I would do all of the similar steps for the ornaments in tandem to make things easier, however that went out the window after more and more time passed and it was late at night and I was panicking. A big factor that contributed to that was realizing how much gluing there was and that my glue (clear Elmer’s school glue) was not as fast-drying as her recommended glue that I could not find anywhere. The reason Mrs. Claus got ahead of Santa was his beard. It needs to stick onto his head bead, and I didn’t want to rush the drying process so I pushed onward with Mrs. Claus while his beard set overnight. Once I realized how many steps needed drying time, I skipped around in the instructions and tried to isolate as many gluing steps as possible so they could all dry while I did other things. I struggled with the stuffing process, because I radically overestimated how much stuffing would be needed for their tiny tiny bodies, but I improved on that as I went along.
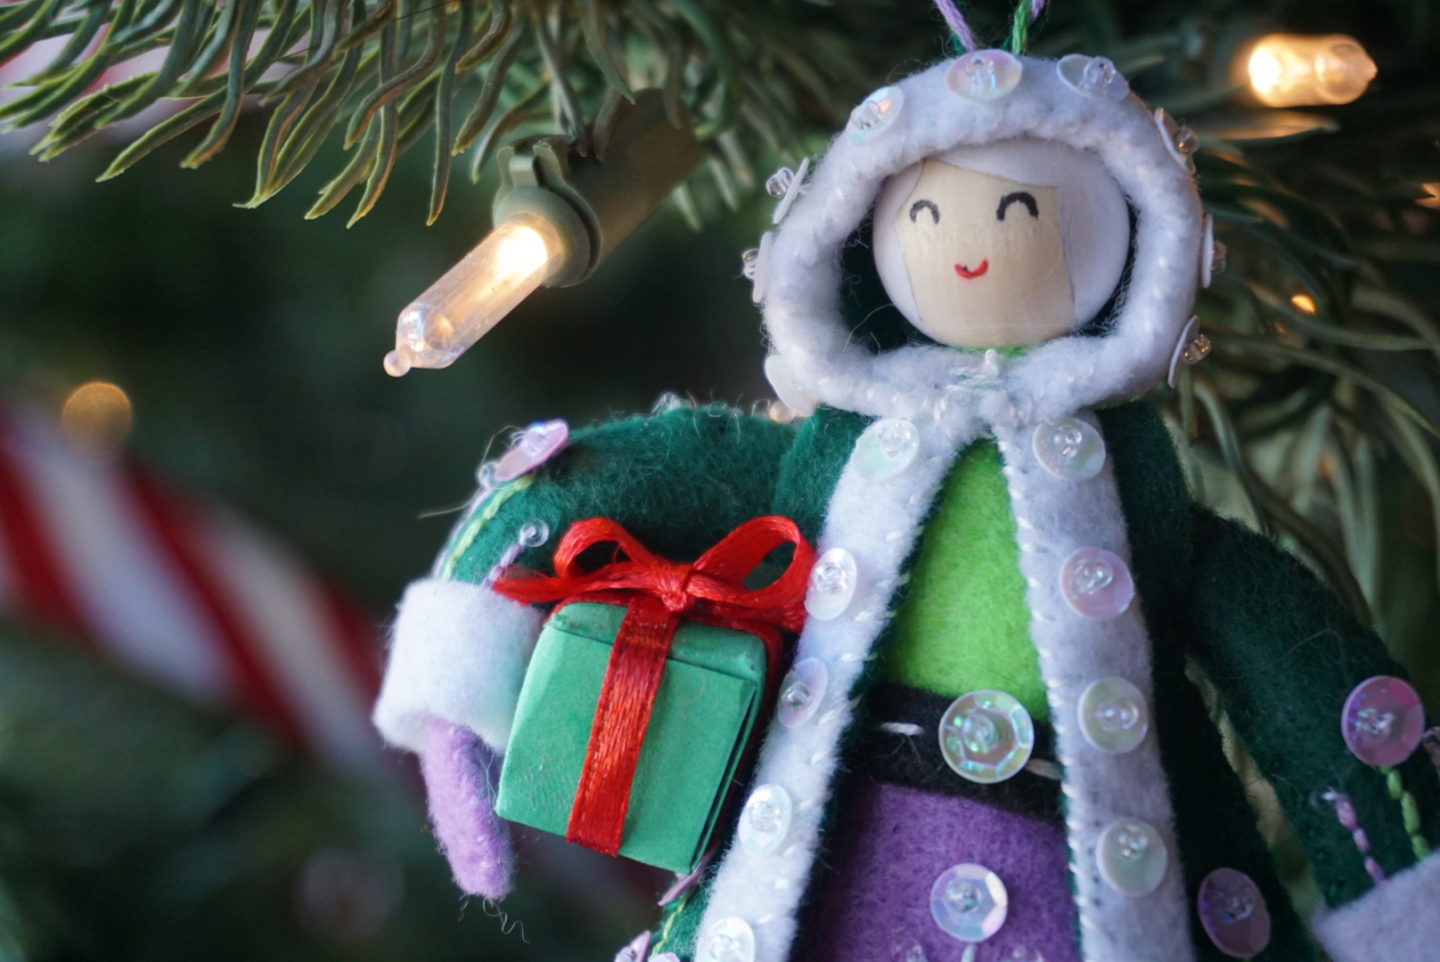
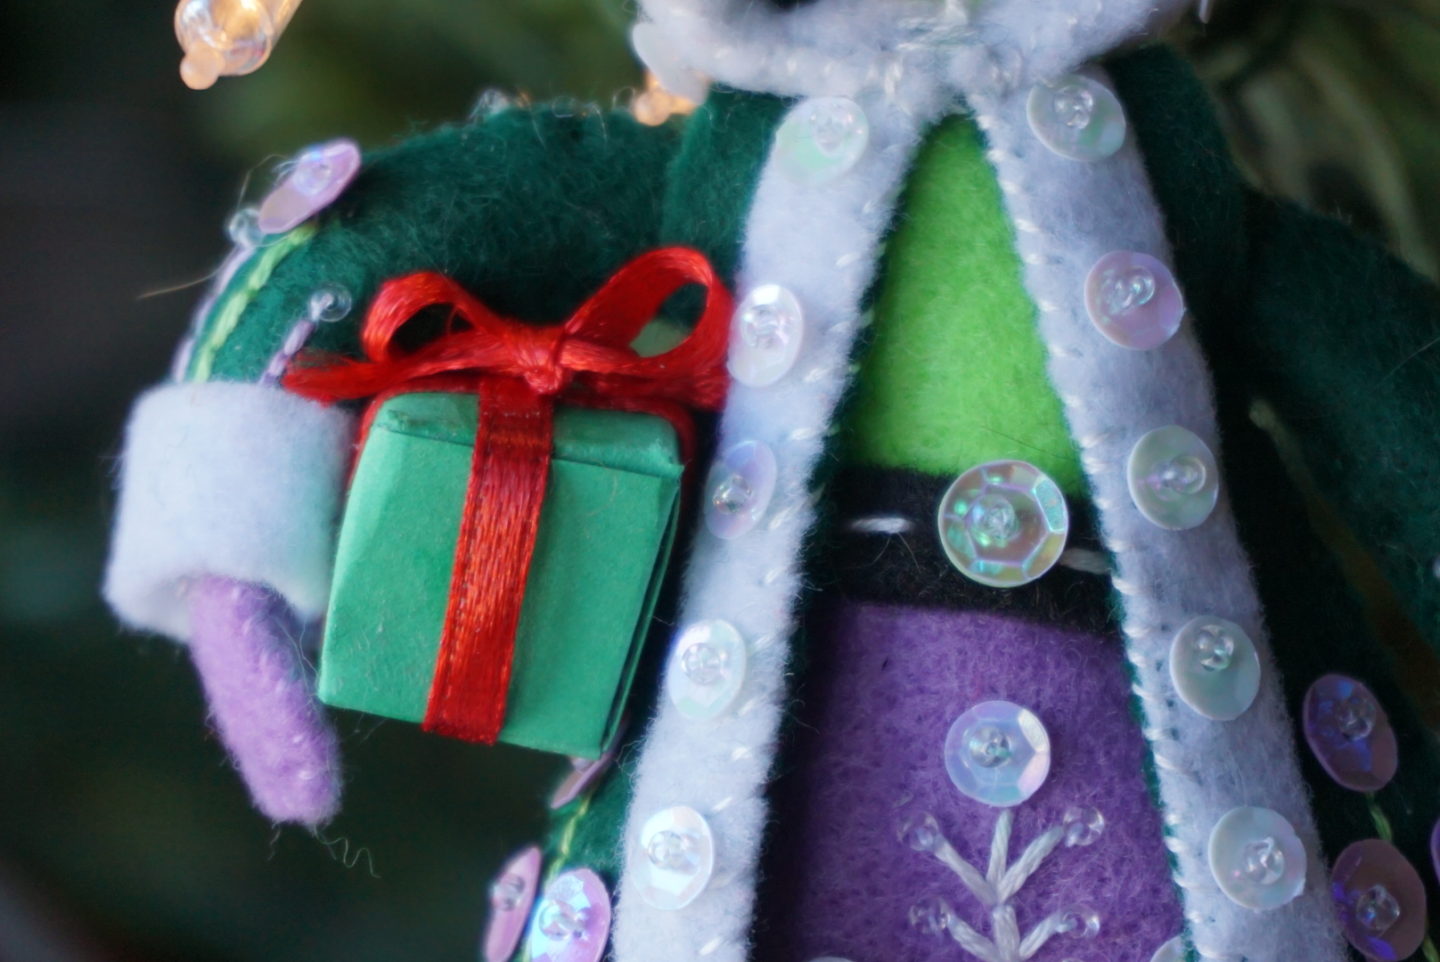
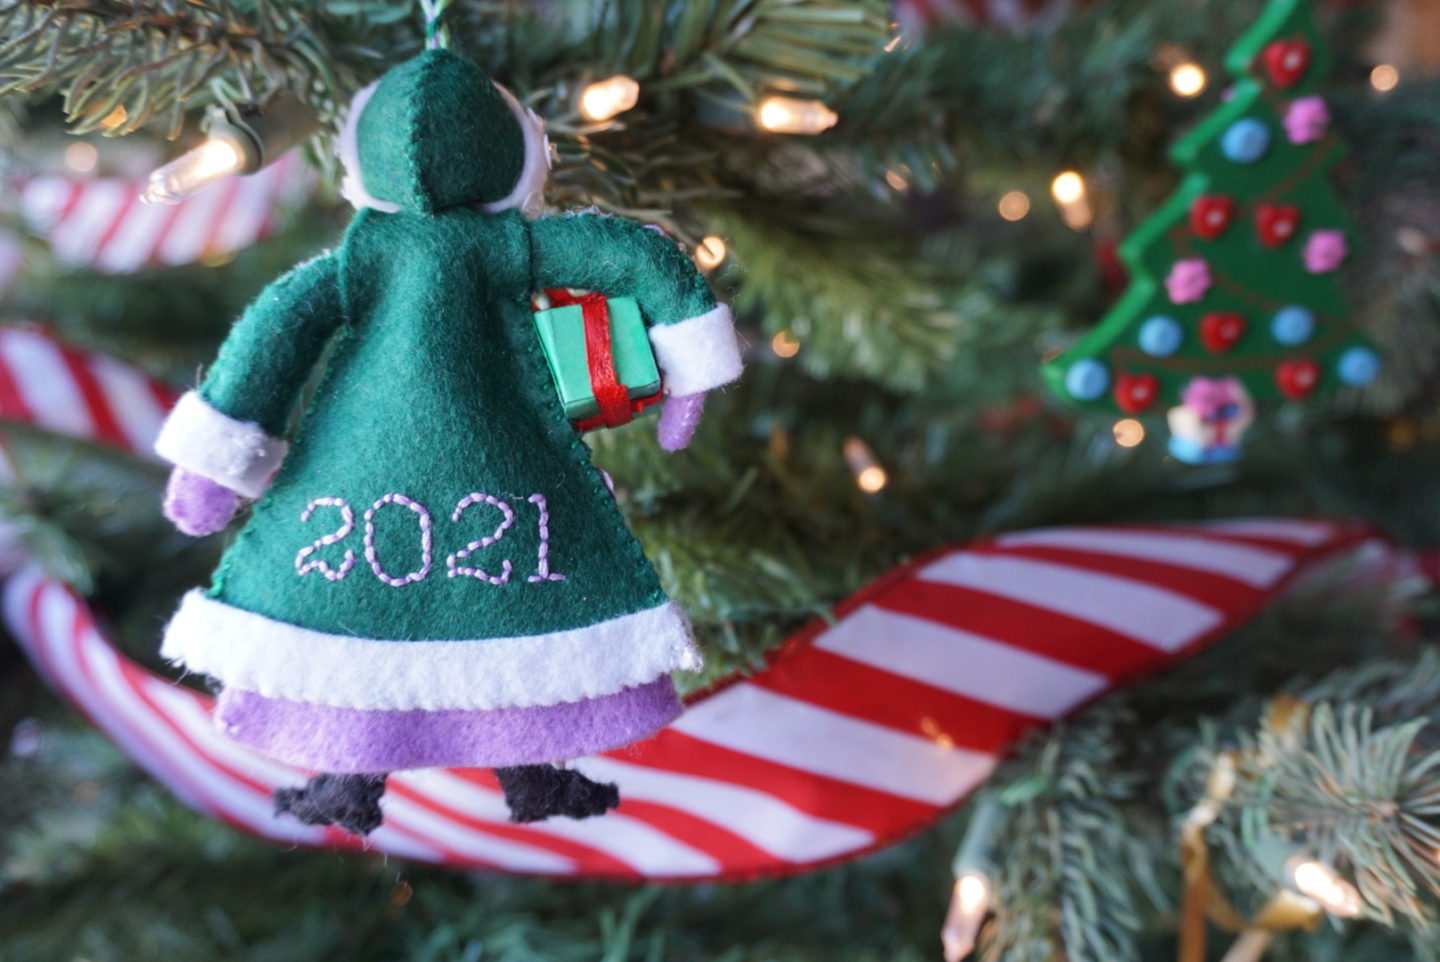
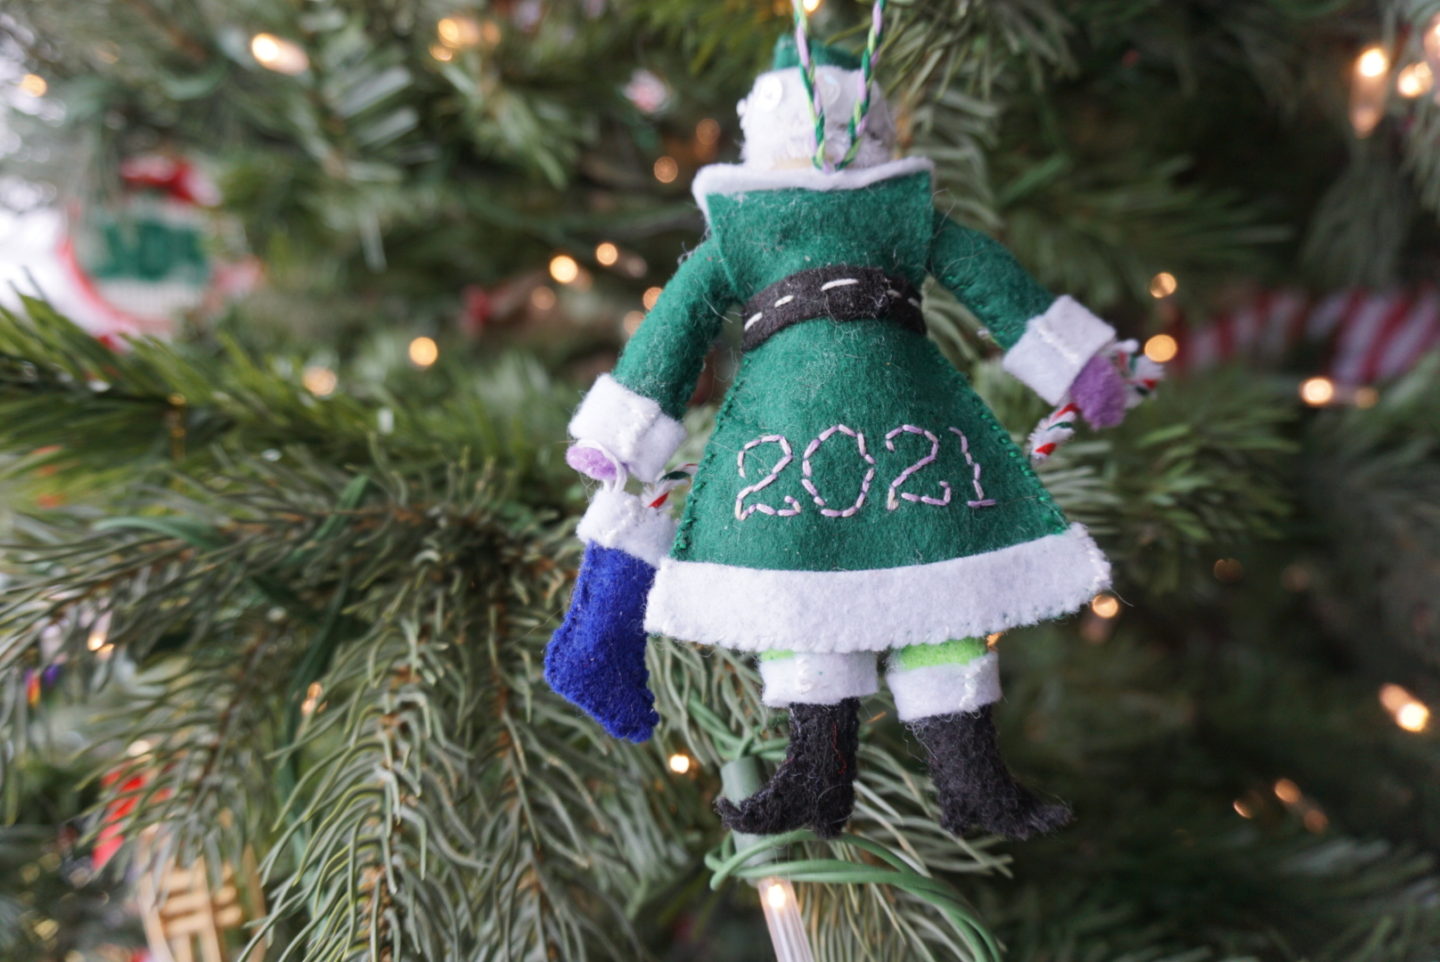
I’m pretty proud of all the little details I managed to finish for these ornaments! There are a few accessory options for both Santa and Mrs. Claus, and for my festive lady I only went with the paper gift box and nothing extra. It was at the point that I was making the gift that I realized that I had no ribbon that was narrow enough. Cue me wildly searching the apartment, culminating in pilfering little pieces of ribbon attached to store-bought gift tags that we had with our wrapping supplies. I would’ve picked a different colour if I’d been planning this ribbon purchase from the beginning, but the red is festive and I am into the cute little box! My partner was a true hero and tied the little bow to glue on top when I was in the midst of last-minute panic. He has emphasized multiple times that he did not enjoy tying that tiny bow one bit and will never be doing it again! I guess this means I have to do it myself next time because I actually prepared and cut out enough pieces to make two pairs of these ornaments, one for my mum, and one for myself. And they have the year embroidered on the back so this is the real pressure for me to actually sew the other set now instead of letting them languish for another year.
Let’s move on to Santa. You may be wondering why my ornaments are green and purple. There are two main reasons. Firstly, I was interested in getting a bit more creative with my colour palette after seeing all the cool combinations that Larissa came up with for her samples. She has red and blue ones, yellow/blue/mustard ones, and pink and orange ones! I was severely limited in my colour dreams by the colours of felt that were for sale at my local store, but I like the green and purple combo I came up with! If I ever make these patterns again, I think I will hunt down more colour options (and maybe actually use wool felt) on Etsy, but I’m still pleased with these. As mentioned above, Santa’s beard was a step that required a lot of time for the glue to try. You have to twirl a pipecleaner and then glue it to his face. After that’s dry, you have to glue the sideburns that extend up to be hidden by his hat, and then finally you have to glue on his little moustache bits. Something that I had to substitute on Mr. Claus was related to his jaunty hat. The tip of his hat is supposed to have a little store-bought pom or a tiny bell. I had forgotten to buy either of these things. I think at the time I initially bought everything else, I had intended to eventually go to another store to grab it, but I never did. What I did have at home was wool roving that I’ve been using as part of the handmade animal dolls project that I’m still only halfway through. I looked up a tutorial on YouTube for making felt balls and then made this little white hat pom myself. As well as five other ones of decreasing size because I’m terrible at estimating size of fluffy stuff apparently and my first attempt was literally an inch in diameter. Oops.
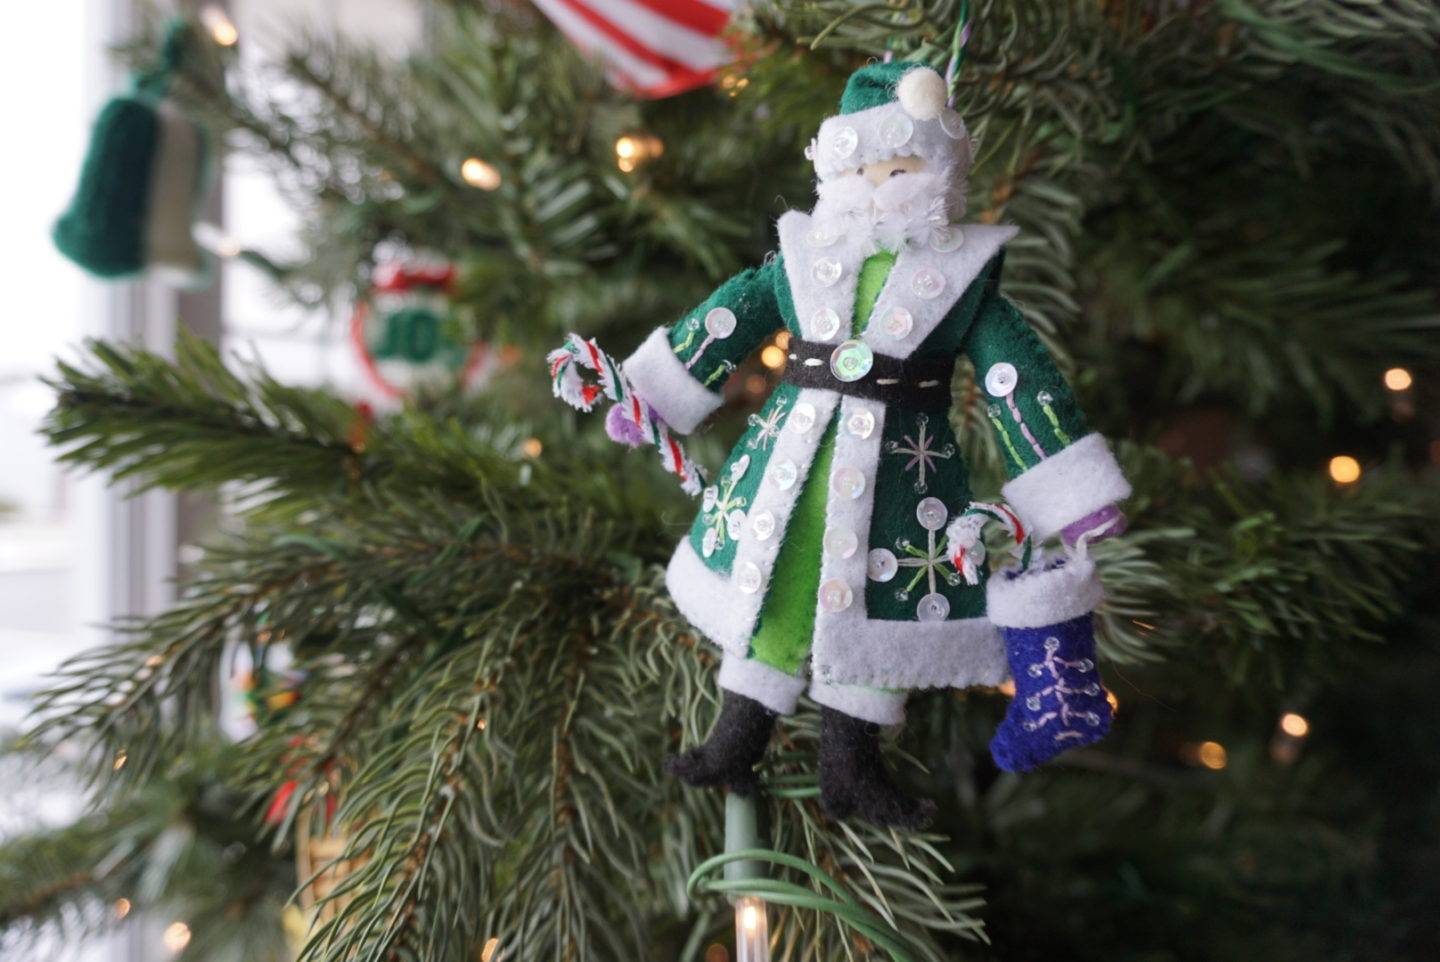

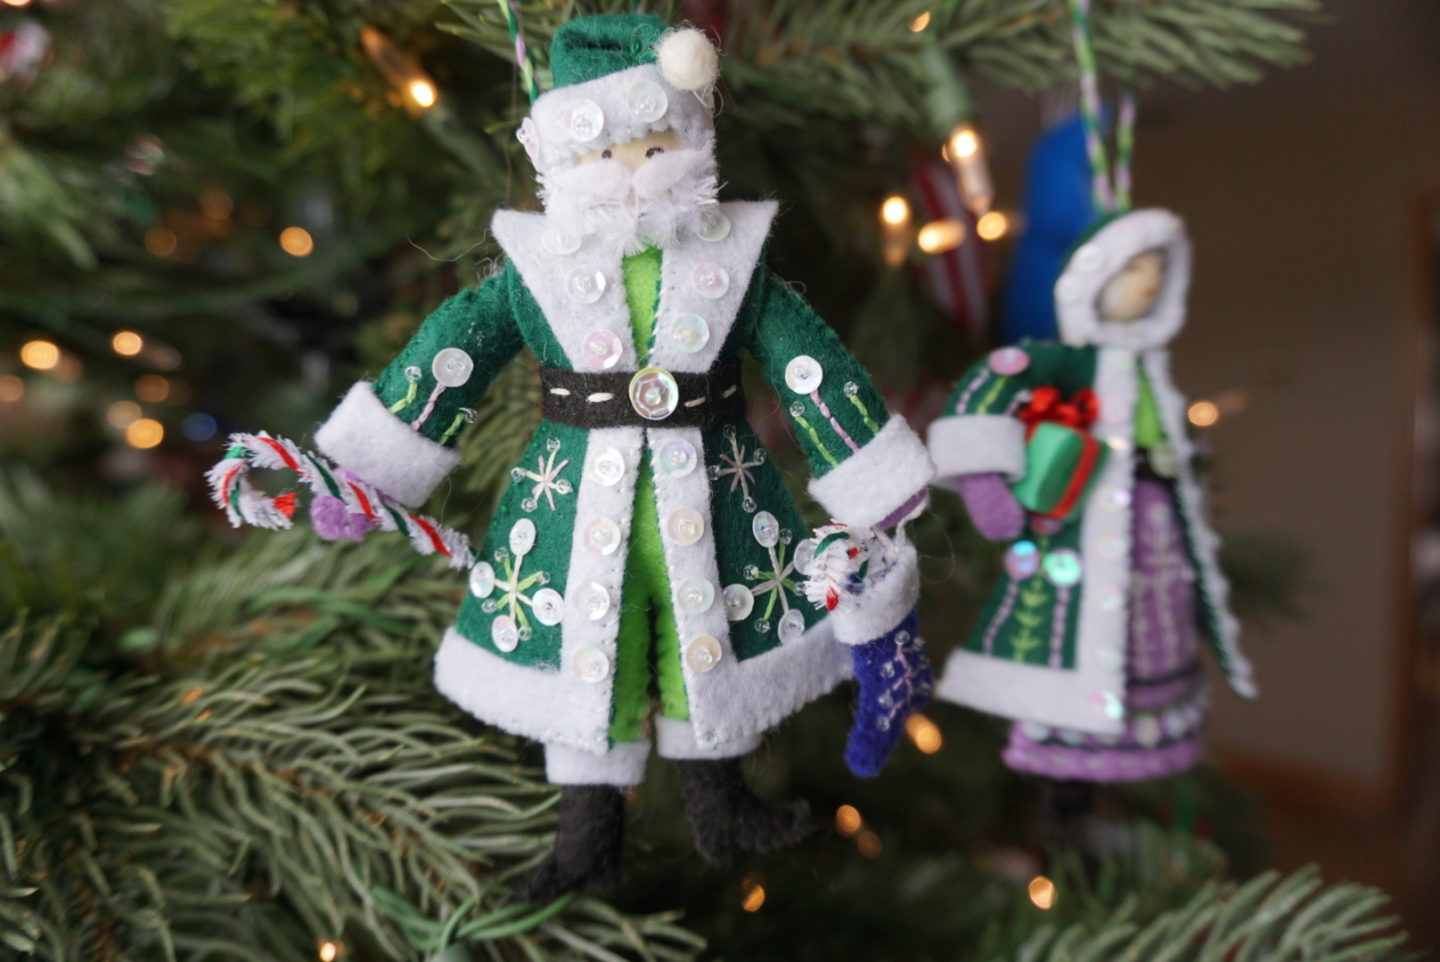
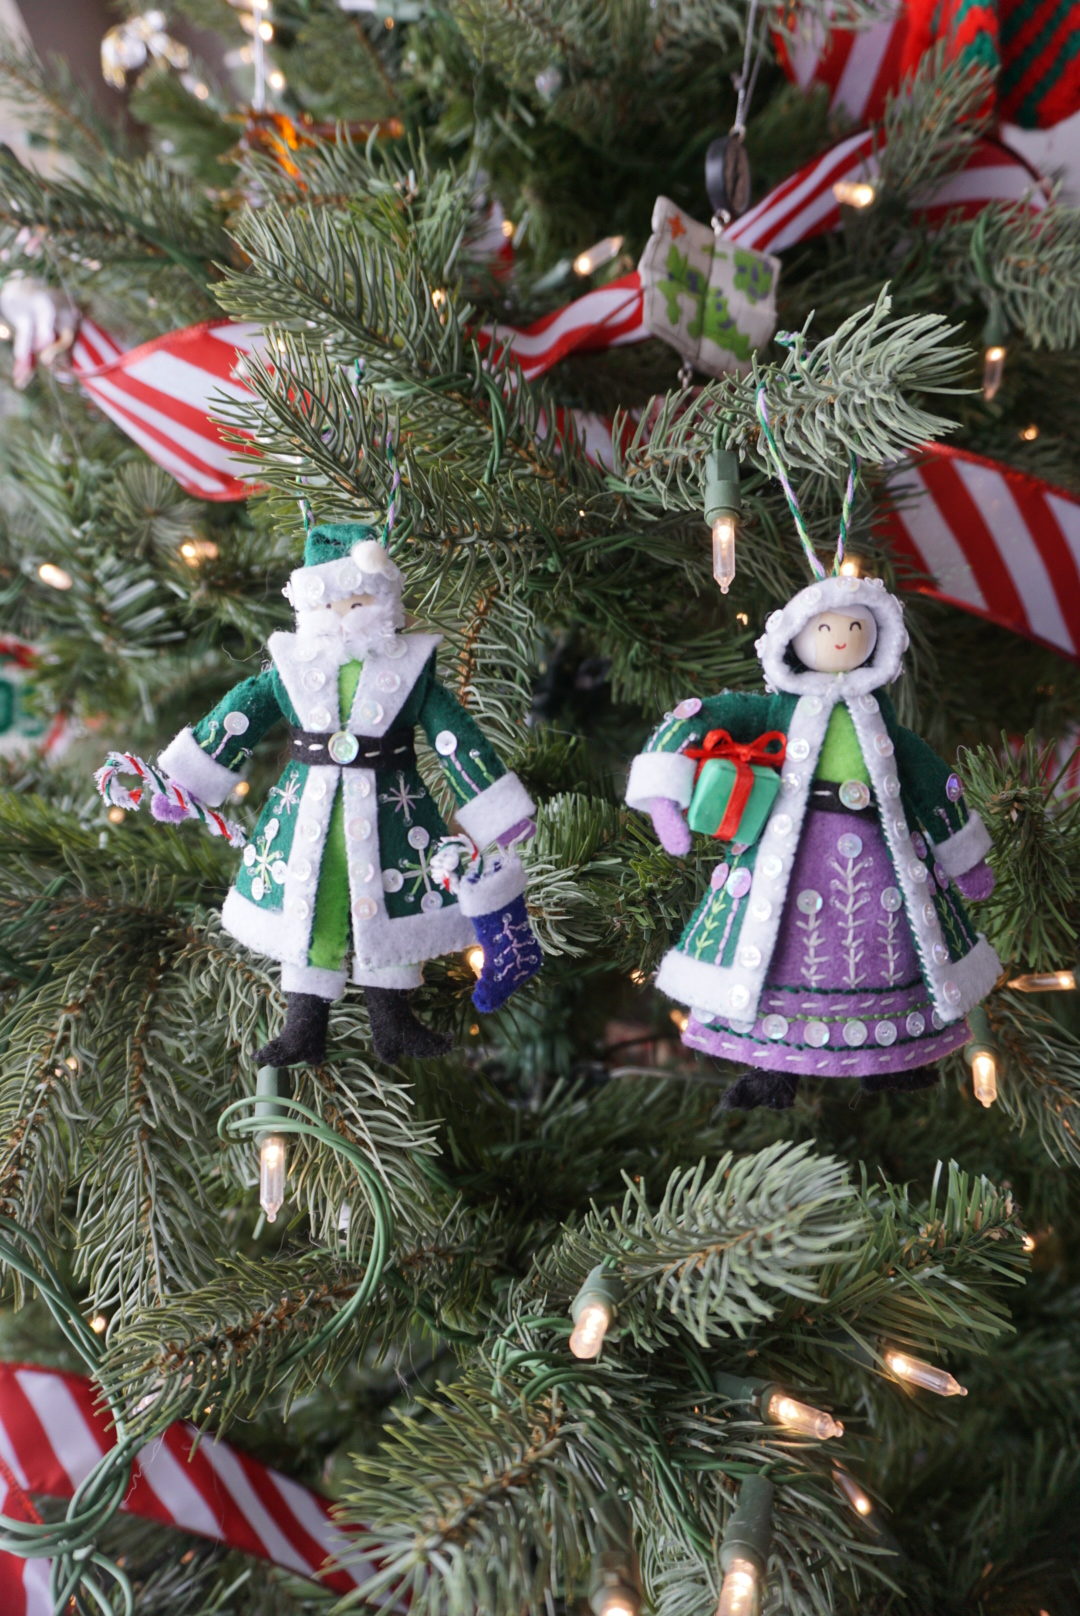
Santa came together much quicker than Mrs. Claus, I think because I had a better handle on things after fully assembling his wife. I think if I return to this pattern, I might only make Mrs. Claus on her own. I just think she’s so cute, I like where her hanger attaches from better, and I think she could be a cute lady even without being specifically identified as Mrs. Claus. Is it weird that I kind of want to have my own version of her extremely cute outfit? Especially the coat?? Anyway, I’m extremely pleased with how both of these ornaments turned out and I think they’re so cute! Would definitely recommend the patterns if you’re looking for a project like this, however will warn you also that they are not small time commitments, especially if you are inexperienced like me! Did anyone else make any ornaments this year? Tell me about your projects!
These are SO precious! You can really see all the gorgeous detail and care you have taken to finish these ornaments. I would be absolutely thrilled to receive these as a gift. And I want a real life size of Mrs Claus’s coats too :o)
Author
Thank you so much, that’s so sweet of you to say! ☺️
These are adorable beyond measure!!