
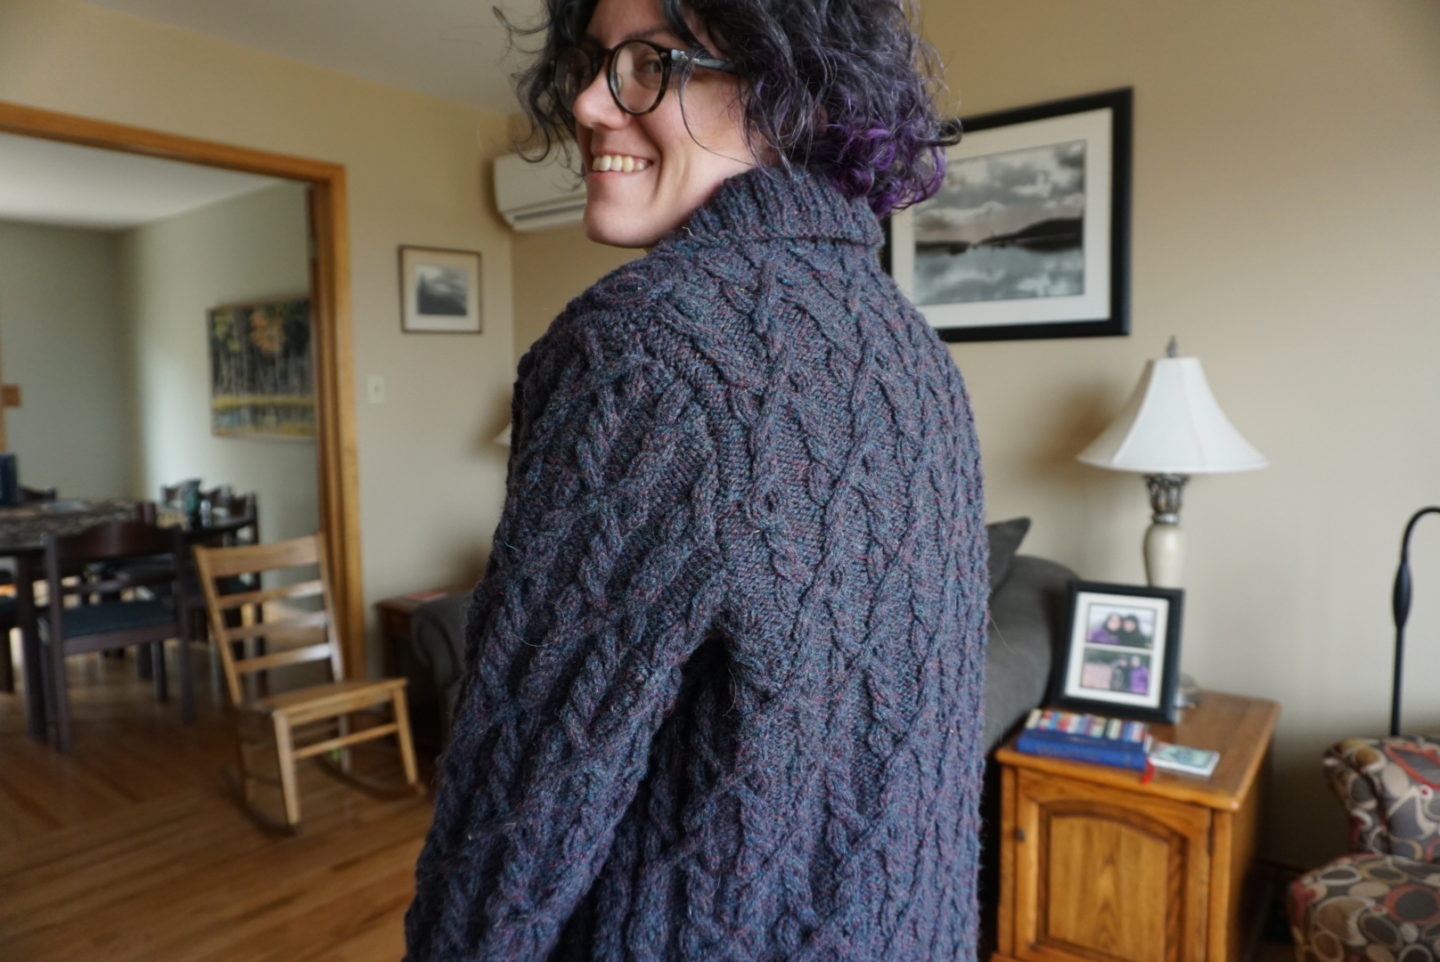
I’m still finding it very hard to believe, but I finished my Snoqualmie Cardigan! This cardigan has been a SAGA with many highs and lows and spanning more than 18 months. It’s the biggest knitting project I’ve ever undertaken, and it feels very strange to not have it on my needles anymore. Everyone, meet my giant squishy purple cable-y cardigan!

My Snoqualmie journey mentally began a long time before I actually started knitting it. In early 2016, Heather Lou at Closet Case Patterns started posting about the Snoqualmie cardigan and how she wanted to knit it. She also announced a knitalong but I don’t think that really went too far. Either way, I saw the pattern and immediately fell in love. I had never knit a sweater before, or done cables, or basically done anything in the realm of knitting since I learned to knit a garter stitch scarf (with many dropped stitches) when I was a kid. Reasonably (and uncharacteristically), I decided not to buy the pattern because it would be out of my skill level. I sort of forgot about it, but it lurked in the back of my mind.
That summer, I relearned to knit and made a pair of terrible socks with terrible cheap yarn that unraveled as I knit with it, and didn’t feel great. BUT, my second sock was better than my first, and this gave me the misplaced confidence to decide to make a sweater. Still not the Snoqualmie, though. There was still a BIT of sense in my head. Instead, I picked the Cline sweater by Julie Hoover. I think I saw it on Jen Beeman’s Instagram feed around the same time. Honestly, I don’t think it was a bad choice for my first sweater, except for I knew nothing and didn’t make a swatch and didn’t have gauge and didn’t realize until it was completely done (in a suitably horrible scratchy poop brown wool) that I had inadvertently made a woolen crop top for a child. I think it’s somewhere folded up in my closet still, lurking shamefully in the dark.
My next sweater adventure was much more successful. Between sweaters, I made more socks and a bunch of Skiff hats, and then I decided the next sweater needed to be something that was knit all in one piece and needed to be a pattern that actually suited my wardrobe and style. That’s when I made the Levenwick cardigan. This was much more successful; I made it in a colour I actually like, I used a yarn that wasn’t scratchy, and because I was knitting it all in one piece, I could try it on as I went to make sure it would actually fit! And it did. Honestly, I have to admit that I don’t wear it that much, but I think that might be part of my Me Made May efforts, to wear makes I don’t wear as much and try to figure out how to incorporate them into my every day wardrobe. Anyway, I finished the Levenwick in June 2018 and this success made me feel like I was maybe ready to tackle the Snoqualmie.

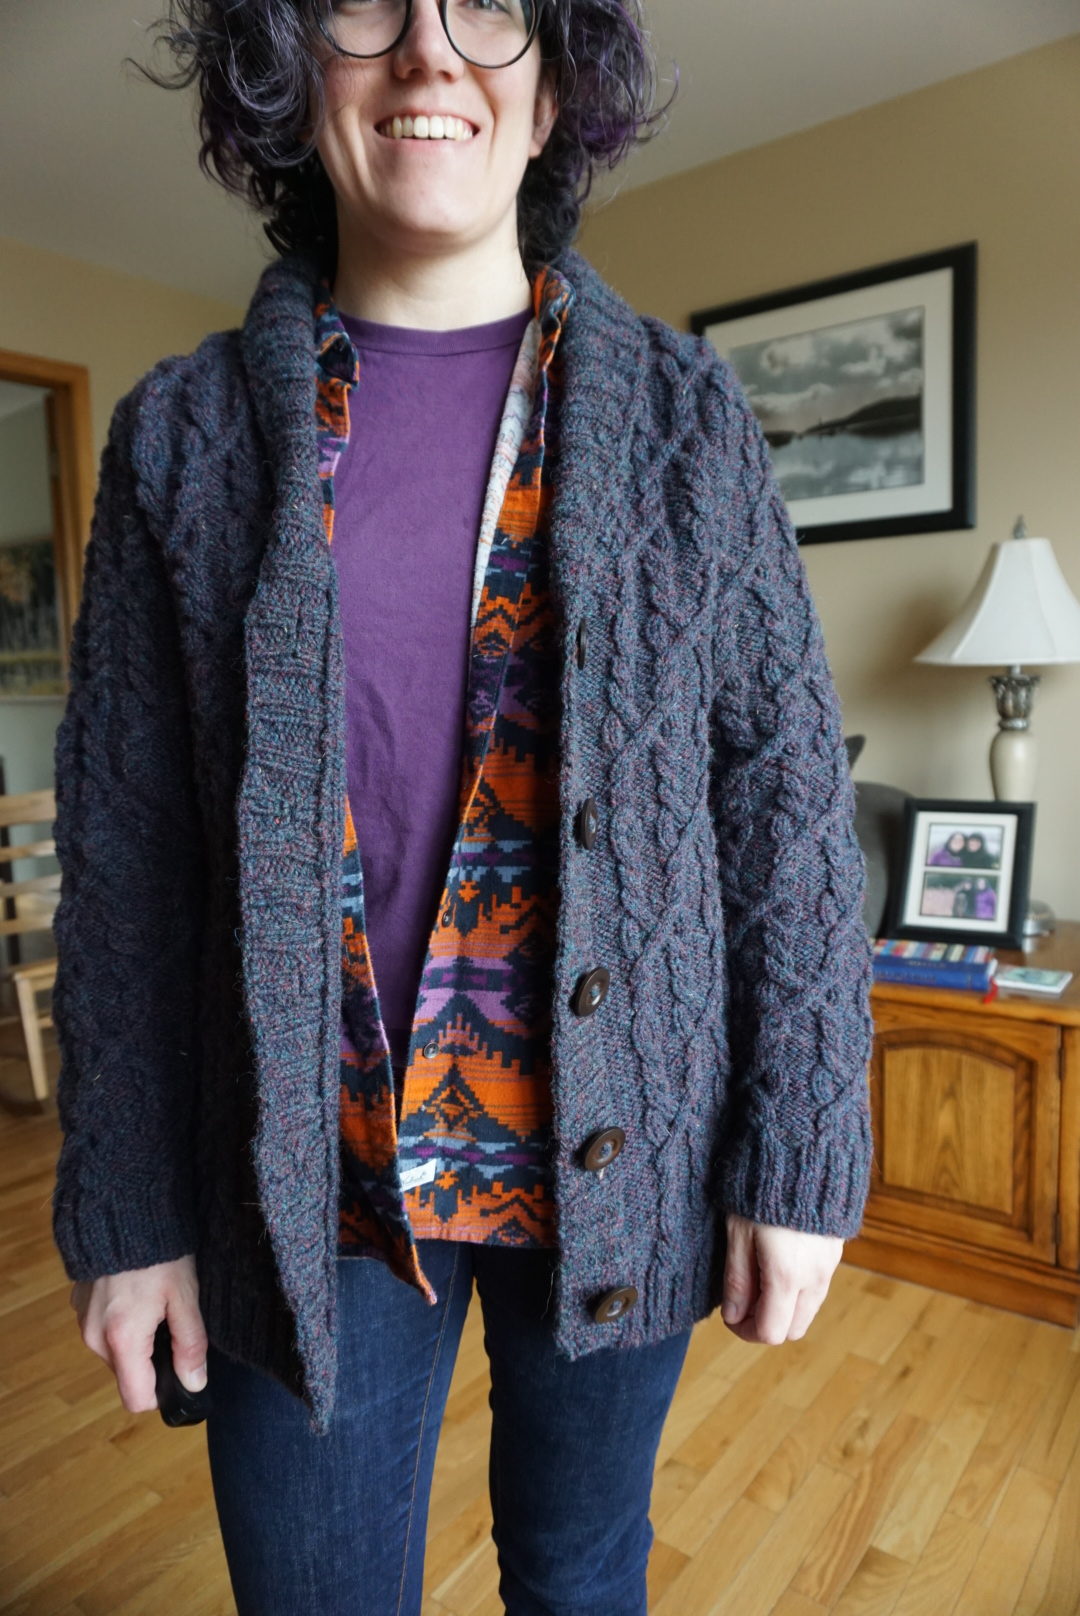
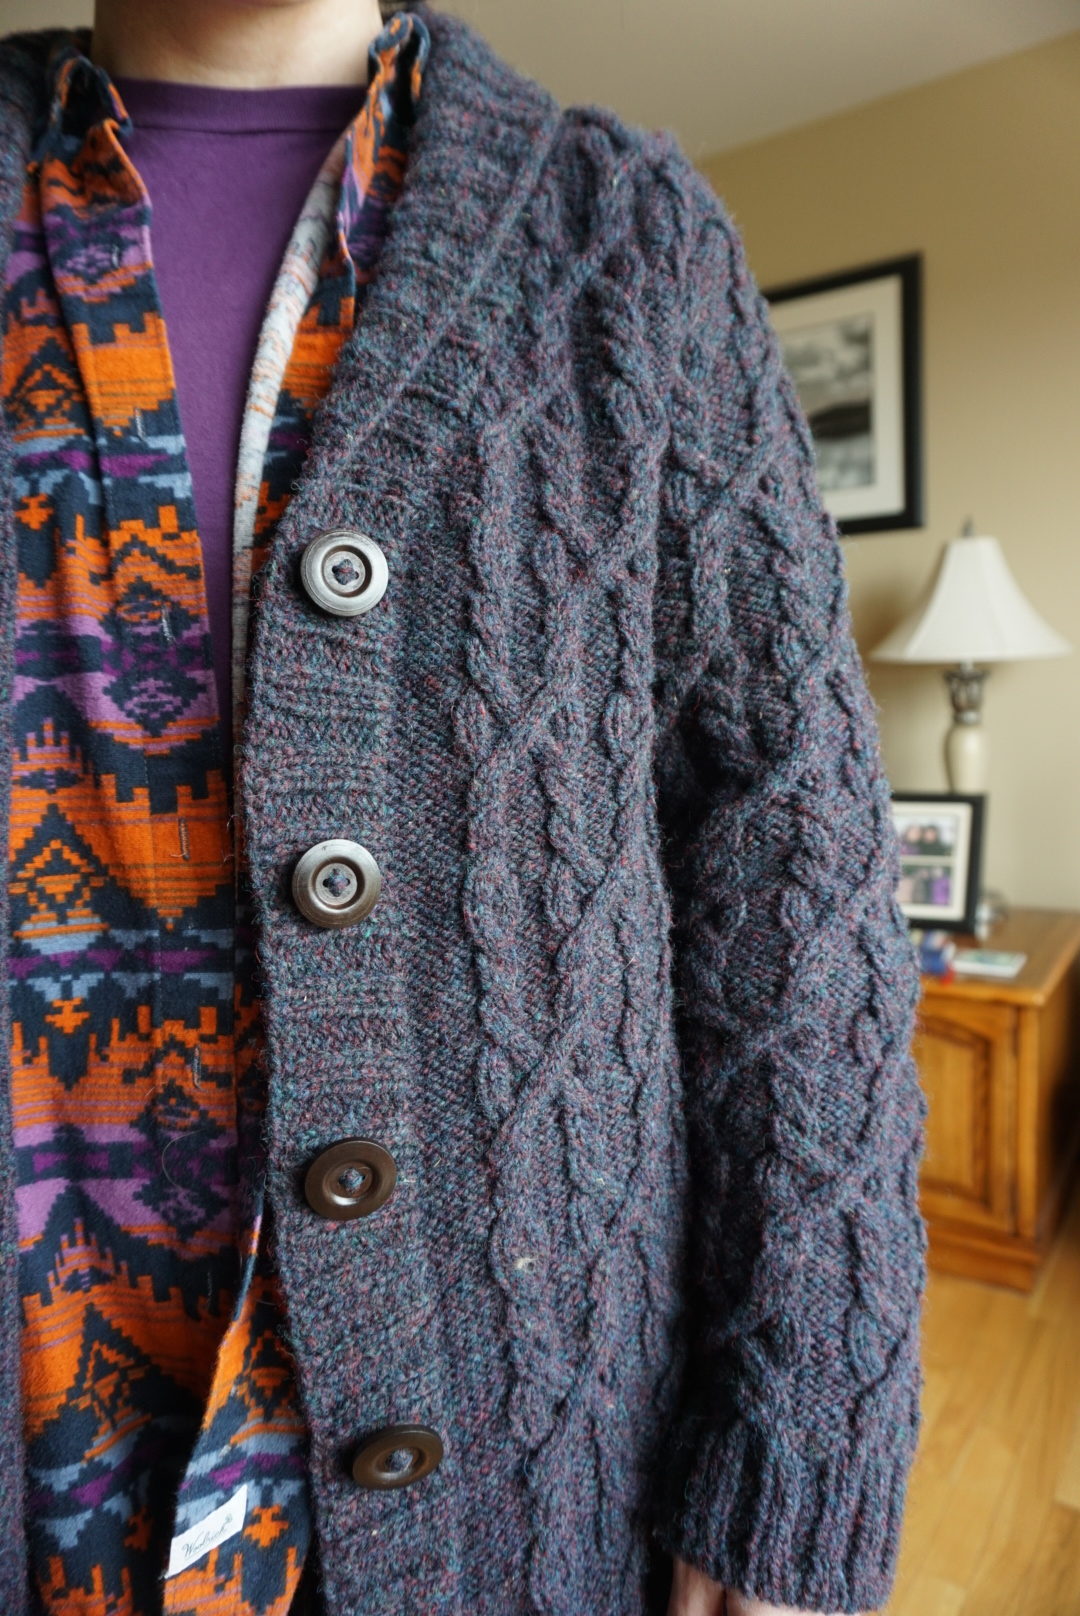
It took me quite a while to find the yarn for this project. The Snoqualmie pattern recommends Brooklyn Tweed Quarry, which I didn’t want to use for two reasons. First, it’s expennnnsive. Especially with the US/Canada exchange rate, and shipping from the US. Secondly, it’s kind of…unspun and single-ply-ish yarn, and I had read a bunch of stuff online about how it wasn’t great for tight knitters (hi, it me), because it wasn’t very strong and could be easily pulled apart. There’s a bunch of technical stuff that I read that I can’t explain because I’m not a spinner (or even a very experienced knitter) but it sounded like it would not be a good fit for me. But I really loved the Lazulite colour. I wanted to try to find something different in a similar colour. Turns out Quarry is a hard thing to match in terms of weight and behaviour, but a yarn-matching website recommended Briggs & Little Heritage. The added bonus for me was that Briggs & Little is Canadian, widely available, and cheap! AND they had a colour that really lined up with what I wanted. I should say, I know that the cream coloured sample for the pattern is BEAUTIFUL, as is the version Heather Lou completed. But I don’t wear that colour. It’s not my style, it wouldn’t go with anything I own, and guaranteed I would get mustard on it. I also didn’t want to make something in a charcoal because I figured if I was making it myself, I wanted to make something I couldn’t find in a store. Briggs & Little Heritage in “grape” was a perfect match for me. It’s purple with flecks of reddish-pink and a deep teal, which is very in line with the colour palette I gravitate toward. I had a very hard time finding enough of it in the same dye lot though. It was a quest, but eventually I found it by accident at Avonport Discount Fabrics, a quilting store in the valley here in Nova Scotia, and they had enough in the dye lot AND it was only ~$5 per ball. So including the buttons (which I found in Toronto in late December 2019 when I was visiting friends), the cardigan cost me a little less than $70 in materials. (We are not going to talk about how much it would cost based on my time…)
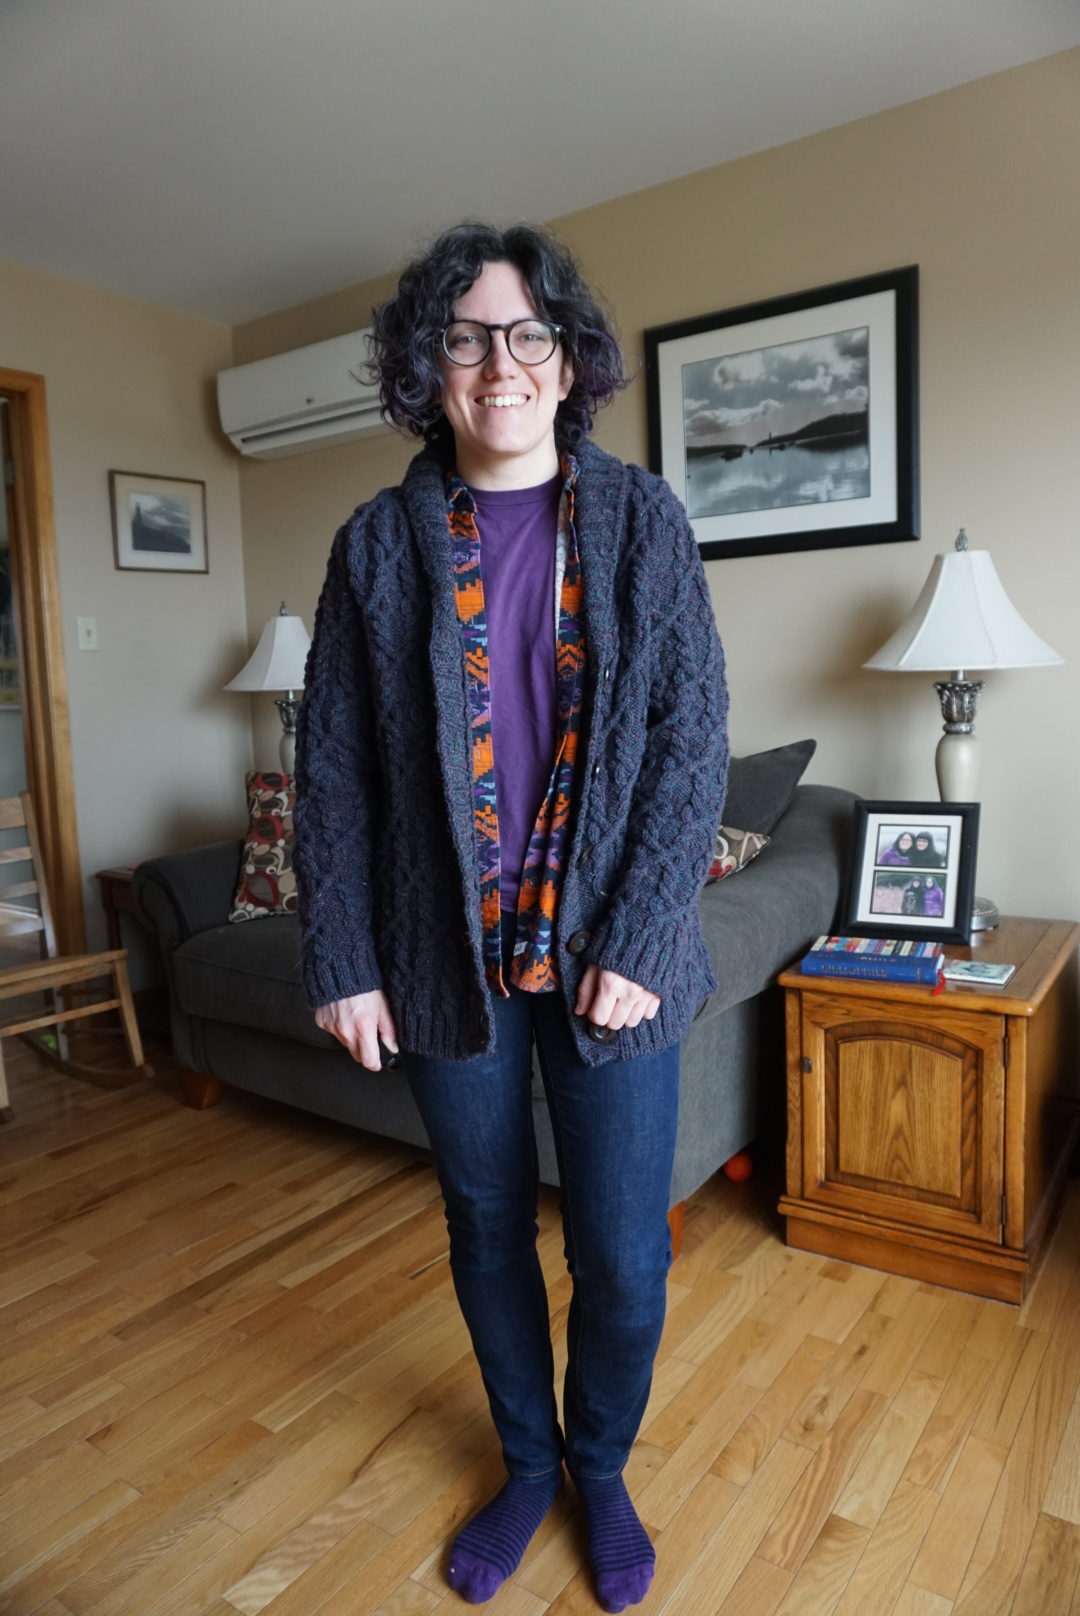
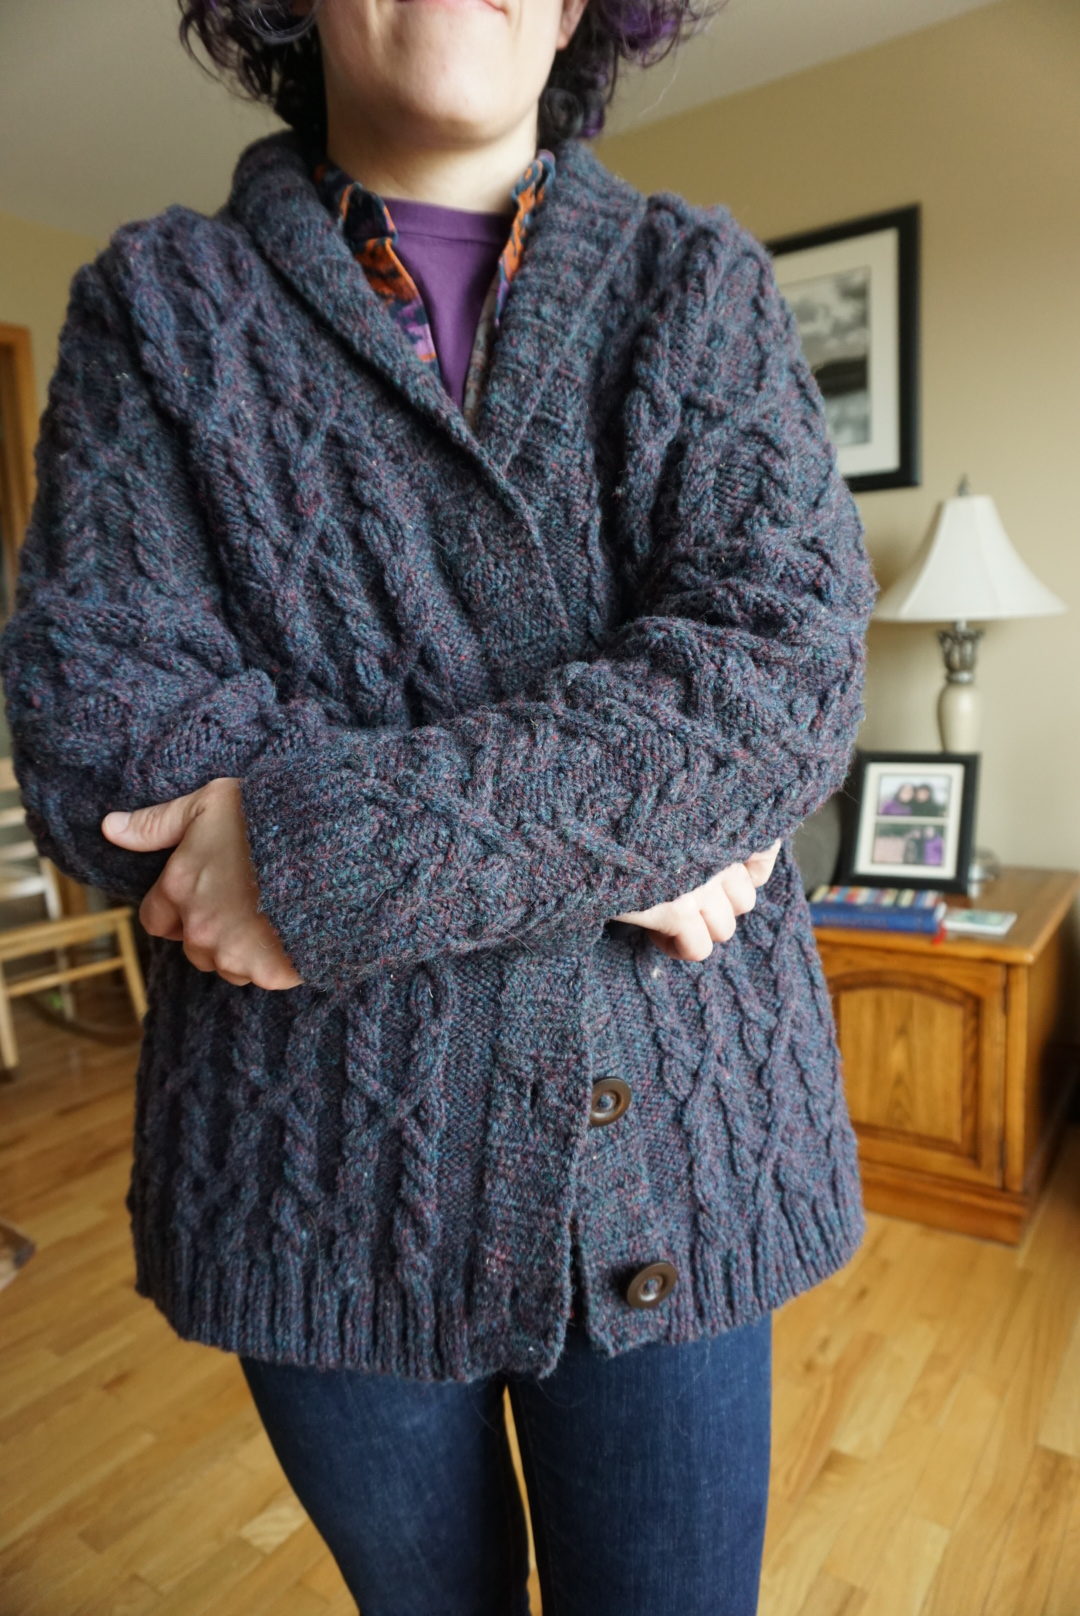
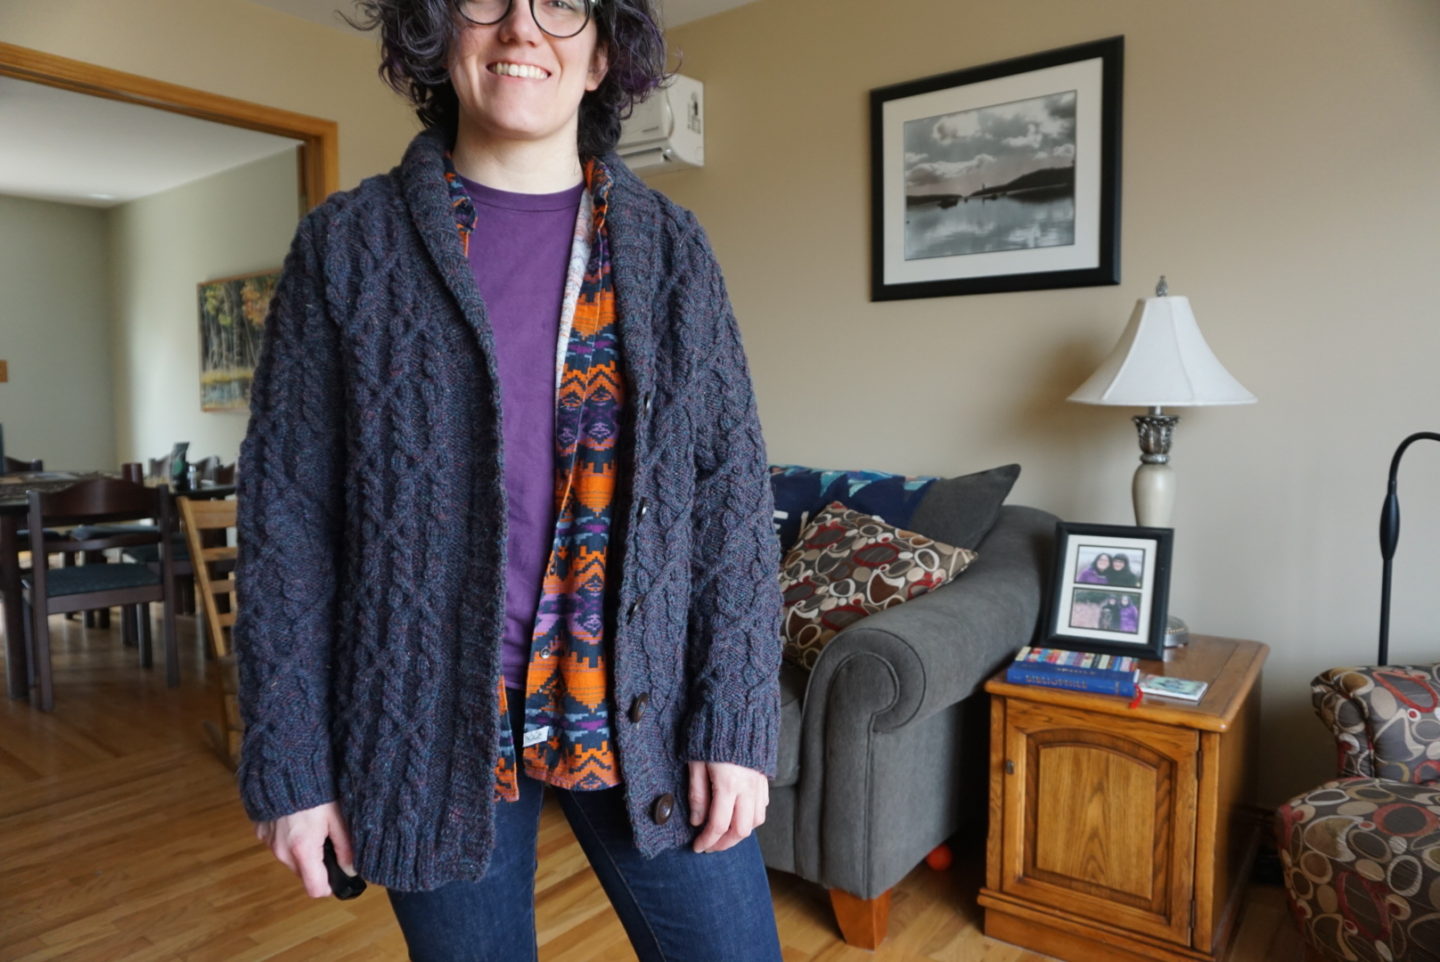
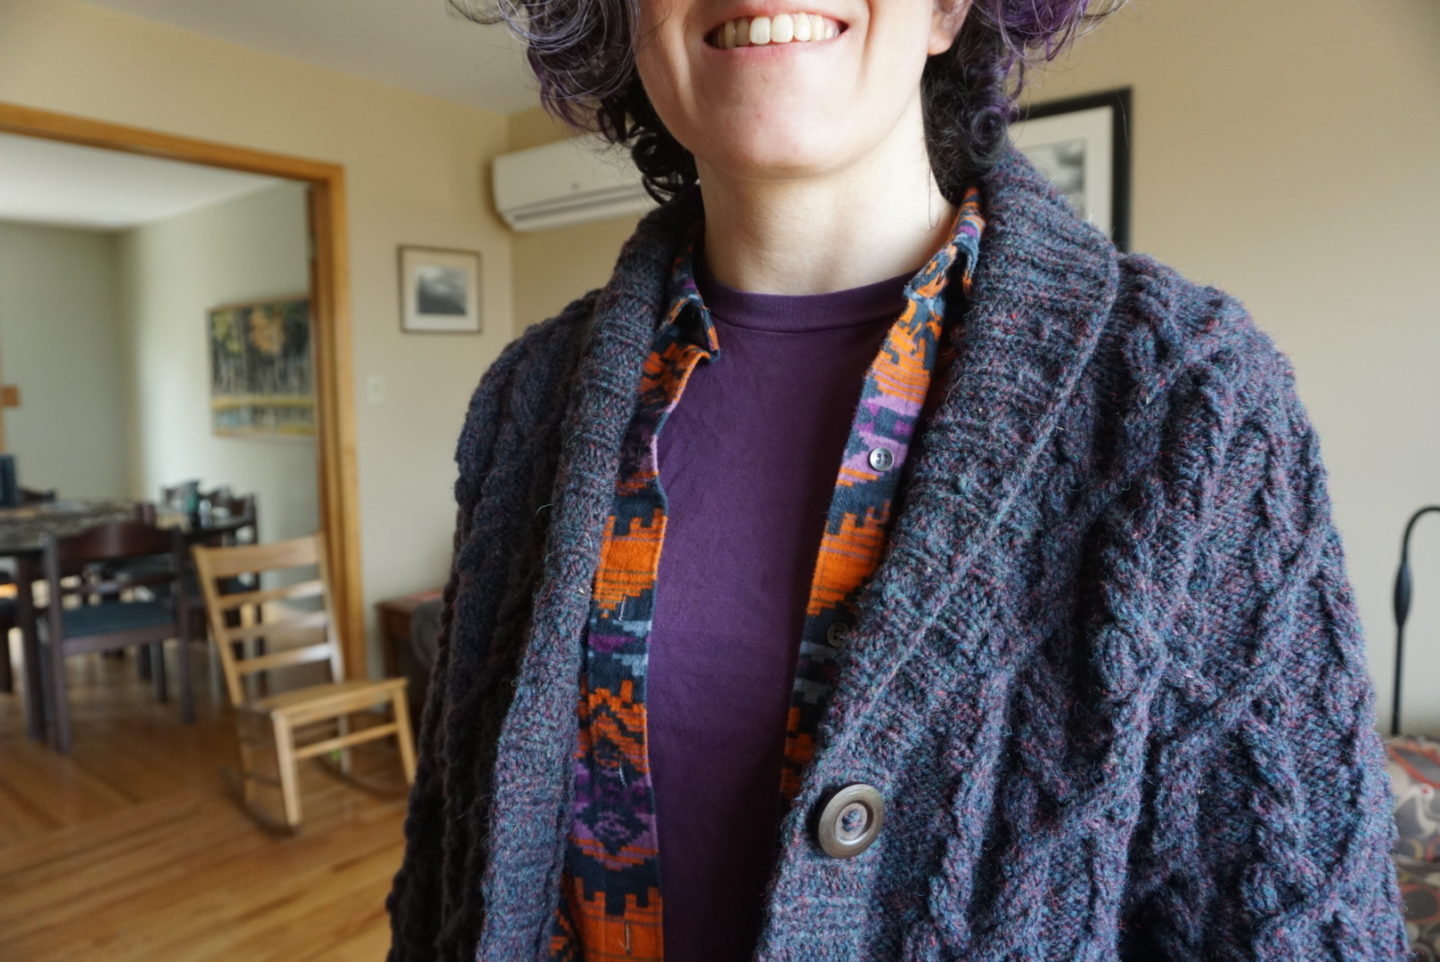
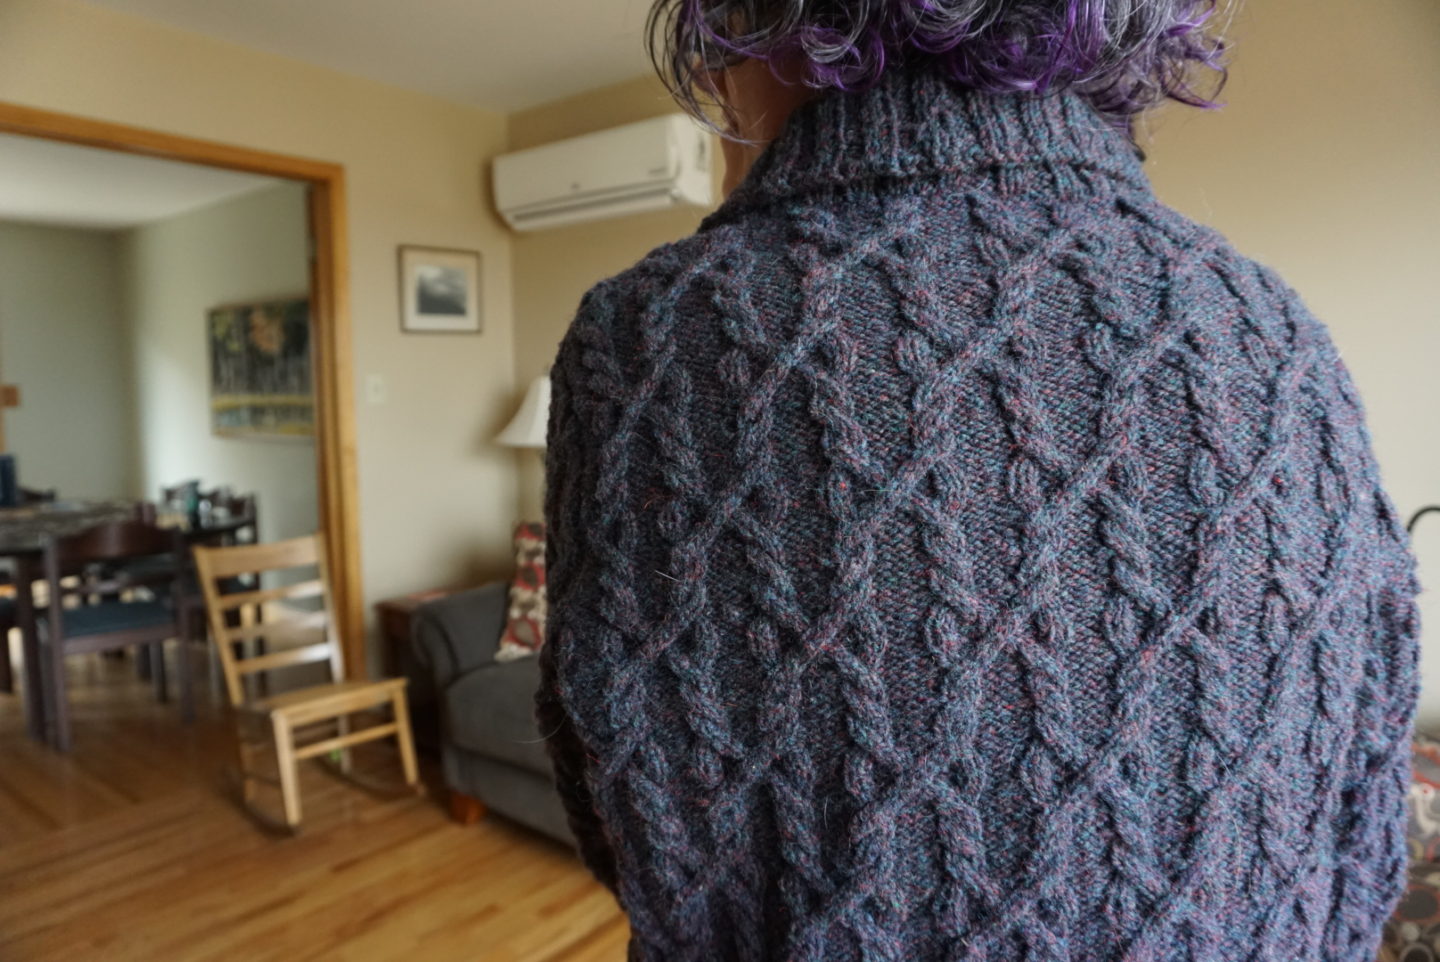
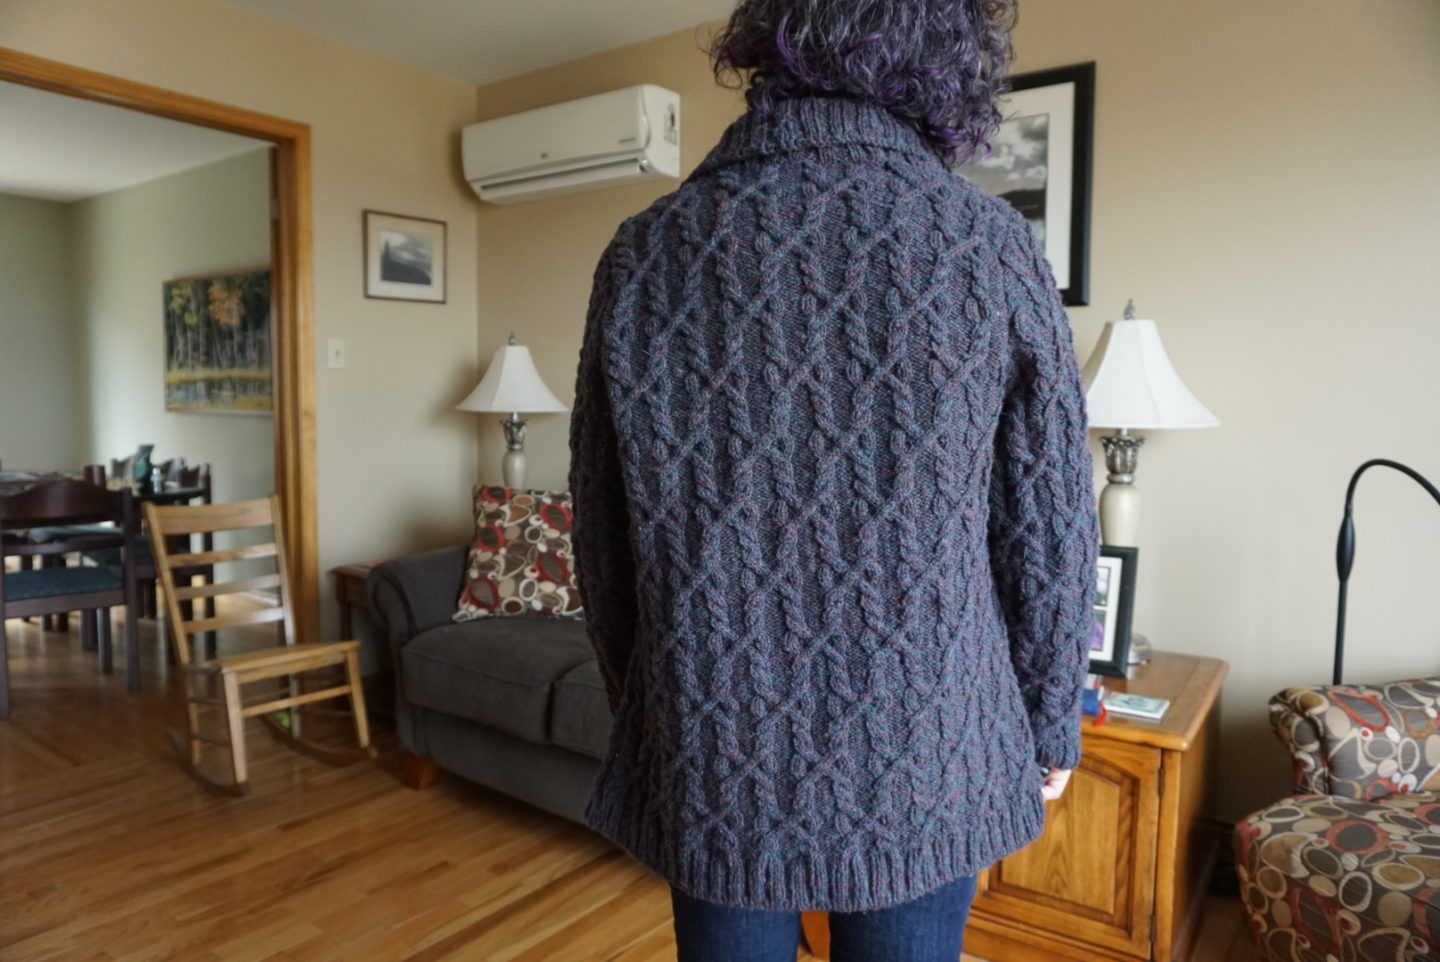
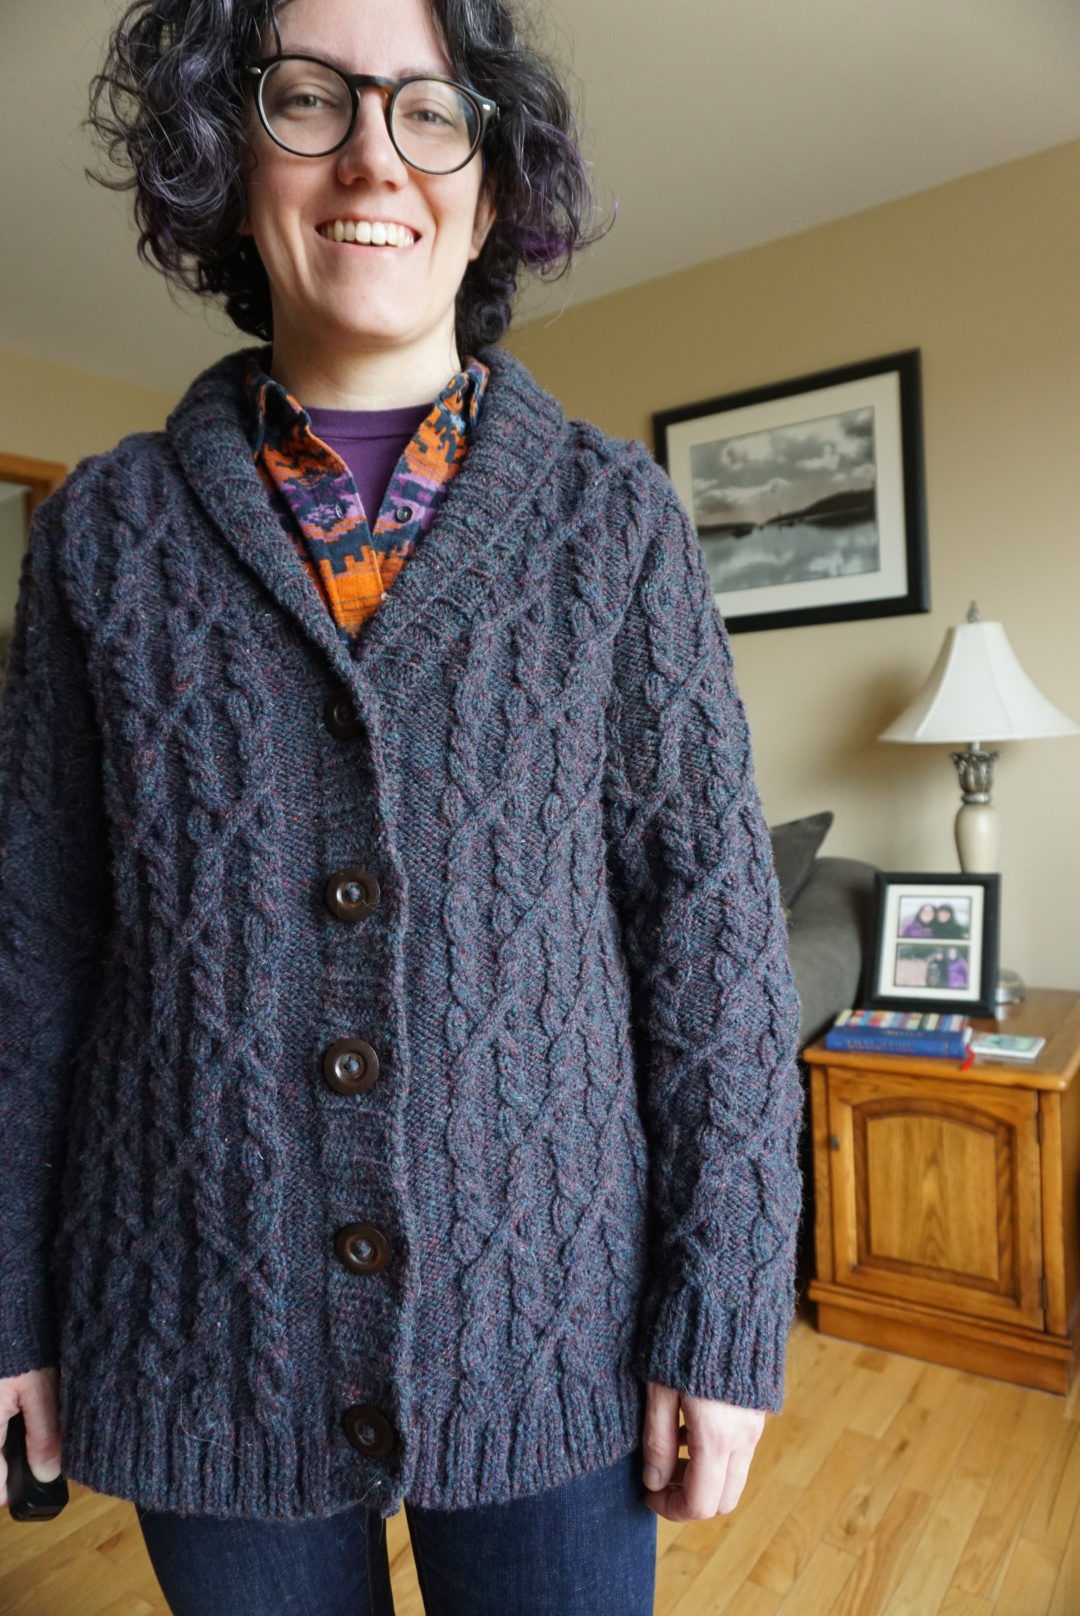
I started knitting it in January 2019. I did test swatch and found a needle size that gave me gauge, and knit the whole back piece (which was an adventure in figuring out how the Snoqualmie cable pattern worked in repeat across a wide piece like the back). I had one false start due to misinterpreting the cable chart, but then I was off to the races. I finished it by knitting during my 3.5 hour education school classes all through that term. I was having trouble with laddering on the sides of my cables, but they were improving, and I was very happy to finish the back piece and block it. Except even with blocking it somehow was 3″ too narrow. I still don’t understand how it happened since I did do a test swatch, but regardless of why, it was way too small. I set it aside and didn’t look at it for months, and then at the end of August I was finally read to face it again and pulled the whole thing out so I could start over. I did more test swatches, I blocked them this time, and I figured out that I needed to use my same needle (one size smaller than recommended, I believe) but follow the pattern for two sizes bigger than the one I actually wanted. EXCEPT with regards to row amounts/measurements. When it would say “knit until piece measures X amount from finished edge”, I would use the measurements of the size I actually wanted. I also blocked all of my finished pieces to the measurements of my desired size, not the size I’d technically been knitting. This worked surprisingly well, and I am very happy with the fit. It doesn’t have an overwhelming amount of easy, but it’s nice and snug with a flannel button-up underneath, which is perfect because I didn’t want the wool to actually be directly against my bare skin. You can see below how it fits when the buttons are all done up. Honestly, I probably will never wear it with the buttons done up because that’s not the way I anticipated styling it when I was making it, and when I look at the photos I think the buttoned up style makes me look like a sweater-clad dad in disguise.
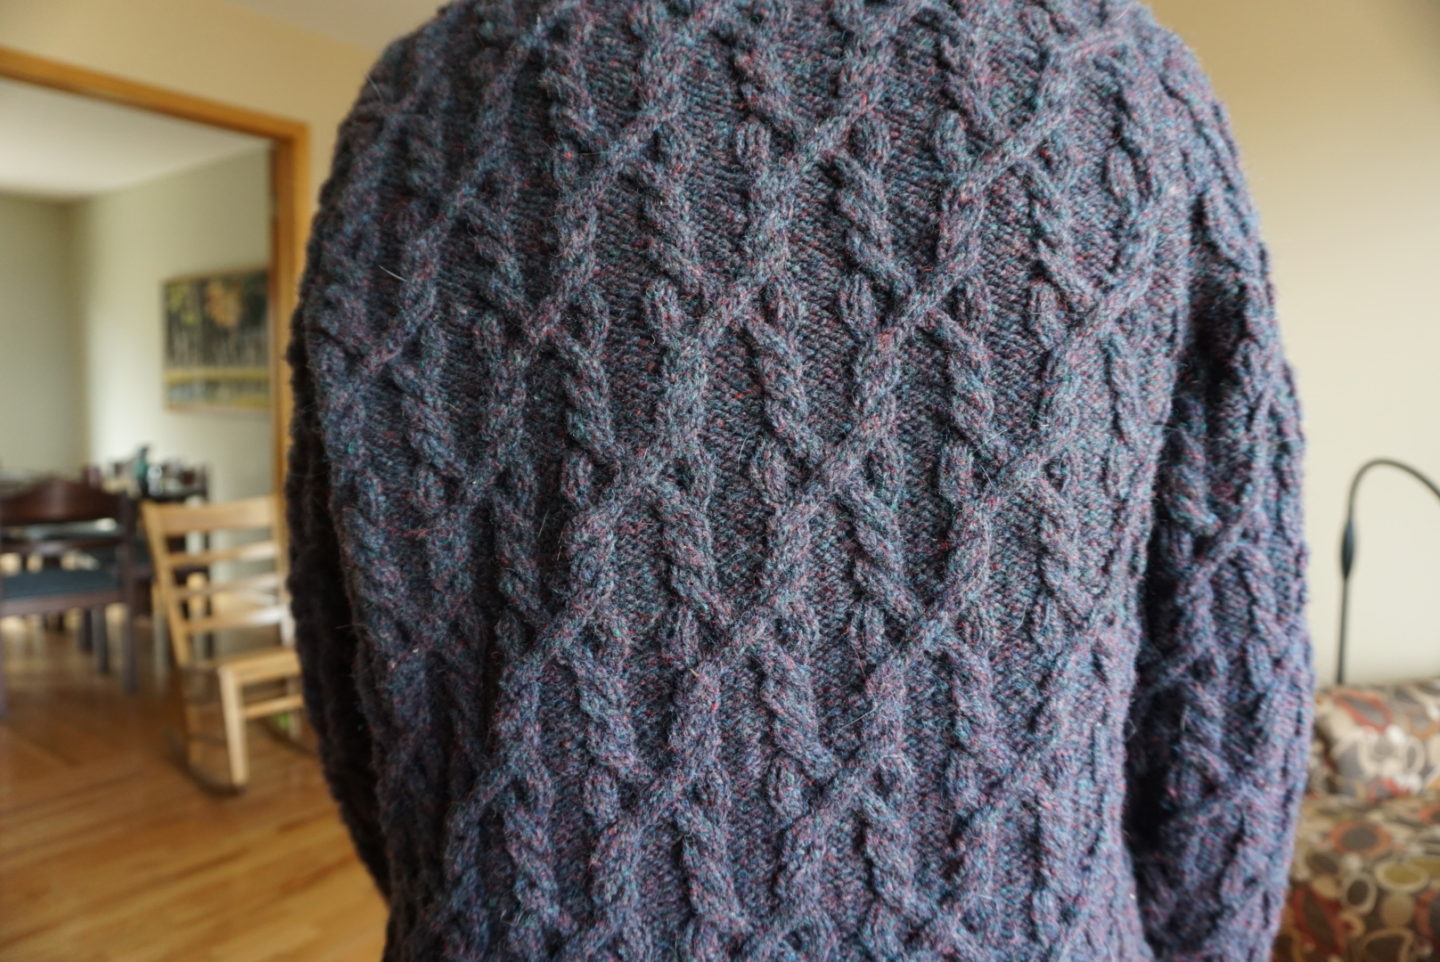
I managed to fix my laddering on my second try, so in that sense it was good that I restarted. I used the strategy in this video where you do your first purl after a cable and then bring the yarn to the back of the work and pull it snug and then continue on as usual. It completely solved my entire problem and is not a huge deal to incorporate. Also, I was feeling more confident by the time I got to the front panels and so I knit them two at a time on the same needle! They were just mirror images of each other. I did the same for the sleeves, which was a great strategy for me because then I didn’t have to keep track of how many rows I’d done on the first piece in order to match it in the second piece, and then I got to finish both bits at the same time. It’s actually a big reason why the finish line of my Snoqualmie snuck up on me: I was thinking I had so much left to do but then out of nowhere I was done both sleeves and realized all I had left was the neckband to knit. Which was where I learned another new concept: short rows. I’d never done them before, but conveniently Bluprint is having a free-watch event until April 16th so I watched a couple courses by Anne Hanson about finishing your handknits and as well one about short rows, and it was immensely helpful. Short rows feel like total magic to me – it’s how part of the collar is a lot wider than the button band at the front. Also, speaking of the button band. 2020 Megan is wiser and more savvy and actually did a test swatch of ribbing to try out the buttonhole size with her buttons so that they would guaranteed fit before doing the actual buttonholes on the sweater. Mainly I knew I should do it because I already had these buttons, I have no easy way to get different ones because of isolation, plus I super love these buttons! And they fit perfectly, I didn’t have to adjust the size of the hole (4 stitches across).

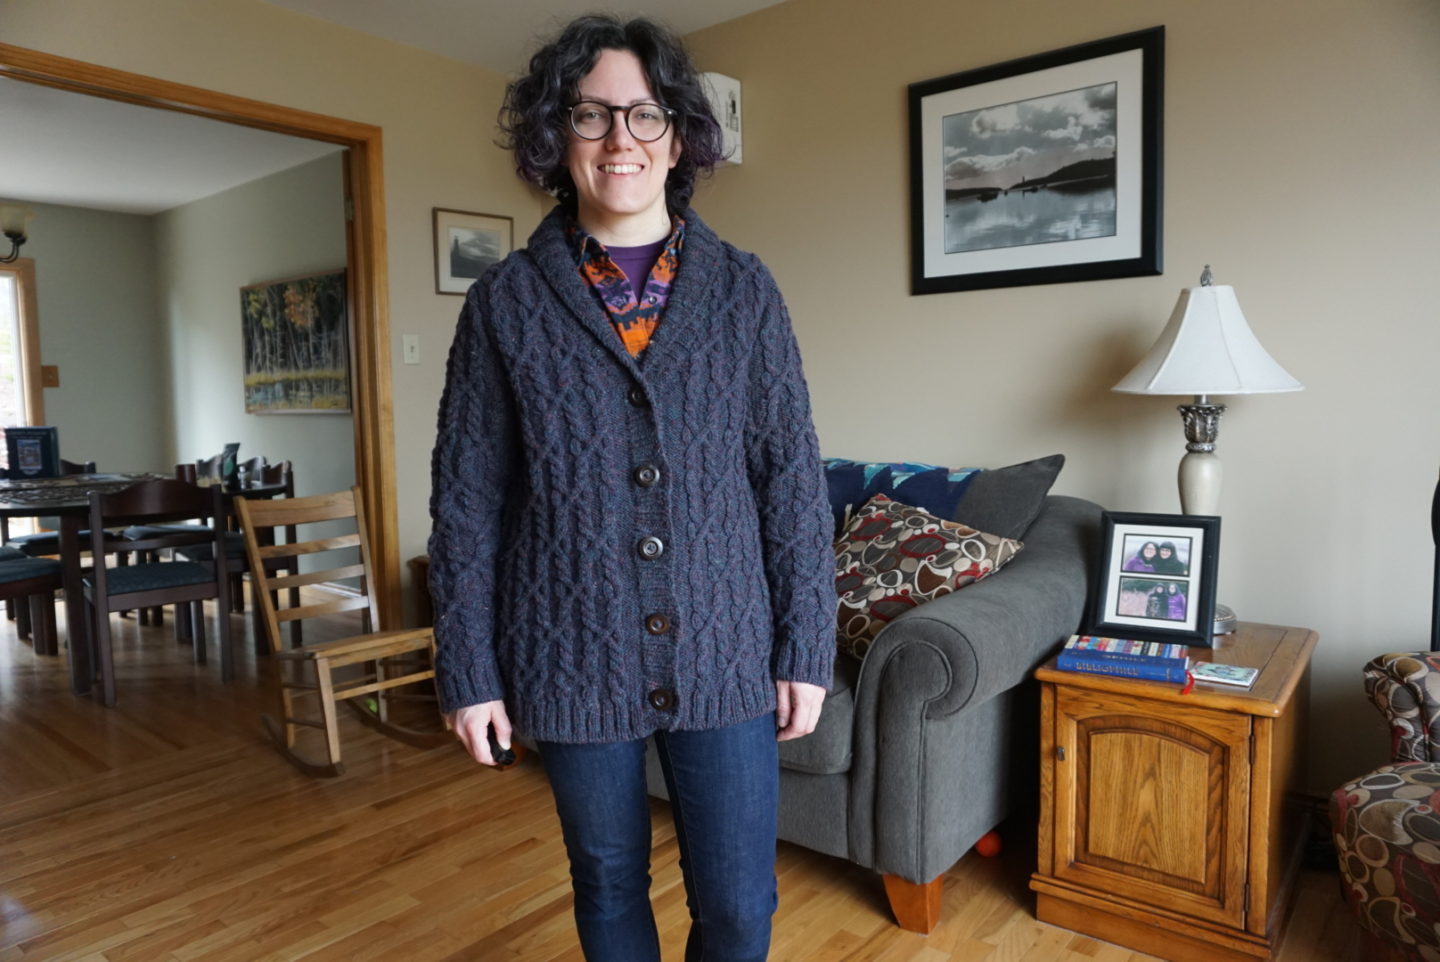
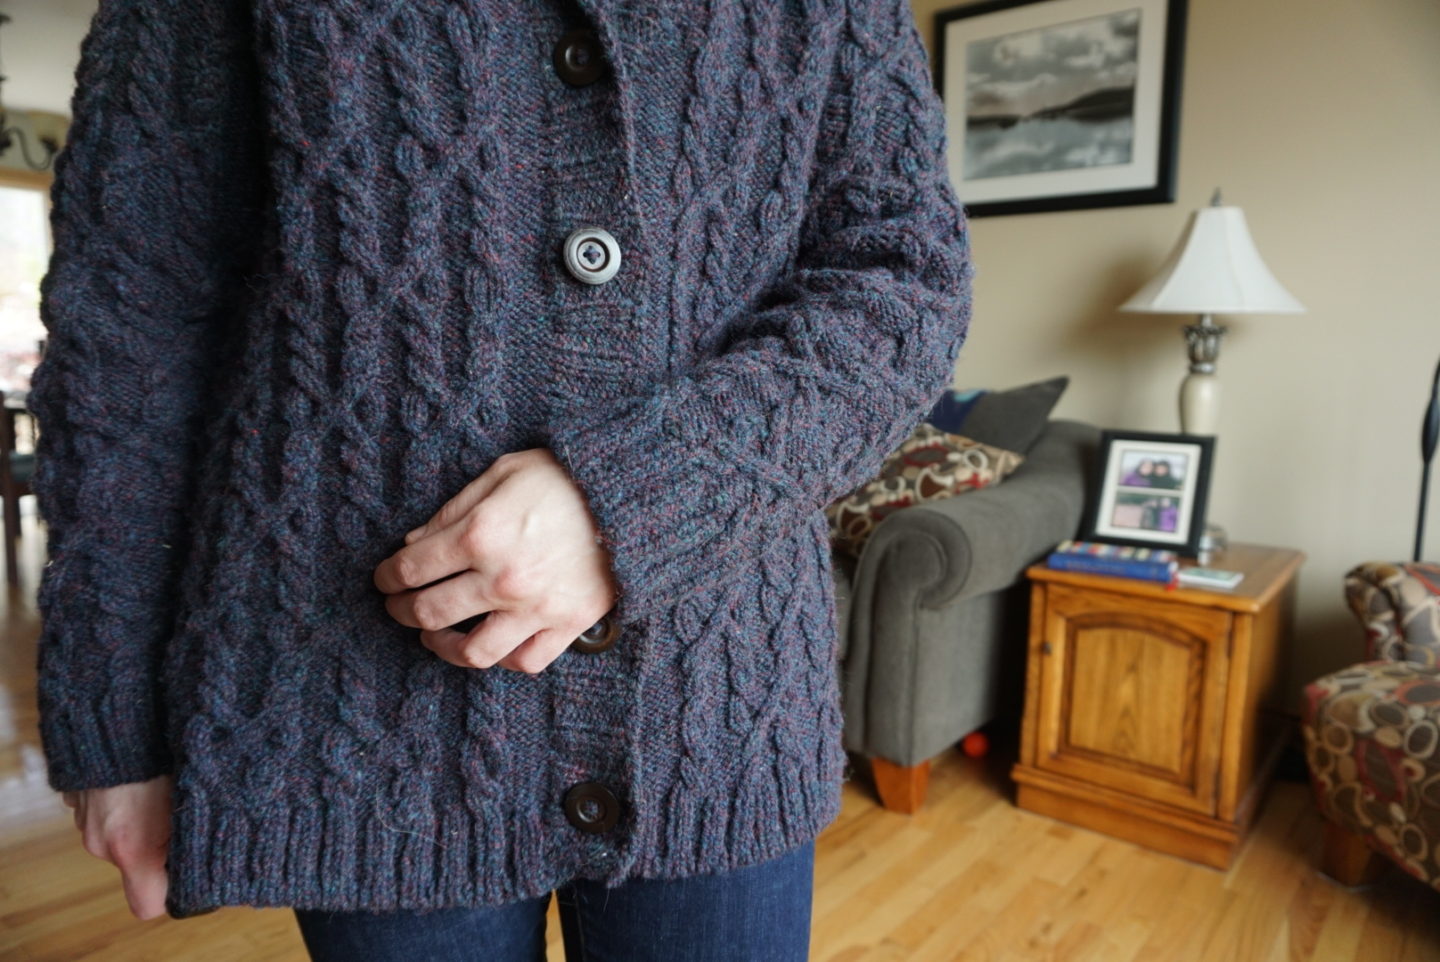

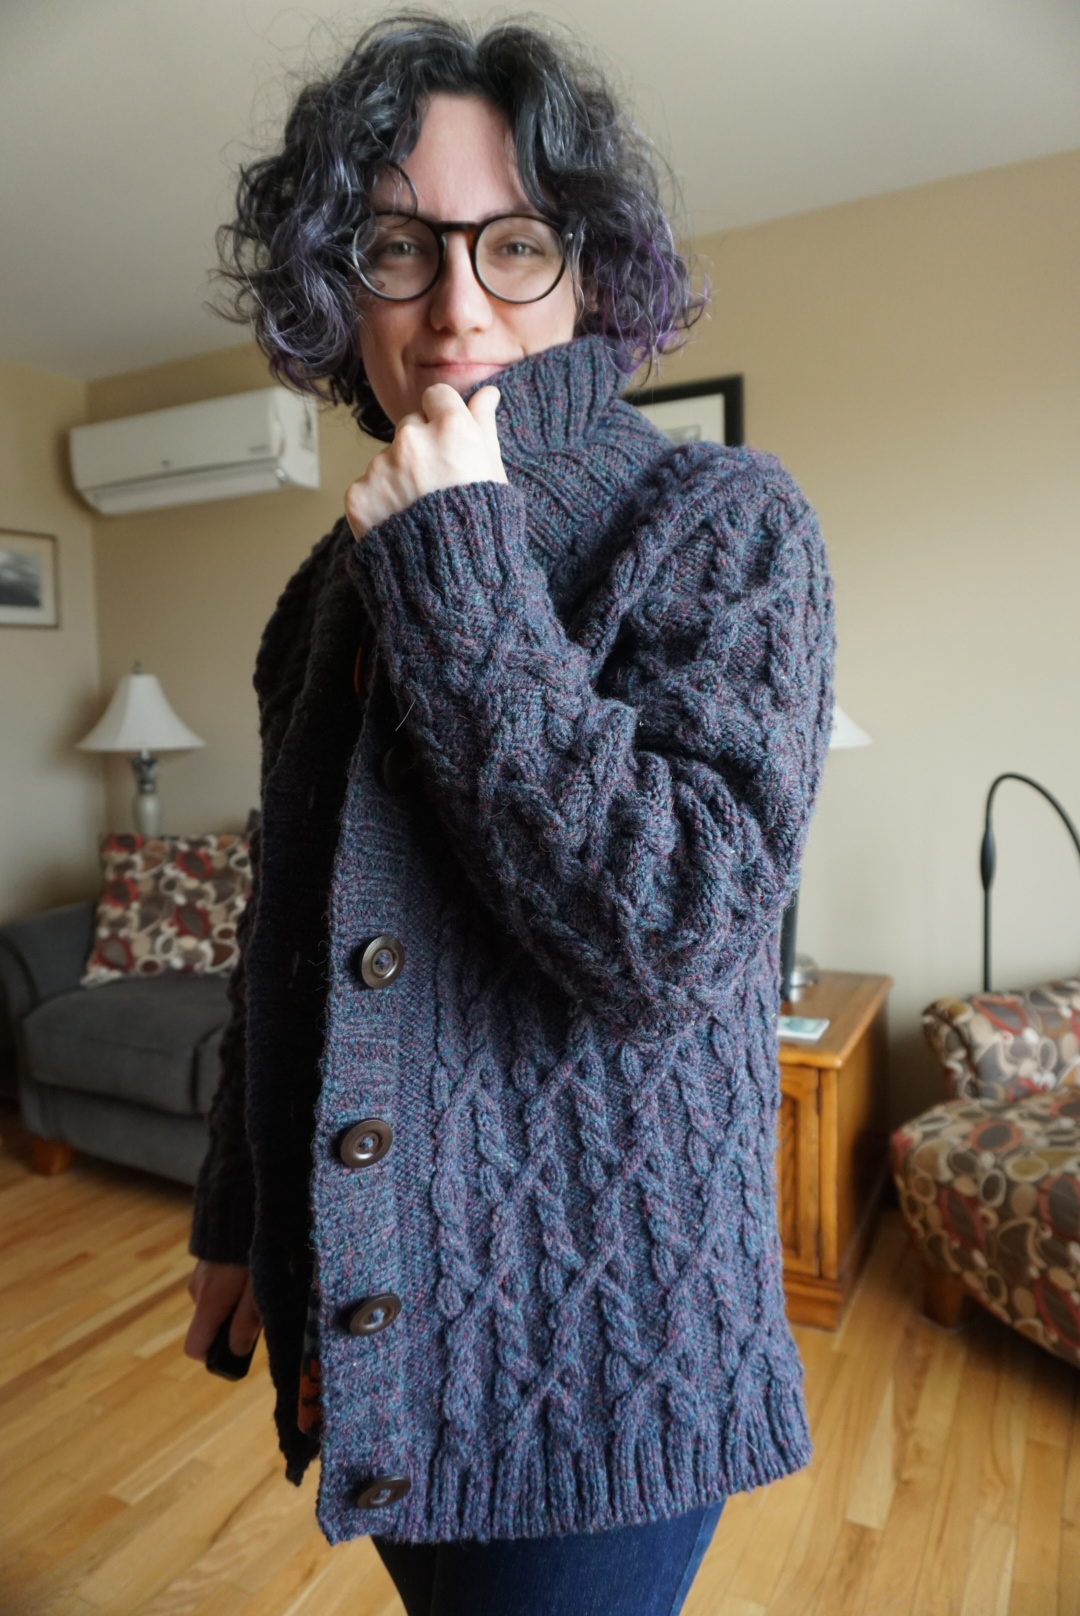
I had to finish my photos with a cheeky collar-up photo like in the sample photography for the Snoqualmie. I wet blocked the whole sweater after I finished it (before adding buttons), in addition to wet blocking all of the pieces before I seamed them, so I could get the collar to fold down in the place I wanted it to without flipping and shifting around (that’s why you can see a bit of a crease in the photo above). I should also mention that after I bound off all 280 stitches of my neck/button band, it wasn’t stretchy enough and it looked dumb, so I pulled the whole bind off out and did it again using a method that has a yarn-over in between each stitch, and that solved my entire problem. There was a lot of doubling back and fixing things and a loooot of learning new things during this project, but I’m very very happy with the finished product and am very glad I took the time to go back and fix things so that I could be completely content with my final garment! Has anyone else made the Snoqualmie? More relevant: has anyone else taken on a giant project without knowing if you had the skills to do it before you started?!

You are so brave to try such a hard cabled sweater as a new knitter! And you did a wonderful job! I have the Snowqualamie on my list of to-do knitting (for years) and am inspired to knit it. Hard projects are challenging, and you can be proud of yourself! And a rock climber too! Late for comments but I just found your site. Thanks!
Author
Thank you! I have a habit of trying things that I don’t really know how to do and struggling through until I figure it out. Reknitting the back was not the most fun, but my cables got better the second time with tension so it was still a learning expereince! I hope you make yours soon.
Hi! What needle sizes did you use? I am hoping to use the same yarn in a light brown. Gorgeous sweater.
Thanks so much!
Author
Hi Helen, thanks so much! I wish I had written down what needle size I used, but I didn’t. I do remember that I knit a few different swatches in the cable pattern and then blocked them. I chose my needle size based on which fabric I liked the best, and then based my size off of which one would give me the right dimensions width-wise from the schematic (if that makes sense). It’s quite doable to adjust as you go for length, but the width was the tricky bit for me! And you’ll also be able to double check as you get a bit into knitting the back piece that it’s the width you want. 🙂