
I started off as a sewist, but more and more I’m realizing that I could probably call myself a knitter as well. Along my knitting journey so far, I’ve gradually accumulated a bunch of knitting needles. My storage method was to keep all of my yarn craft supplies (circular, double pointed needles, needle pairs, crochet hooks, pompom makers, etc.) in one drawer of my mini filing cabinet from IKEA. This absorbed the addition of my grandma’s tools when she passed away. When her sister (my great aunt, really a bonus grandparent to me) died in the last 12 months and I acquired her knitting needles as well, the chaos level of this drawer reached an unmanageable level that made it a huge chore to find anything anytime I wanted to start a new project. I couldn’t easily see what I had, and it sometimes took 30+ minutes to even find it if I did have it! I wanted to do something about this, because taking out every knitting needle you own every time you need to find one circular needle seemed like a waste of time. So here are three projects that I sewed recently in order to tame that chaos!
I wanted to make a circular knitting needle organizer inspired by one that my best friend’s mother made (she’s a professional knitter/knitting designer so she has a lot of needles to organize!), so I pulled out the chaos drawer and put it on top of my desk so that I would be reminded to start that project. It remained in that very annoying location (on top of my printer, having to be moved any time I wanted to print a PDF sewing pattern) “reminding” me for more than six months. The thing that got my butt into gear was actually a bouldering gym doing a big clean-out of their back storage room. That might seem unrelated to this project, but my sister’s boyfriend works there and when they came across a huge piece of unbleached cotton canvas, he reached out to see if I might want it. I accepted it immediately, but actually didn’t think of using it for this particular project until I happened see the chaos drawer and the canvas languishing side by side a few weeks later. It was a perfect match!
In order to save myself a bit of time, I wanted to see if maybe there was a tutorial out there for something similar to Lucy’s circular needle organizer. I couldn’t find anything that was exactly what I was looking for, until I stumbled across this blog post, titled “Lucy’s Circular Needle Storage System“, through a Google search for “circular knitting needle organizer”. I thought that that was such a funny coincidence that the blog post had the same name as my friend’s mum – it felt like it was meant to be! When I clicked through and saw the domain name of the blog, I had a big laugh at myself because it WAS Lucy’s blog. MY family friend Lucy herself! I’d somehow Googled my way right back to the source of my inspiration! I texted her to tell her my silly story, and she responded saying that that must be a sign from the universe, because SHE had been wanting to make another one of the hanging storage systems for a friend of hers but couldn’t remember where she’d put her own instructions for making it. Somehow we ended up helping each other!
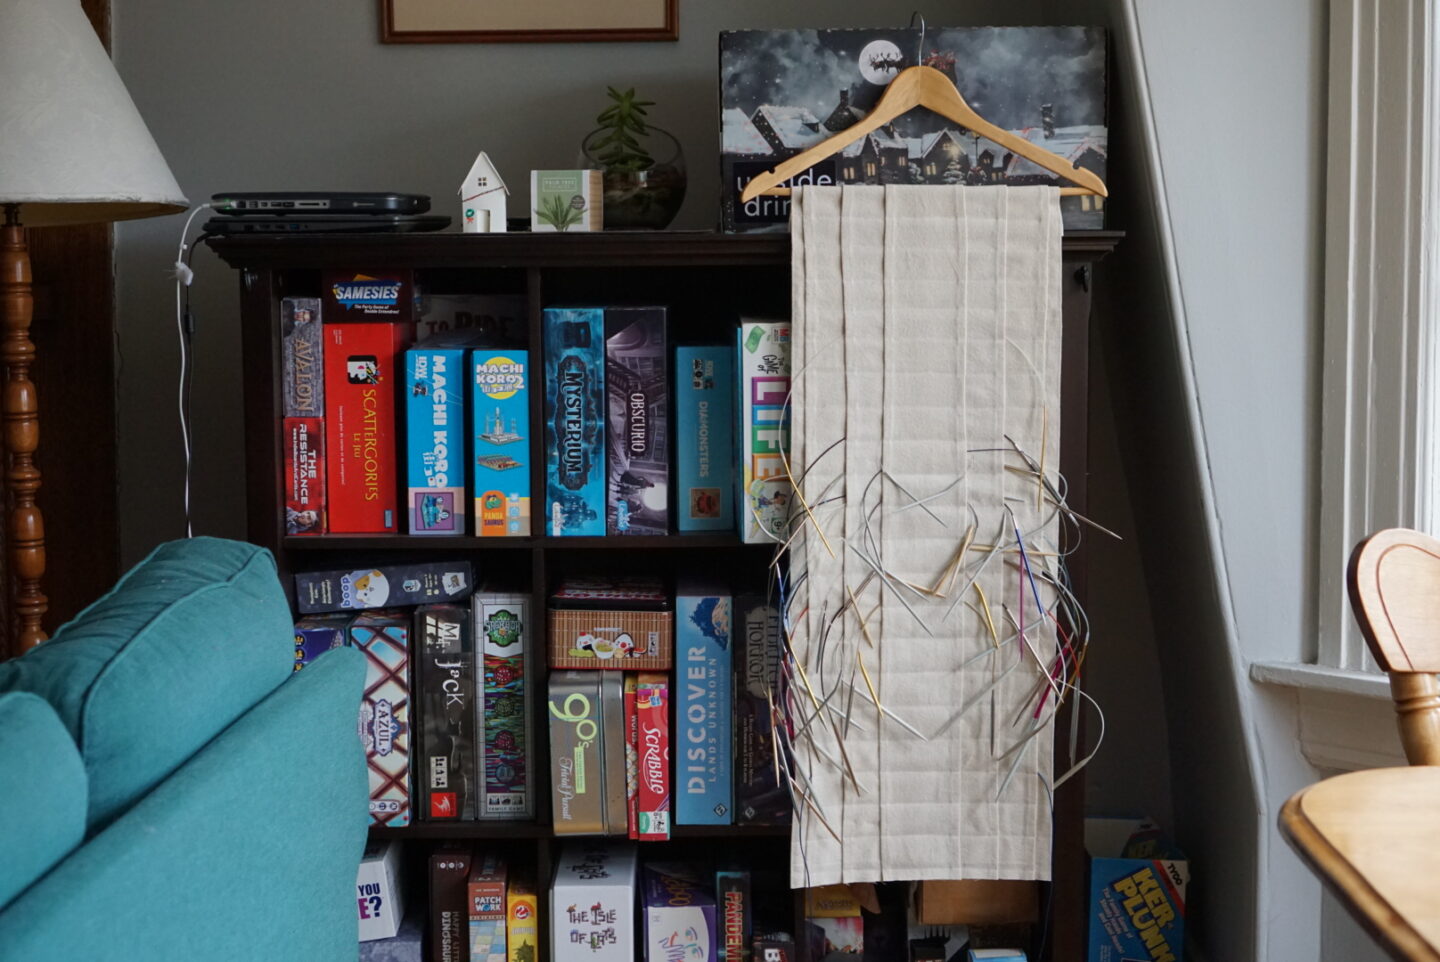
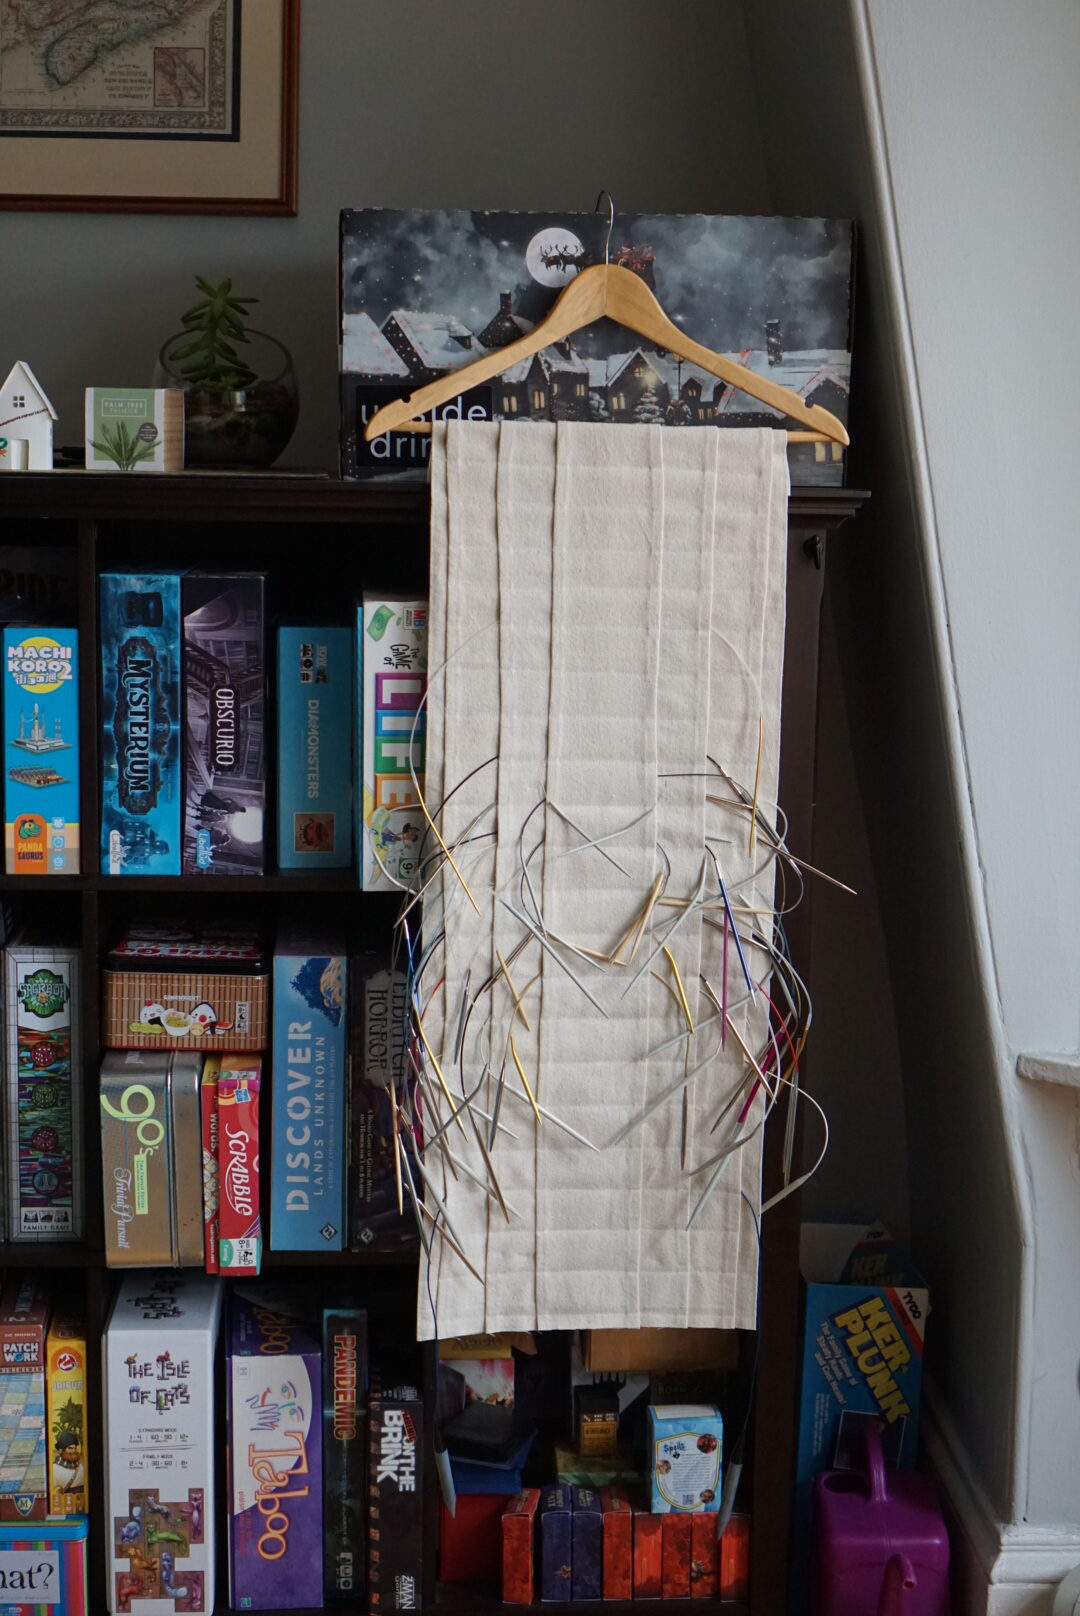
In Lucy’s tutorial, she has instructions for different widths of organizers, but the one I saw at her house actually had multiple widths layered in the same organizer, which is what I wanted to replicate. Lucy’s tutorial has you make the fabric into a tube in order to avoid hemmed edges that the needles can get caught on. Based on the thickness of my canvas, I was worried that if I made multiple tubes and then tried to sew through them all, so many layers would be too much for my machine or end up with needles getting broken. Because of that, I made my bottom layer a tube for stability (aligning the long tube seam along the center back when I pressed it flat), but all of the top layers are a single layer of fabric, hemmed at each long side by folding under 3/8″ twice and stitching it down. Here’s a diagram I made to show you the finished dimensions of mine.
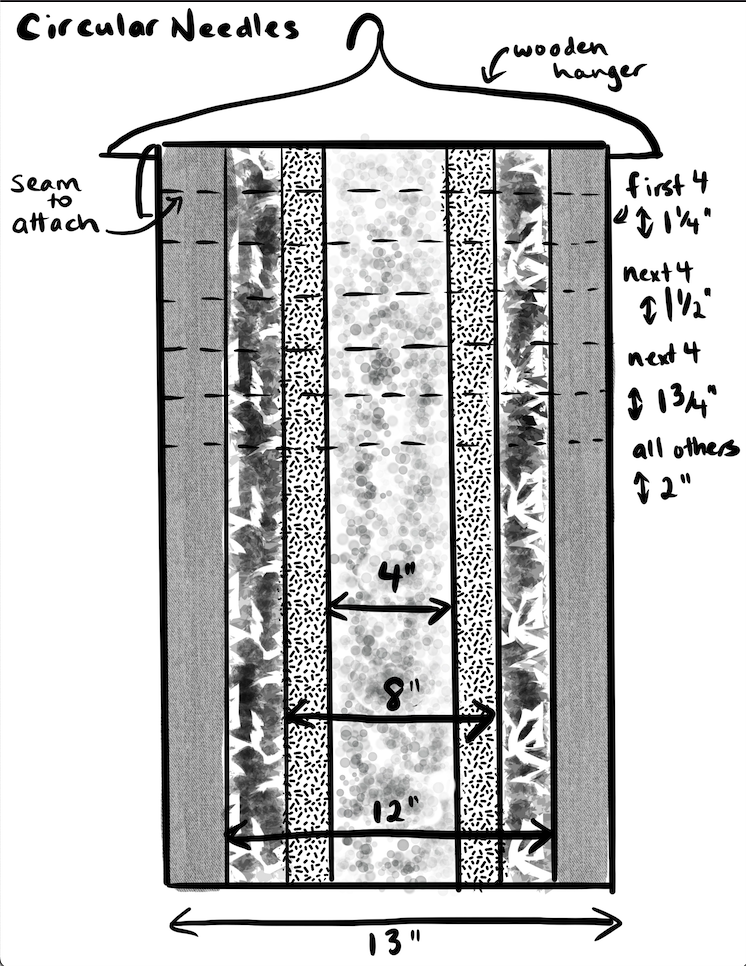
You’ll notice in the diagram above that I didn’t list a length. I initially cut my pieces to be 37″ long because I had tons of the canvas and I wasn’t sure how long I’d want it to be. This means that the four pieces I ended up needing were: 27″W by 37″L for the base tube (sewn together with 1/2″ seam allowance length-wise); 13.5″W by 37″L; 9.5″W by 37″L; and 5.5″W by 37″L. My fabric was almost 50″ wide, so I think I could fit all of those pieces side by side across the fabric. I made the widest one into a tube and pressed it flat, then hemmed all of the long edges on the other three pieces by turning them under 3/8″ twice and stitching it down. After that, I layered all four pieces with the widest tube on the bottom and the most narrow piece on top, roughly centering each one as I placed them. You will need to pin all of these layers in place on top of each other, because your stitching is going to run horizontally in order to create the pockets for your needles. This might be obvious, but as someone who has accidentally made multiple Giant Pants Tubes instead of Pants That Humans Can Wear in her sewing career, sometimes the obvious thing needs to be said: Do not stitch anything down vertically!!
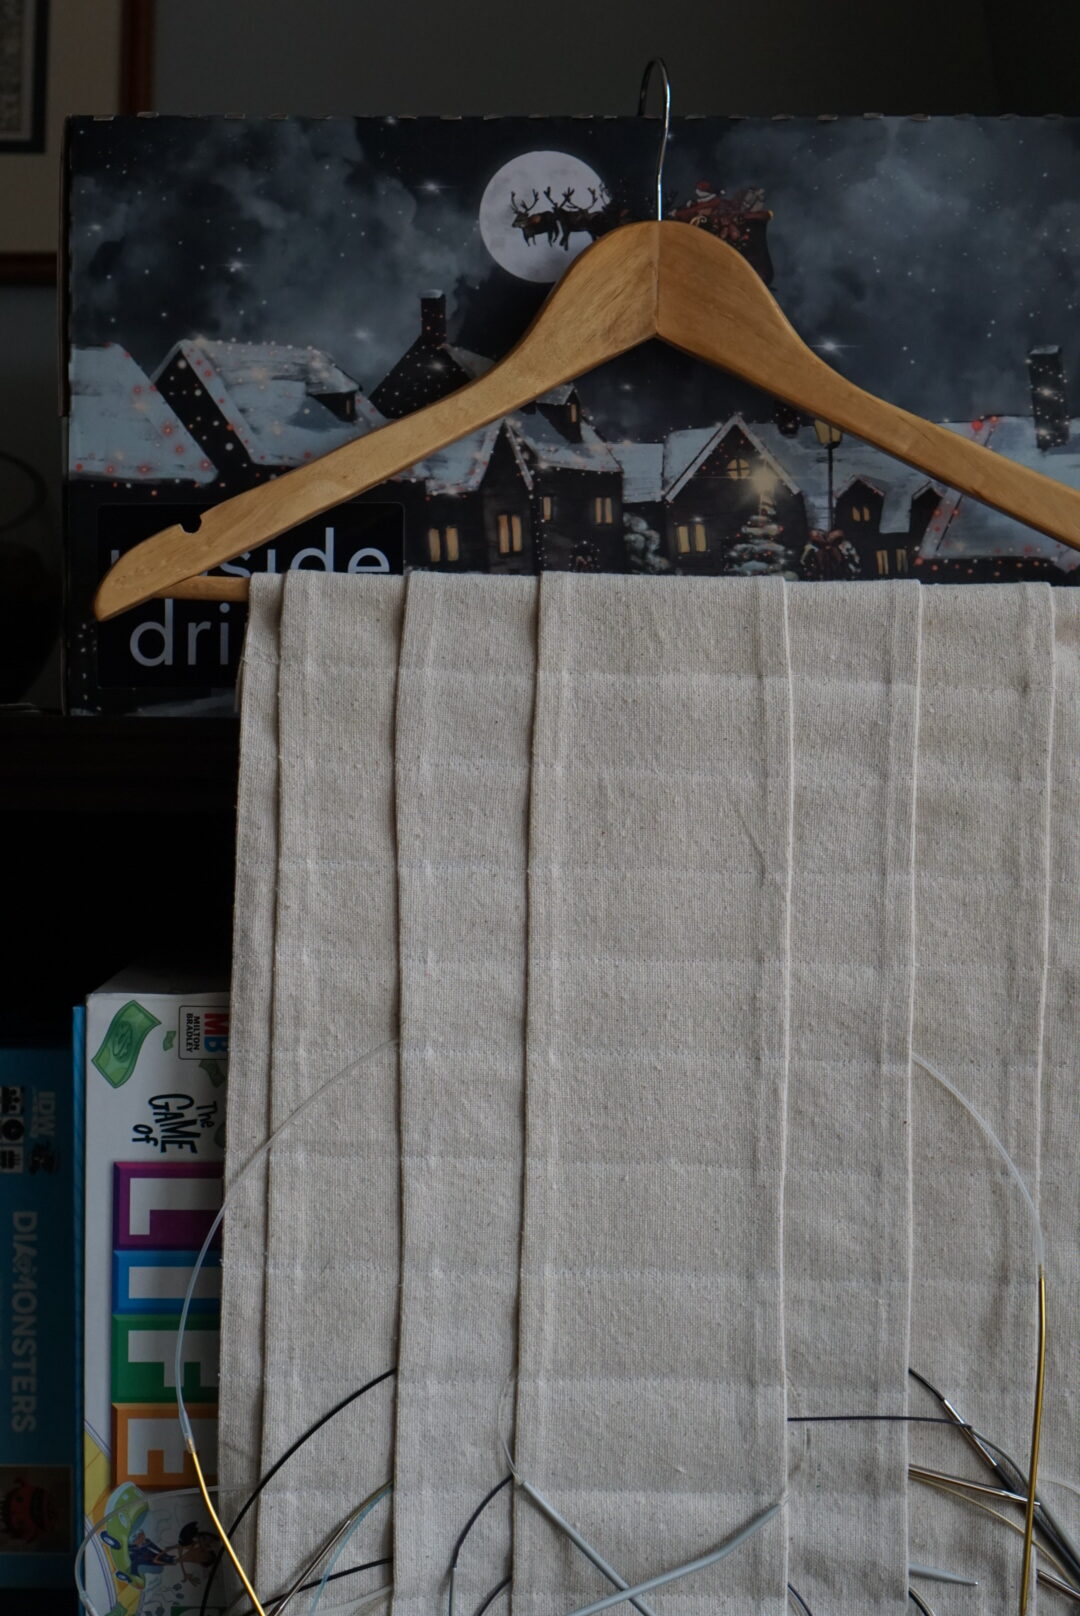
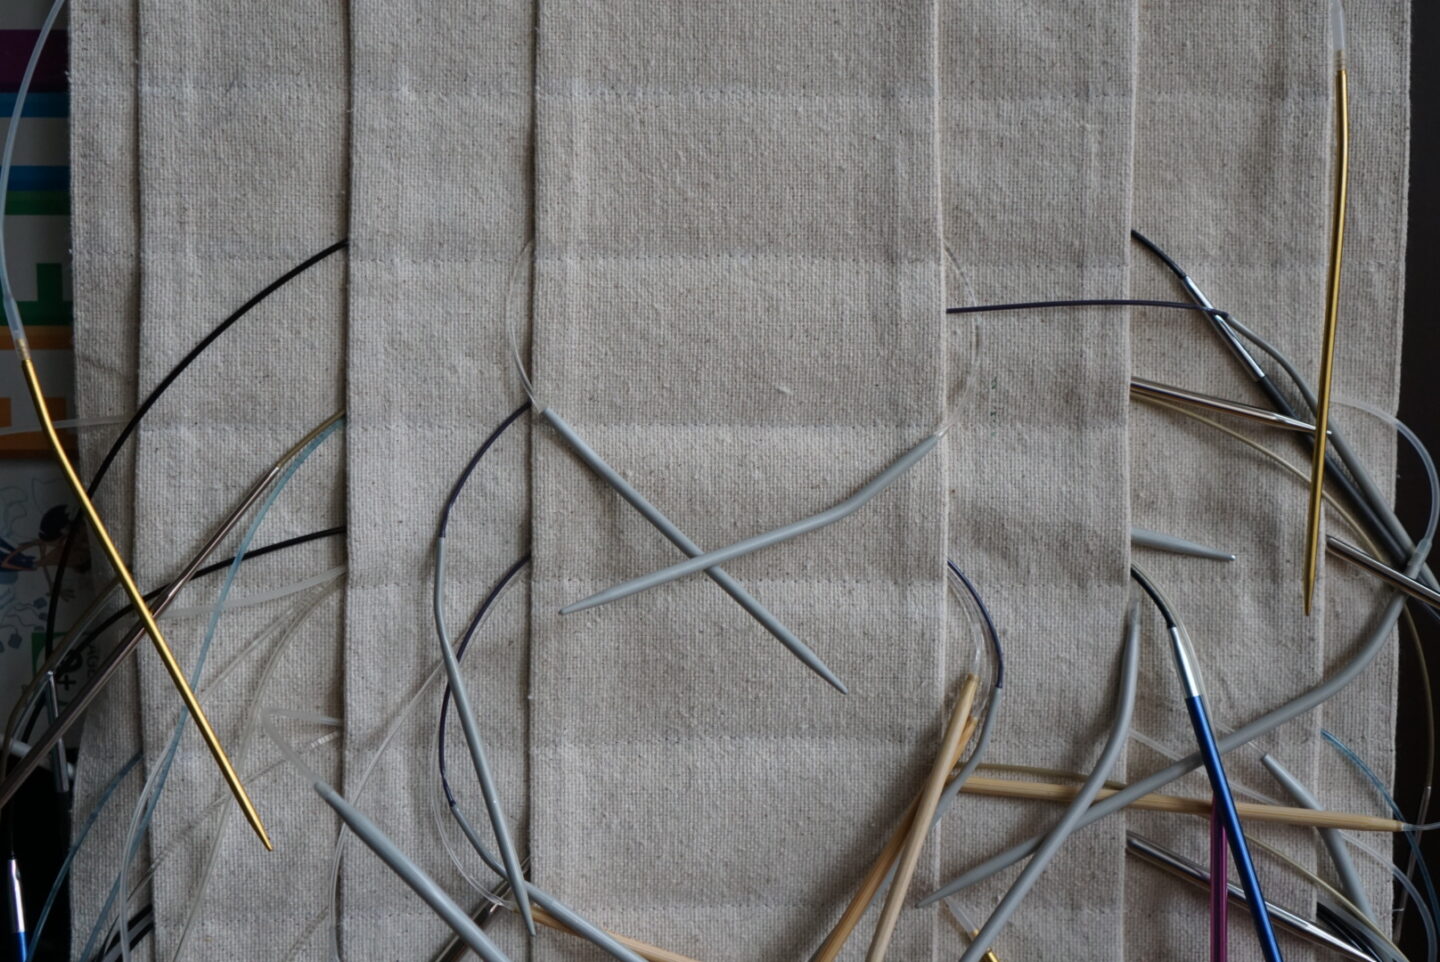
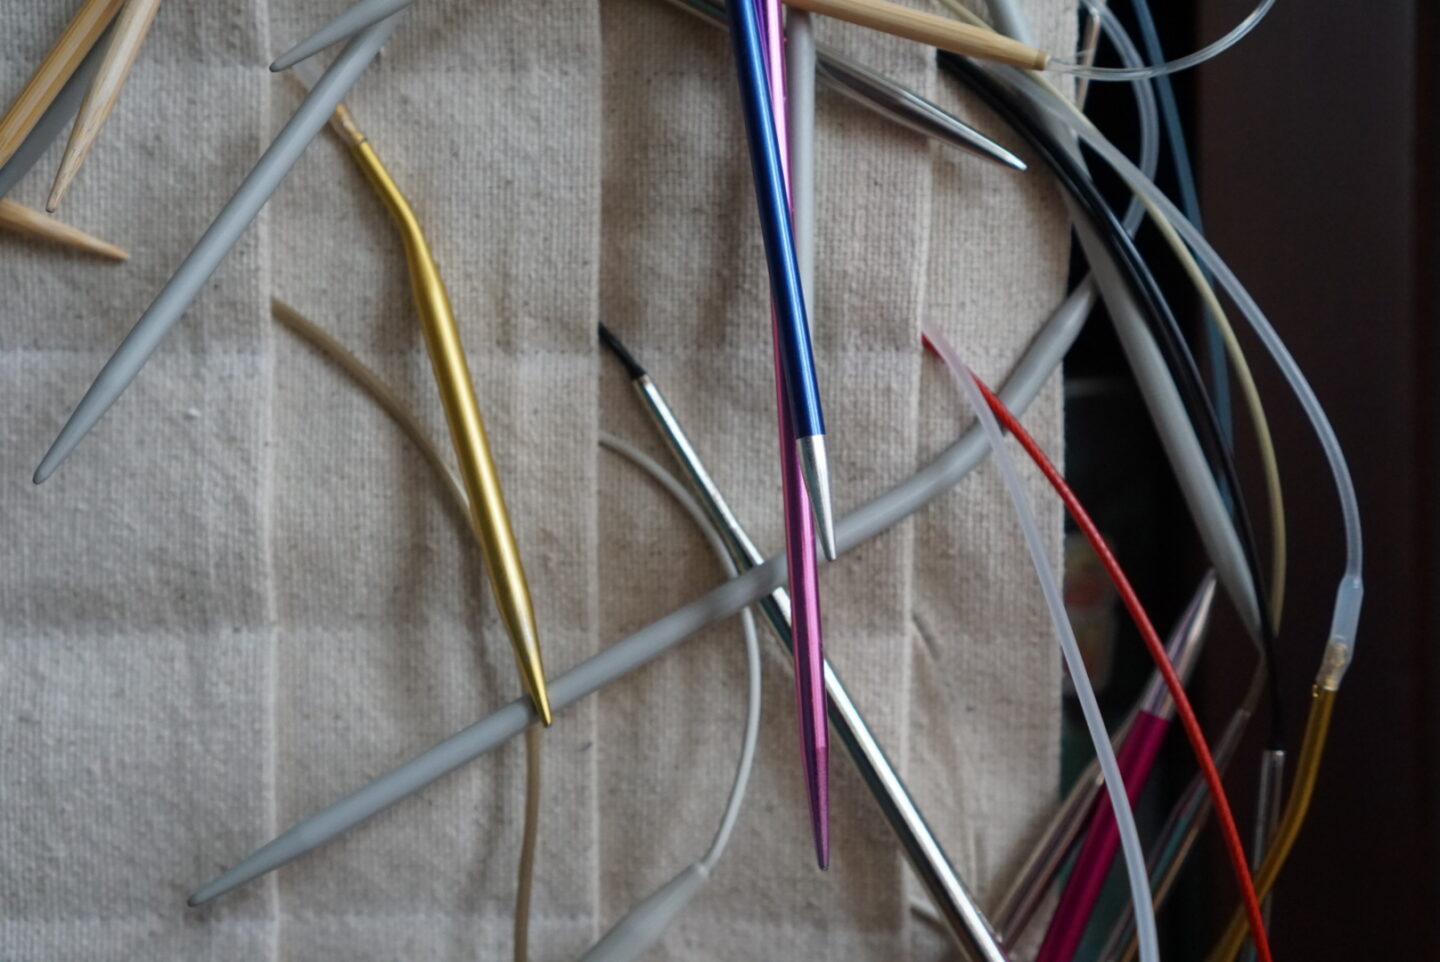
At this point, I basted across the top of all of my layers to hold them together. Then, I fed it through the wooden hanger and folded over a big chunk in order to attach it to the hanger. It’s probably easier if you attach your hanger at the very end so you don’t have to manage a big wooden hanger while you’re sewing all of your horizontal pocket lines. I didn’t do that because I was not in the mood to measure out all of my needle pockets in advance. Probably it would be a better time if you did that. Probably you should do it that way, and not the way I did it. Probably. Once you know where your attachment stitching line is going to be, you can measure out and draw in all of your horizontal lines. I did my first four lines at 1.25″, then the next four at 1.5″, then the next four at 1.75″, then all of the rest at 2″. I sorted all of my circulars by needle size so I could get a sense of what was there. I didn’t have anything super small, but didn’t want to rule out that for future storage/acquisitions. Based on this chart, I thought it was probably safe to start at 2.0mm and make a pocket for each of the metric sizes listed. That’s what dictated the number of pockets I made – twenty total. I figured I only had one set of super giant circulars, and that I could probably group all of the really chunky ones in the same row if I ever got any more. Eventually I will probably use fabric paint or a marker to write the metric size on the most narrow layer, centered on each pocket row, so that sizes are easier to see at a glance. As you’ll see in the photos, the reason for the different sizes of layers is so that you can generally sort by the cord length. I mainly own fixed length circulars, so this is a huge help in allowing the cords to relax and not get kinked up.
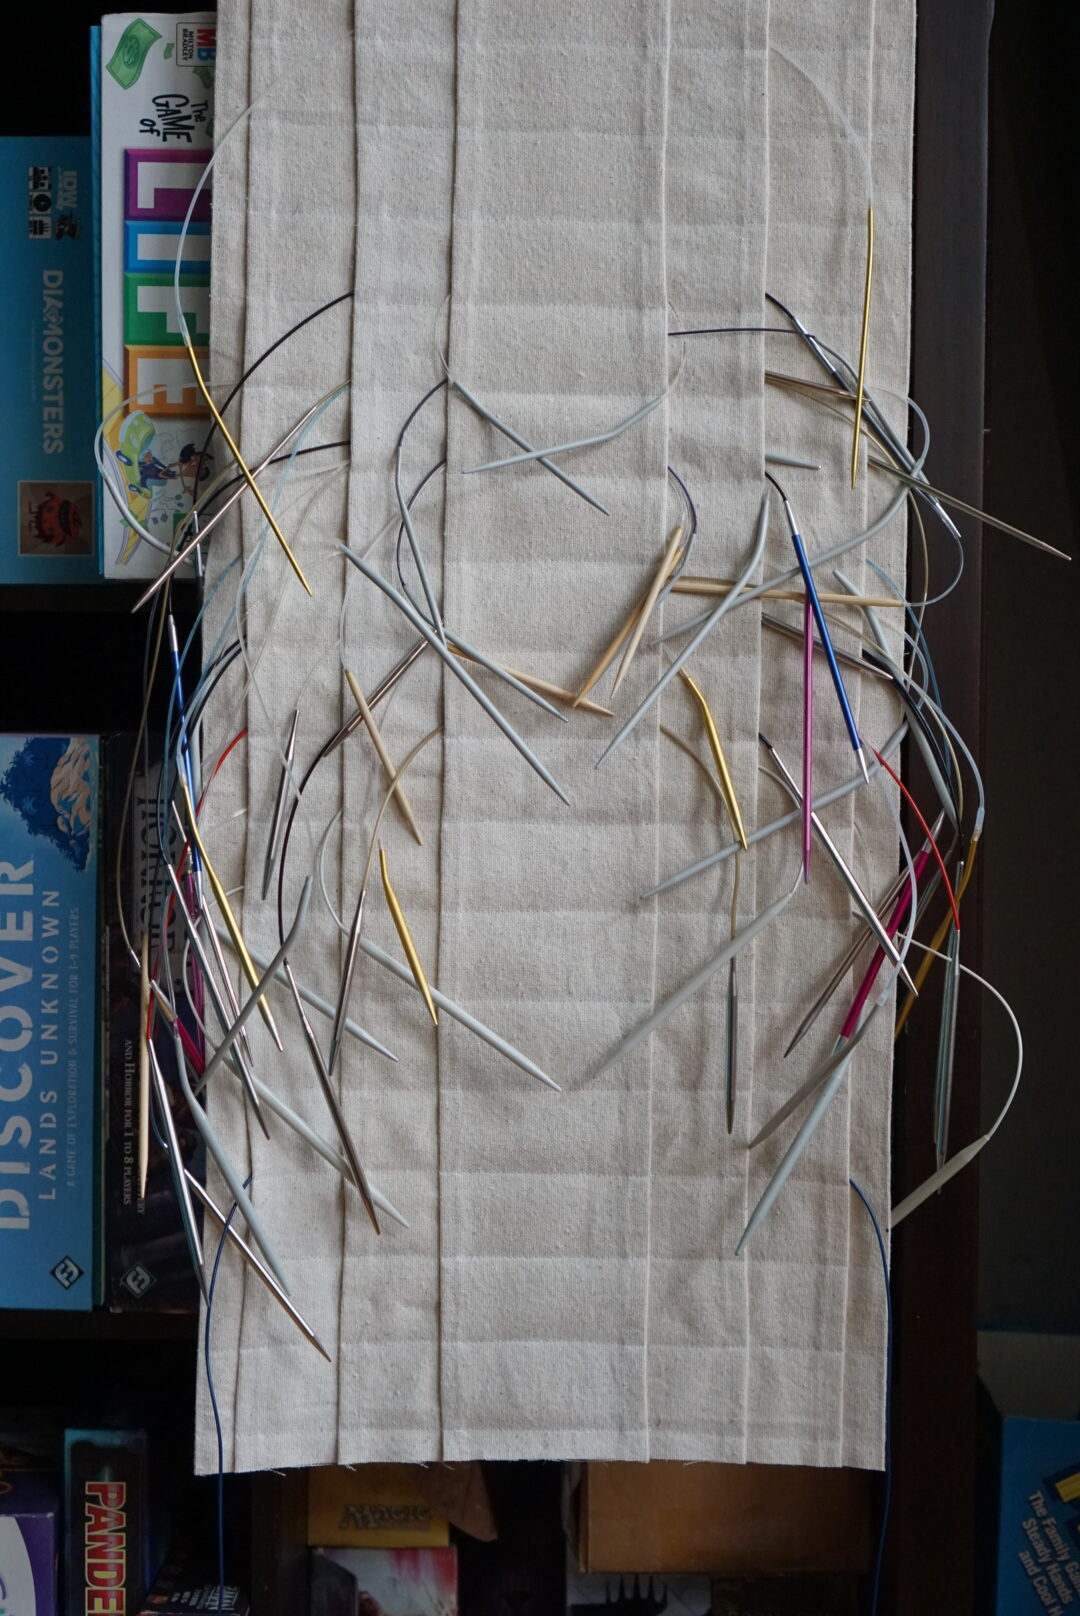
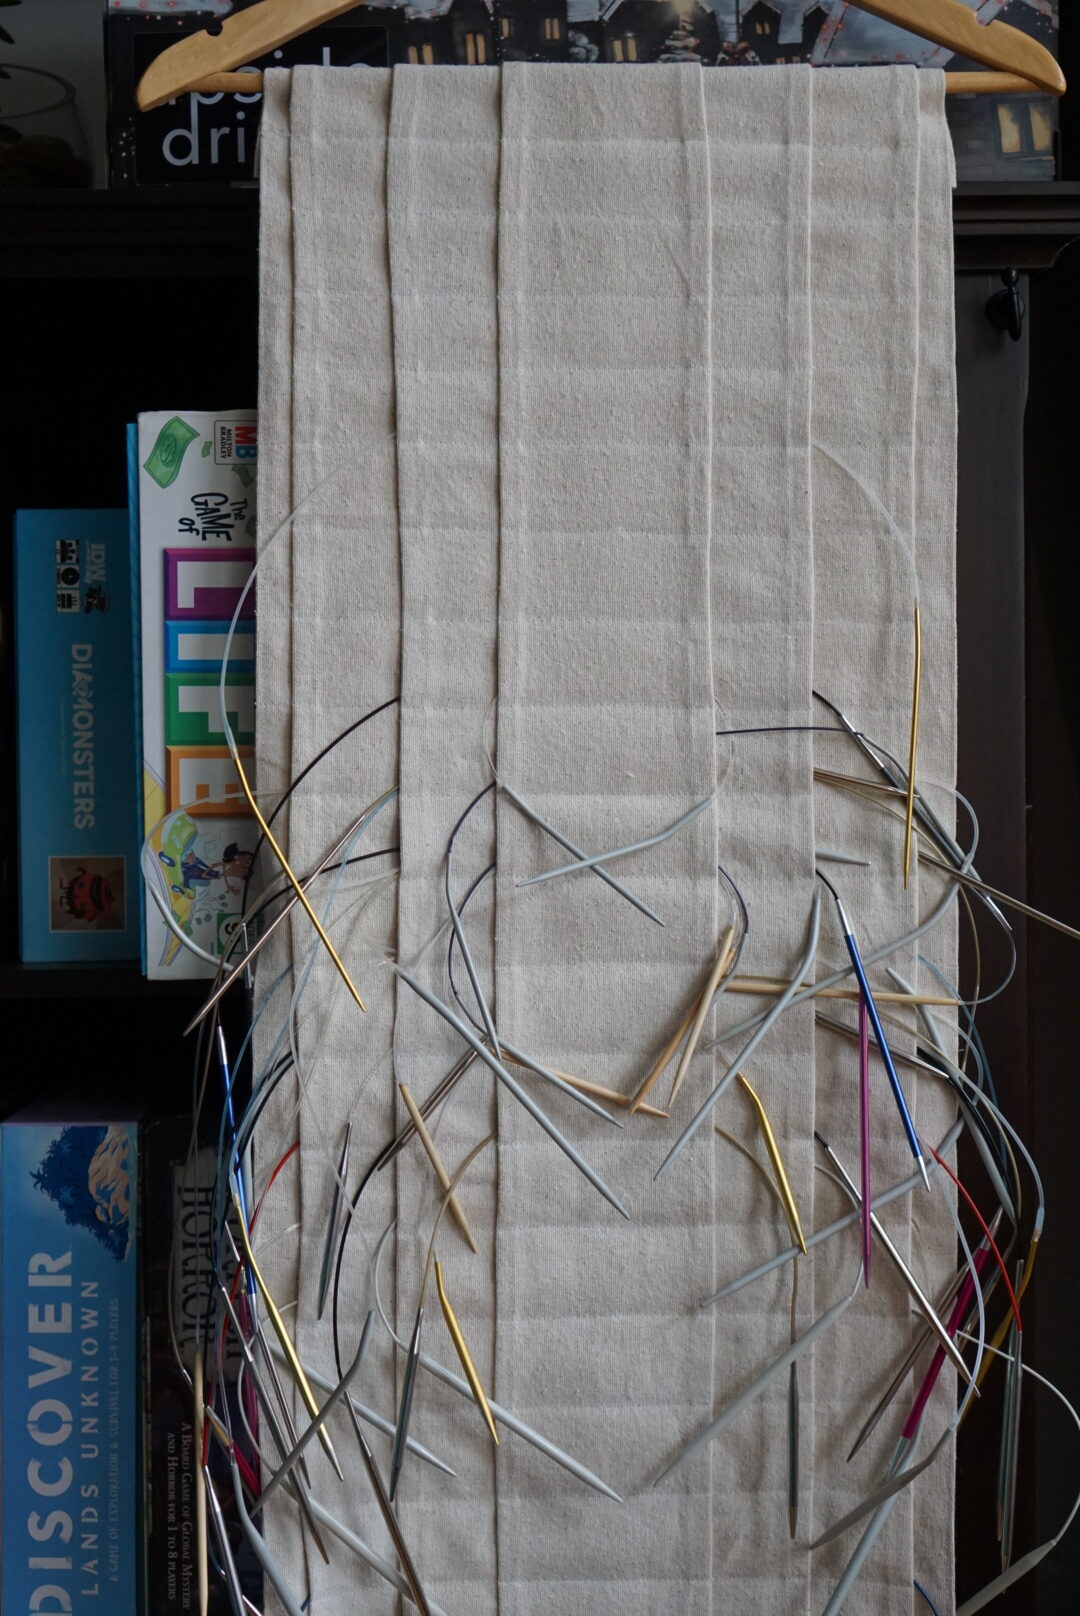
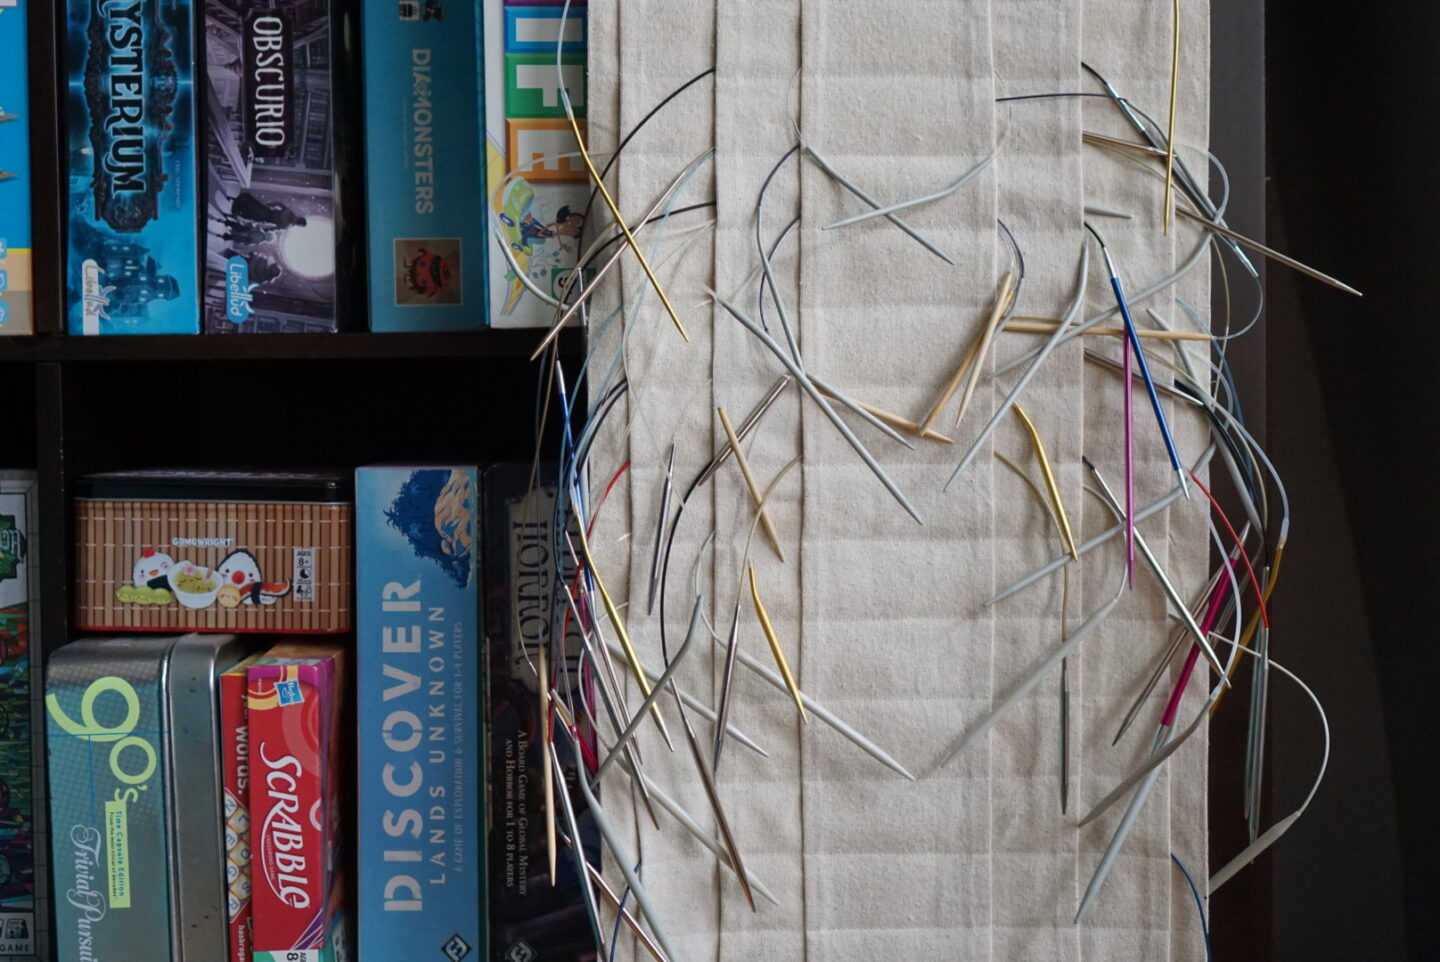
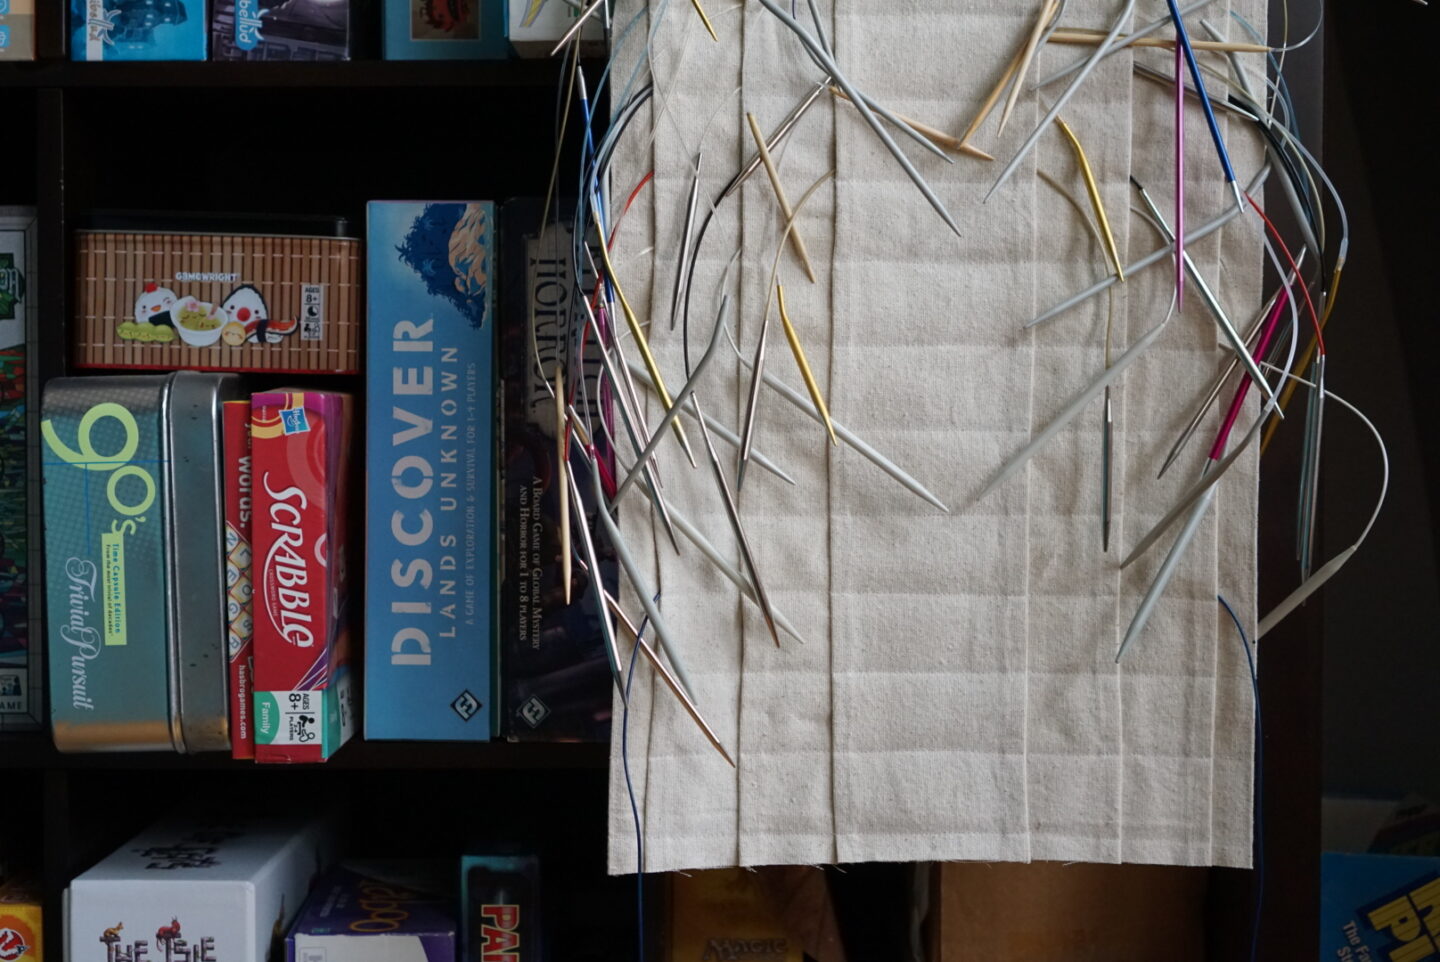

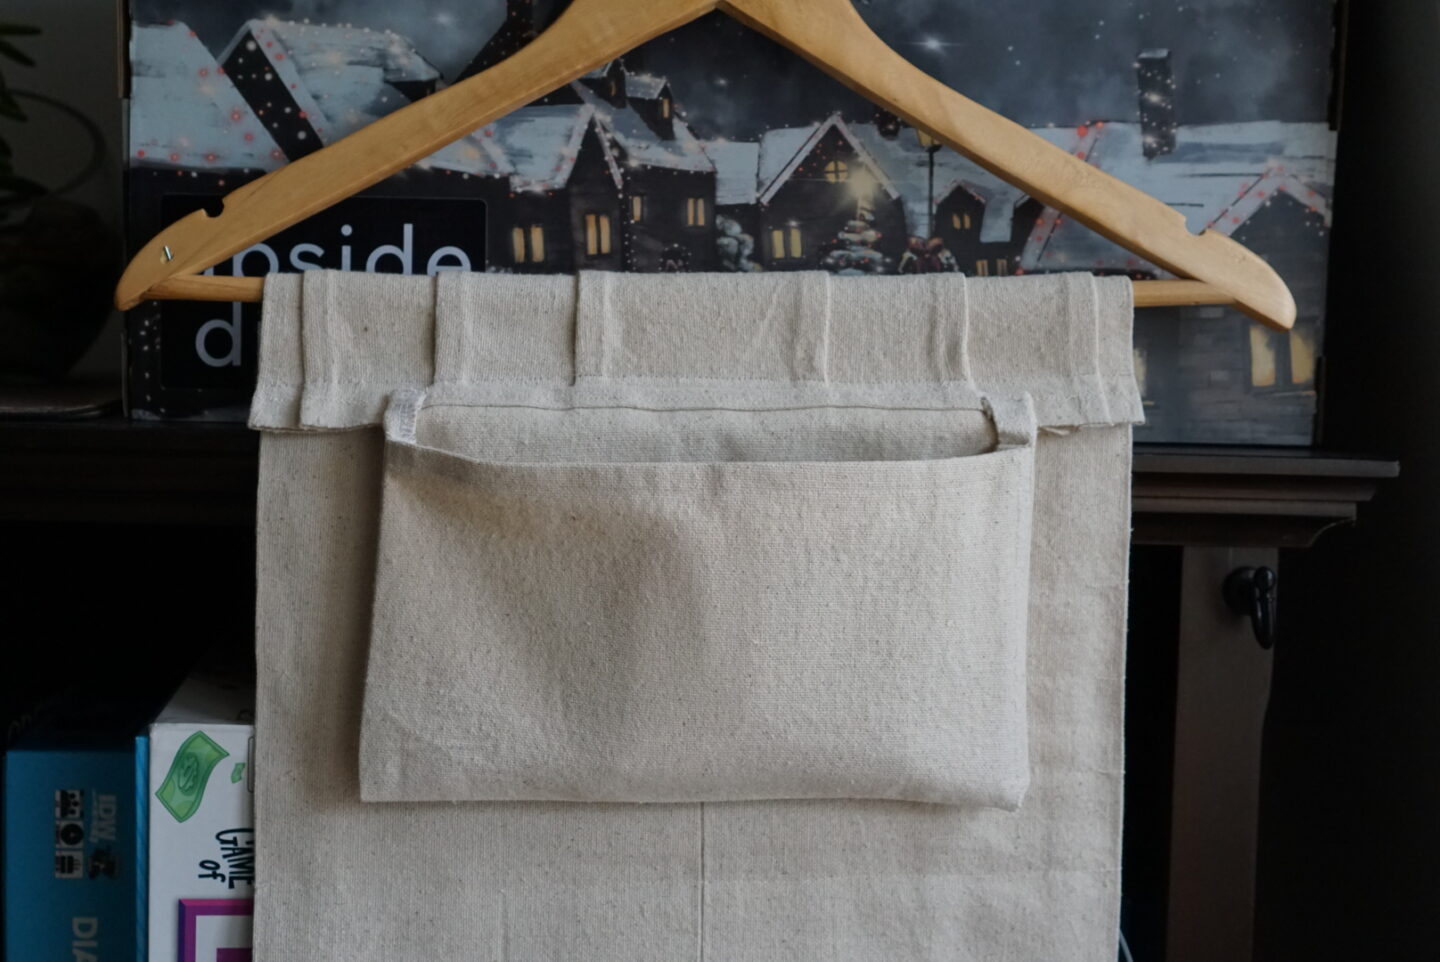
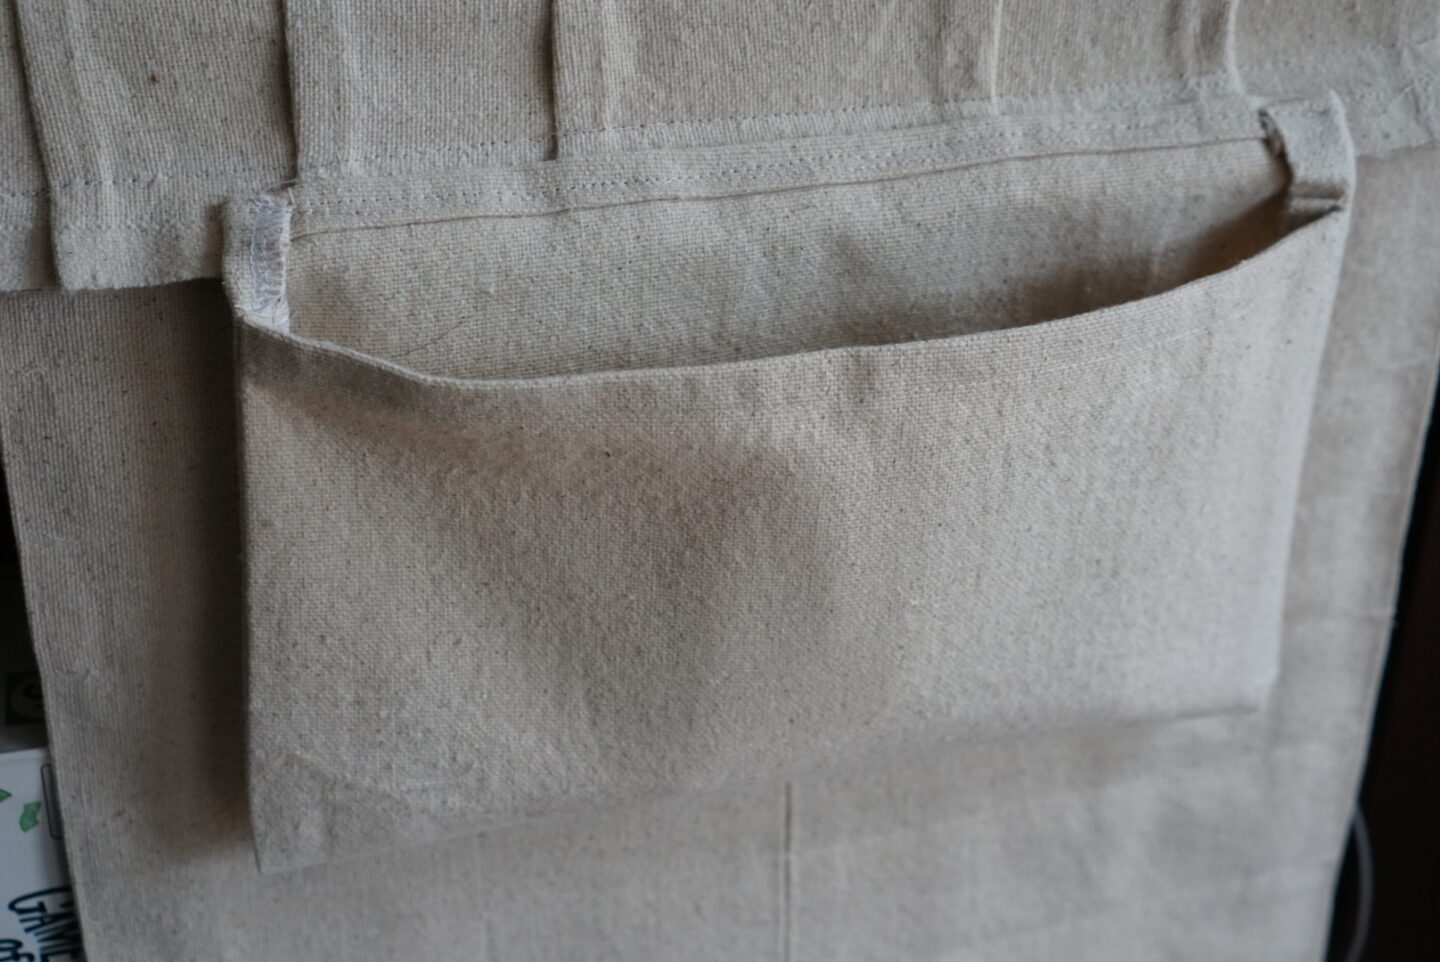
After I had sewn enough stitch lines to make my twenty pocket rows, I just chopped off the extra fabric, leaving it unfinished. You could totally finish it with a serger/overlocker, some bias tape, or another method of your choice, but I didn’t think it was super necessary and I didn’t feel like doing anything about it! You do you. After I finished loading in all of my circular needles, I had a few bits leftover. This was my needle gauge tool, plus a few miscellaneous detachable cords/needle tip sets. Because of my slapdash approach to attaching this to the hanger, I had a giant seam allowance hanging out in the back of the organizer. I made a rough pocket with a spare piece of my canvas and then sewed it to the back of my organizer along the extra seam allowance fabric (so that it didn’t mess with my pockets on the front, and so I didn’t have to sew through a zillion layers). This worked perfectly to store those small extra bits, and it’ll be helpful to have the needle gauge right there to check needles as I select them for projects.
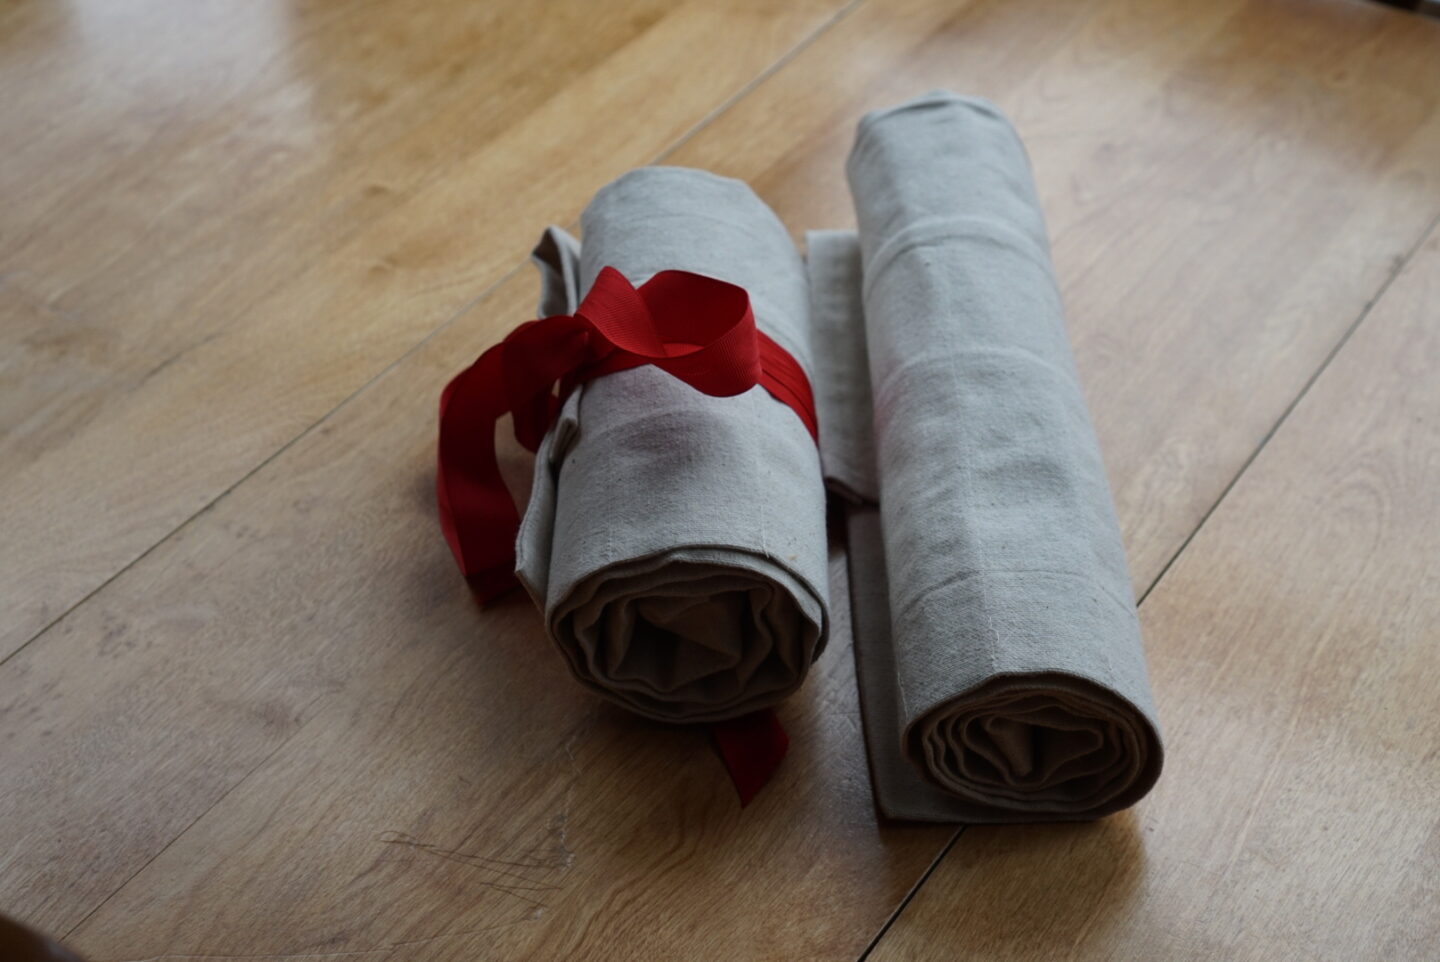
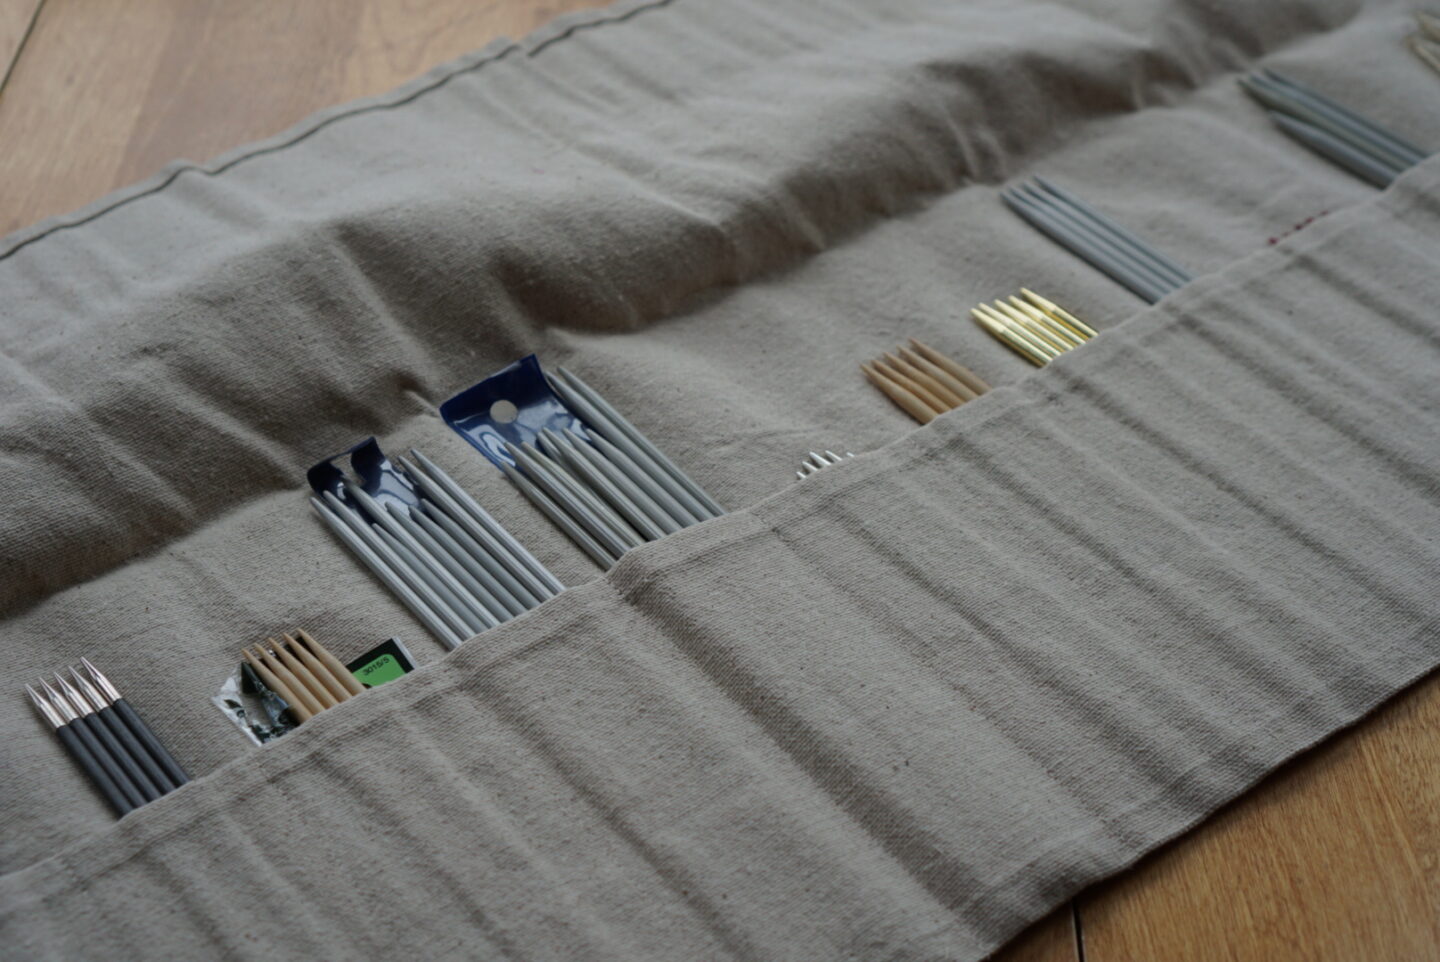
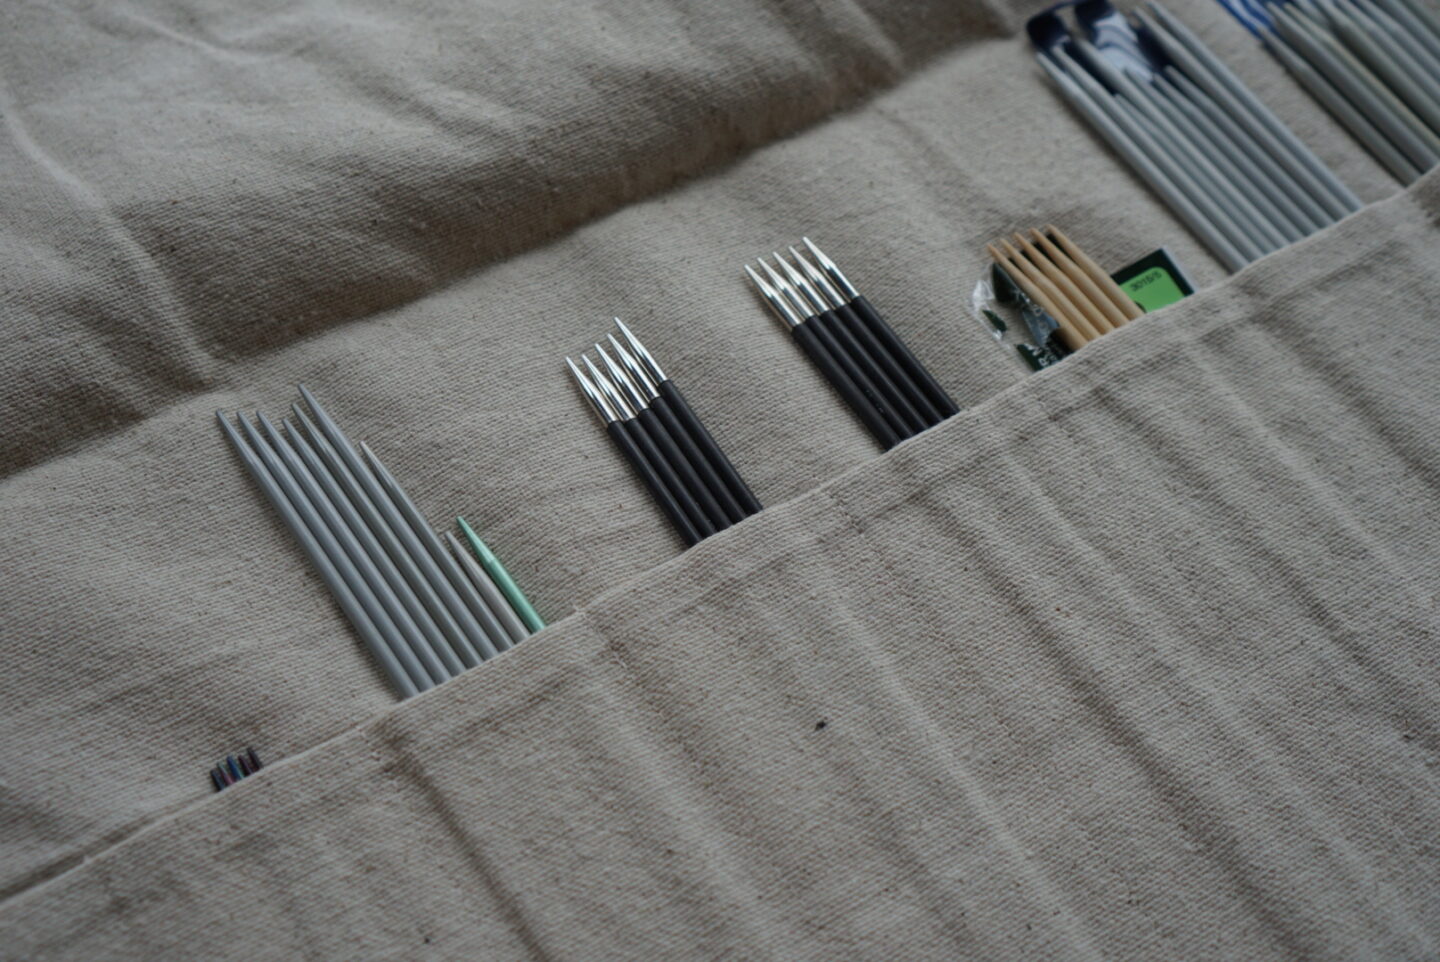
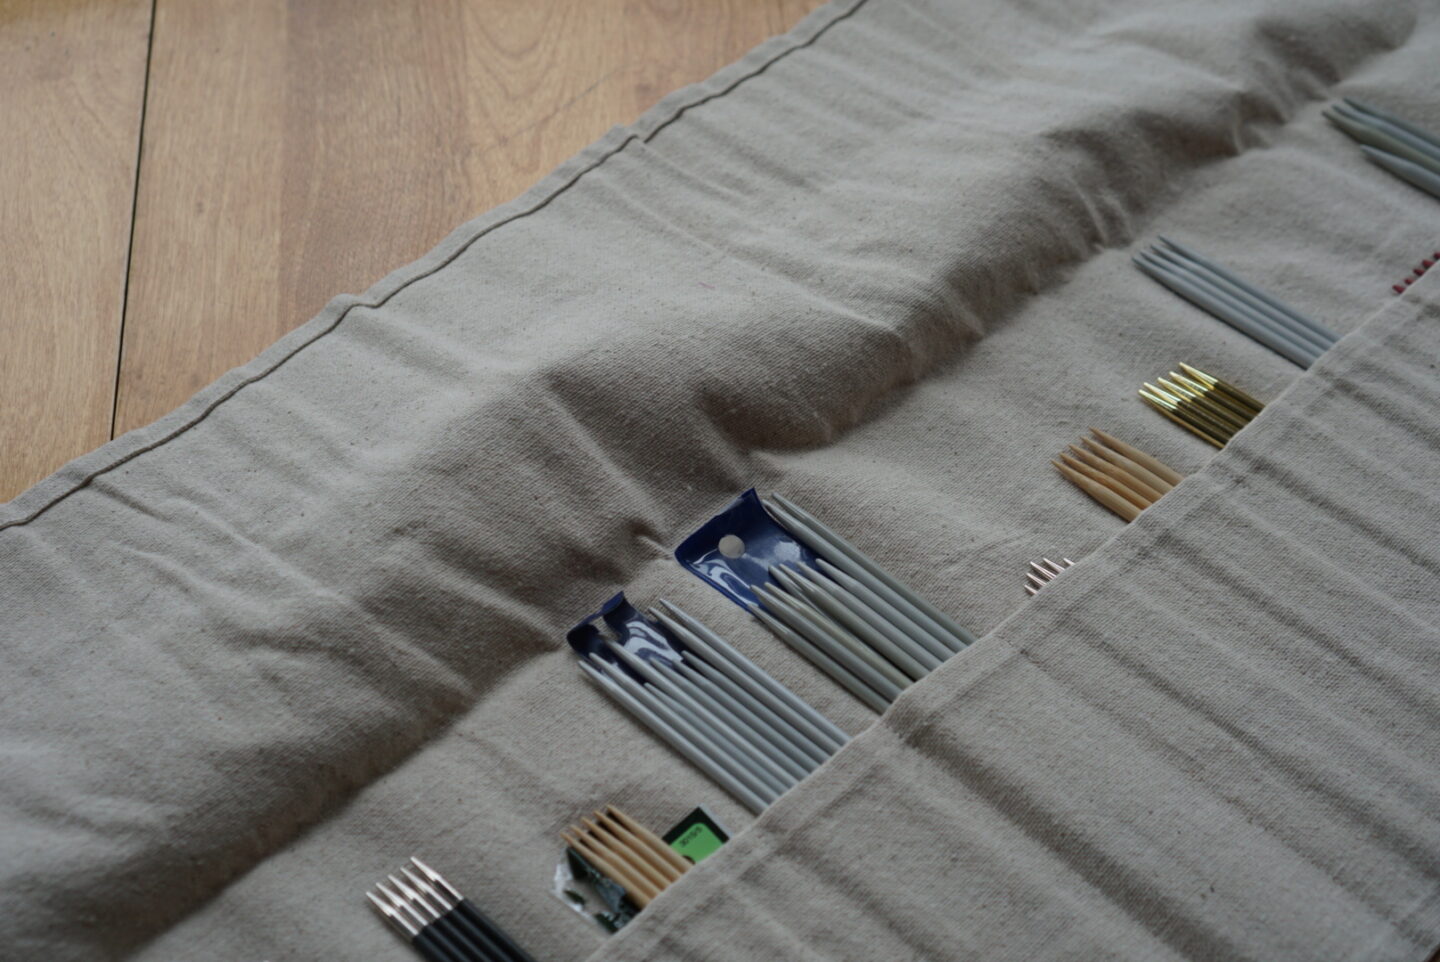
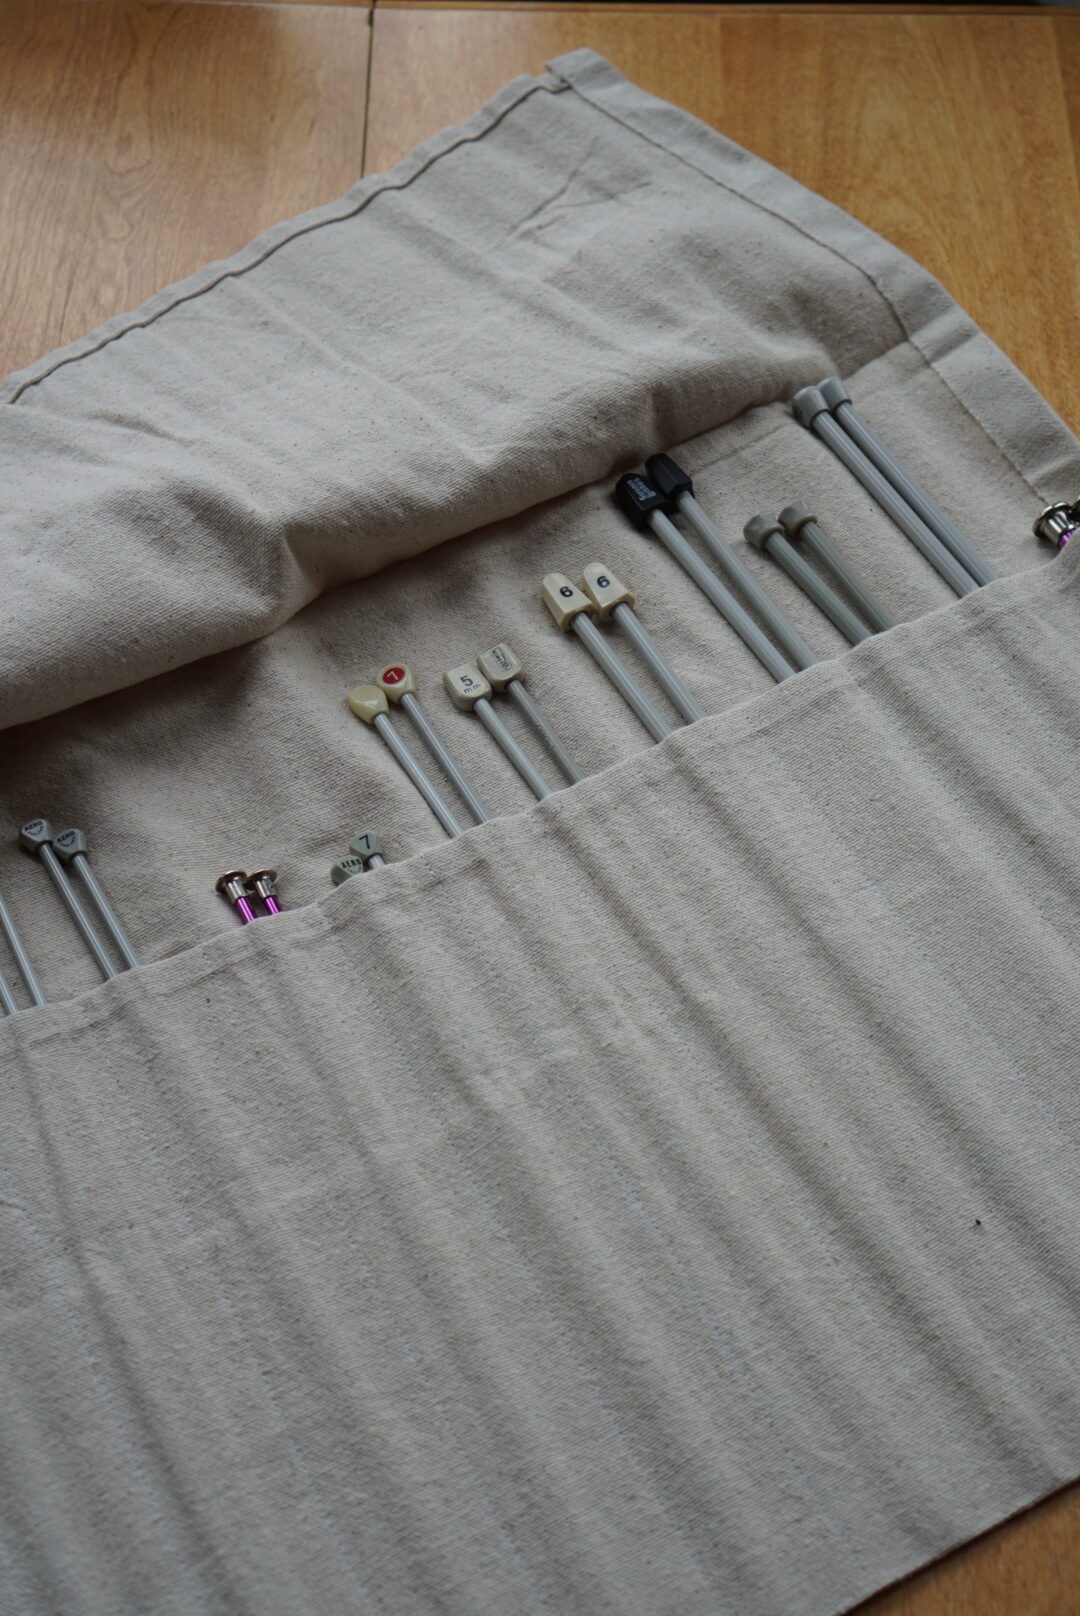
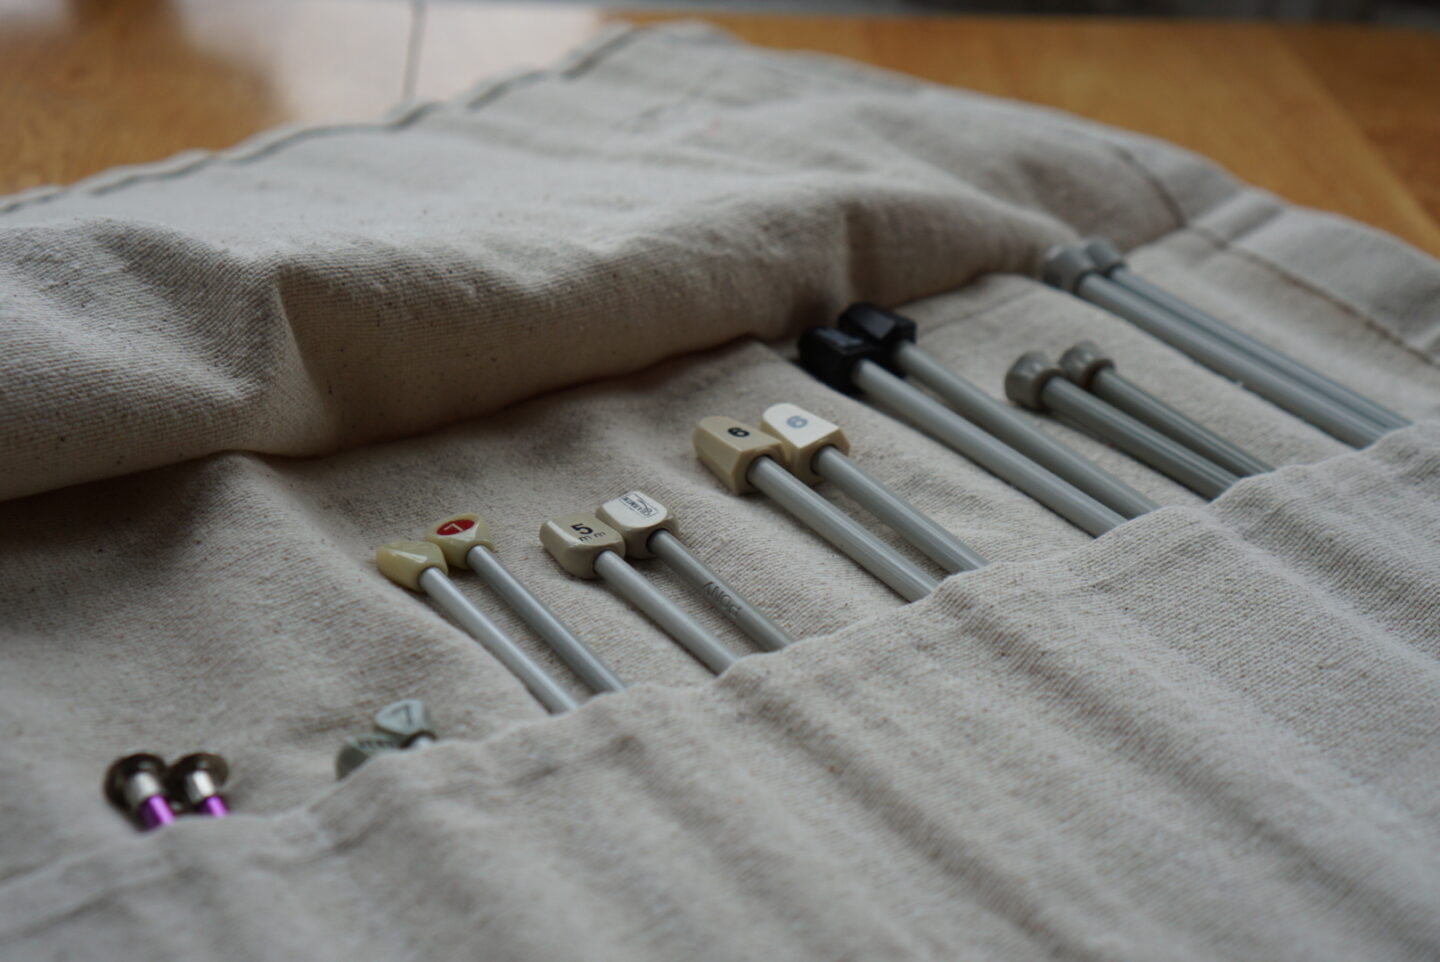
The other two things I made using the canvas were these needle organizer rolls. I made one for my double pointed needles (DPNs), and one for my pairs of single pointed needles. There are a million tutorials for this type of organizer, but this is the main one I looked at while constructing this project. I ended up doing things way differently though, so if it seems like what I’m about to tell you is nothing like the instructions in that tutorial, you are correct. I didn’t attach any ties to my rolls because I won’t be using them for transportation, and to be honest, I just didn’t feel like sewing on ties at the time! I just used a spare piece of ribbon to wrap around and tie it shut, and it’s working fine for me.
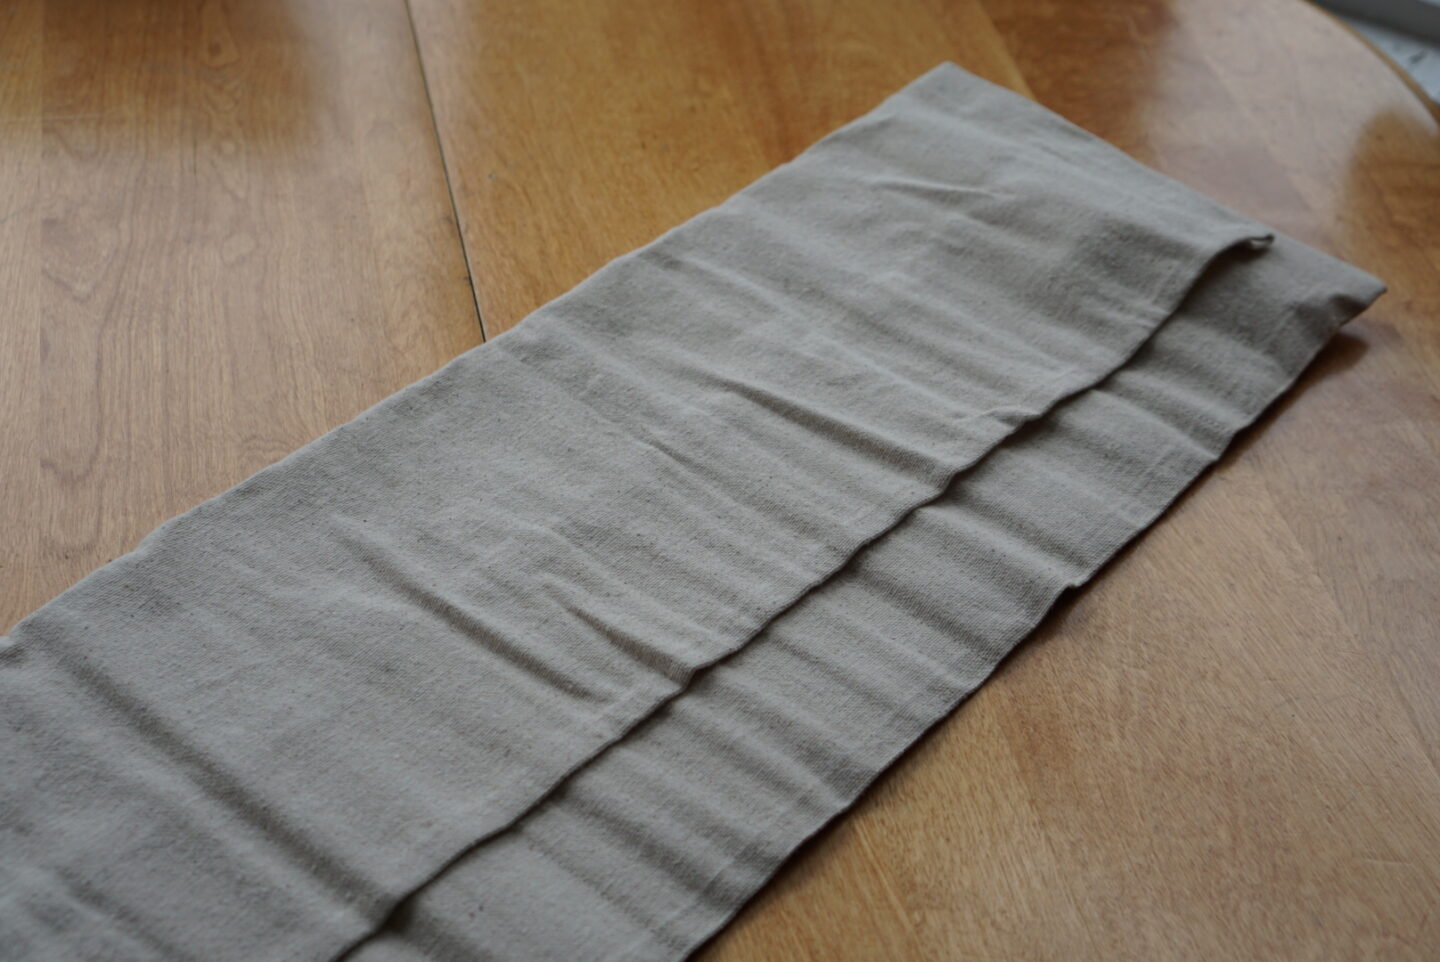
Below is a diagram I made to show you what I did for my DPN roll. You probably don’t need one as wide as I made mine, but I had so much of the canvas and saw no need to limit my future options, so I cut my piece the width of my fabric (47.5″). Based on the dimensions below, I cut a piece that was 23.5″ by the WOF. This resulted in a roll that was 10″ tall, which I decided based on the height of my tallest DPN sets. The first thing I did was to fold the long edges under by 3/8″ twice and sewing it down to hem it. Both of these hems should be folded to the same side of the fabric, based on the way I constructed it. I’ll call that side the “wrong side” going forward, even though my fabric didn’t have a right or wrong side. After I hemmed those edges, I folded one long edge up by 6″ (right sides together), and then sewed each end in order to make the ends of the pocket. I don’t know seam allowance I used for these ends, because I was just trying to sew far enough in to avoid the thick selvage edge. You could use a more conventional seam allowance if you weren’t trying to avoid a selvage edge. I turned that so the right side was out, pushing the corners to be sharp, and then pressing it along the sewn edges and along the long bottom folded edge. Make sure you measure the pocket height as you press along that long edge, to make sure it stays consistent. I then pressed in the side edges of the flap (the fabric not involved in the pocket) at the same seam allowance that I used to sew the pocket ends and top stitched it down along the edge. If you aren’t using the full width of fabric and can’t rely on the selvage edges, I’d probably overlock the end edges before you turn the pocket right way out. This is because you won’t be able to easily fold the flap edge under twice.
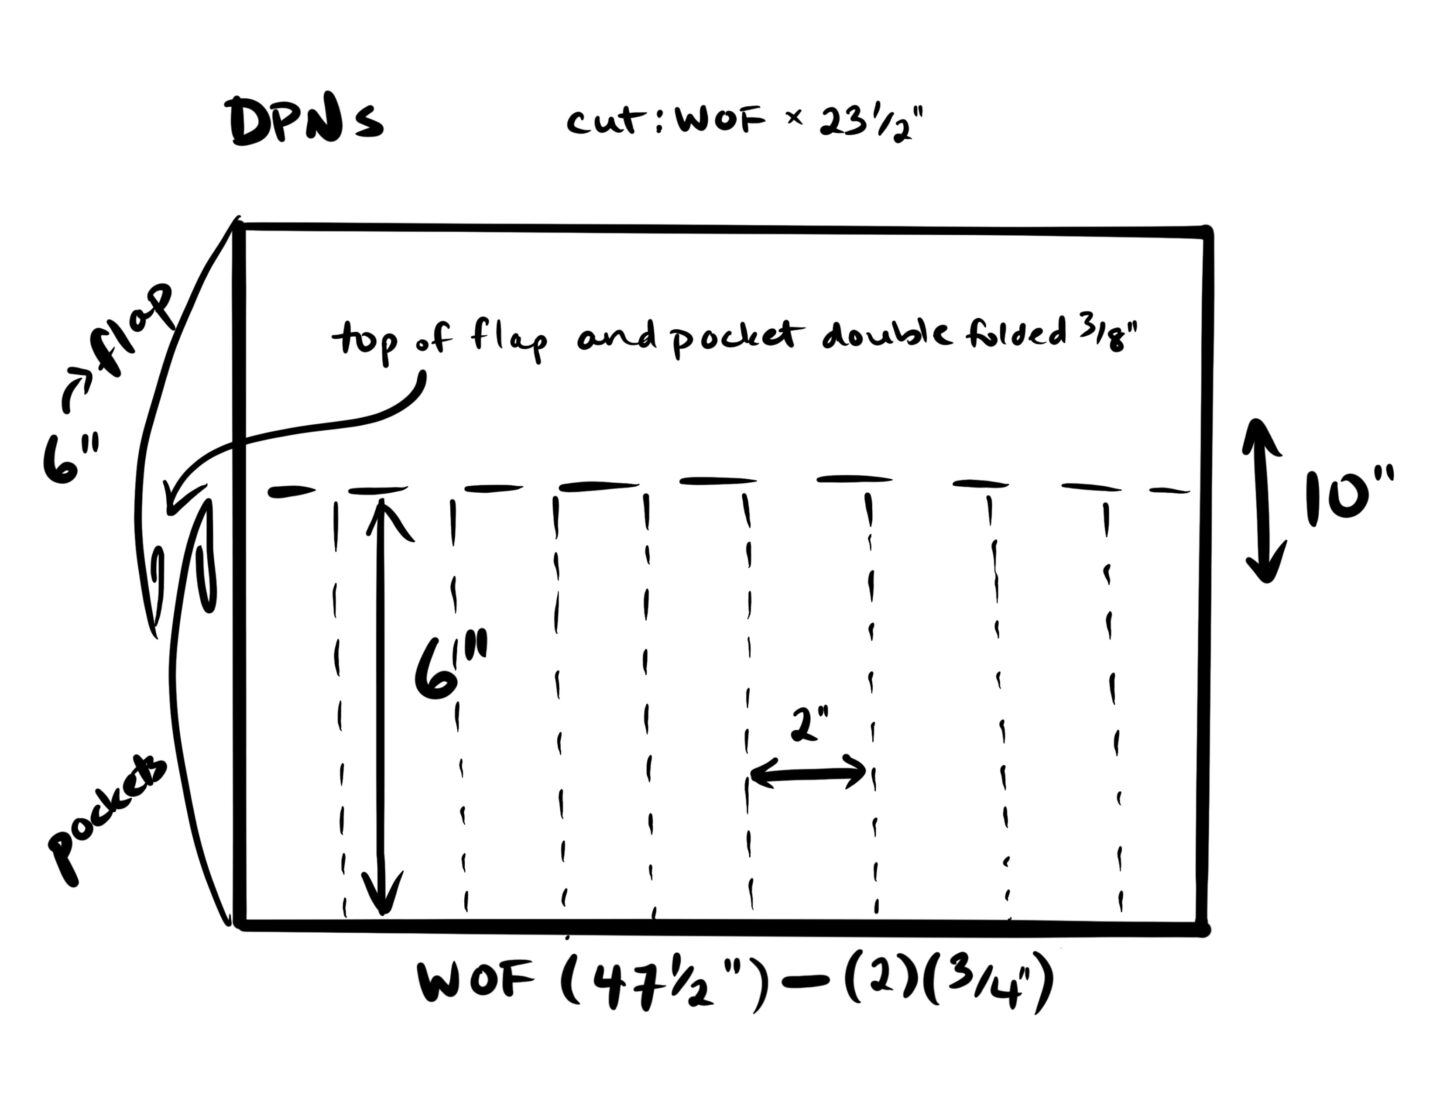
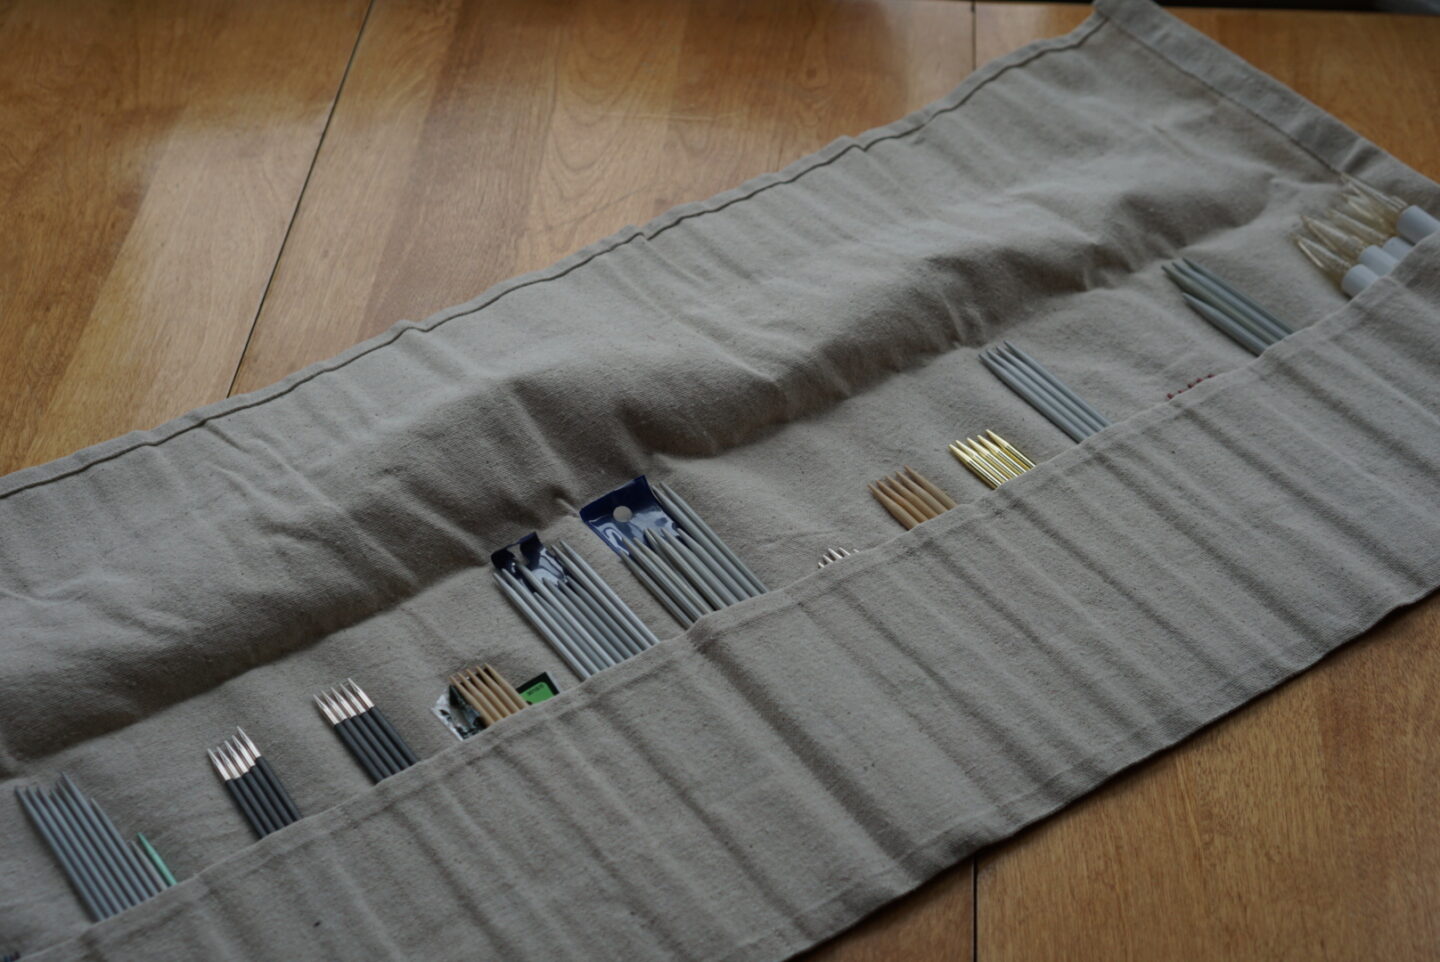
Once that’s done, mark out the vertical pocket lines and sew along those. I sewed all of mine 2″ apart, aside from one that was much wider because I have a hilarious set of giant chunky DPNs that I knew wouldn’t fit in a 2″ pocket. As I got toward the end, I just took the last chunk of space and divided it evenly into 3 pockets that were roughly 2″ (but not exactly) so that they looked mostly consistent instead of having one noticeably more narrow pocket at one side. Then I folded the flap down by 6″ and pressed it along the top edge. I chose the dimensions shown in the above diagram in order to have the flap cover the tops of the needles and a little bit of the top of the pockets, just for security. After that was pressed down, I loaded all of my DPNs into the roll (in size order), and rolled it up!
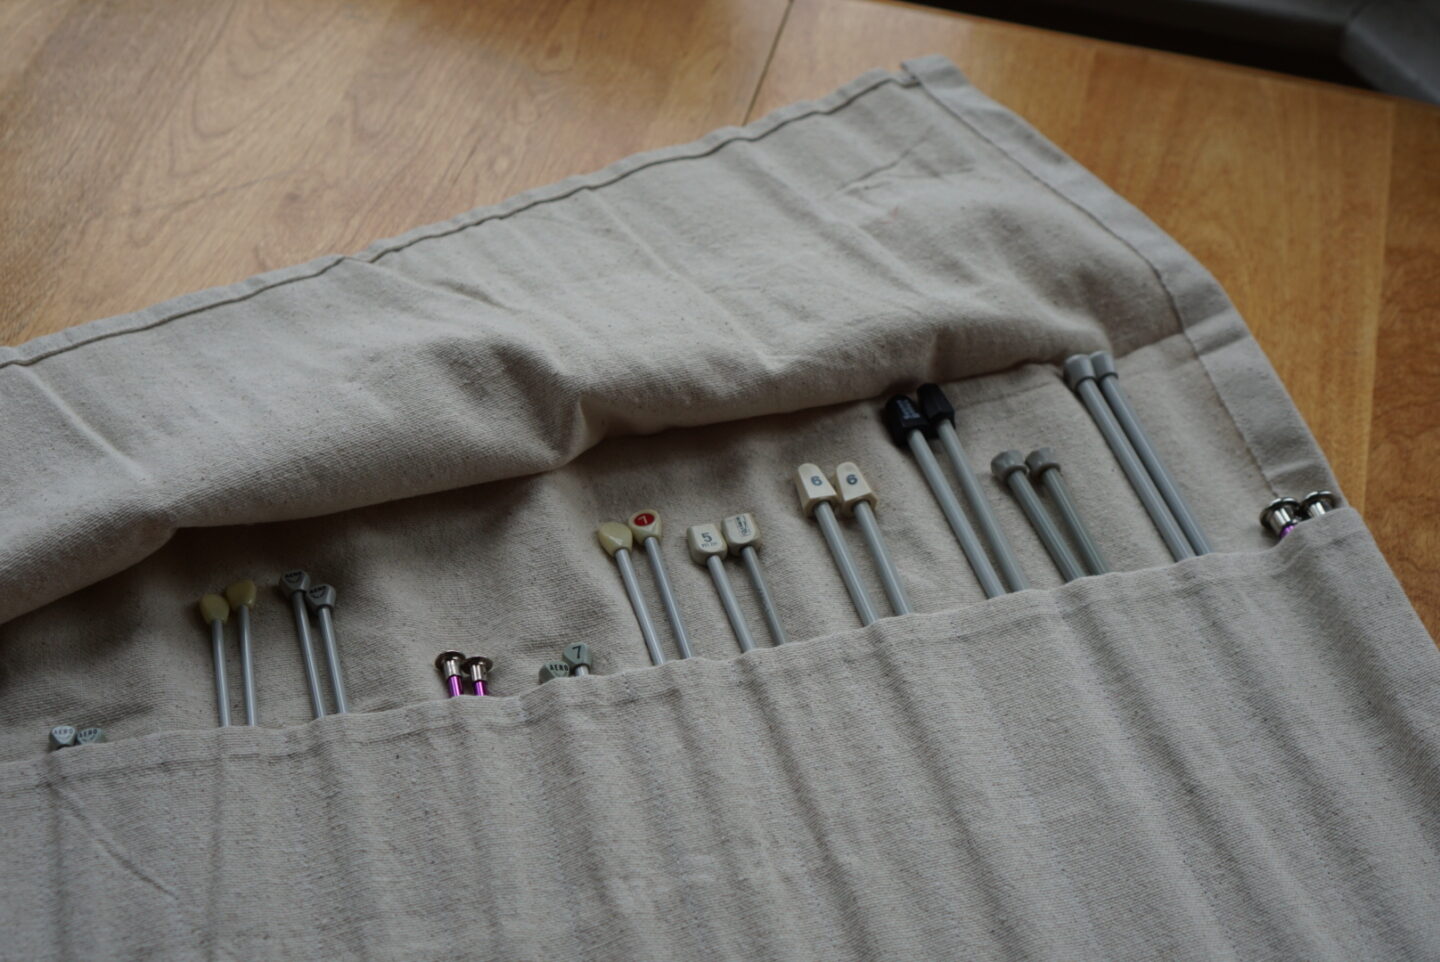
Below, you’ll also see photos of the roll I made for my single pointed needle pairs. I used exactly the same construction process as my DPN roll, but changed the heights and pocket widths based on the needles I had in my collection.
And that’s it! I hope this helps anyone who might want a quick and dirty solution to organize their knitting needles! I’m very pleased that I was able to make all three of these out of the same random piece of canvas without having to purchase any new fabric! It worked perfectly for the job. Let me know in the comments if you have any questions, I’m happy to help if you want to make your own!

Hi,
Thrilled to find you and your beautiful Wiksten jacket! I got the Wiksten jacket pattern free on the internet. But I can’t find sewing direction anywhere!
Can you help me?
Sally Howell
Author
Hi Sally, I just did a quick search and this YouTube video seems like it would be what you are looking for! https://www.youtube.com/watch?v=f8qO8BxSUO8&ab_channel=SewSewLive 🙂