
Hi all! I’ve been back from my trip to the west coast (of North America) for a couple weeks and finally got to have the sewing marathon I’d been craving! I’ve been doing so much travelling this summer (Vancouver, Seattle, and Portland) that I haven’t been able to dig into a project as much as I’d like to. I’ve been plugging away on my Kelly anorak but I really just needed the satisfaction of a finished project. Cue this Nani Iro dress!
I bought the Nani Iro Sewing Studio pattern book when I was in Seattle at Drygoods Design and was itching to get home and make something from it. There are 18 garments in the book, and I was particularly drawn to the Cocoon Dress and the Work Dress, but I’m headed to Montreal later today and was thinking it would have to wait until I got back in about a week. But then I went to Patch yesterday while running another errand and remembered that I really wanted to make something from the book IN Nani Iro fabric to get the full effect. And then Chris (the owner of Patch) sensibly pointed out that I couldn’t possibly finish my Kelly anorak before I left, that it would be seasonally not that useful for my trip, and that what would be much more satisfying and practical (and for the greater good, obviously) would be a dress from the book. And she was completely right!
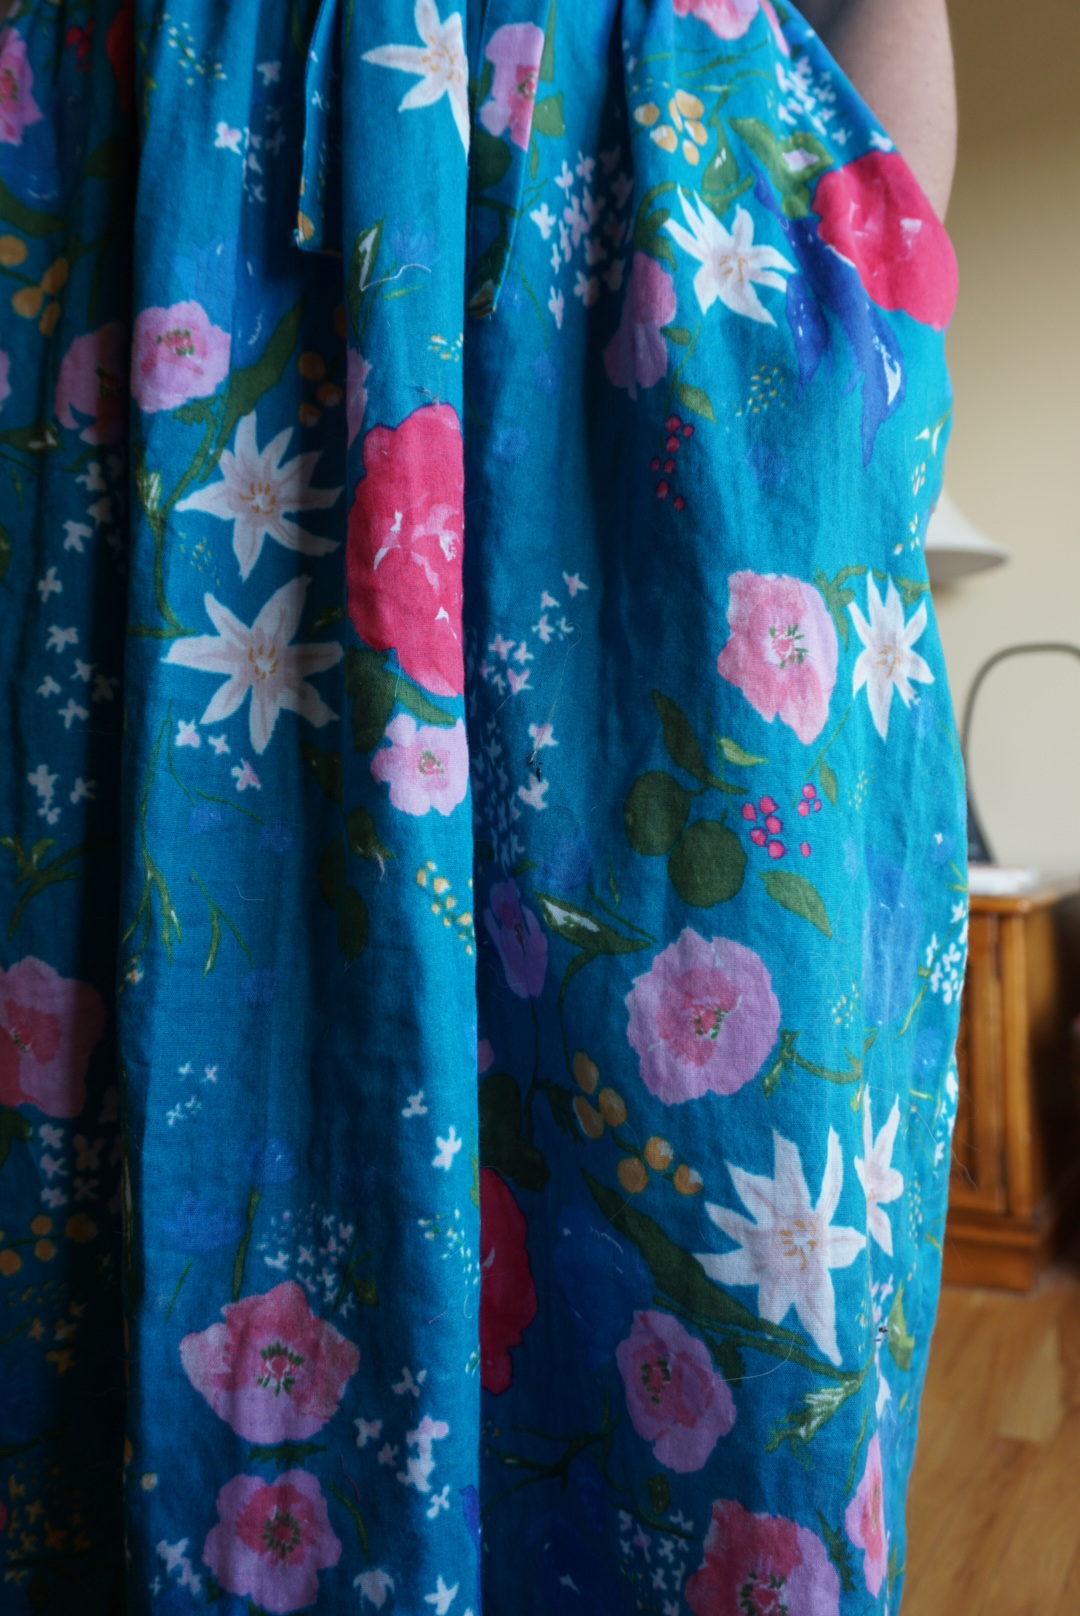
I’ve never been someone who sews clothes specifically for trips, and especially not down to the wire the night before. I can’t say that this dress was made FOR my trip, but I was really determined to finish it before I went. I got this double gauze (print is Nani Iro’s iconic Fuccra rakuen) but there was only 3.4m left and the pattern calls for 4.4m so I was worried I wouldn’t have enough. While it was pre-washing and drying, I traced off the pattern pieces from the sheets at the back of the book and I managed to fit everything on the amount of fabric I had! I had to piece the waist tie from two width-of-fabric strips (crossgrain to what the pattern indicates) but it’s not noticeable at all. I didn’t even have to cut the pockets from a different fabric!
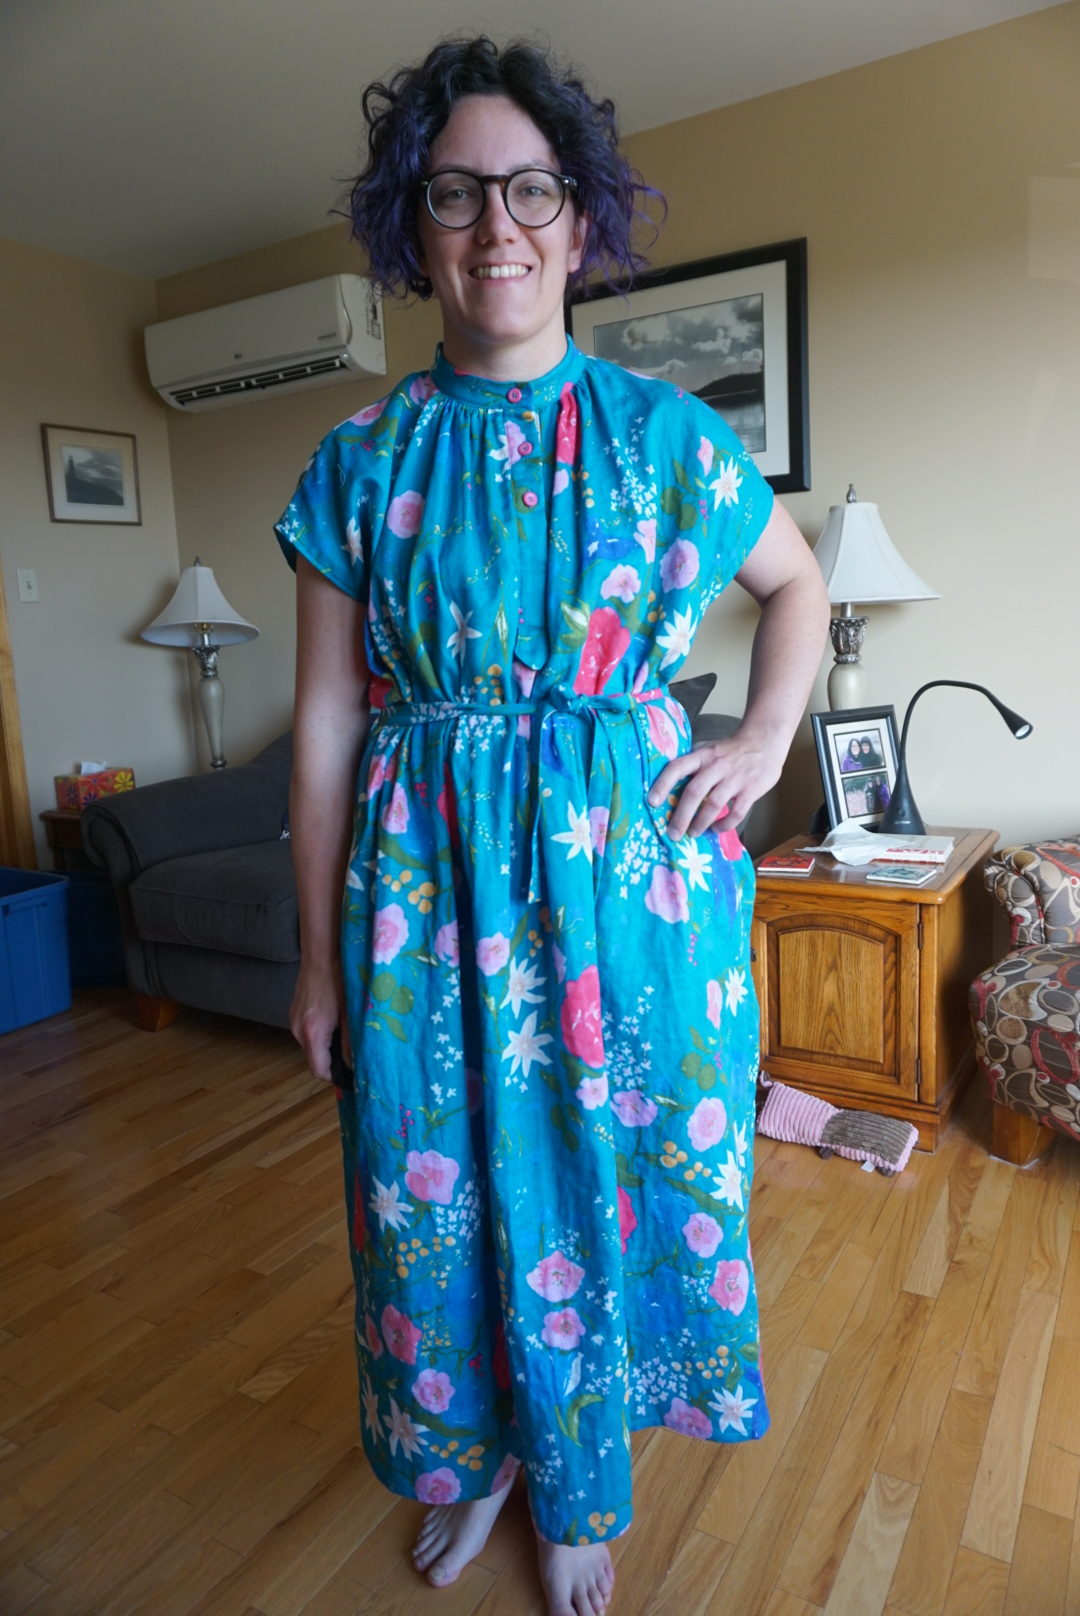
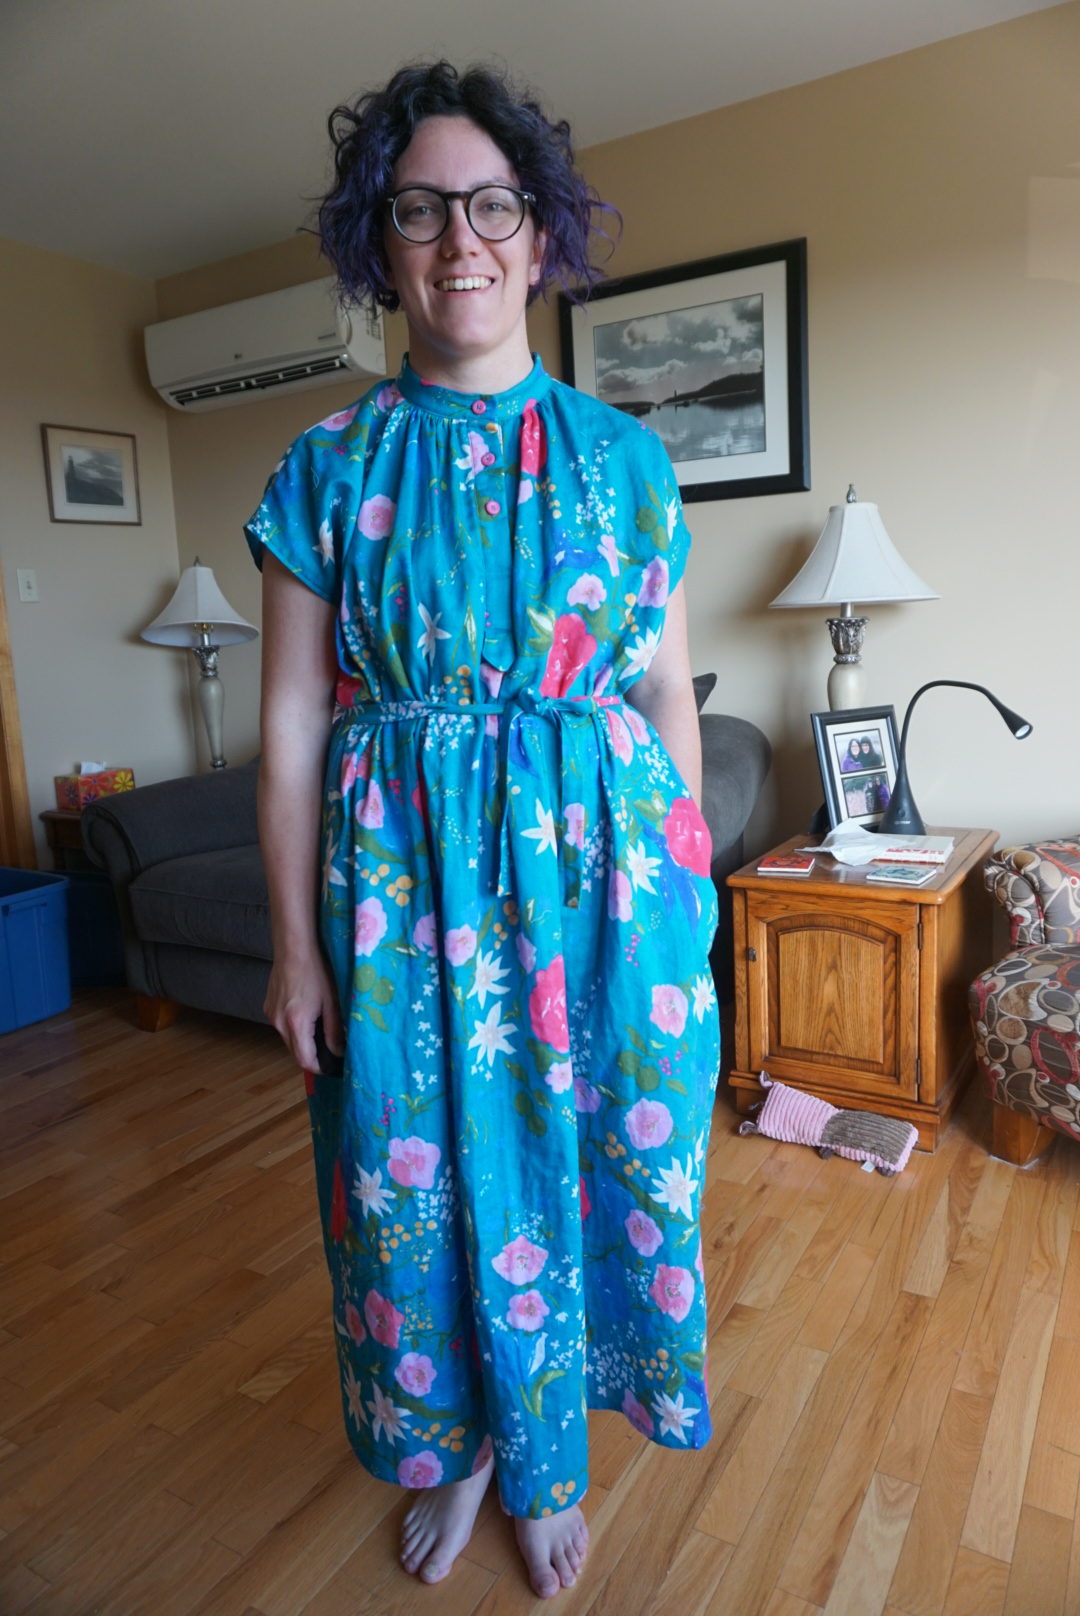
I’ve never used a Japanese pattern book before, and I think the Nani Iro book is a pretty low commitment as far as that goes since it’s already translated into English. I will say that for me it was totally fine, but if you’re not very experienced, you might need a little more guidance than what the instructions/diagrams give you. This is pattern N from the book, known as the “short sleeve work dress”. The pattern pieces for the front and back of the dress are basically rectangles aside from the shoulders/neck, and I was worried that there was going to be way too much volume for me. The book says that you should size down if you’re worried about it being giant, so I made the smallest size of the three (S) and it fits perfectly in the neck which is basically the only place you’d really have to worry about fit. The other thing is that the phrase “short sleeve” is a bit misleading, because this version of the pattern (there’s also one with sleeves and a tunic version) actually has no sleeves at all! Not even cut-on sleeves! Since the pieces are basically rectangles, the instructions have you finish the side edges ahead of time and then leave an opening in the side seam for your arm to go through. The “sleeve hem” is created by turning in the edge along the seam allowance and top-stitching it down. I was pleasantly surprised by the shape this gave at the armhole when the dress was all finished.

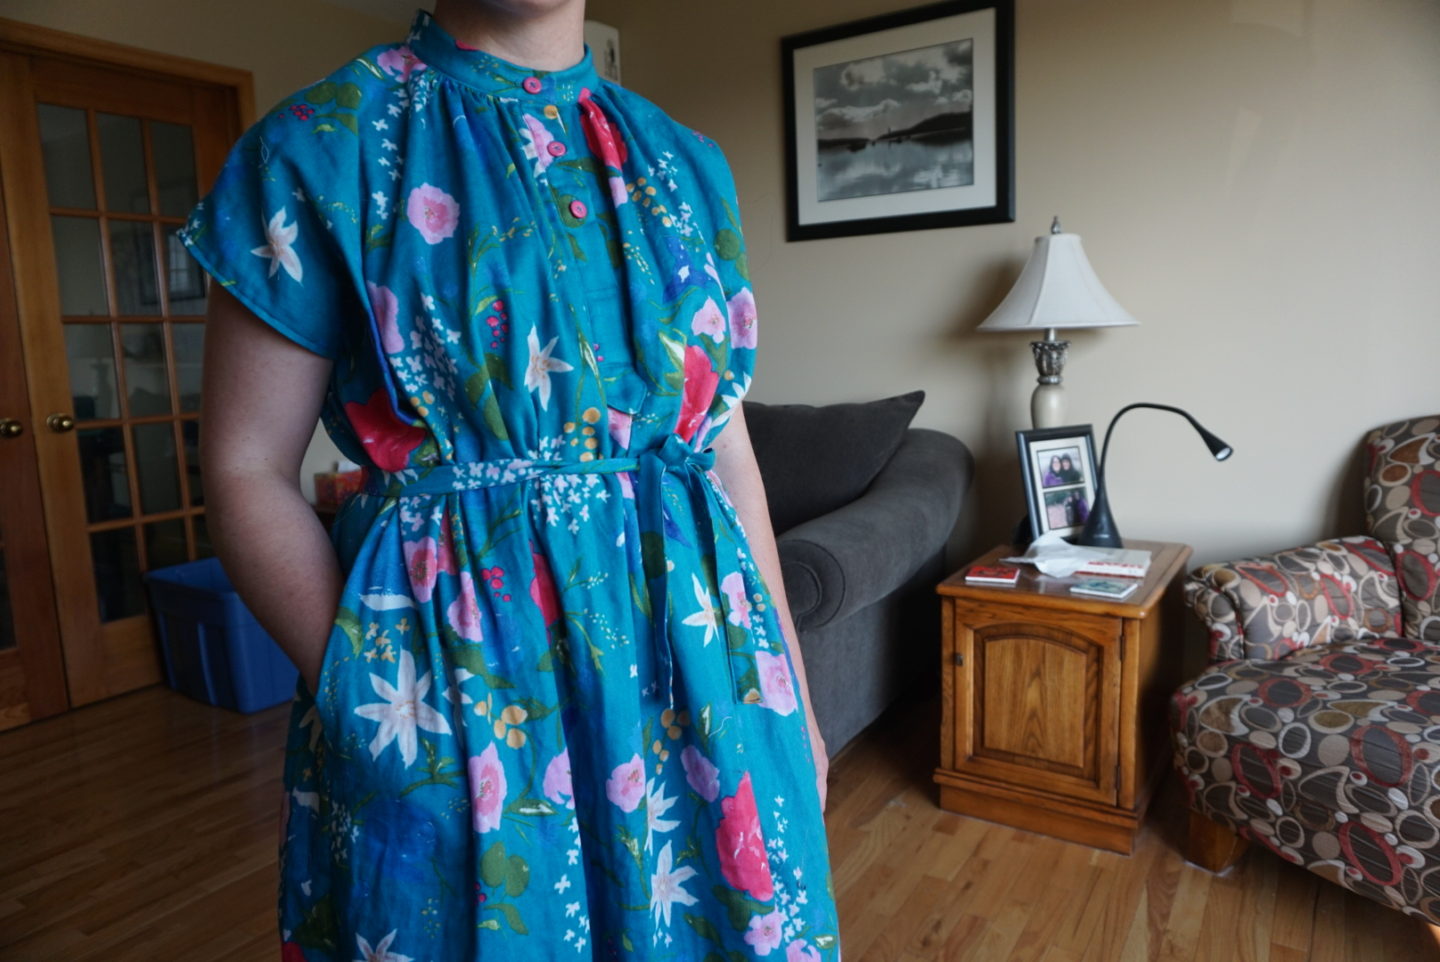
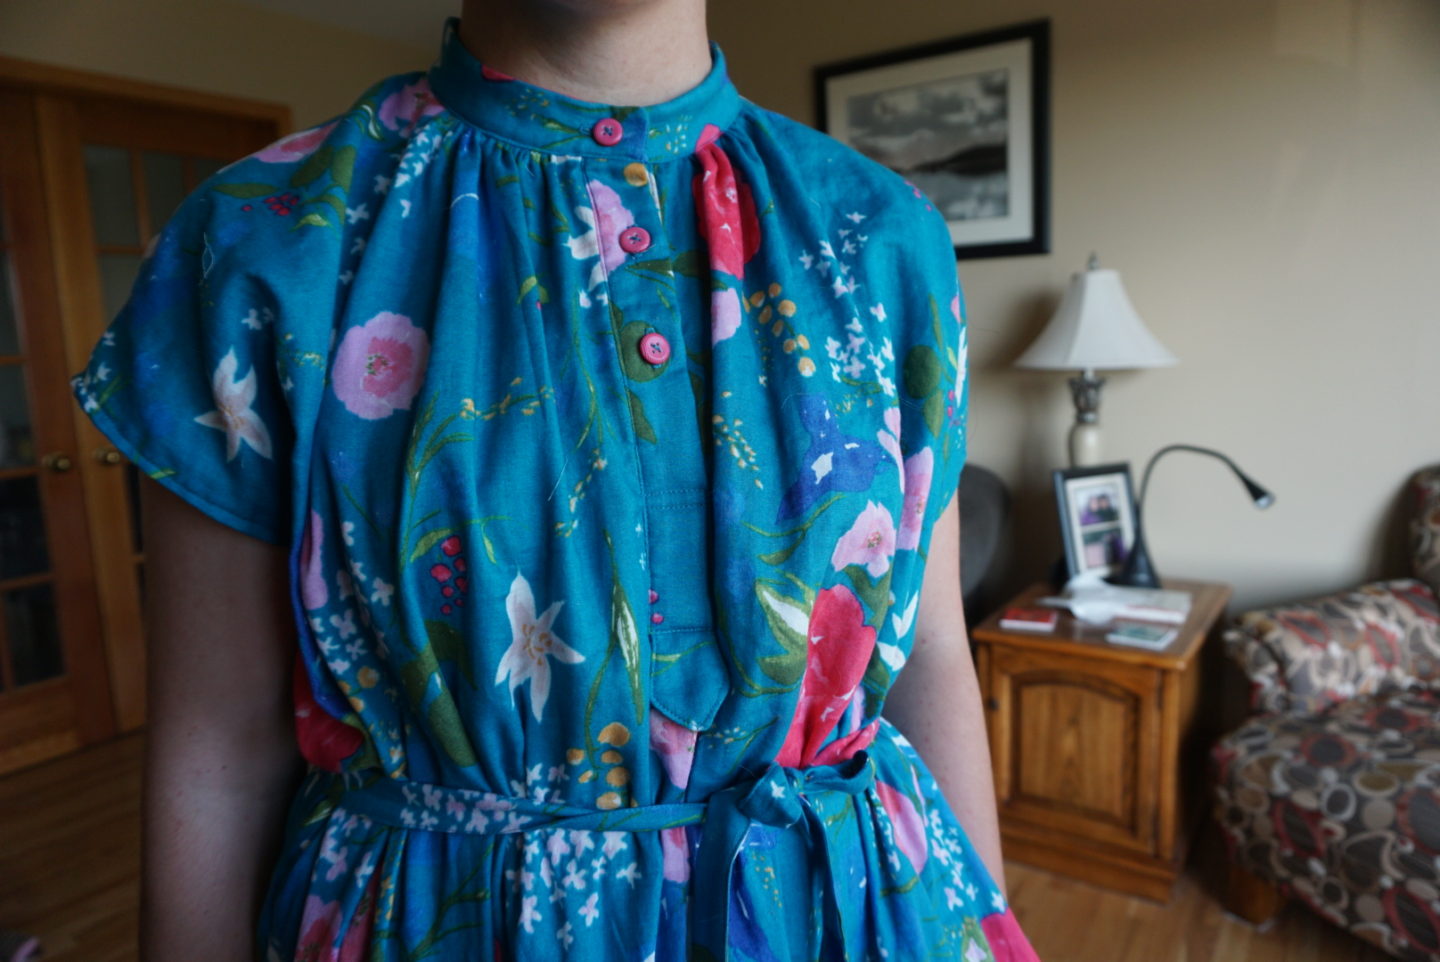
In the Nani Iro book, their sample of this dress (and the markings on the instructions) includes one button on the collar and then only one along the placket. I was worried about gaping so I used my buttonhole gauge to add a third one and changed the spacing a bit. Speaking of buttonholes, the instructions also tell you to put a buttonhole on the tab at the bottom of the placket which doesn’t actually get used for anything, and I opted not to do that. I figured if I changed my mind later I could always just do it then. The tab is pretty clever, because it hides the fact that there are teeny gathers at the bottom of the placket where it joins up with the body of the dress. I think it also makes the finishing at that area a little bit more foolproof because you don’t have to worry about the neatness as much.
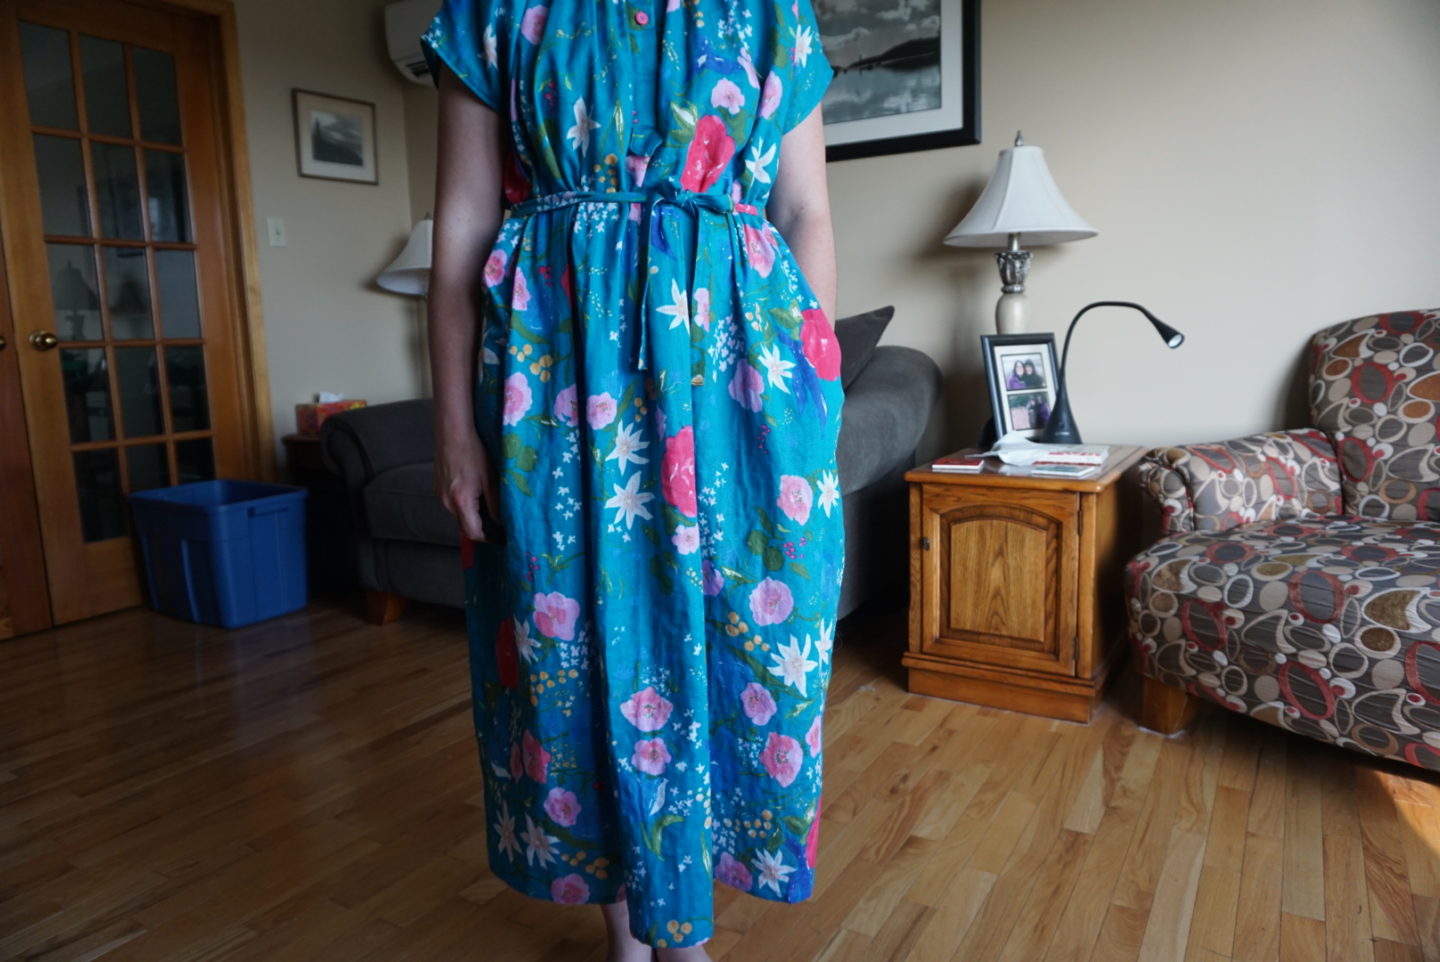
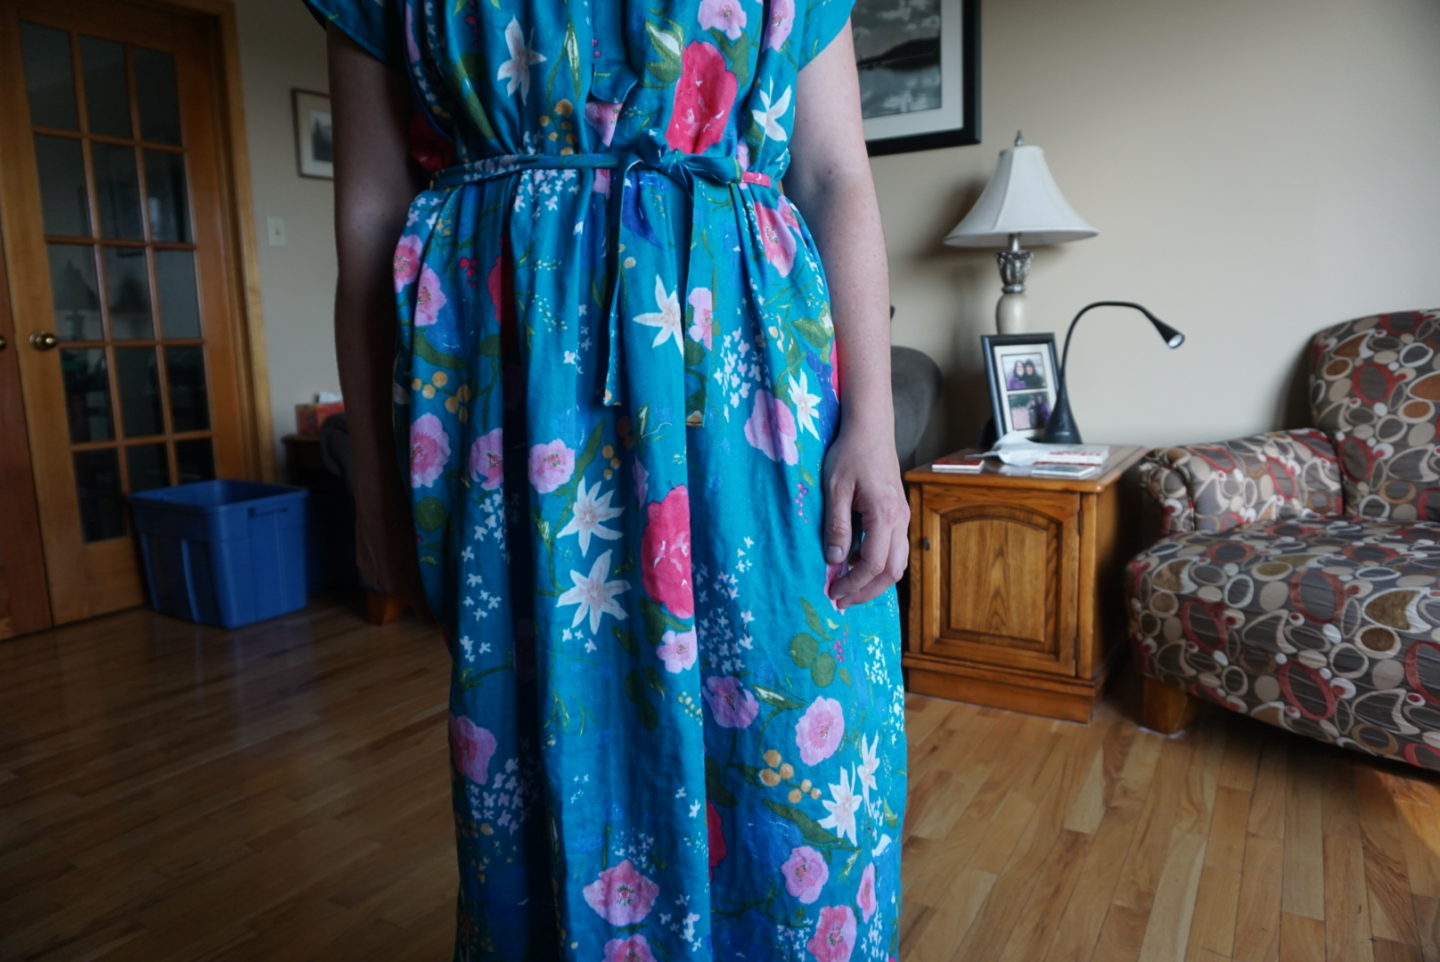
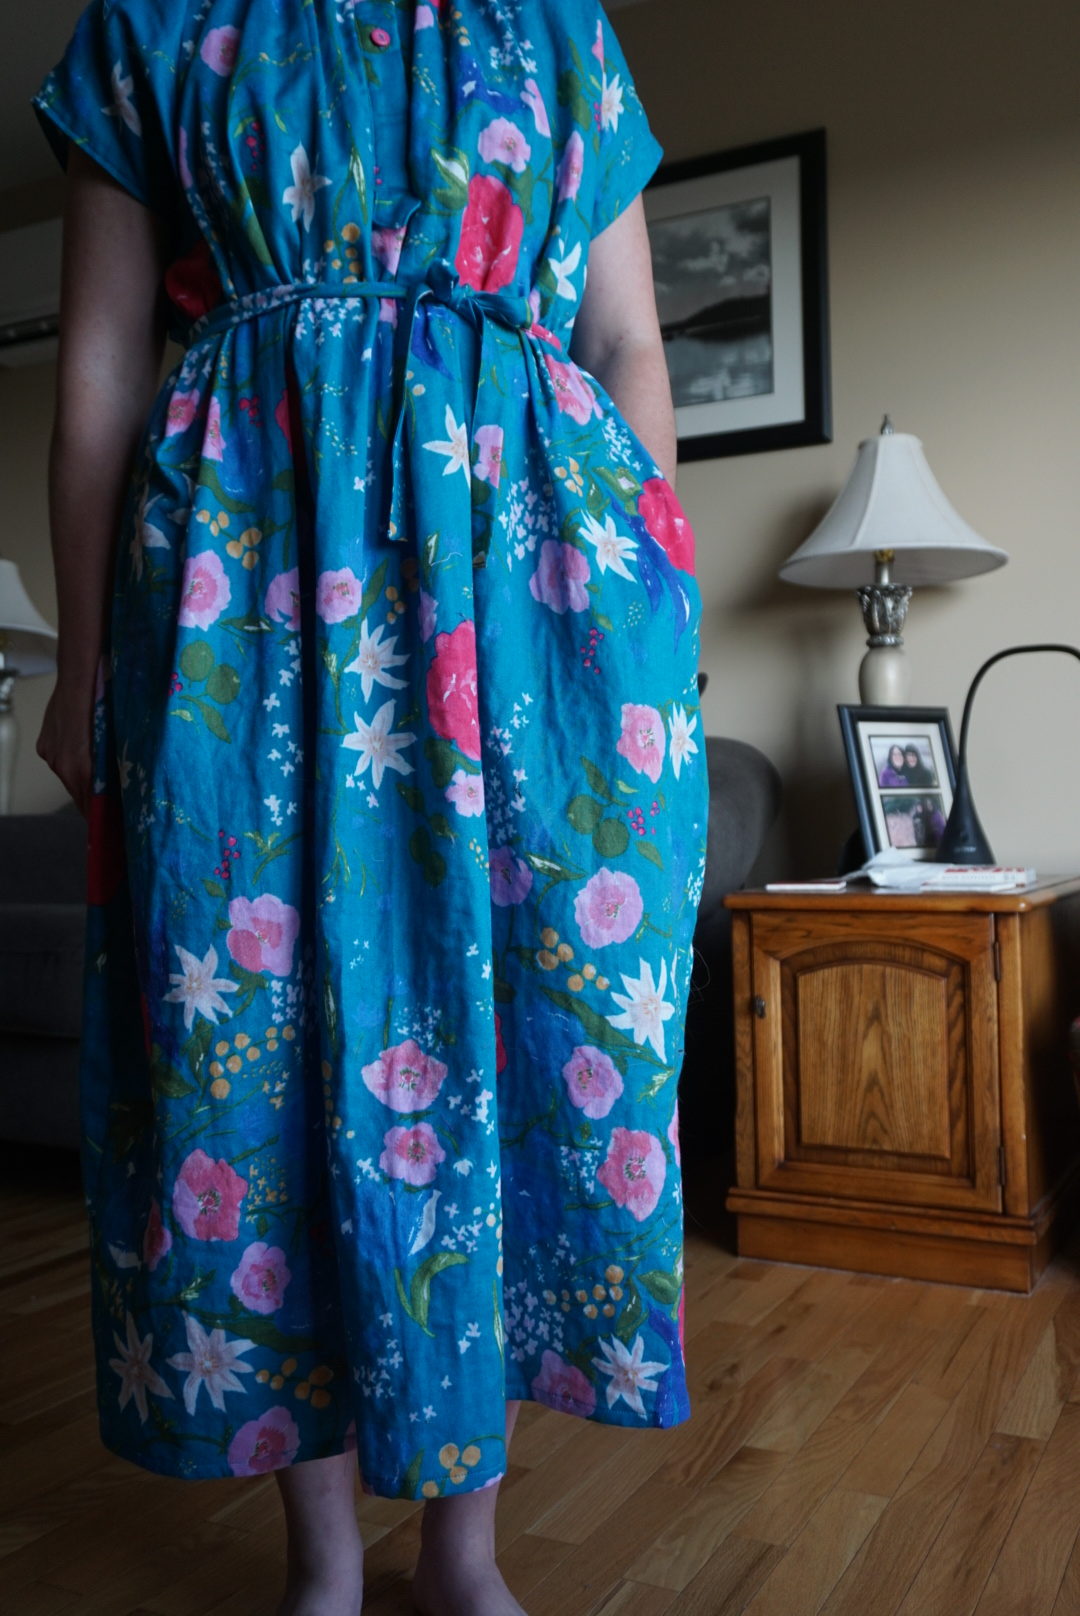
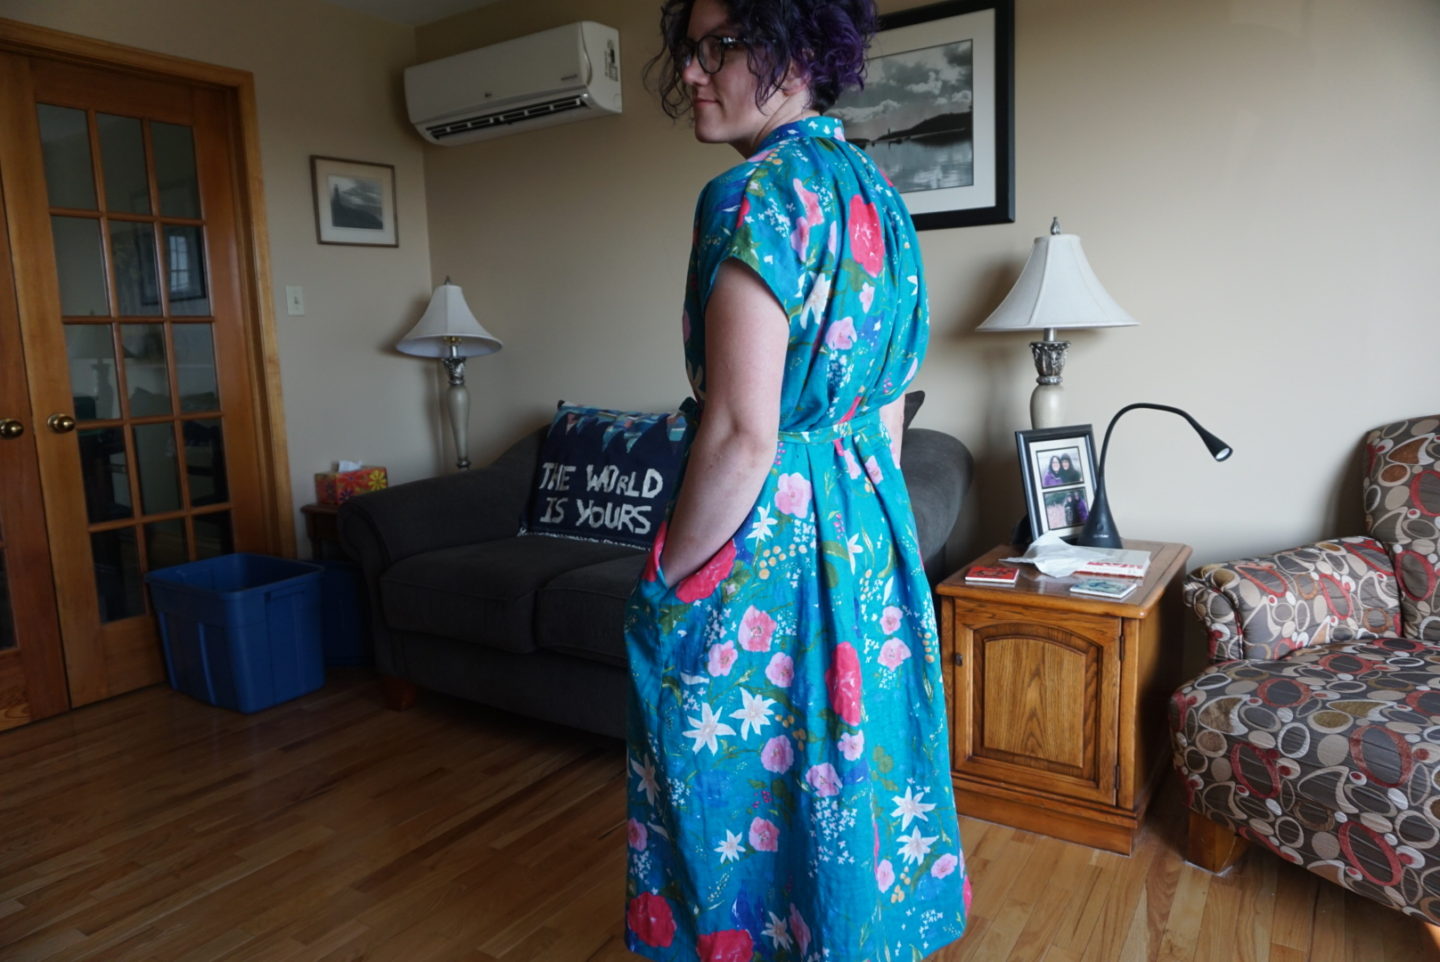
I think if/when I make this pattern again, I would make the waist tie a bit wider. I don’t mind it at this width, but I’m definitely a sucker for a wide waist tie. Speaking of the waist tie. In order for the pattern pieces to fit on the sheets at the back of the book, this pattern piece was indicated to cut on two different folds – along the long edge and the short edge. I get why Nani Iro/the publisher would indicate the short edge along the fold, because it’s a long piece, but the other fold just makes it half as wide, which really didn’t make a huge difference that I could see in terms of the real estate it took up. When I traced the piece, I just traced the whole thing four times so that I ended up with a paper piece that was the actual size of the full belt. This made it easier to visualize when I was trying to fit it onto my limited amount of fabric.
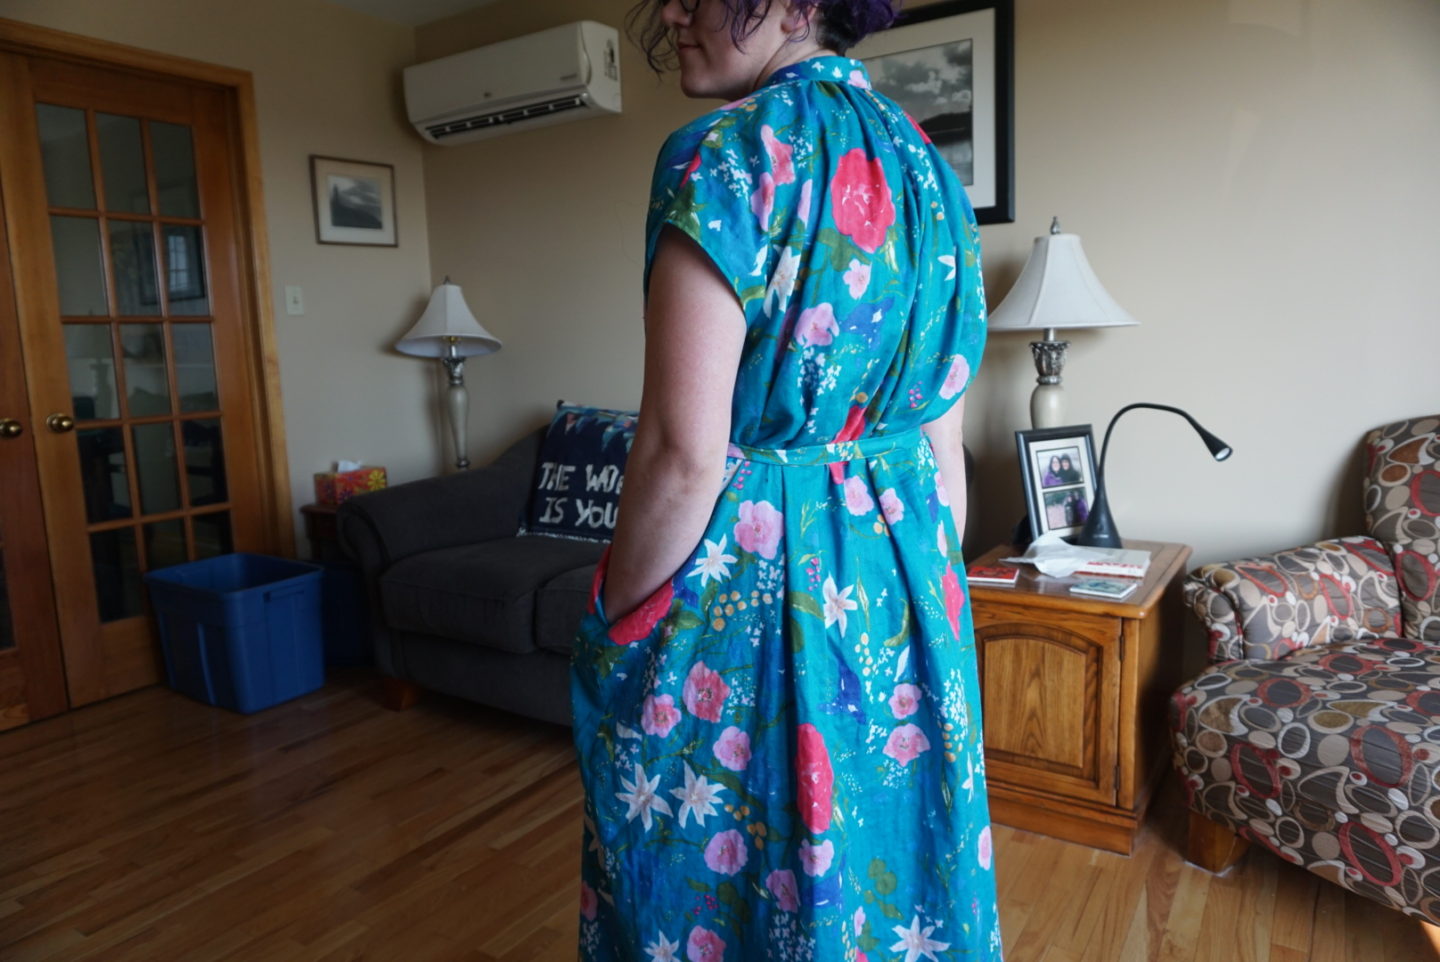
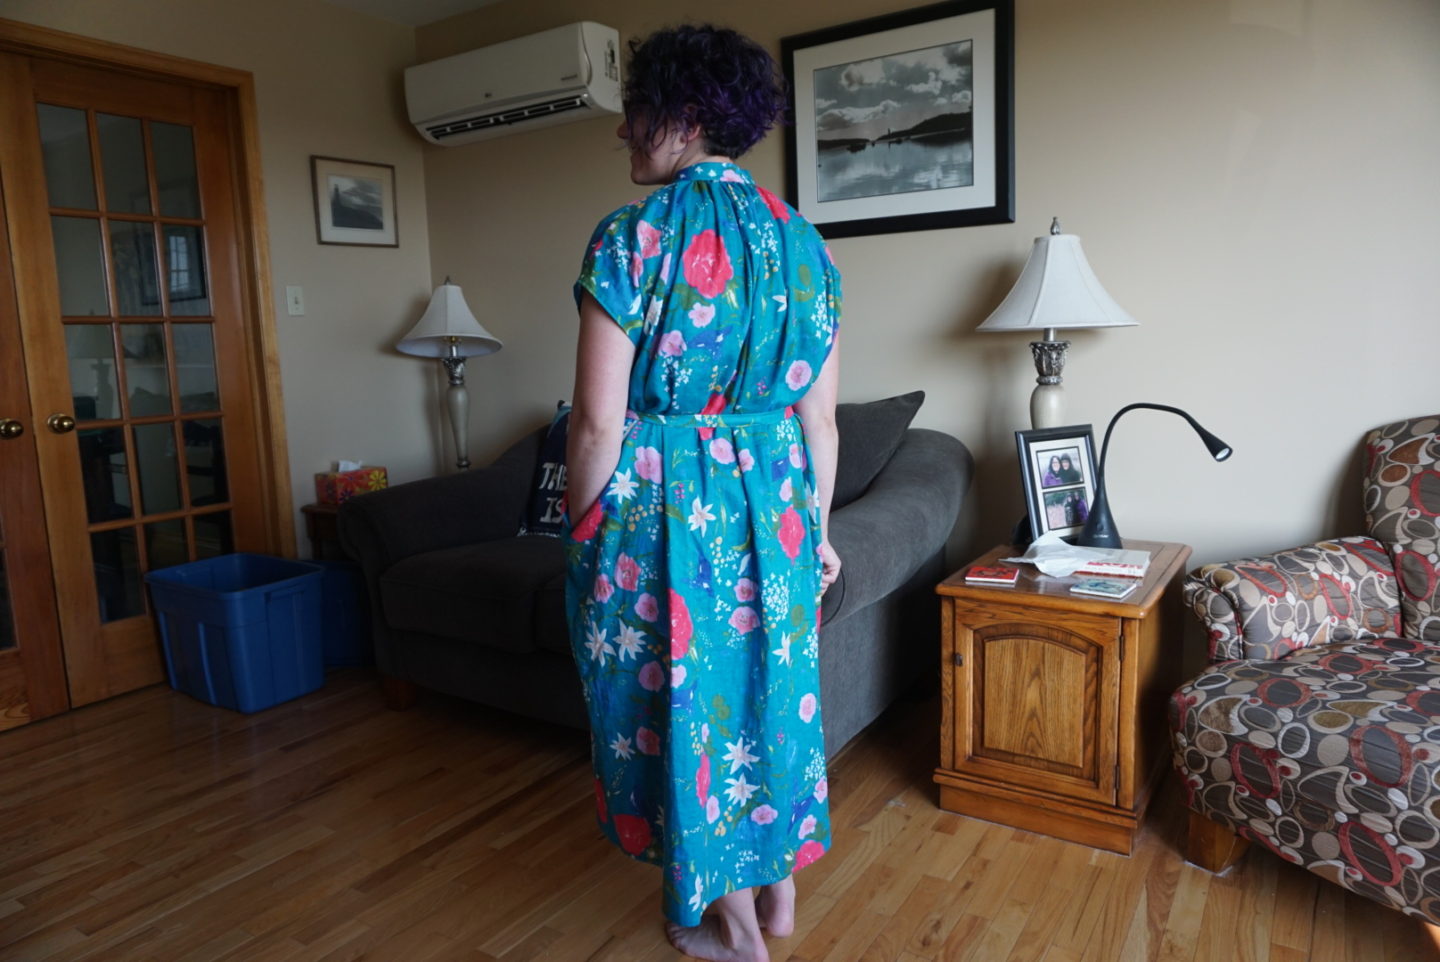

I was in such a sewing zone that I didn’t try this dress on whatsoever while I was making it, and I didn’t do any fit tests ahead of time before cutting into my “real” fabric. I had vague worries while I was making it that it was going to completely swamp me and was not convinced that the waist tie was going to be some magic solution, but it really is! I think this silhouette is really flattering and this pattern is great for featuring a big bold print, since it has no seam details at all besides the gathering at the collar. I’m also really into the collar shape and height. The Nani Iro book is full of really beautiful designs and all of the samples are made up in their fabrics, so it’s worth flipping through for the eye candy alone! And now I’m off to Montreal to visit friends! 23 hour train ride, wahoooo! (Only a little sarcastic, I actually enjoy the train.) Does anyone else enjoy a long train ride? More relevantly, has anyone else made anything from the Nani Iro book or other Japanese pattern books?

Love this print, the dress looks great on you!
I can’t believe how neatly you stitched the collar on this squashy fabric! It’s an outstanding dress.
I once took a 13-hour train ride to Montreal…and I…did not love it. Possibly because it was preceded by a 5-hour bus ride, and I knew it would be followed by a 13-year-train-plus-5-hour-bus ride home.
Hey Megan, I’m working on the cocoon dress from nani iros sewing book in blue cotton sateen (Mercy). So far it’s a easy to work with pattern and I’m looking forward to finishing it the next days. greetings, Jeannine
Author
I’m glad to hear it’s an easy pattern to manage! I definitely want to try it eventually – maybe once warmer weather hits us here I’ll be more motivated. 🙂
Hi Megan- Just found this when googling this pattern- your dress is beautiful! I’m just about to cut out my pattern and reading ahead- I don’t understand what the ‘outside pockets’ are…I haven’t seen them in any pictures of finished dresses and they look so odd right next to the placket on the pattern- did you exclude this part?
Author
I’m pretty sure I did exclude them, yes! I think I decided I didn’t like how they looked or that I never used pockets in that location and just omitted them!
Hi Megan!
Thank you so much for this! And your dress is stunning! I am about to start sewing the same dress (just with long sleeves). However, I have already encountered my first issue with the placket? I cut them out just like they were shown on the pattern layout (p. 108) and attached interfacing to the ws just like shown in the book. Now I am about to sew, but it suddenly looks like the placket should have been flipped 180 degrees when looking at the instructions on p. 104? Does that make sense? Am i the only one with this problem?
Author
Hi Louise, thanks for reading along! I just took a peek in the book to check the issue you’re talking about. I think (it’s been a while) I may have initially made the same error as you, but maybe didn’t write about it in my final post. The book uses shading to show the “wrong” side of the fabric in the cutting diagrams, and also uses + signs on pattern pieces to show the “wrong” side as well, so I think the cutting diagram is correct but confusing. If I compare the placket pieces to the other pieces in the cutting diagram, I’m noticing that on both pages 101 and 108 that the plackets are filled with + whereas the other pieces (aside from the collar, which also is shaded with +) are white on the inside. I think this means that they are telling us to cut the placket pieces with the pattern pieces upside down on the “wrong” side of the fabric, i.e. right side of the pattern piece touching the wrong side of the fabric, which should result in the pattern piece being cut in the orientation show on page 104, instead of mirror image. I’m not even sure what the purpose of cutting it like that would be, since it’s not cramped by other pattern pieces in the cutting layout and could easily have been shown with the pattern piece right side up. I hope that clears up any confusion – in any case, I hope you have enough fabric to recut the plackets so you can match them to the way they are in the instruction section and make a beautiful dress! 🙂
Hello Meagan makes
Thanks for sharing
I too own a Nan Iro book
Positive feedback
Looks great on
Keep up the good work
Author
Thank you!
Hi Megan, thank you for your helpful and informative post. I am about to embark on a Work Shirt for my daughter – it was her pick from the wonderful Nani Iro book. I first made the hat ( so cute, but very easy to look like a Gumnut Baby in it) and then the Summer Coat in size medium, and a lined Winter Coat in size large. I flat out adore the Summer Coat. It worked out really well, highly recommend. Not sure I would bother to make a lined one again, why mess with perfection? Your dress looks amazing, great job!
Author
I haven’t tried the Summer Coat, I’ll have to check that out in the book after that enthusiastic endorsement! Always trying to resist sewing more coats though, haha!
I have this book and have made the basic blouse, the tank dress, the pants (tapered and wide), the simple skirt and the pleated tunic. They are very good patterns for me. I have made the pants from very light fabrics for summer and in heavy jeans or Punta di Roma (with bum pockets and a zipper fly) for winter. With their high elastic waist they are very comfortable. I did drop the waistband a few cm in the back after my first make. Although I have a very full back quarter,the crotch fell a bit low for me. I have considered making the work dress, but was afraid it might be too voluminous. I have a flowy fabric for a summer dress or tunic and I might go for the work dress.
Author
Wow! You are prolific! You’re inspiring me to go back to this book and sew more of the garments. Thanks for telling me about your projects and the fabrics you used!