
The garment in this post may be one of the funniest things I’ve ever made. It’s a dry robe to use after swimming outside! Basically what they are is a robe with a wind-resistant/water-resistant exterior and towelling on the inside. There are brandname Dry Robes but they cost $340CAD, and I thought I could make one for cheaper. And I was right!
I bought my materials first, before I had decided on anything related to pattern or design, which might seem weird since you’d usually need to know how much fabric to order before actually ordering it. But I wasn’t ordering something that would be cut to measure, I was buying shower curtains and towels! I bought two BANJANTRÄD shower curtains (71″ by 71″) and four SLÅNHÖSTMAL bath sheets (39″ by 59″). In the end, I used both of the shower curtains and three and ~1/3 of the bath sheets, so my estimates were pretty good!
I looked around online a bunch to see if anyone had done this before, but there wasn’t a lot out there. Heathery Makes had a great blog post about a robe she made and I was initially planning to go in a similar direction to that one. That robe uses a zero-waste concept based on a historical garment known as a “bog coat”. I liked that idea because it uses a lot of rectangles and doesn’t cut up the fabric very much. I also had a couple lofty goals for the garment that I ended up discarding because it was getting to be too much to comprehend. I had visions of having the dry robe be able to fold away into a self-contained reversible pocket. I have an old K-Way windbreaker that can do that, and becomes a little fanny pack, similar to this more current version. I also wanted the sides to be closed by snaps instead of being sewn shut, because I thought it might be cool to be able to open the robe flat and use it as a beach or picnic blanket. Both of those ideas were breaking my brain to figure out how to combine, especially when trying to have it be lined and with the towelling being such a thick material to work with. I decided that I needed to employ the old KISS principle (Keep It Simple, Silly! – modified because I think calling yourself “stupid” is unnecessarily mean and unproductive!). I needed to stop trying to make this garment (that I’d never even sewn before) into some sort of Swiss Army knife garment because it would never actually get made.
I ended up modifying an existing pattern, which greatly expedited the process. I’ll talk more about below. But I should actually show you the thing before I write anything else. You’ve waited long enough (or you’ve gotten impatient and scrolled down to the photos already – I respect that).
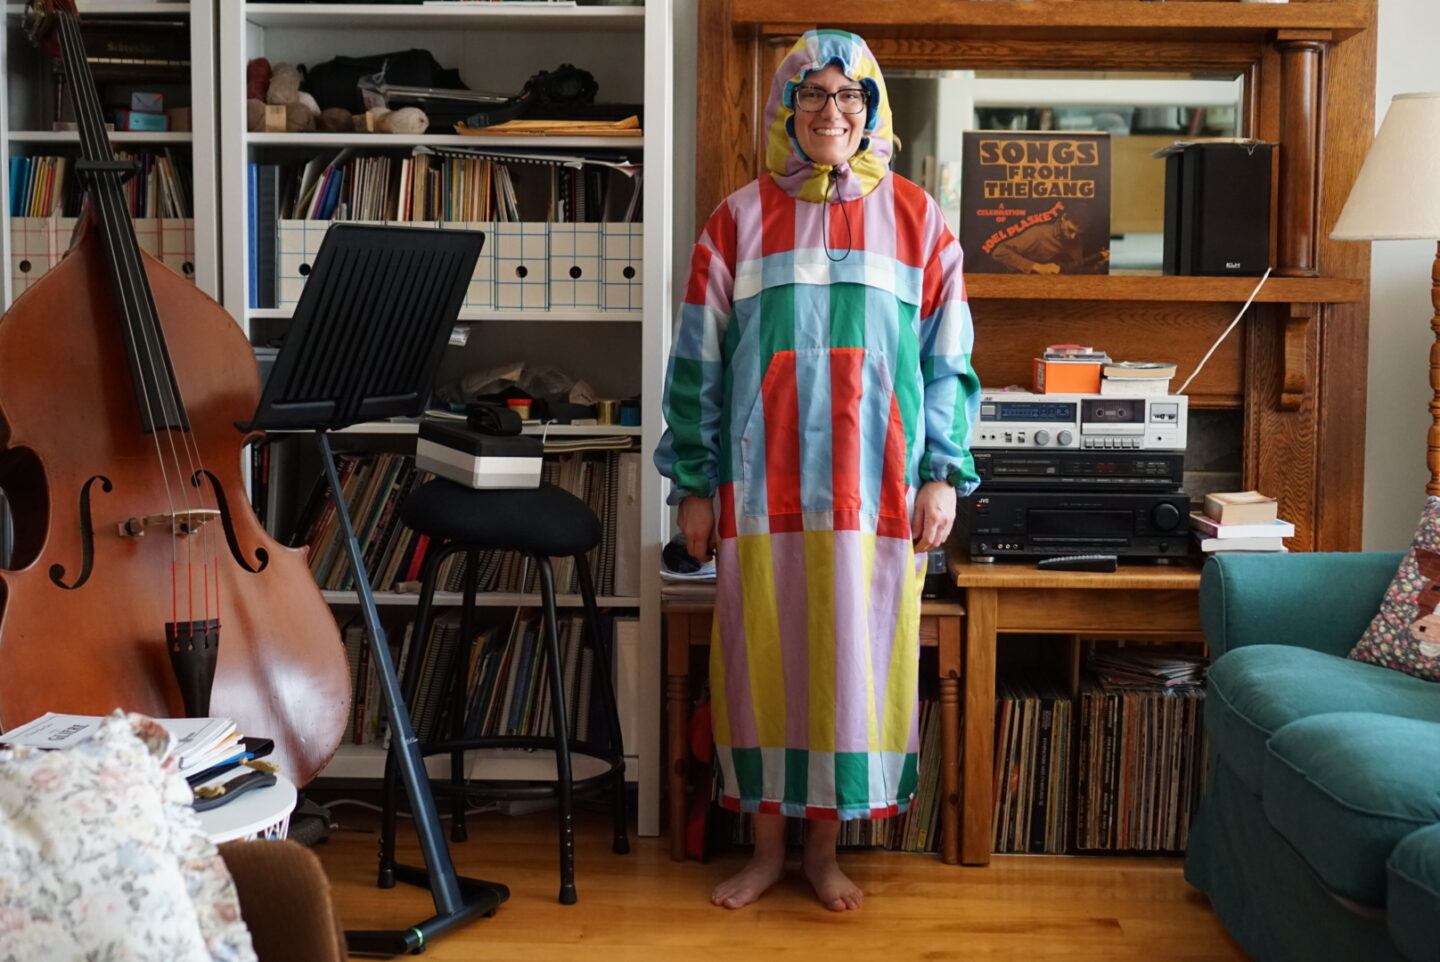

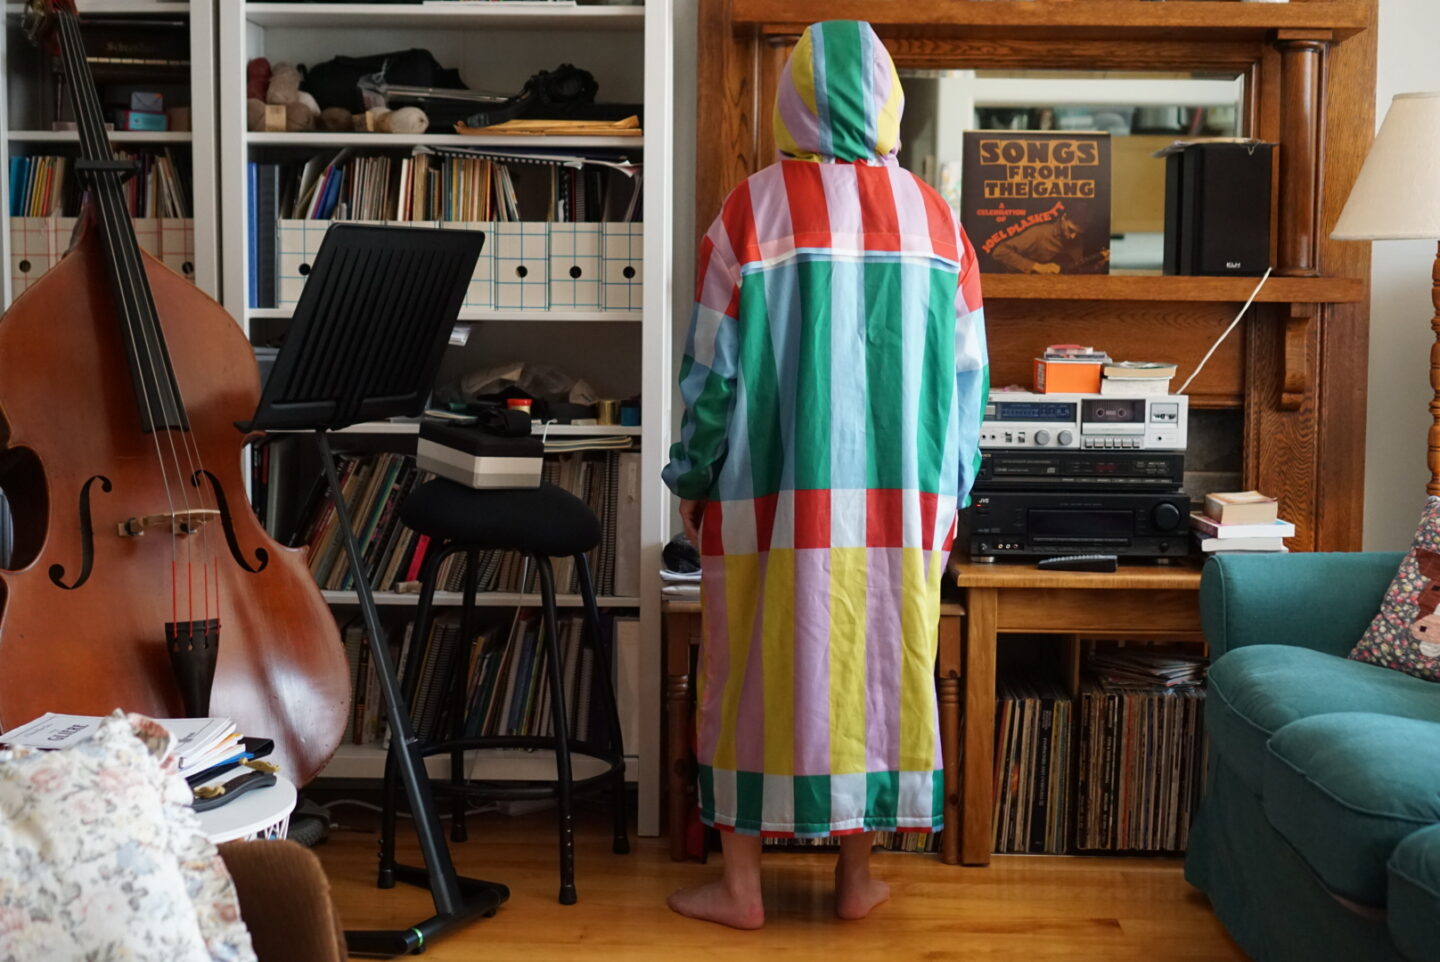
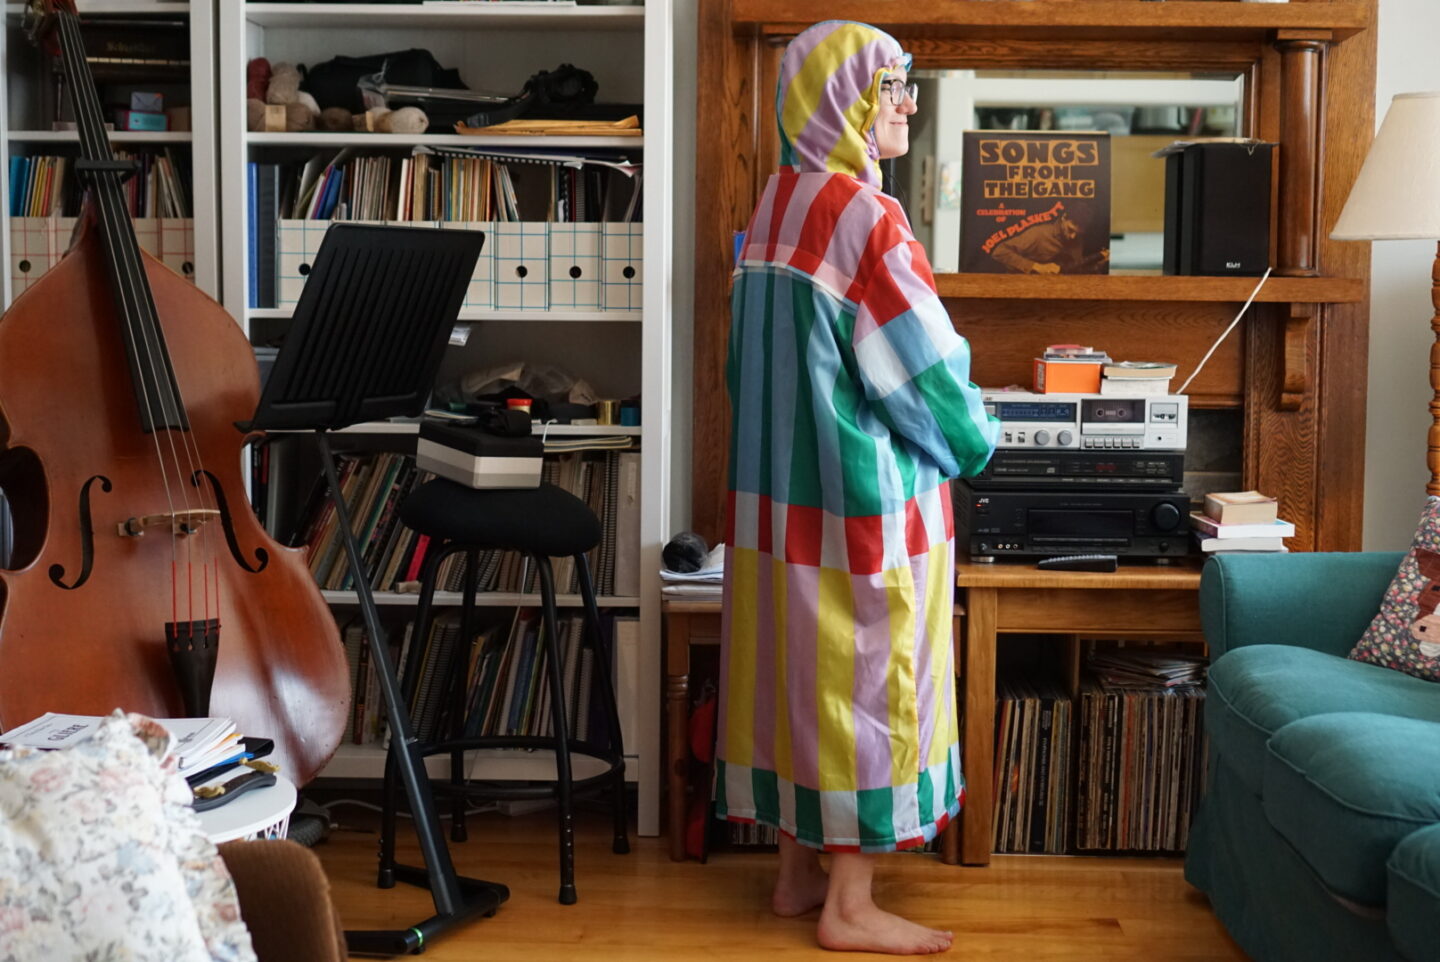

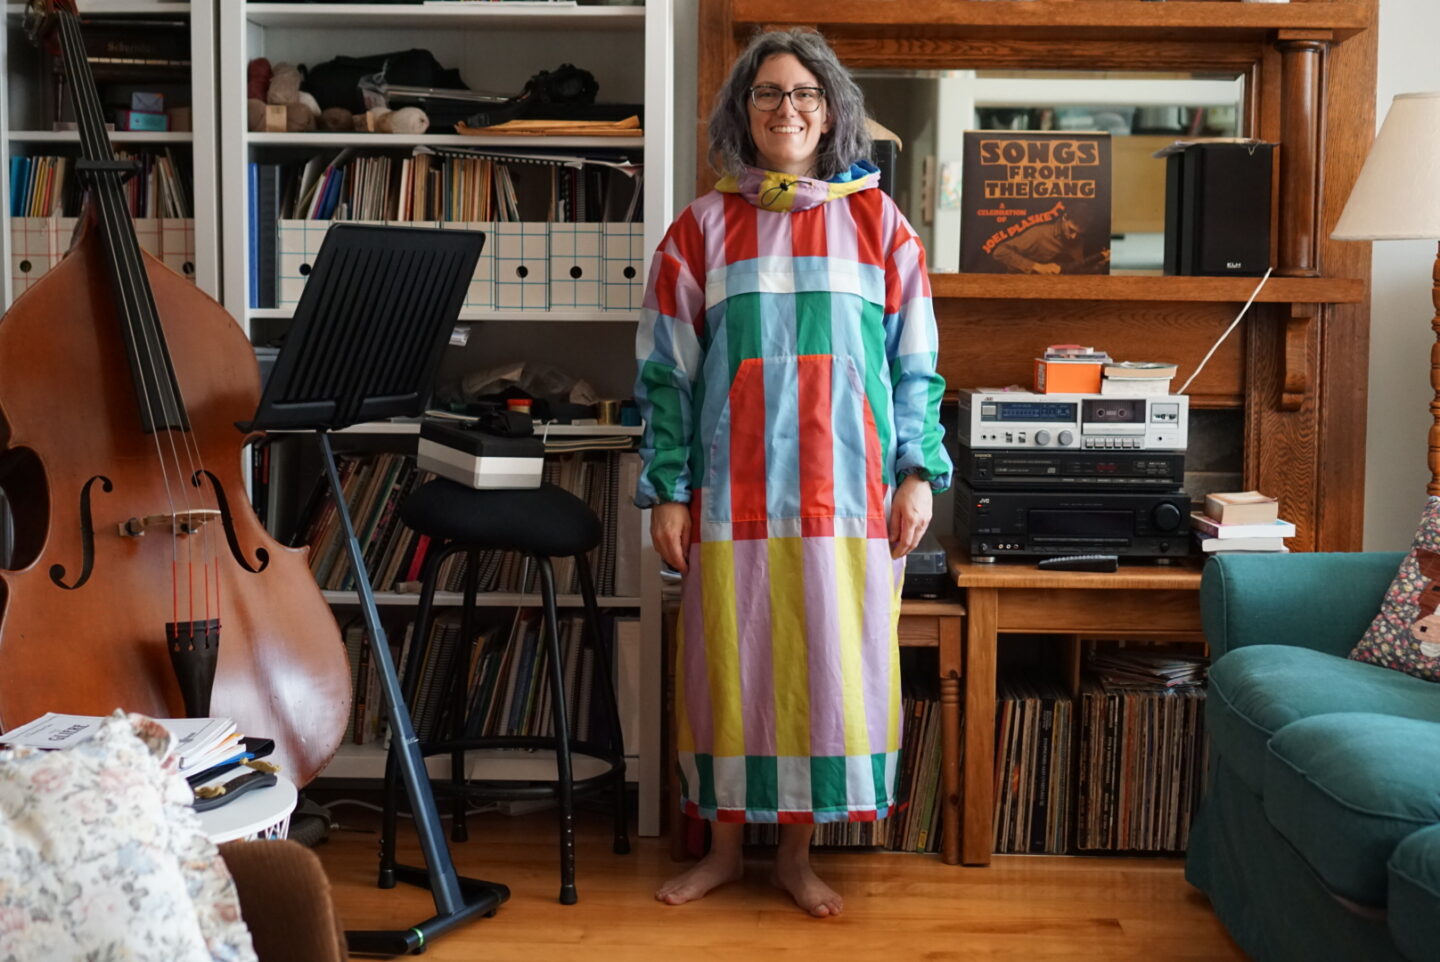
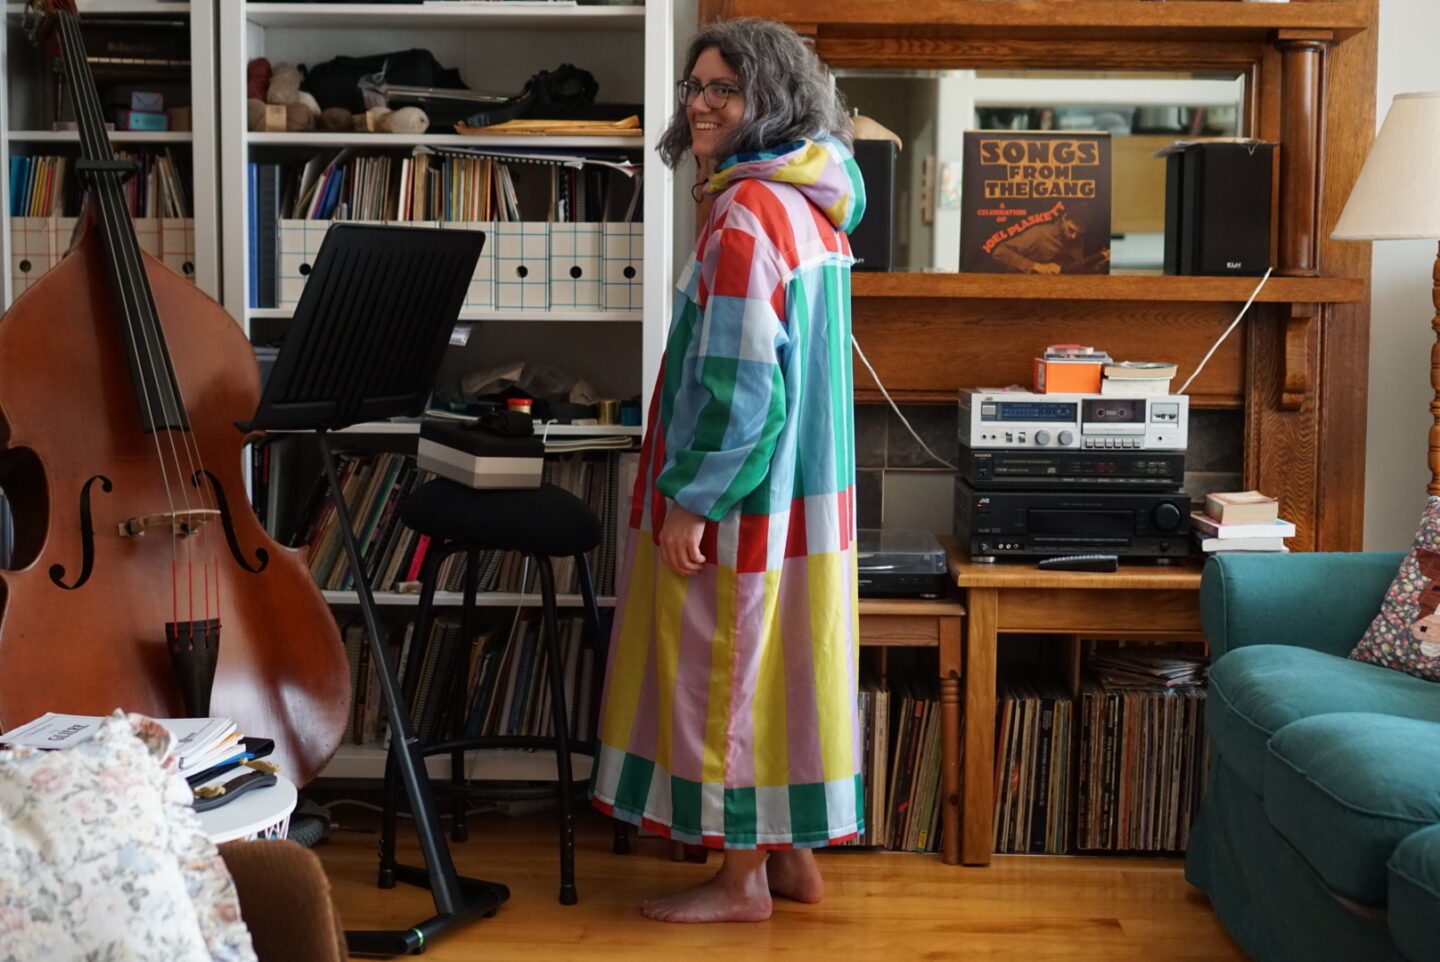
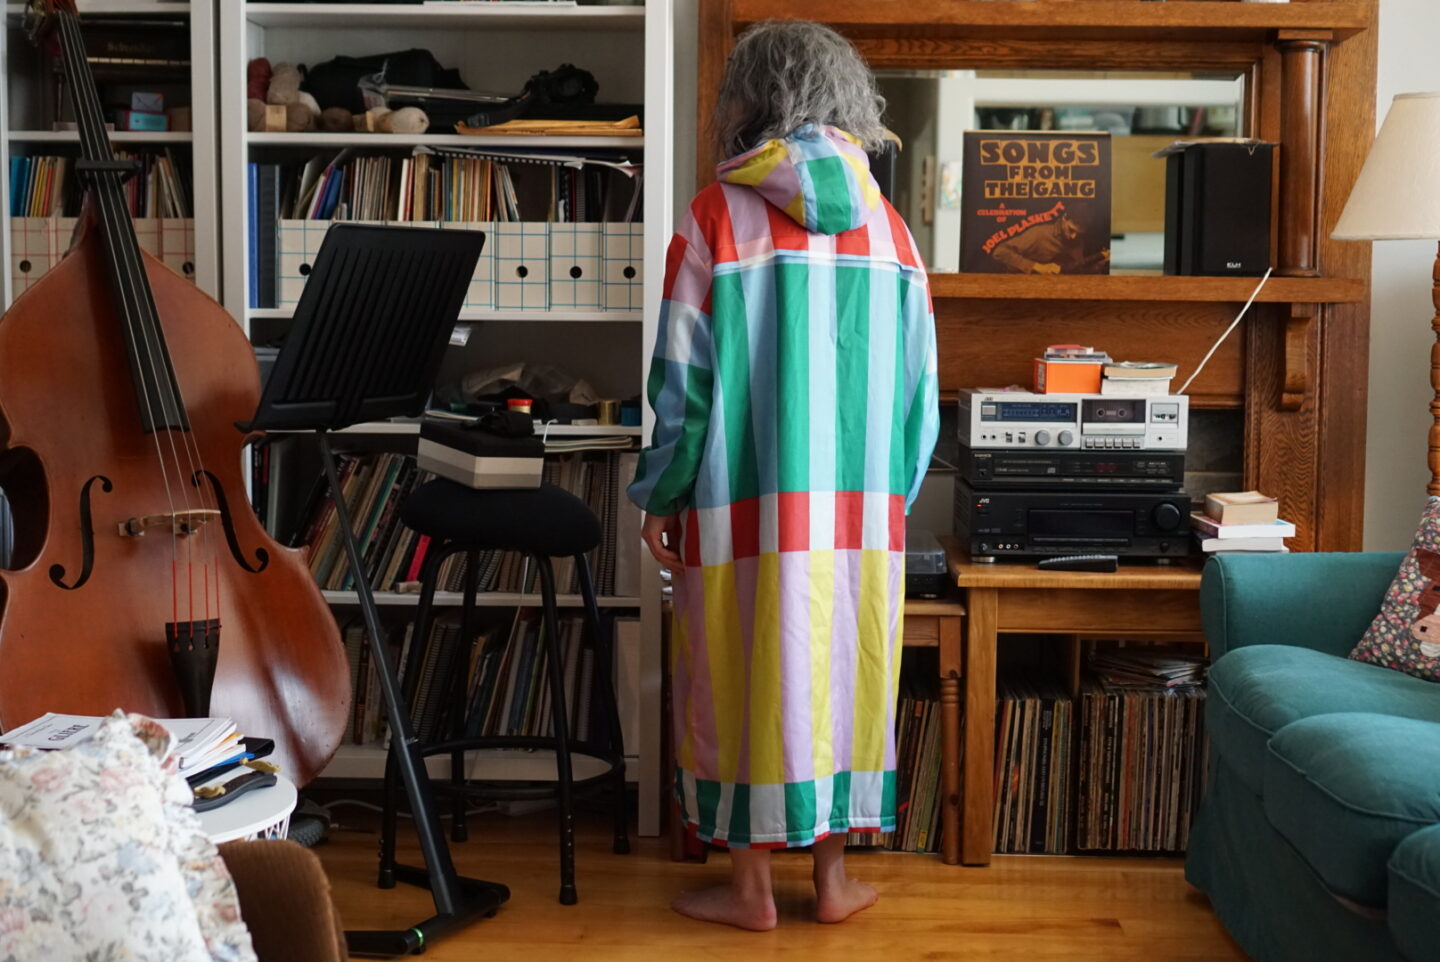
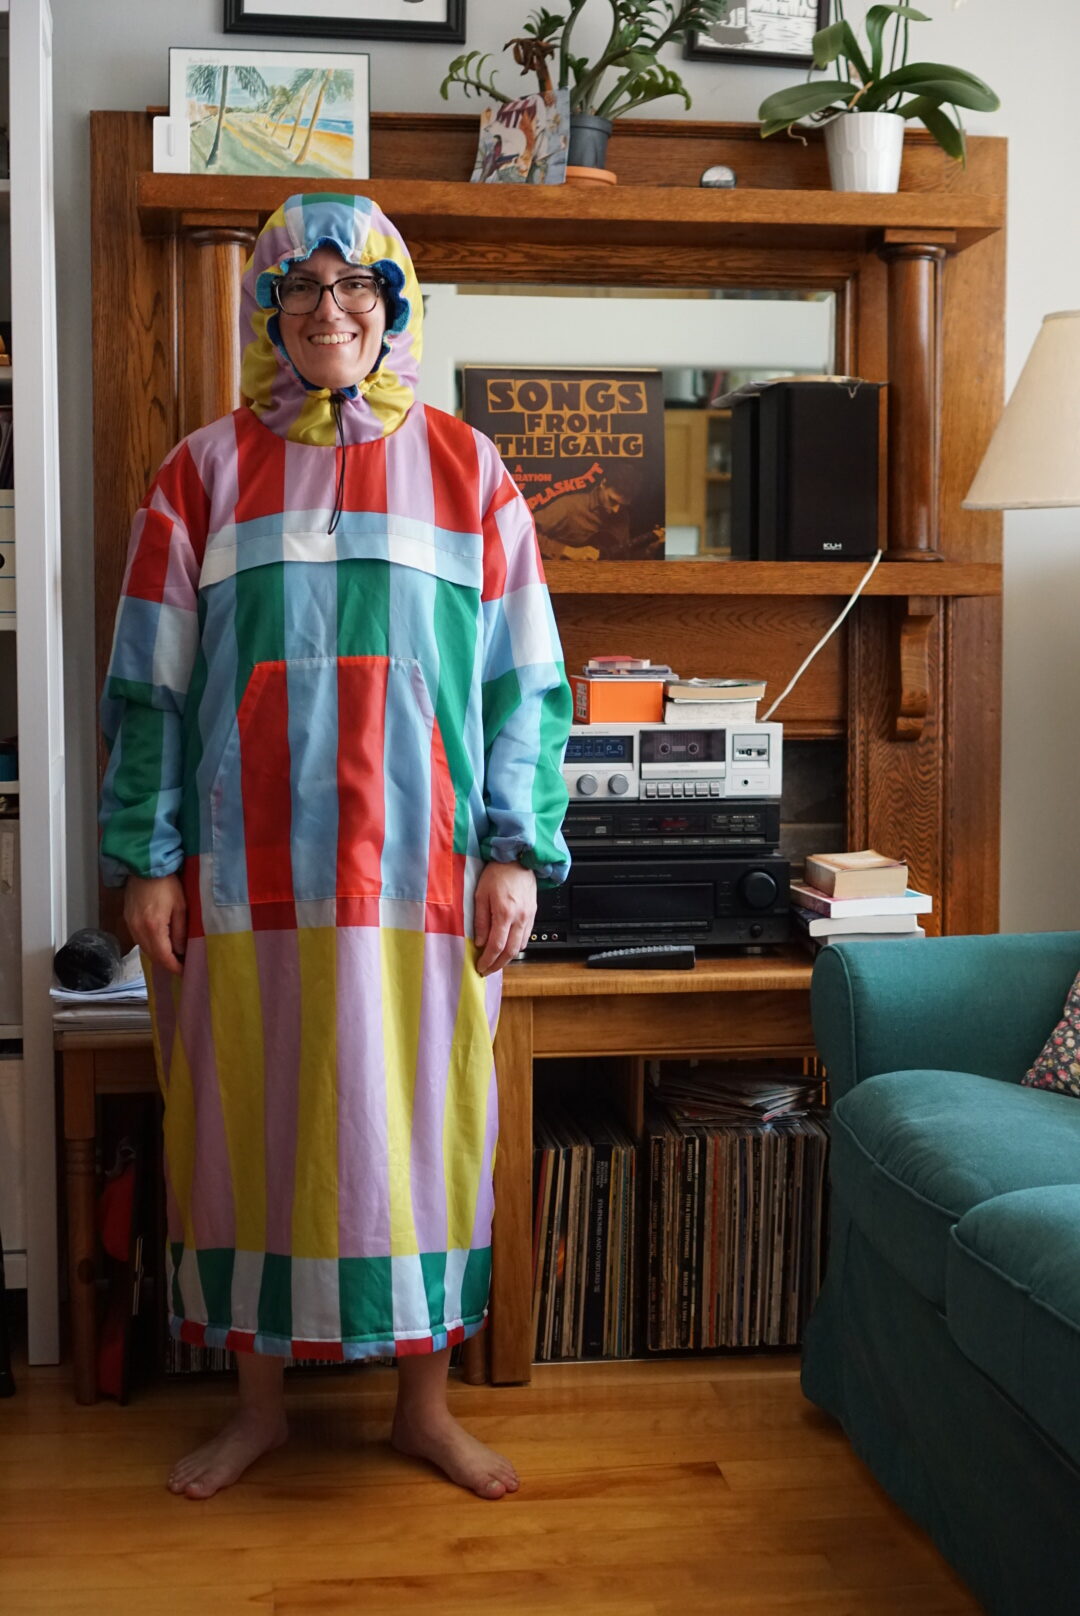
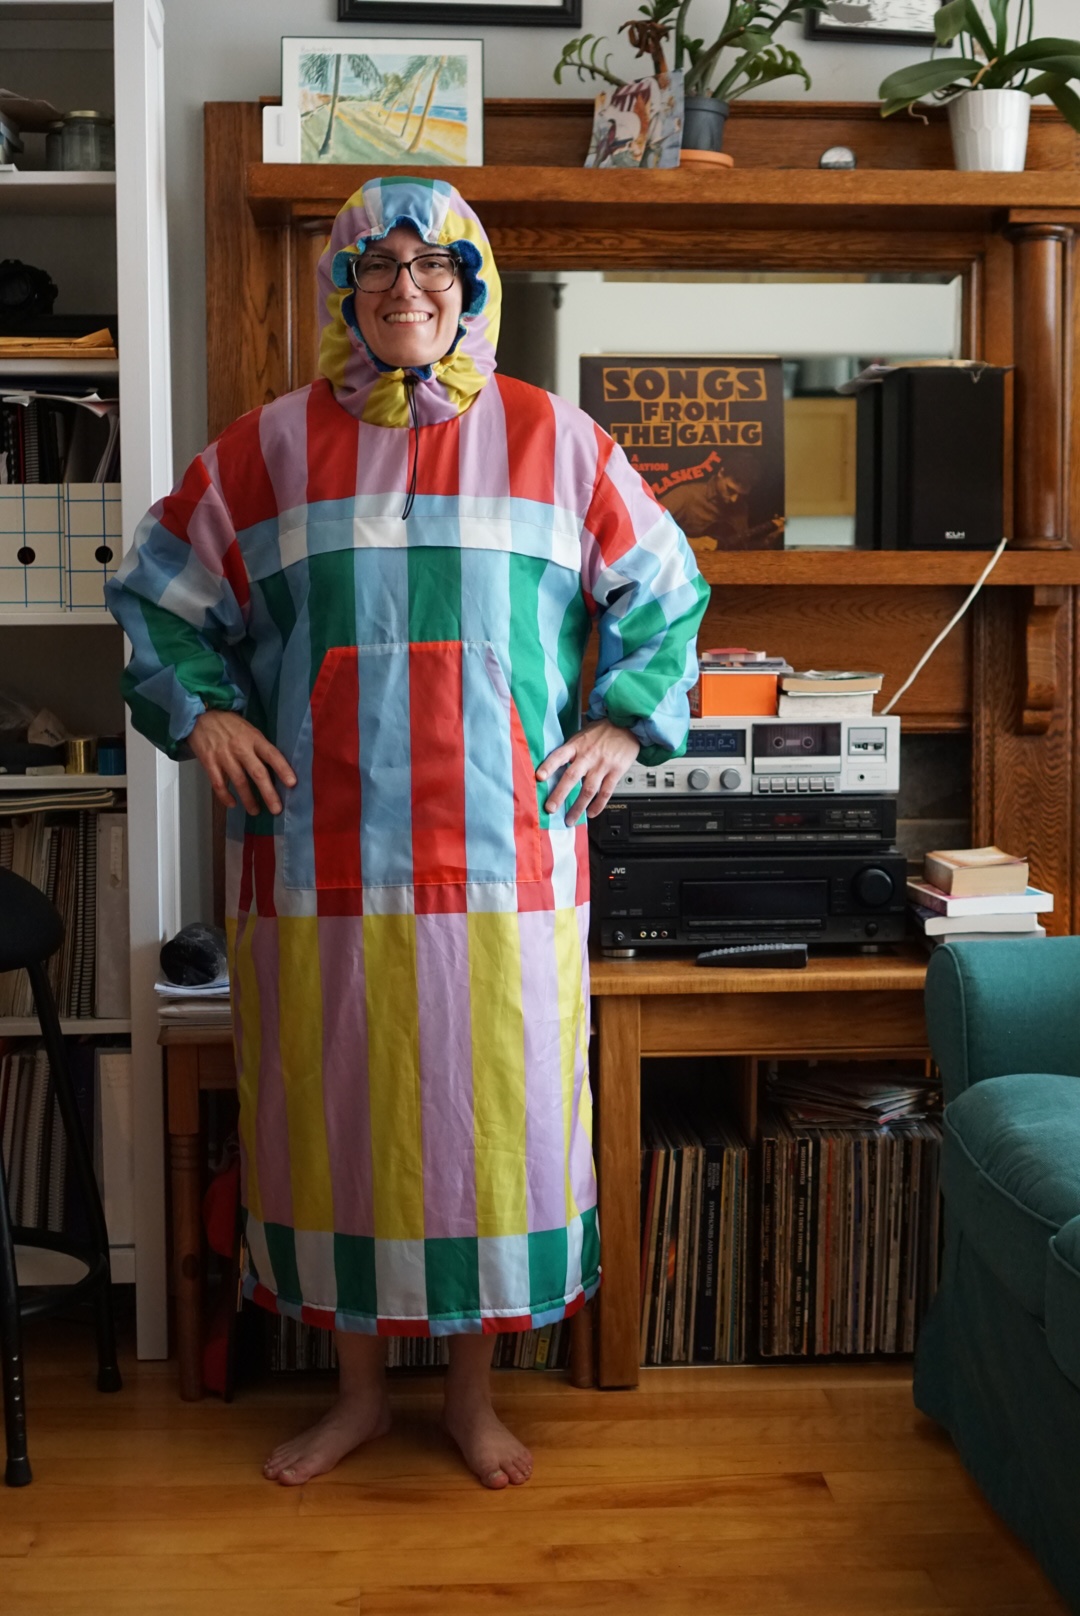
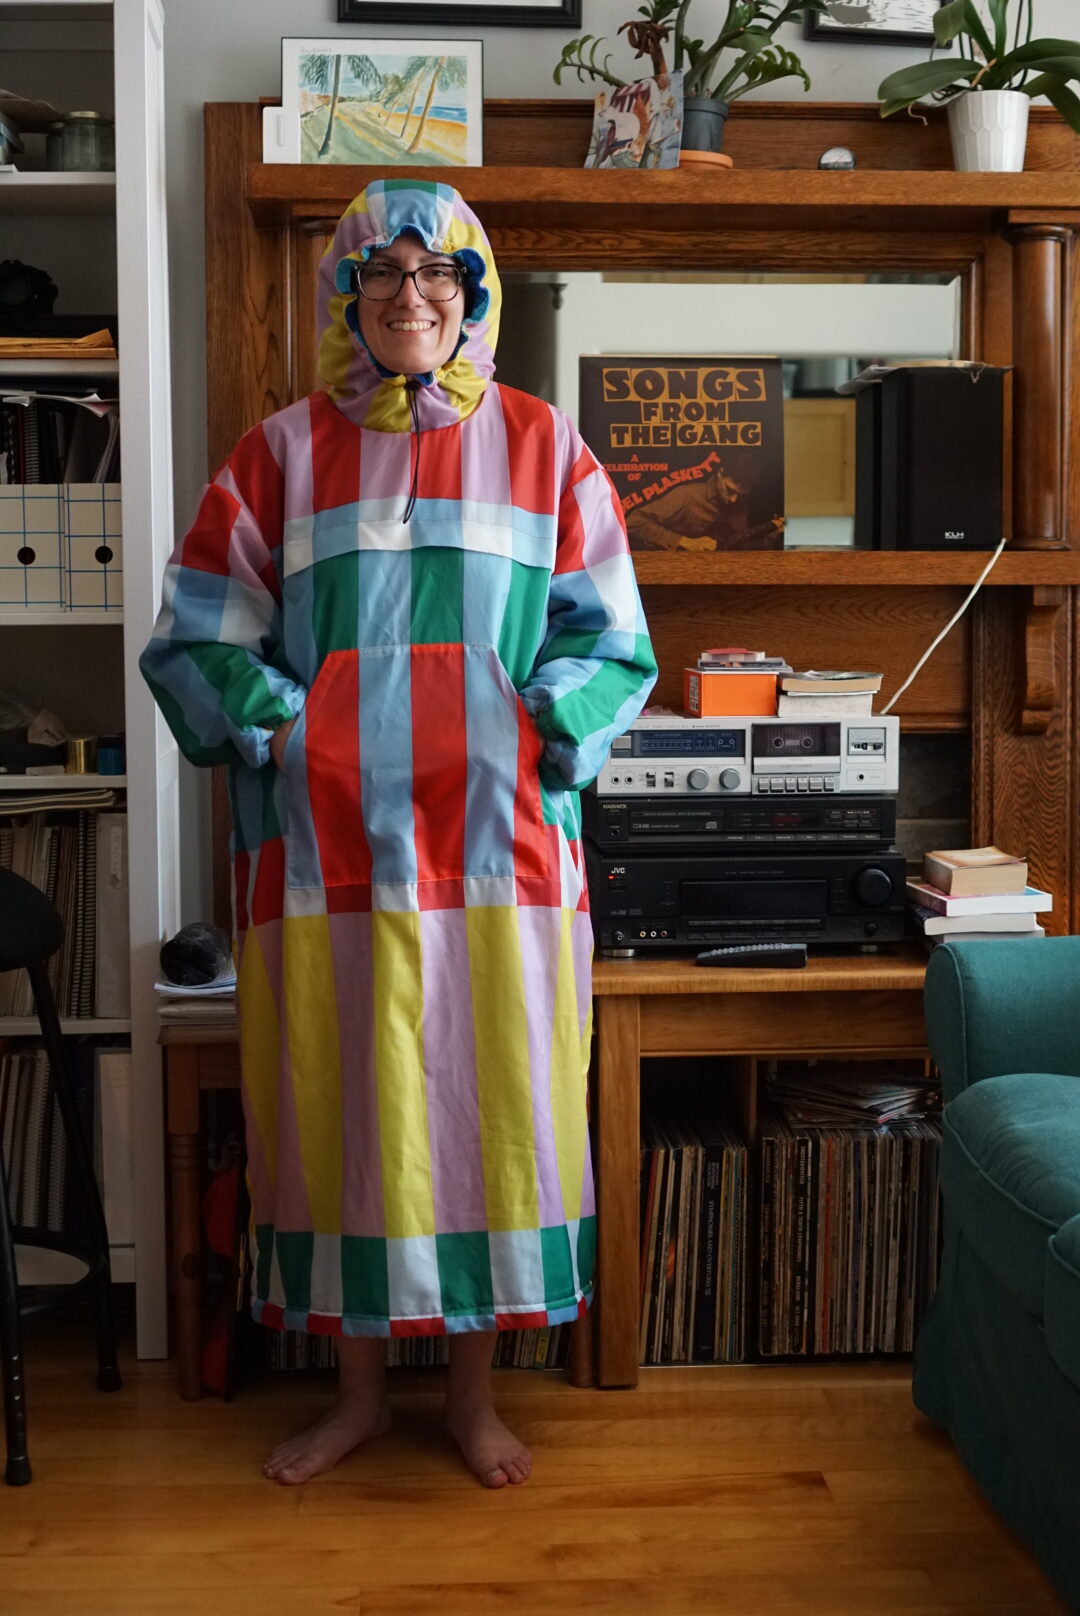
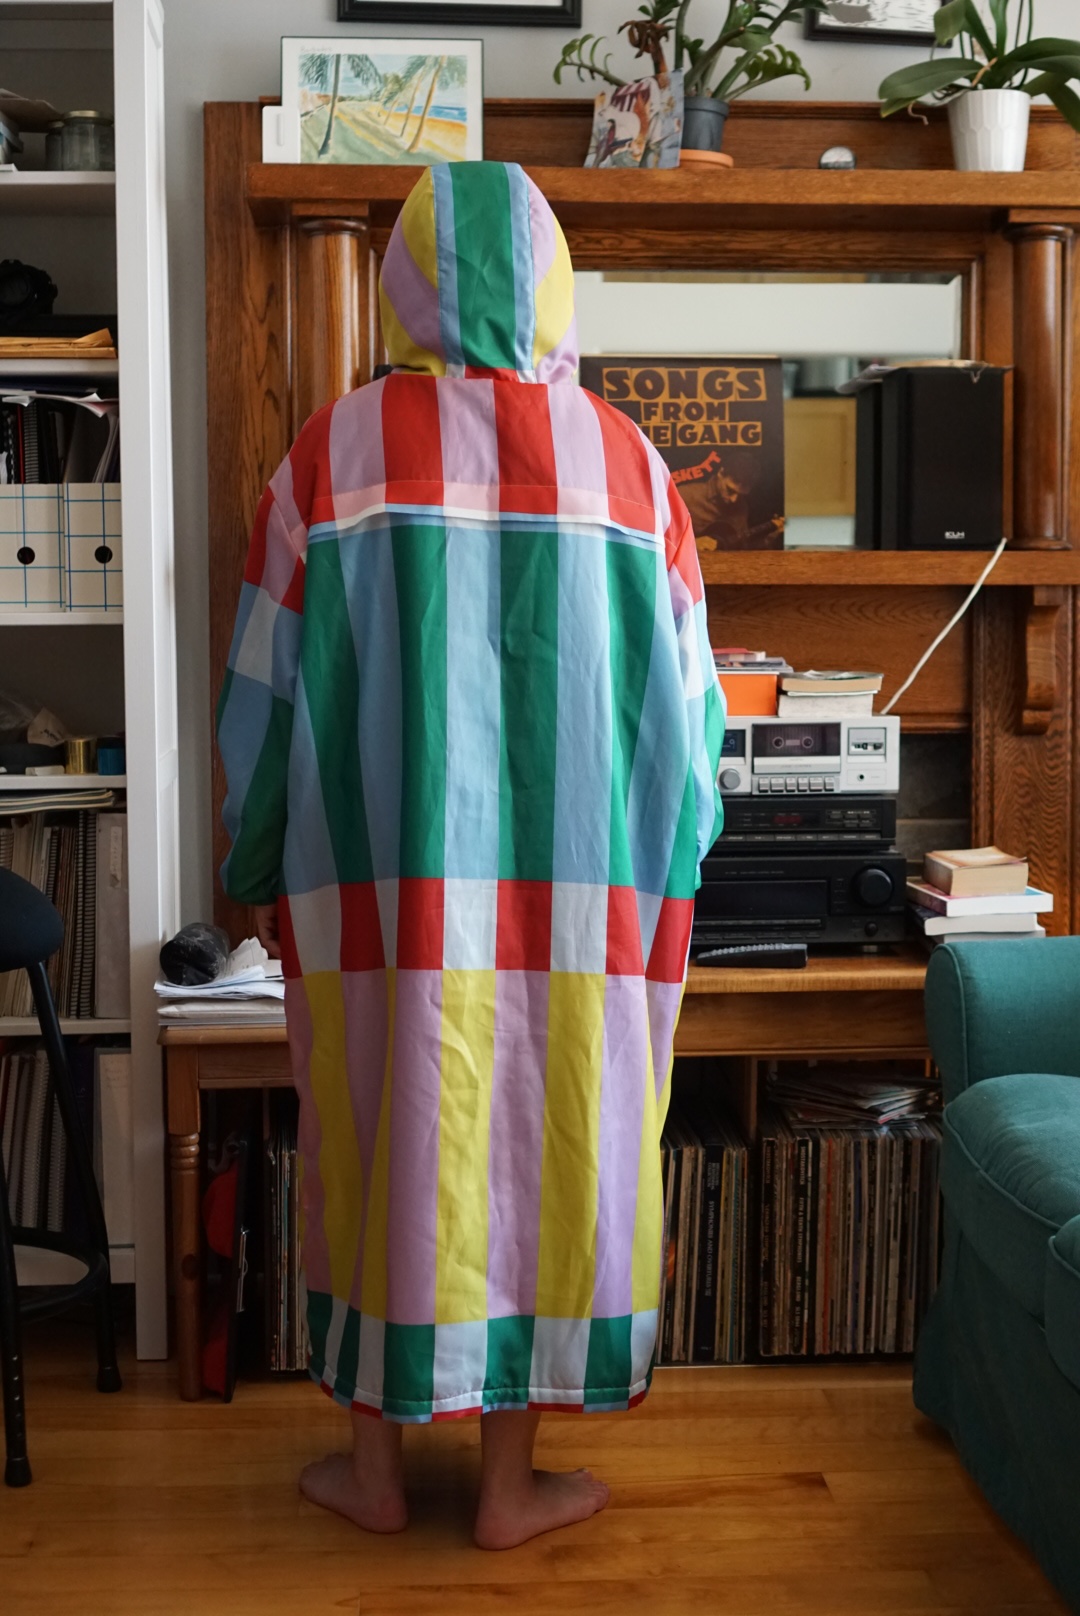
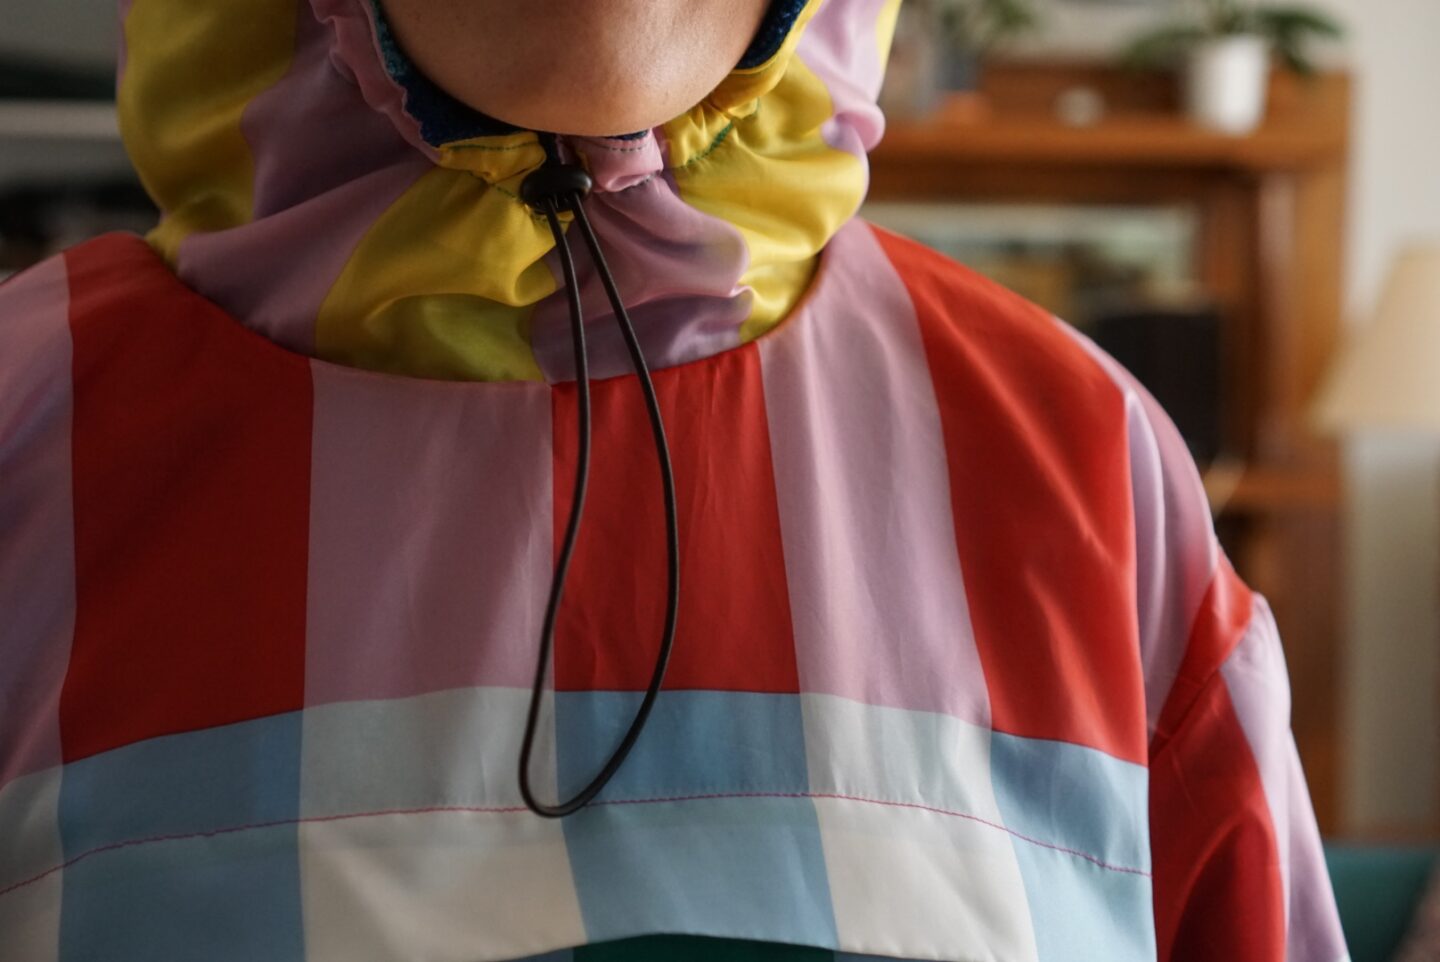
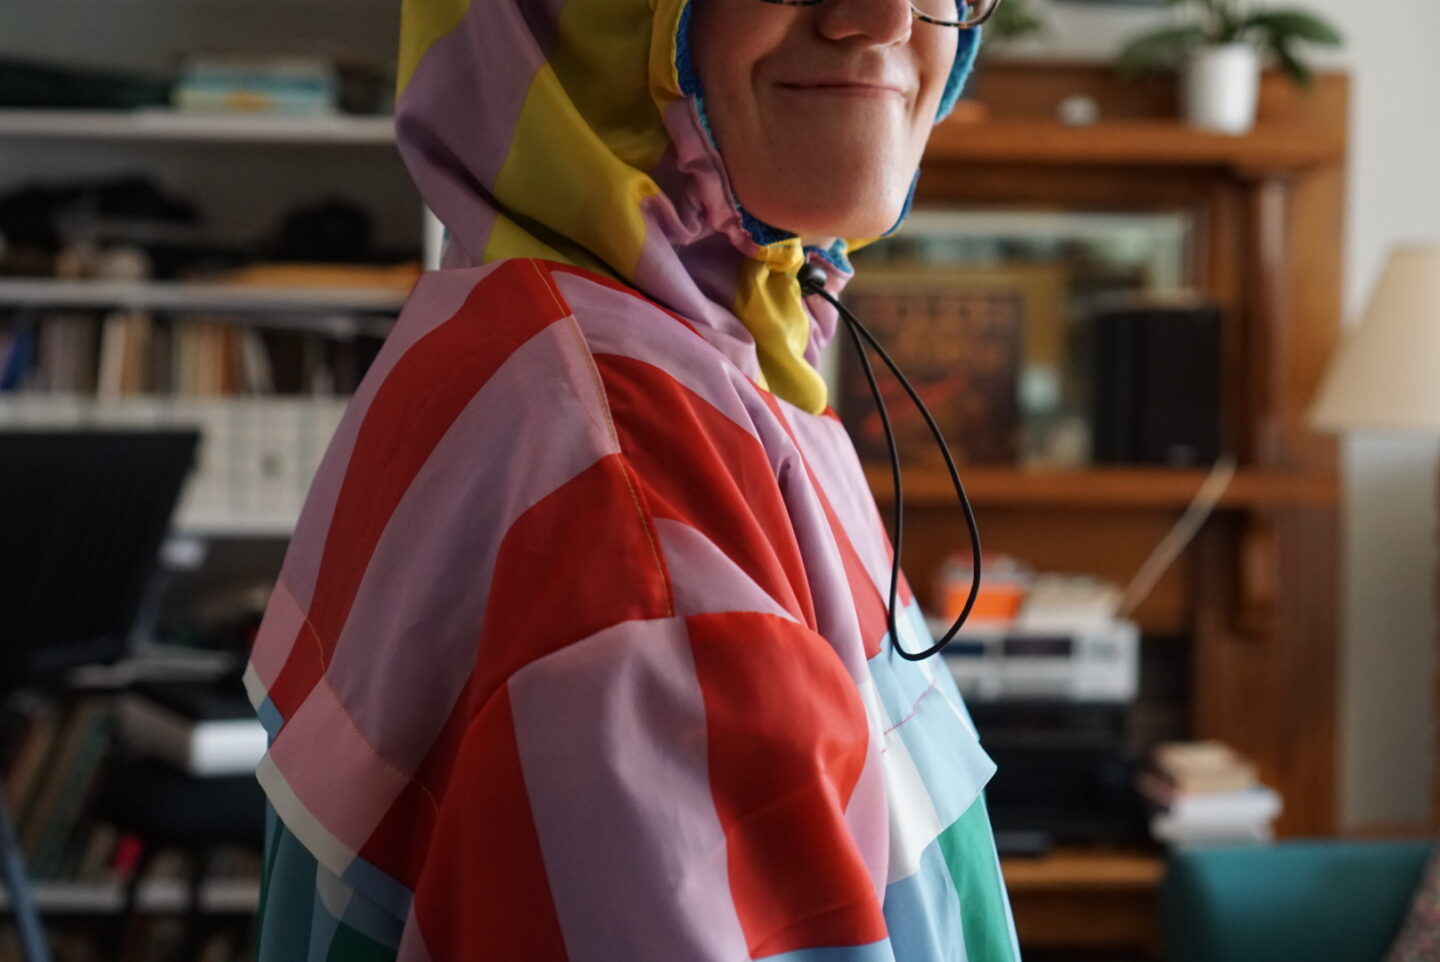
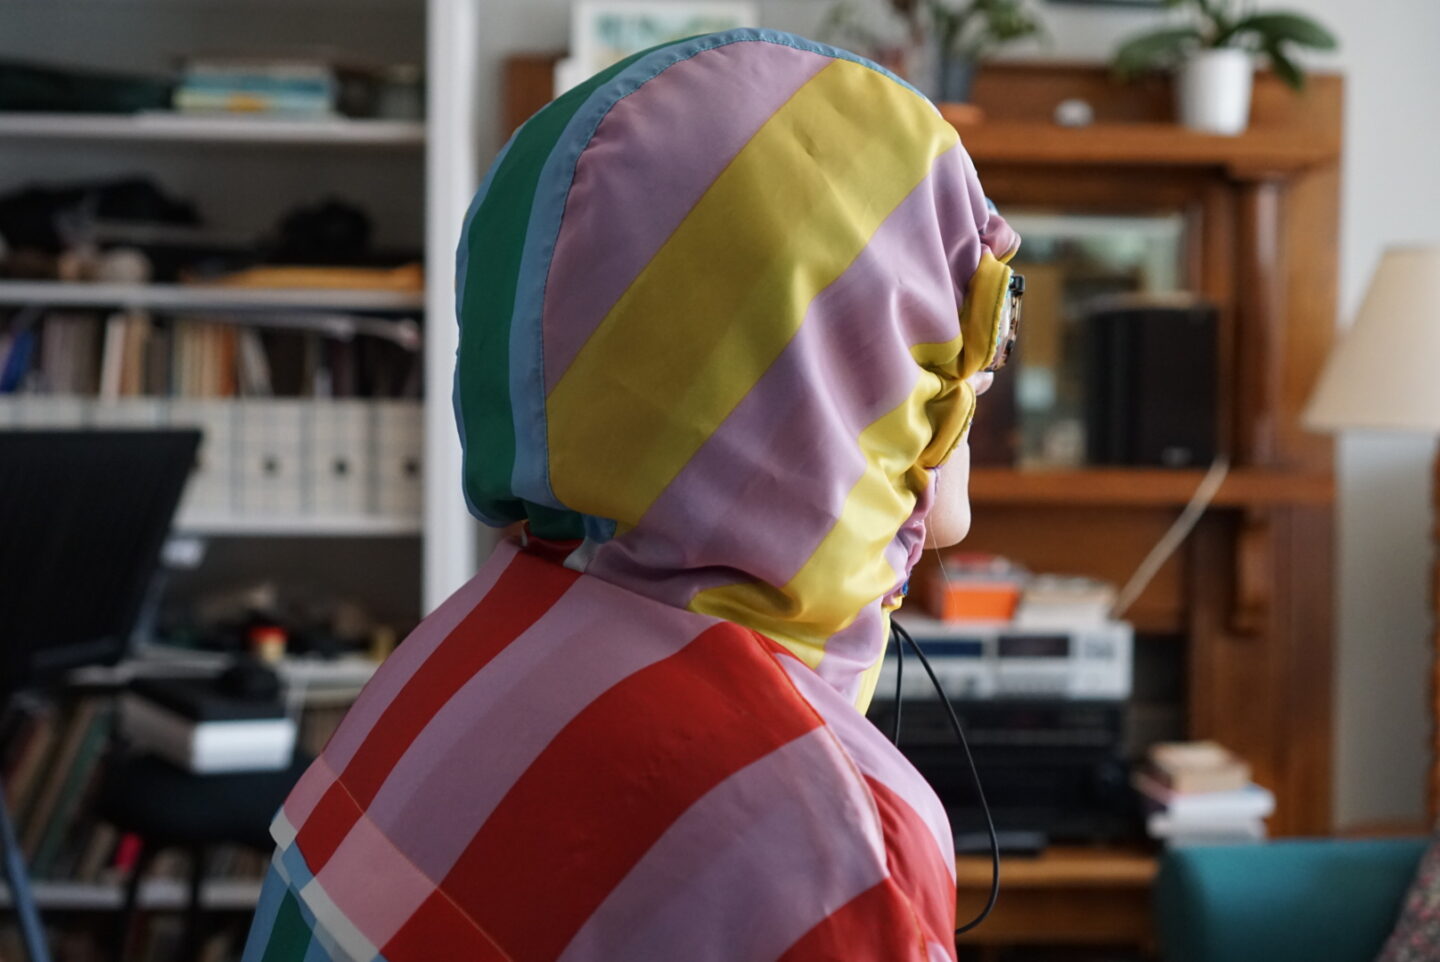
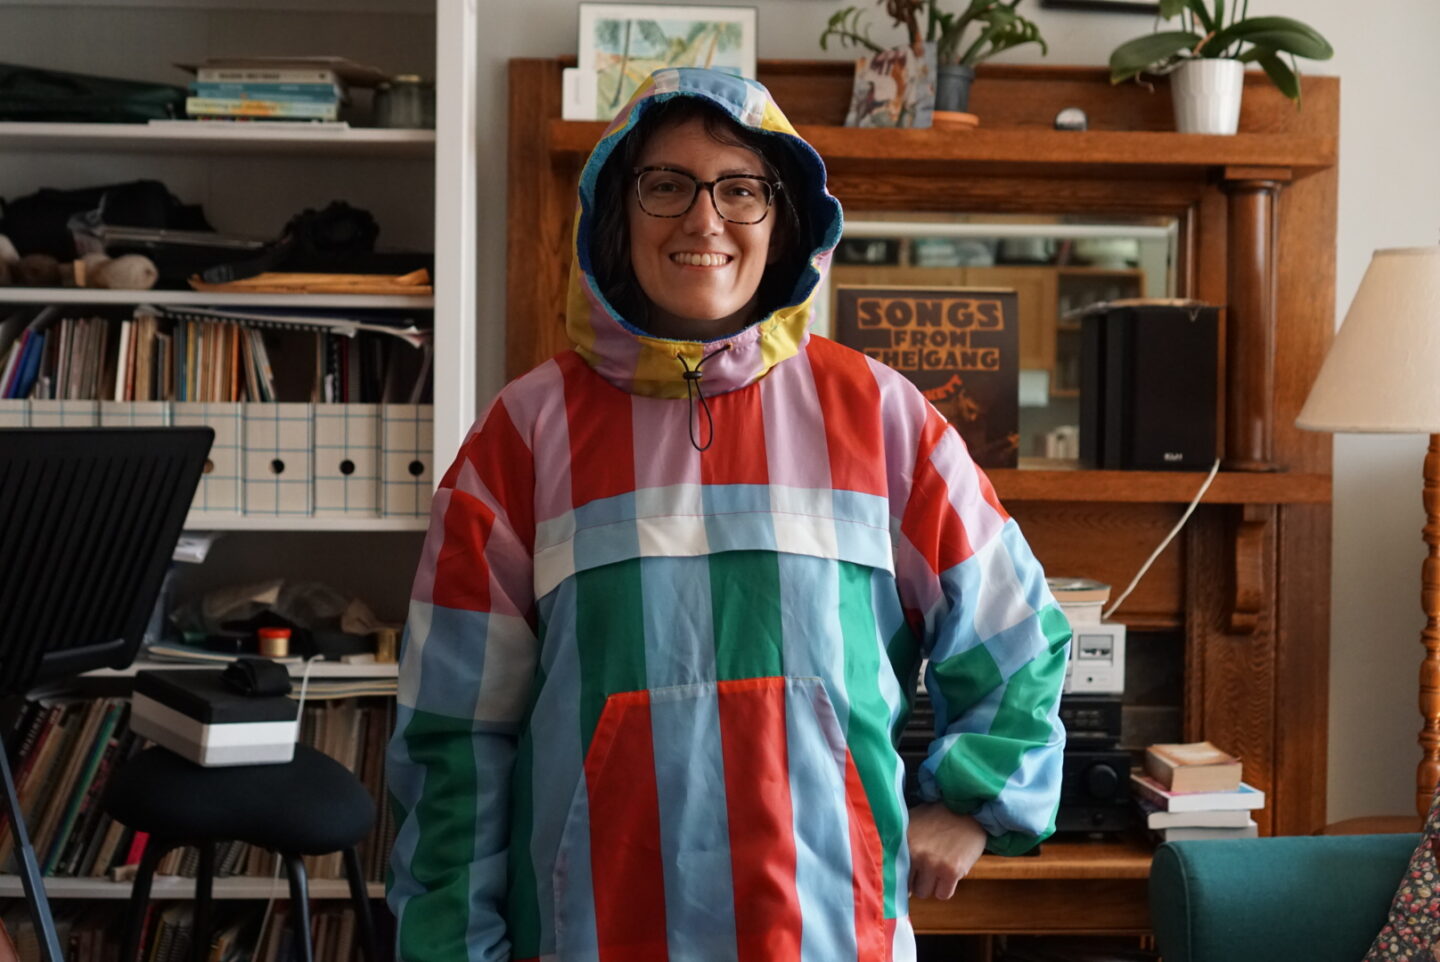
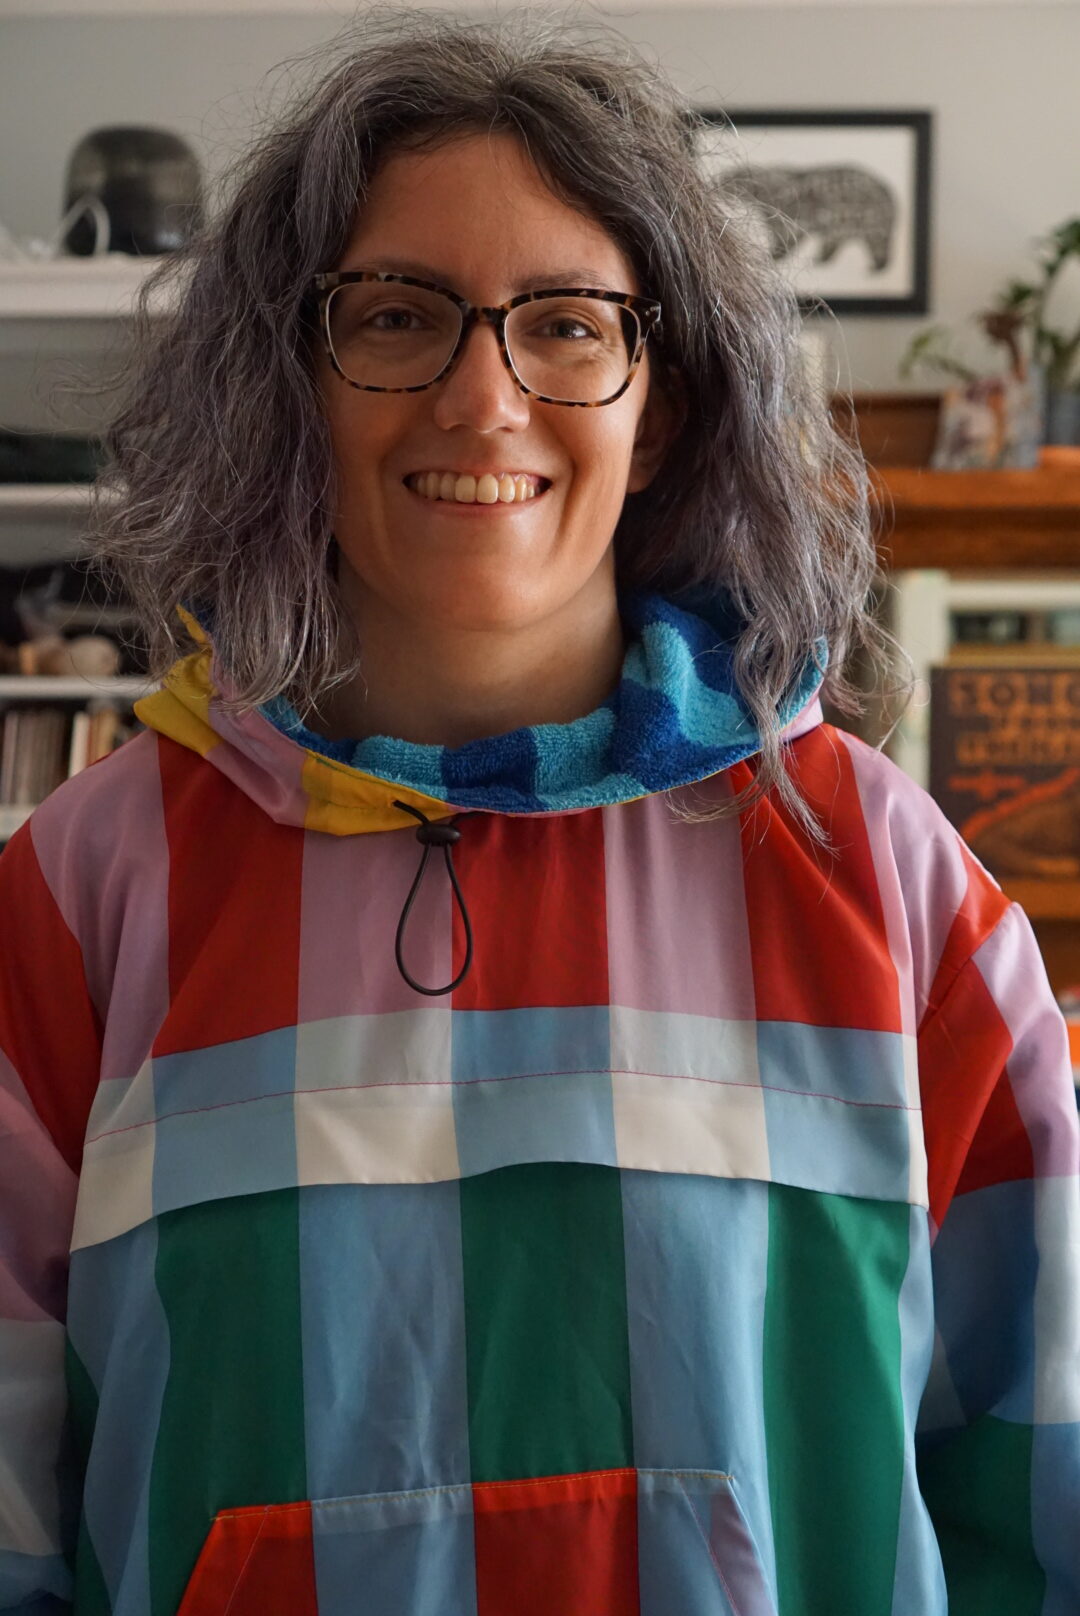
As you can see, I have turned myself into the human equivalent of the old TV error screen. (If you are too young to know what that is, click here to understand this reference.) It makes me laugh and feel very silly, but also I think it’s very fun! When I was thinking of the zero waste plan, that appealed to me because I would have been able to avoid cutting the towels and could maybe have used the contrast colour edges (they’re green!) inside the garment. After I scrapped that plan, I still wanted to find a pattern that would have minimal seaming due to the bulk of the towels. A lot of dry robes have a zipper front, or some other kind of closure, but I wondered if I could maybe get away with it being a pullover. The hood was actually the biggest obstacle when searching through the extensive database on The Foldline. A lot of jacket/anorak/raincoat/windbreaker/etc. patterns with hoods have details like a zipper that continues up into the front of the hood or snaps that close the front of the hood. I didn’t want that, because I knew it would make it really bulky with the towel material in that location.
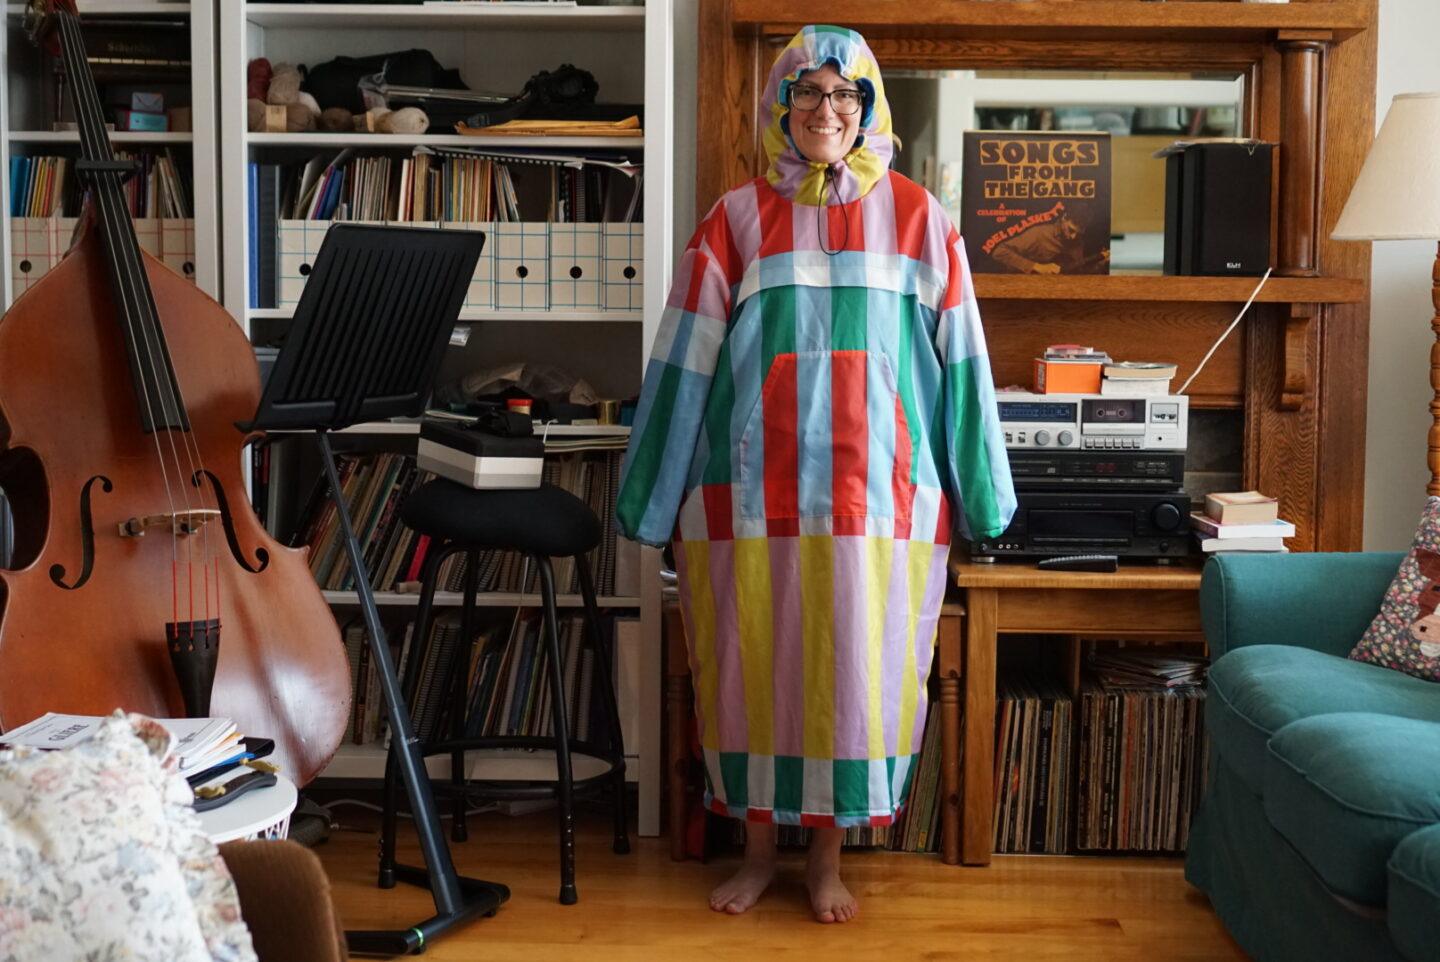
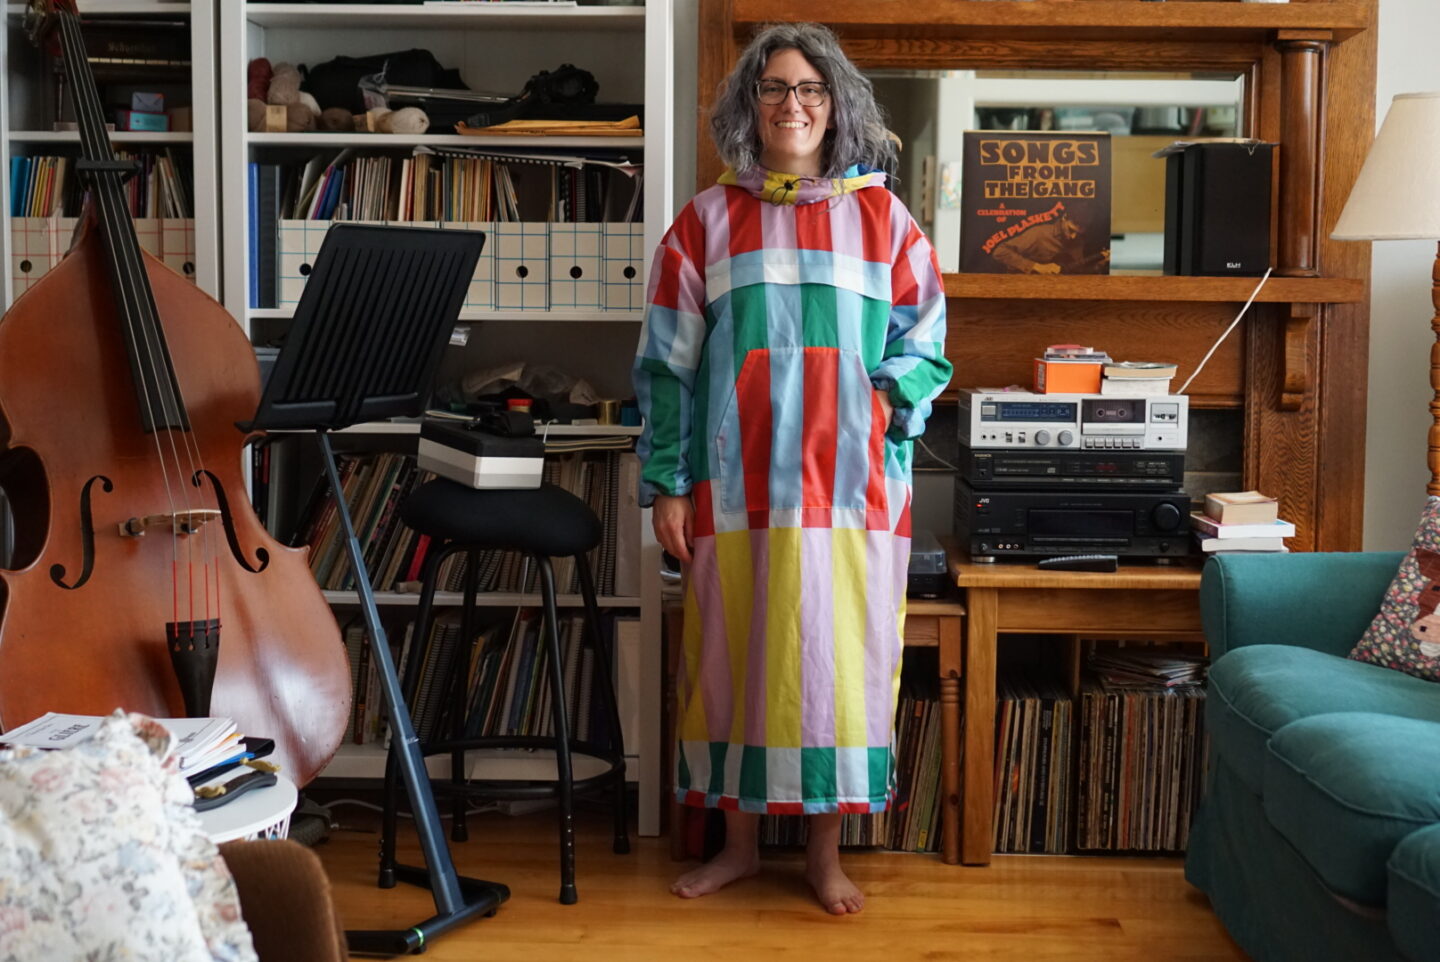
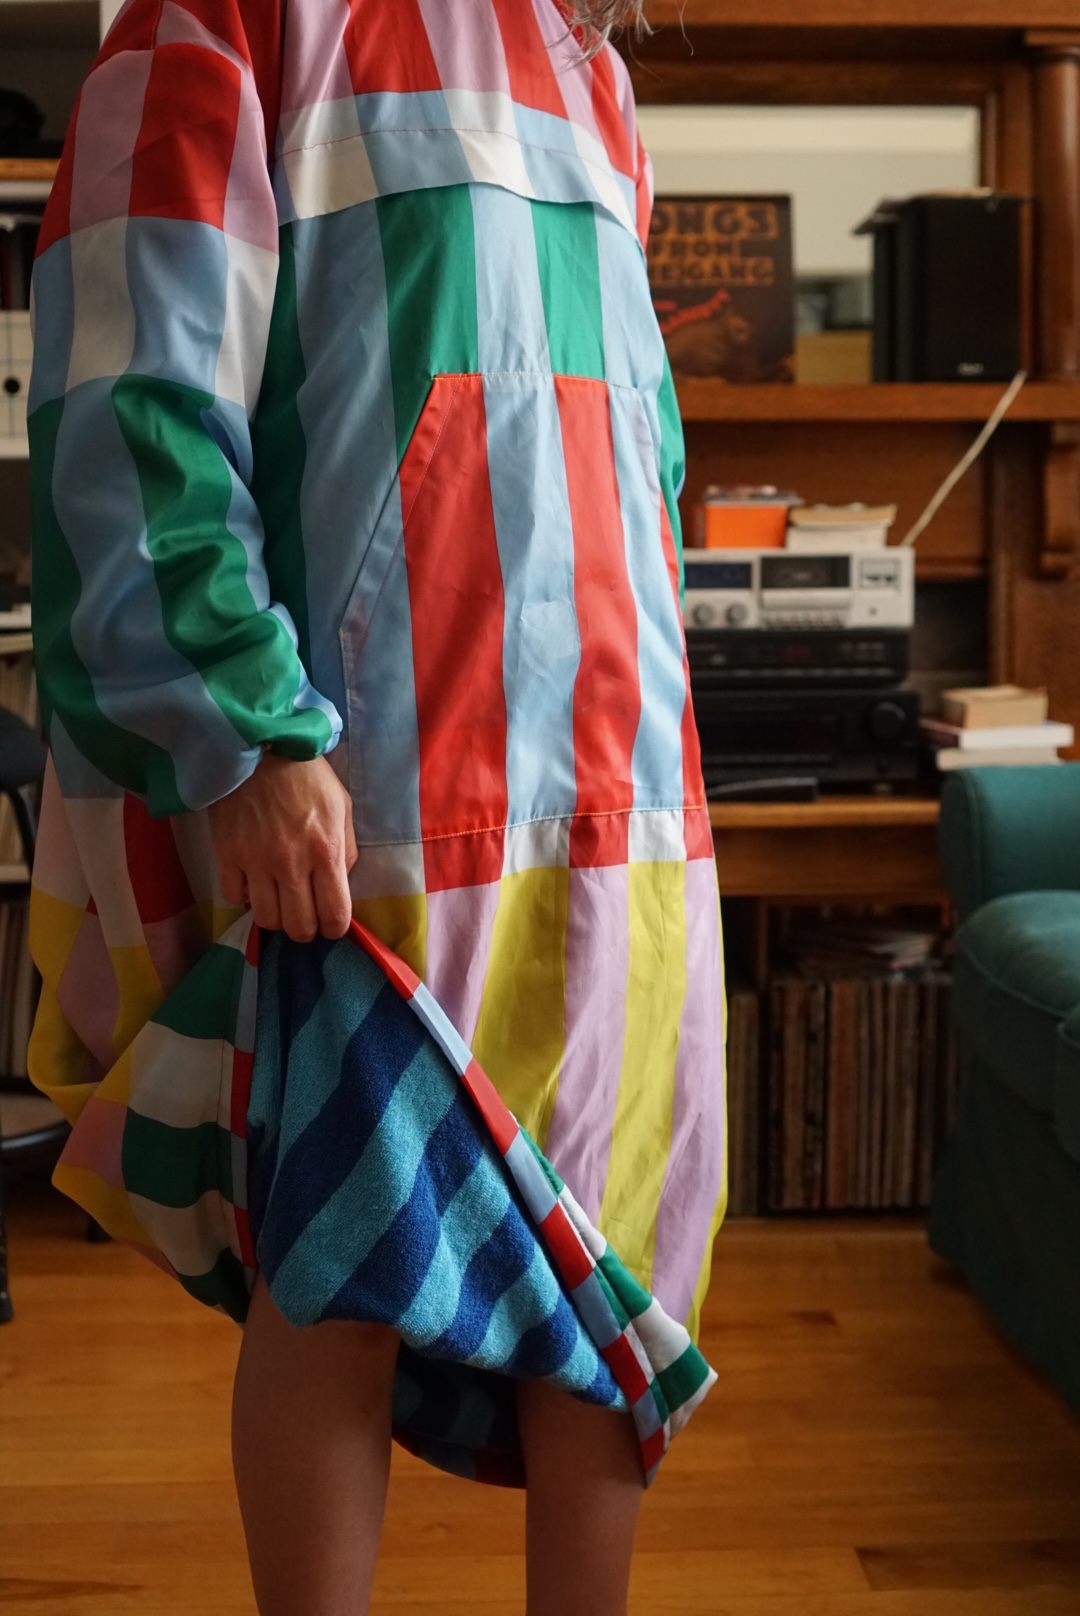
The pattern I ended up choosing was somehow the perfect combination of everything I was looking for. It’s the Neya Anorak by Viki Sews. I think I may eventually sew one in a material that is not a shower curtain. It has a hood with only an elastic closure, no front closures, and has very minimal seaming throughout. I really like the shape of it as well. I bought the size 44 – my bust is 38.5″/98cm, my waist is 31.5″/80cm, and my hips are 39″/99cm, and the size 44 says it’s for 100cm/80cm/106cm. It’s a bit on the bigger side for my measurements if I was making an actual windbreaker, but I wanted to err on the larger side for this dry robe. Viki Sews also sells patterns in different height ranges, and I bought the second height range (drafted for 162cm to 168cm, and I’m 5’4″/162.5cm tall). The pattern is lined only in the hood, but I wanted the whole robe to be lined. The first thing I did was to lengthen the pattern by 14.5″. That addition was chosen by holding the pattern pieces up to my body and then measuring between the hem line and where I wanted it to hit on my shins. Very scientific, very precise. To make a lining, I just used the same pieces for the sleeves, and for the body pieces, I traced copies of the lengthened front and back and then folded out the pleat details. I didn’t want to have that pleat in the internal towel, as it would just add bulk and not be visible at all. I didn’t really have a plan for what I was going to do at the hems of the sleeves or the bottom of the robe, so I just left those areas as is so I could decide later. (Here, enjoy a photo of me trying the robe out with my arms pulled out of the sleeves – testing out what it would be like to try to change out of a bathing suit inside the robe!)
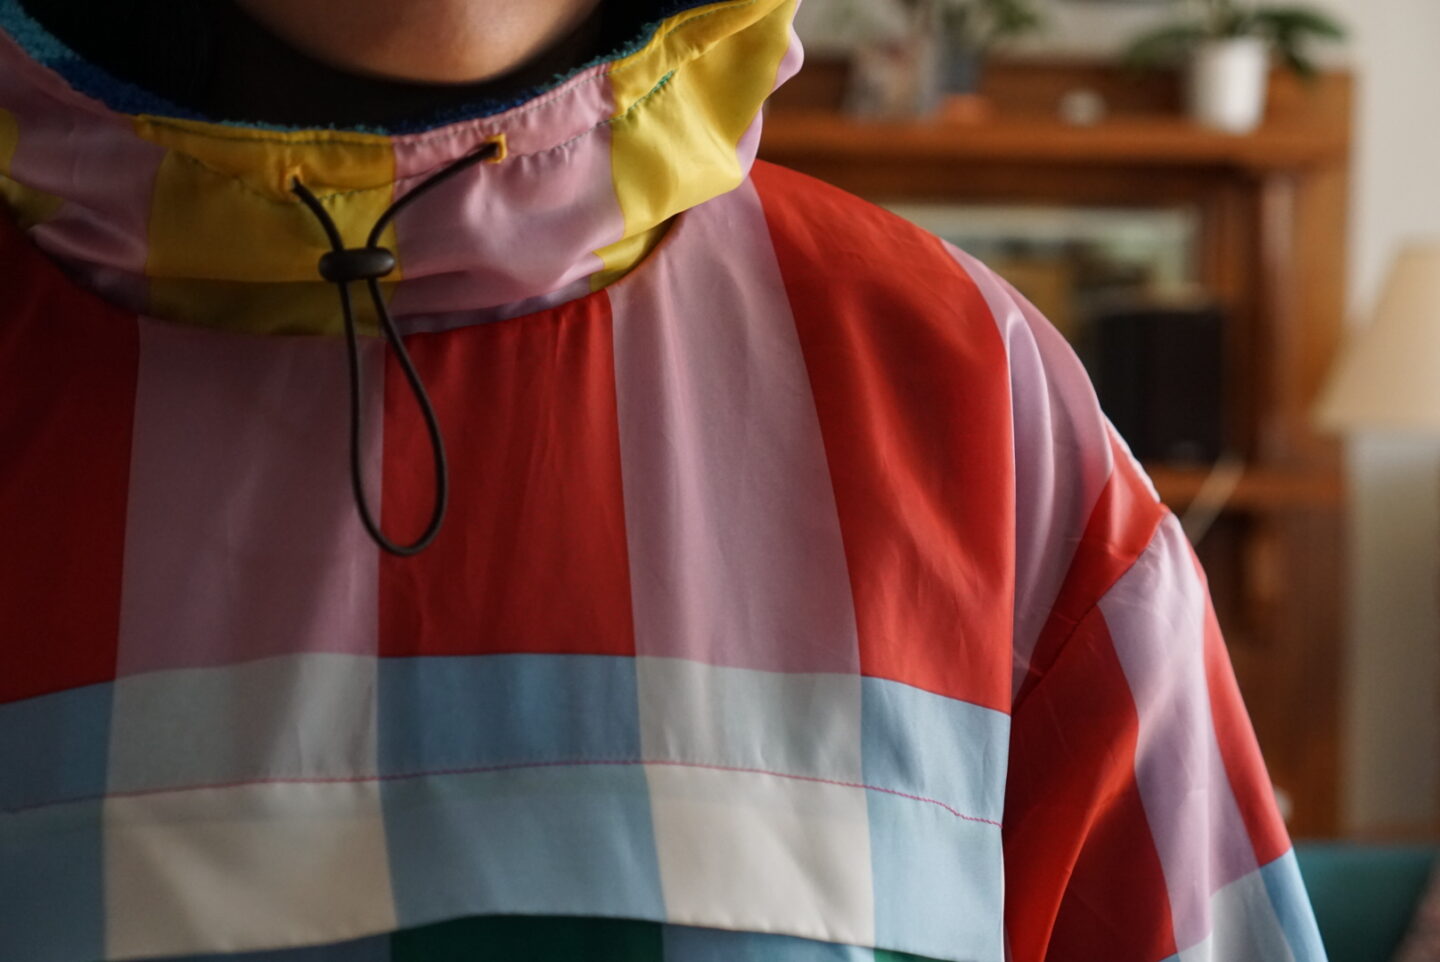
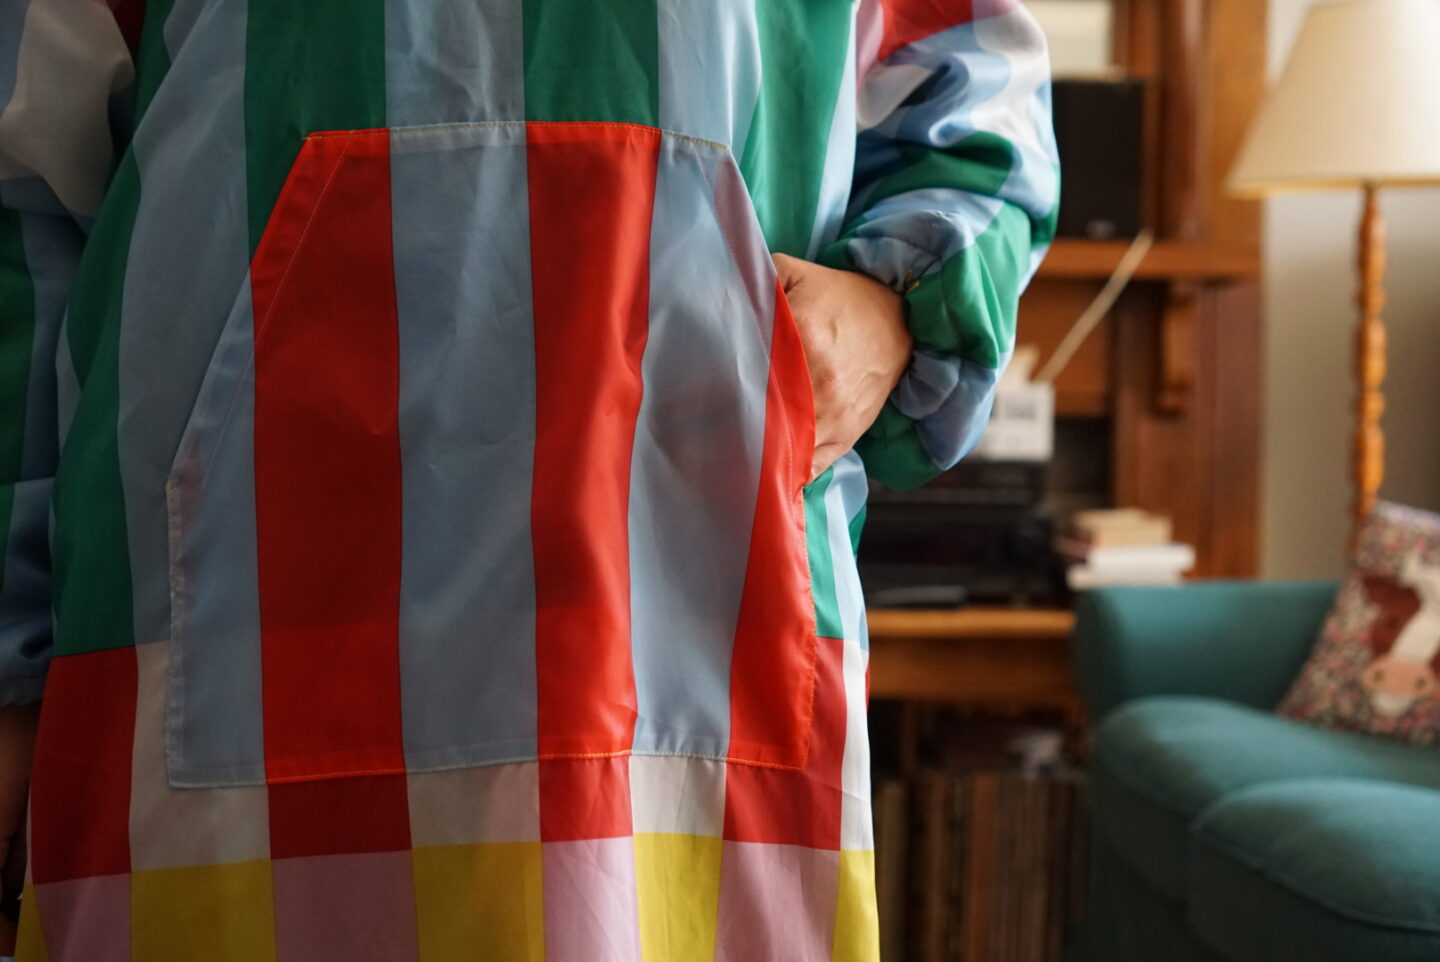
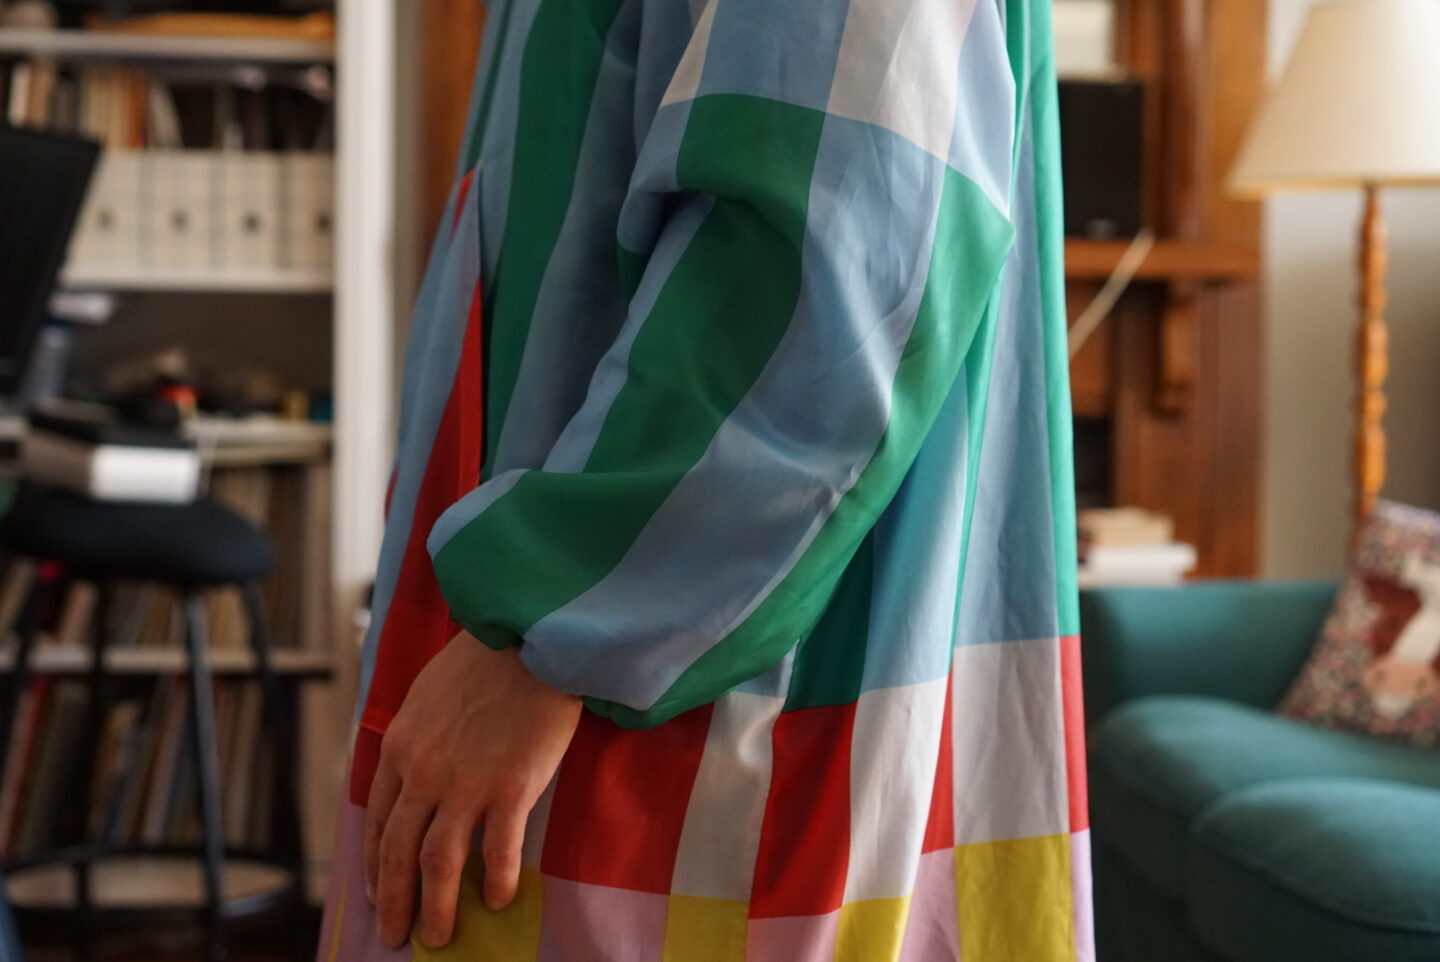
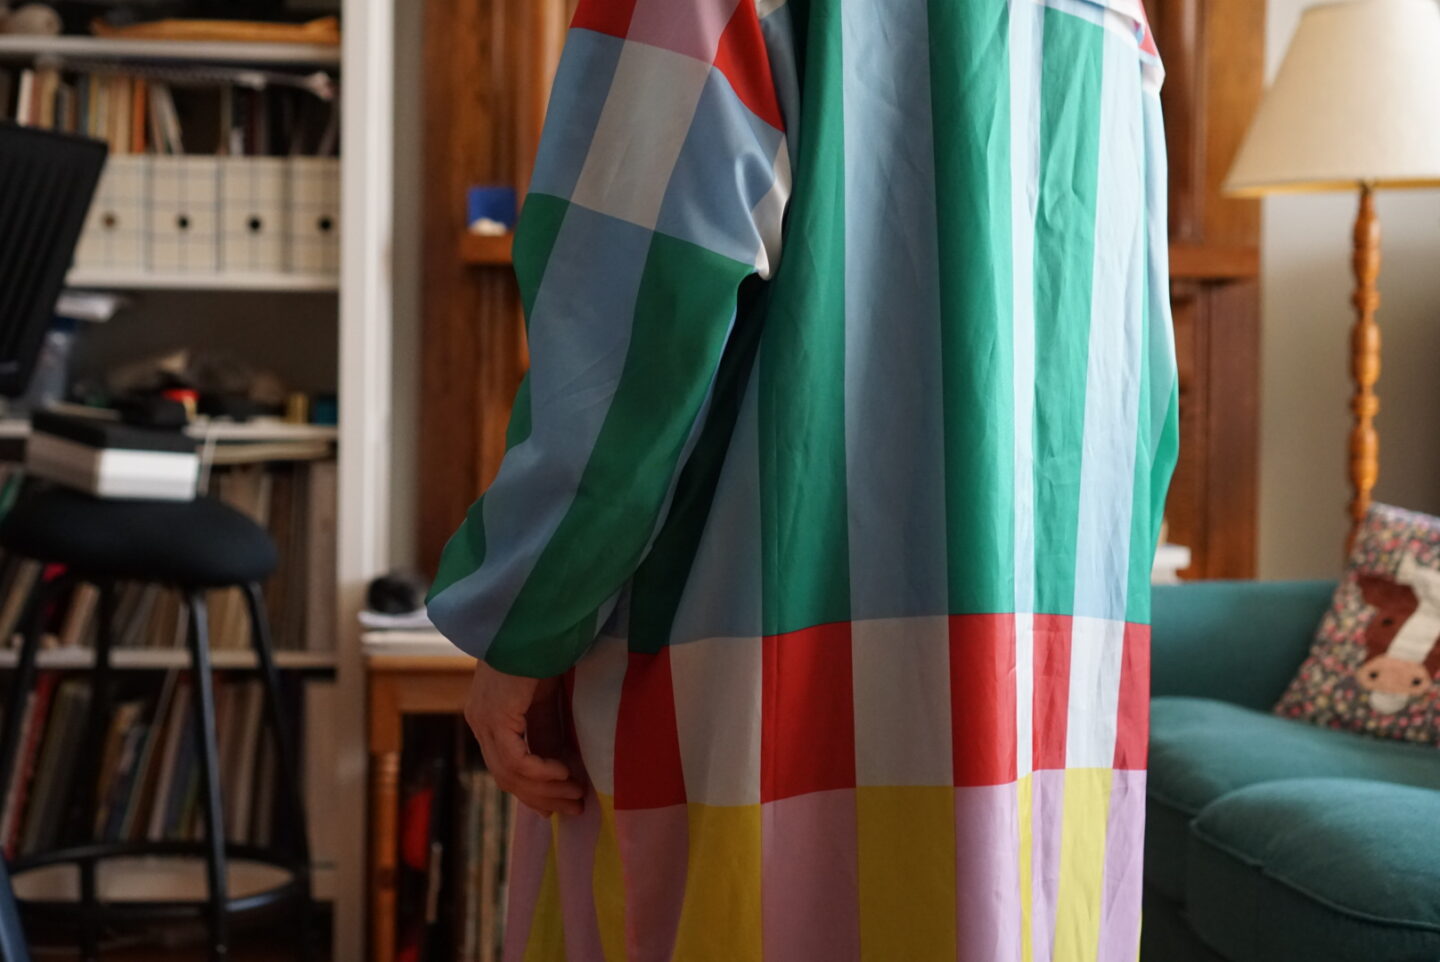
To construct the robe, I cut everything out and then immediately serged the edges of all of the towel pieces. Towelling is like faux fur in that it sheds a lot because it has a pile. I did not want to have towel bits everywhere for all of time, so the serging was helpful and made everything easier to work with. I assembled the exterior fully, with the pleats and the front pocket. Instead of the recommended grommets on the sleeves and hood for the drawstring elastics, I didn’t have any, so I just made buttonholes. I decided to eliminate the drawstring at the bottom hem because I didn’t want to just make a garment that would cause me to waddle and/or trip all the time. I assembled the towel lining the same way, minus the pleats and the pocket. Then, I sewed the edges of the hood right sides together as the pattern instructs for the hood lining, then flipped it out and topstitched it and followed the directions to make the casing for the elastic. I had pressed the seam allowances where the body and hood meet down toward the body of the lining and the exterior, so that I could do this next thing. I sewed the seam allowances of the lining and exterior shells together around the bottom of the hood so that they would stay together and not flop around. This is often done with coats with bagged linings, and I’ve made a few of those so I thought the technique would be good here.
After that, I had to figure out how I wanted to attach the sleeve and bottom hems together. I originally was going to sew them together and then treat them as one layer. I did that, but the towelling had grown during the cutting and sewing process and it hung much longer than the exterior shower curtain shell. It made things hang strangely and the towel hung down past the shower curtain. The original plan was obviously not going to work. I unpicked those lines of stitching and then trimmed back the excess length, plus the 4cm of hem allowance, on the towel edges. Then, I folded up the shower curtain edges as instructed for the hems/casings and sewed them as in the original pattern but with the towel lining tucked inside, edge butting up against the bottom fold of the exterior hem. (I hope that makes sense!) This was much neater than my original plan would likely have been, and I’m happy with how it turned out. (You can see a peek of the lining in some of the photos further down). I had some elastic cord already, so I threaded that into the casings of the hood and the sleeve hems. I only had one two-hole elastic/drawstring stopper in my stash, so I used that for the hood. For the sleeves, I just made the elastic length non-adjustable and sewed it into a permanent loop with no adjuster.


Overall, this turned out exactly as I hoped in terms of its functionality! I haven’t used it yet because it is not cool enough to need it post-swim. I look forward to trying it out! In the other blog post I linked to earlier, the maker lined her robe with Thinsulate to make it extra warm. I didn’t feel that that was super necessary for my swimming habits, but I think that this pattern could easily accommodate that extra layer if you wanted to add that on your own version. The only thing I’d look at is maybe going up a size to accommodate the added bulk. As well, if you are looking to be able to change in and out of a wetsuit inside your dry robe, that might also necessitate going up a size or two. I hope you enjoy this very silly garment and these photos of me looking very cartoonish!

Absolutely loving your blog and so happy that my dry robe was a wee source of inspiration for your one! Currently getting lots of use as the water is chilly in scotland now. Been trying to figure out how to follow your blog / received email notifications and can’t seem to find the button? Help appreciated!
Author
Hi Heather! Sorry that it was such a pain for you – I myself just had to look into it to figure it out, so it’s not very obvious. I think if you go here: https://wordpress.com/following/manage and enter the URL of my site, it will let you subscribe? I hope that helps! Let me know if it doesn’t and I will try to figure it out.