
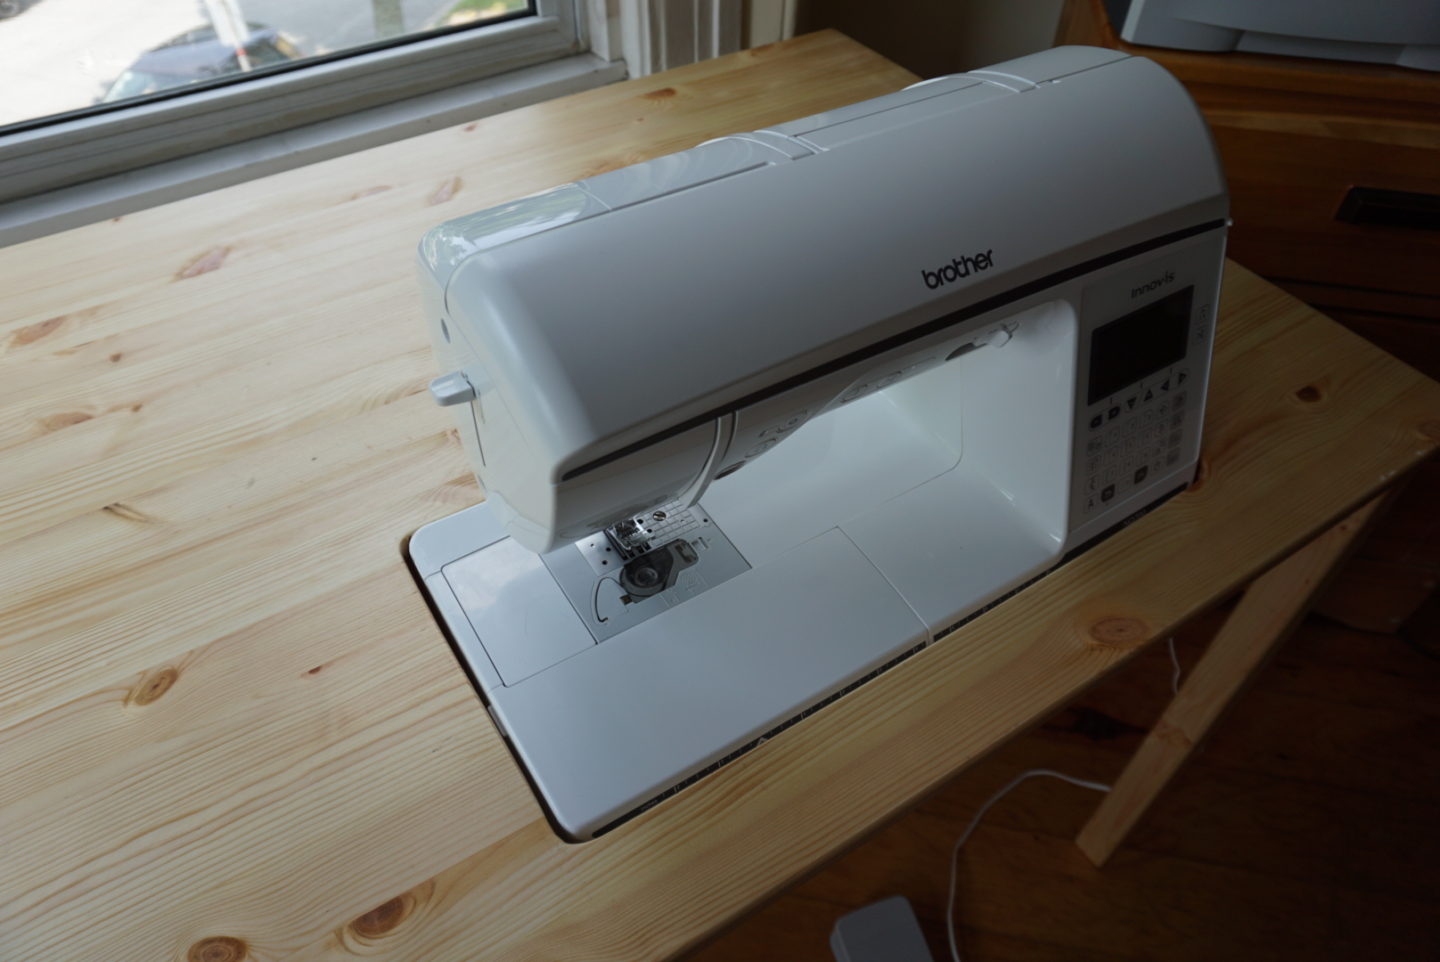
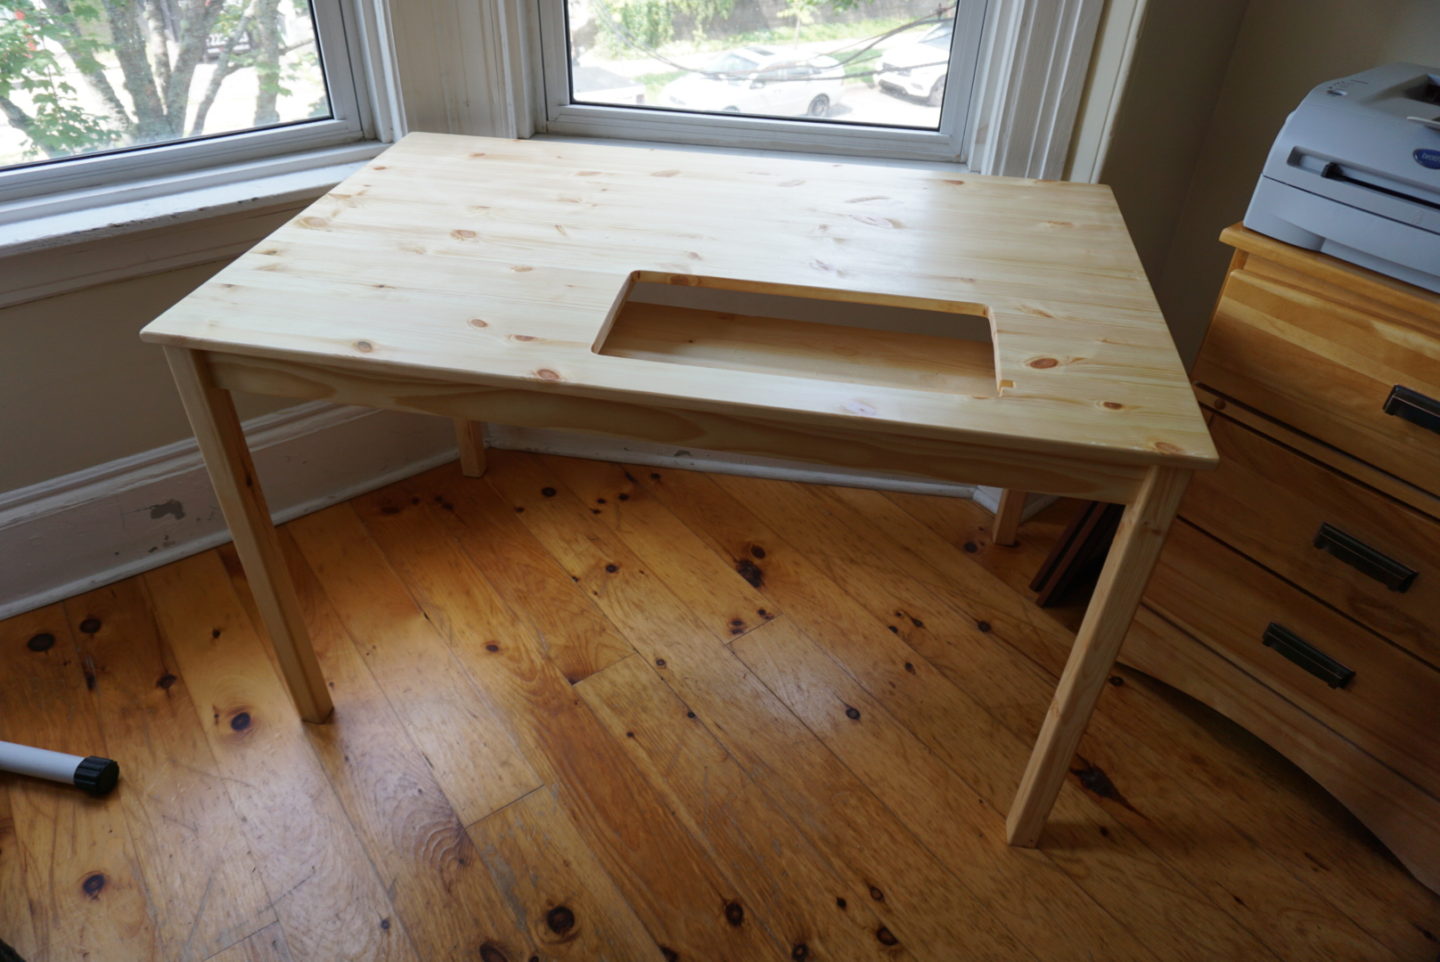
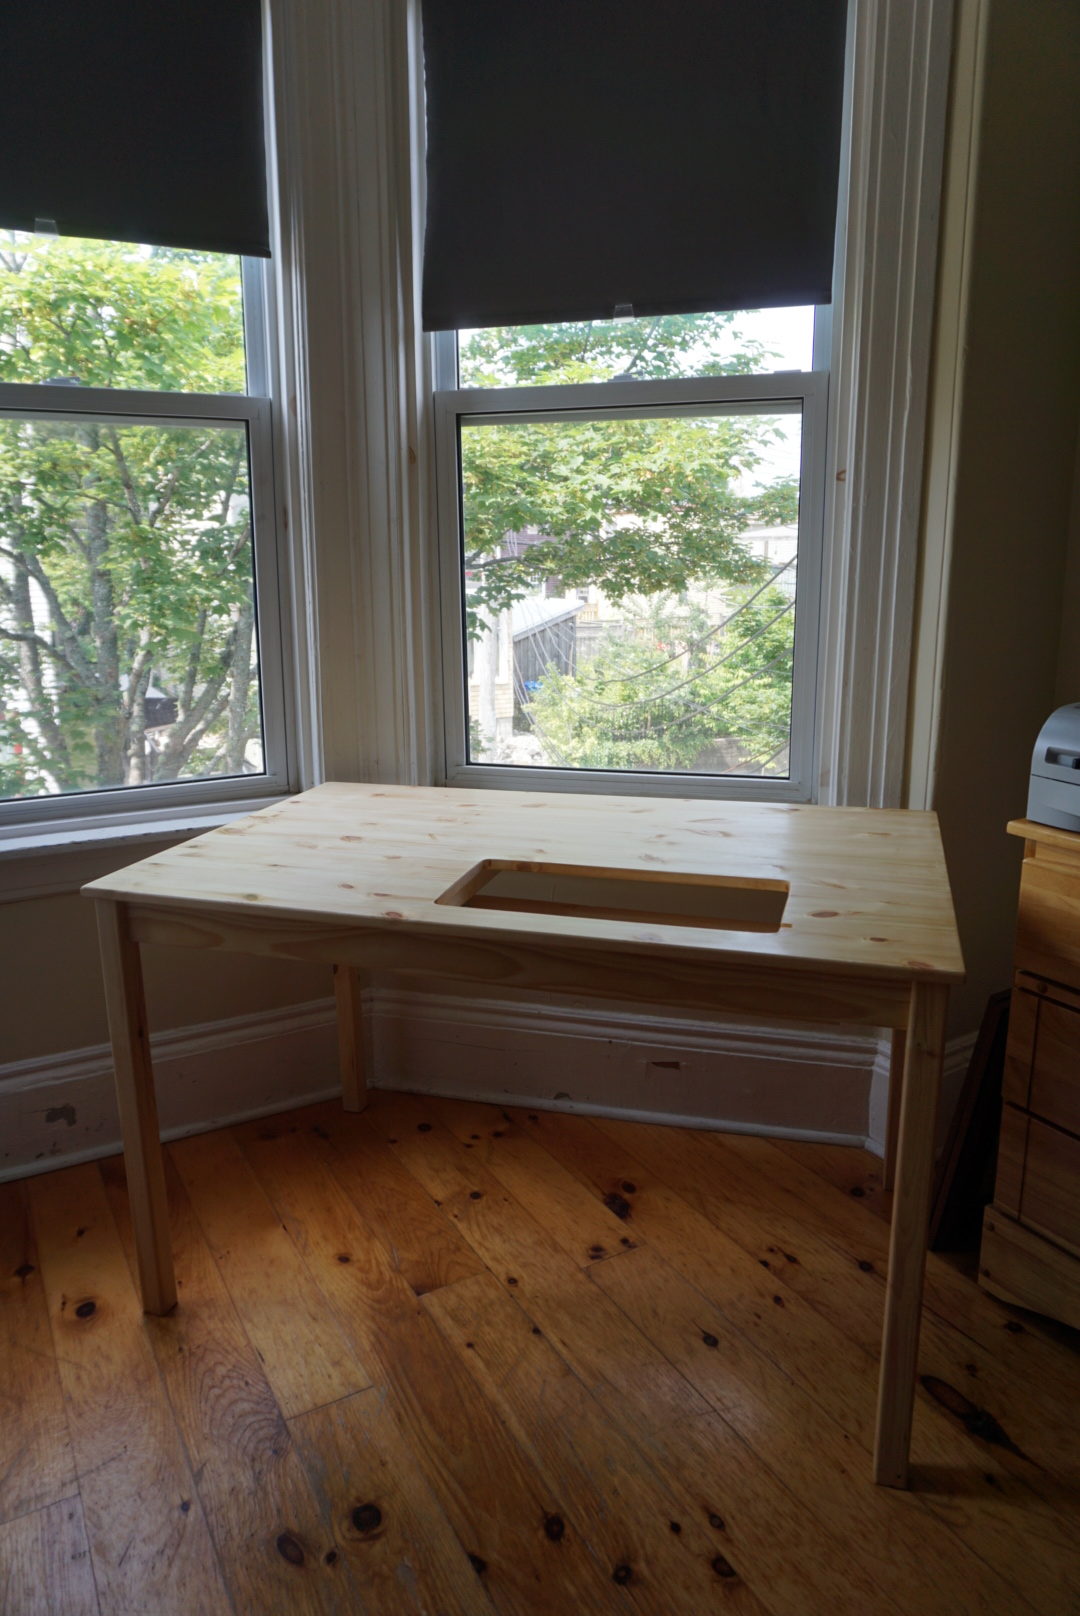
This project didn’t involve any sewing, but it IS sewing-related! If you follow me on Instagram, you may know that I am in the process of moving. We have a bit of lease overlap, which has given me some time to take care of some apartment projects during the moving process. I knew I wanted a dedicated sewing table at the new place instead of just having my sewing machine on top of a desk as I’ve always done. My sewing machine is a pretty robust lady and sometimes makes my shoulders tired from the elevation on top of the desk, so I was on the hunt for a tutorial to make a custom table that could have my sewing machine sunken into it. I found a tutorial that used an IKEA table as a base, and I was off to the races!
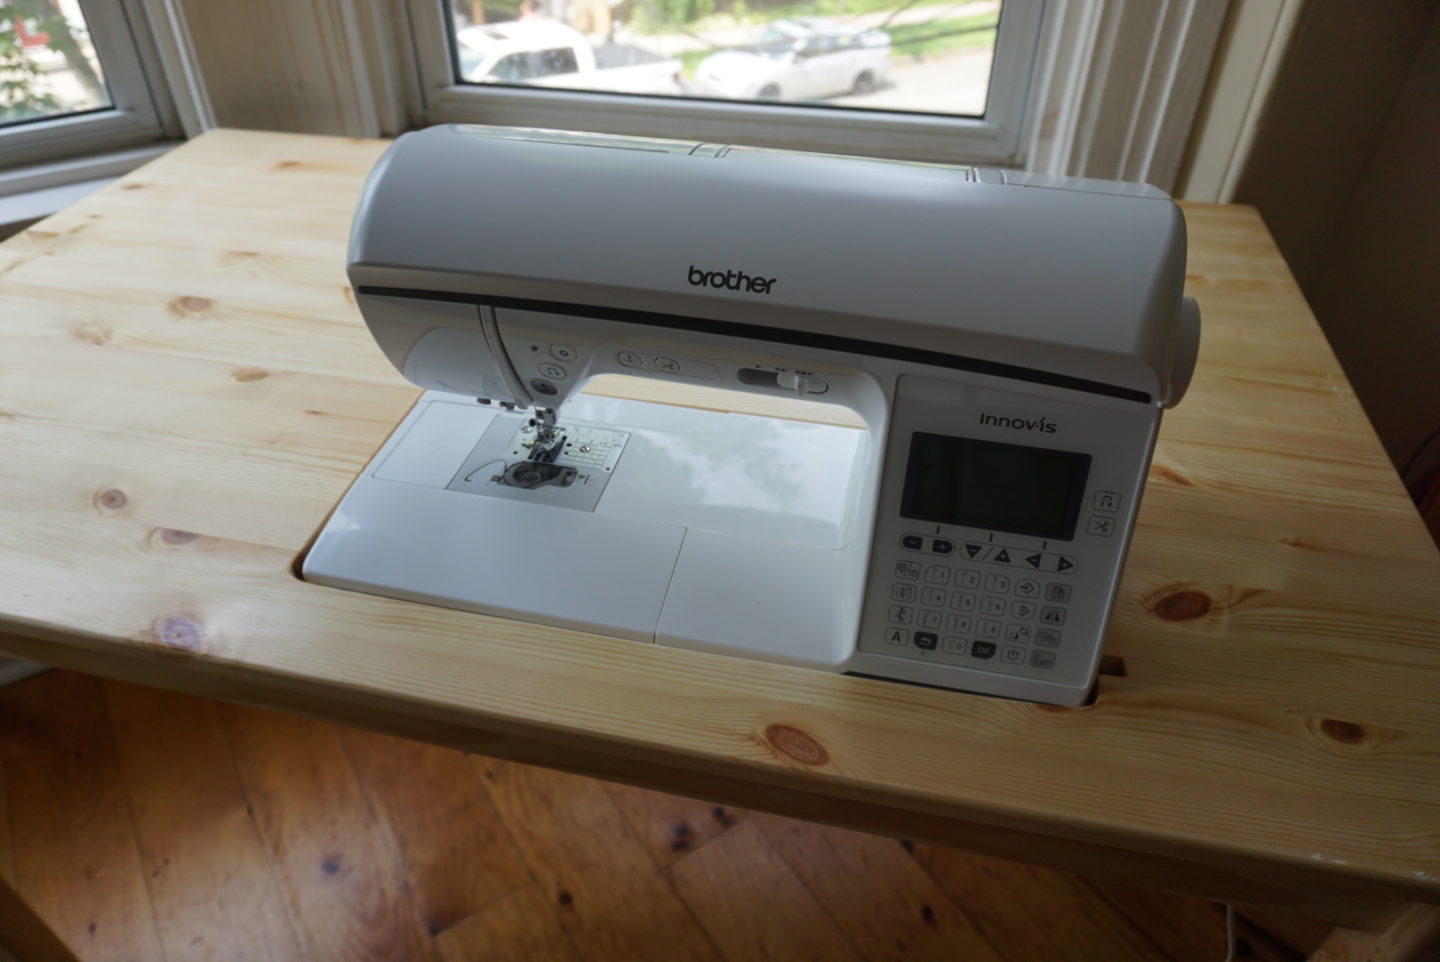
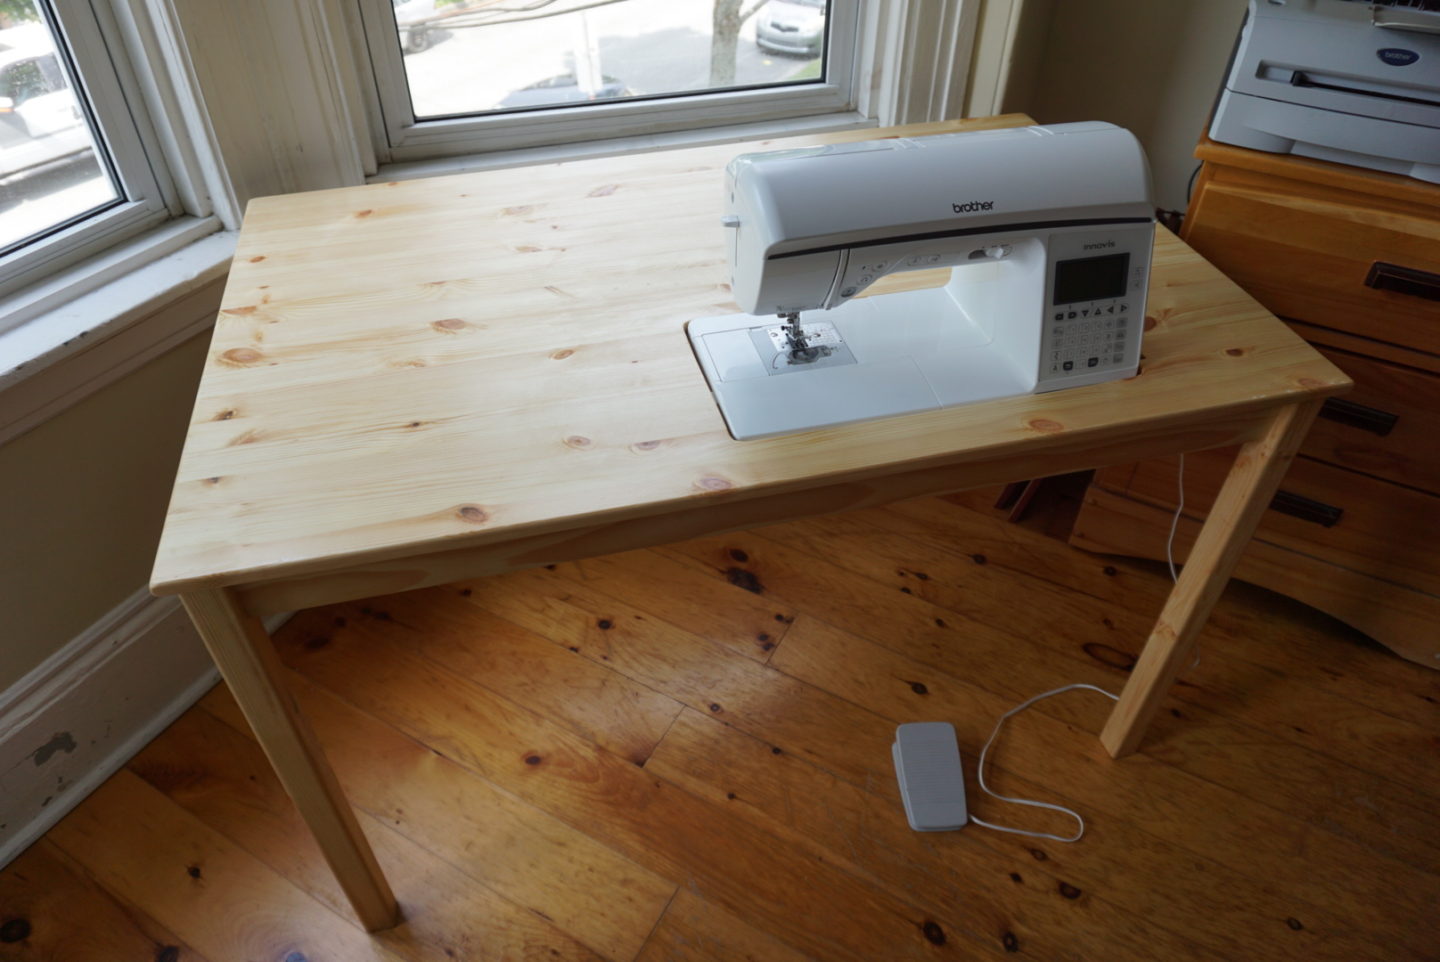
Before I go much further, I want to make it clear that this post is not a tutorial post. The tutorial I used to make this table was really great and I see no need to reinvent the wheel. I’ll be giving you the details of what I did that might be different from the tutorial and what I learned during the process that might help you if you want to make your own. The tutorial I used was this very helpful and detailed one. I started with IKEA INGO table as the base, which is a simple pine table. I like that the surface area is bigger than just the sewing machine. That’s my issue with a lot of the sewing tables available on resale marketplaces like Facebook or Kijiji – they don’t have a lot of additional space, or the additional space comes from foldable table wings, which I find can feel unstable and a bit cumbersome. Plus, my sewing machine was too big for a lot of those ones. She has a big footprint and it just seemed like I’d get a better result if I just made my own.
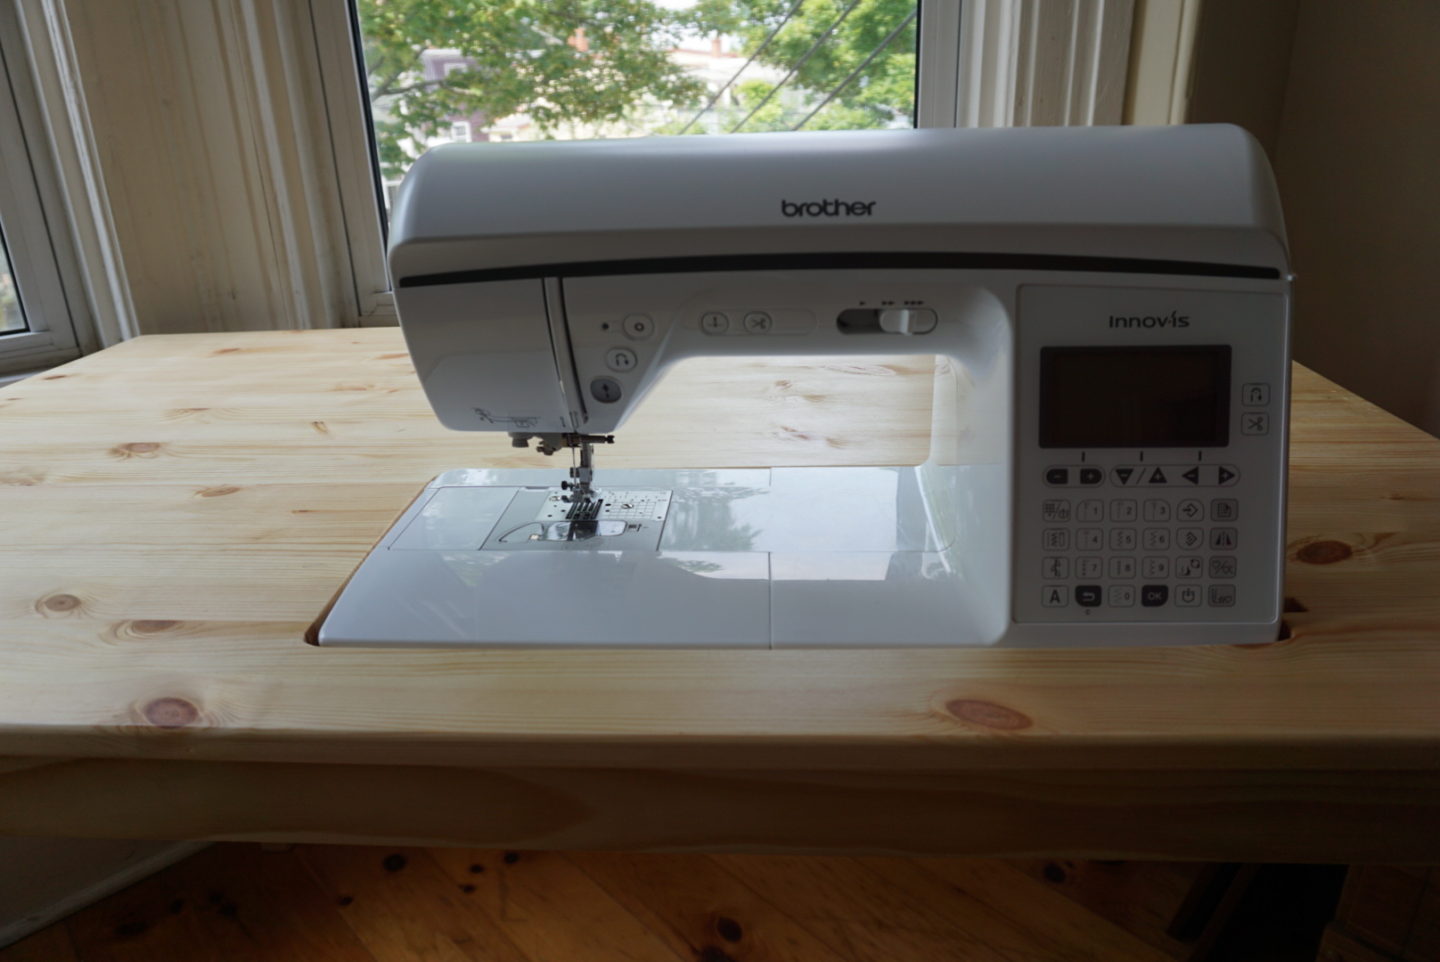
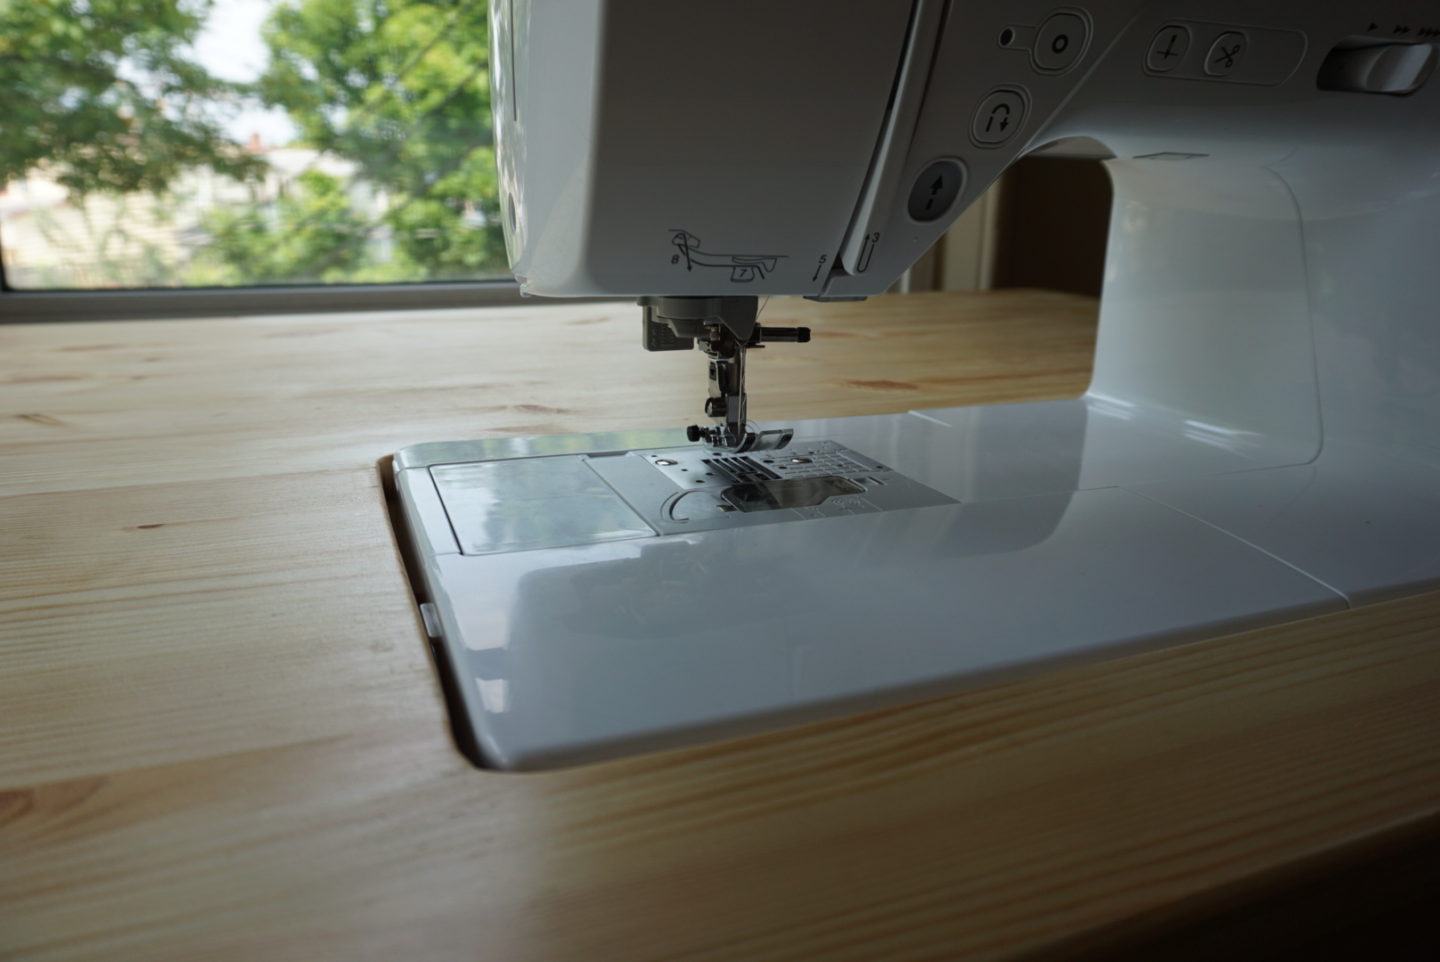
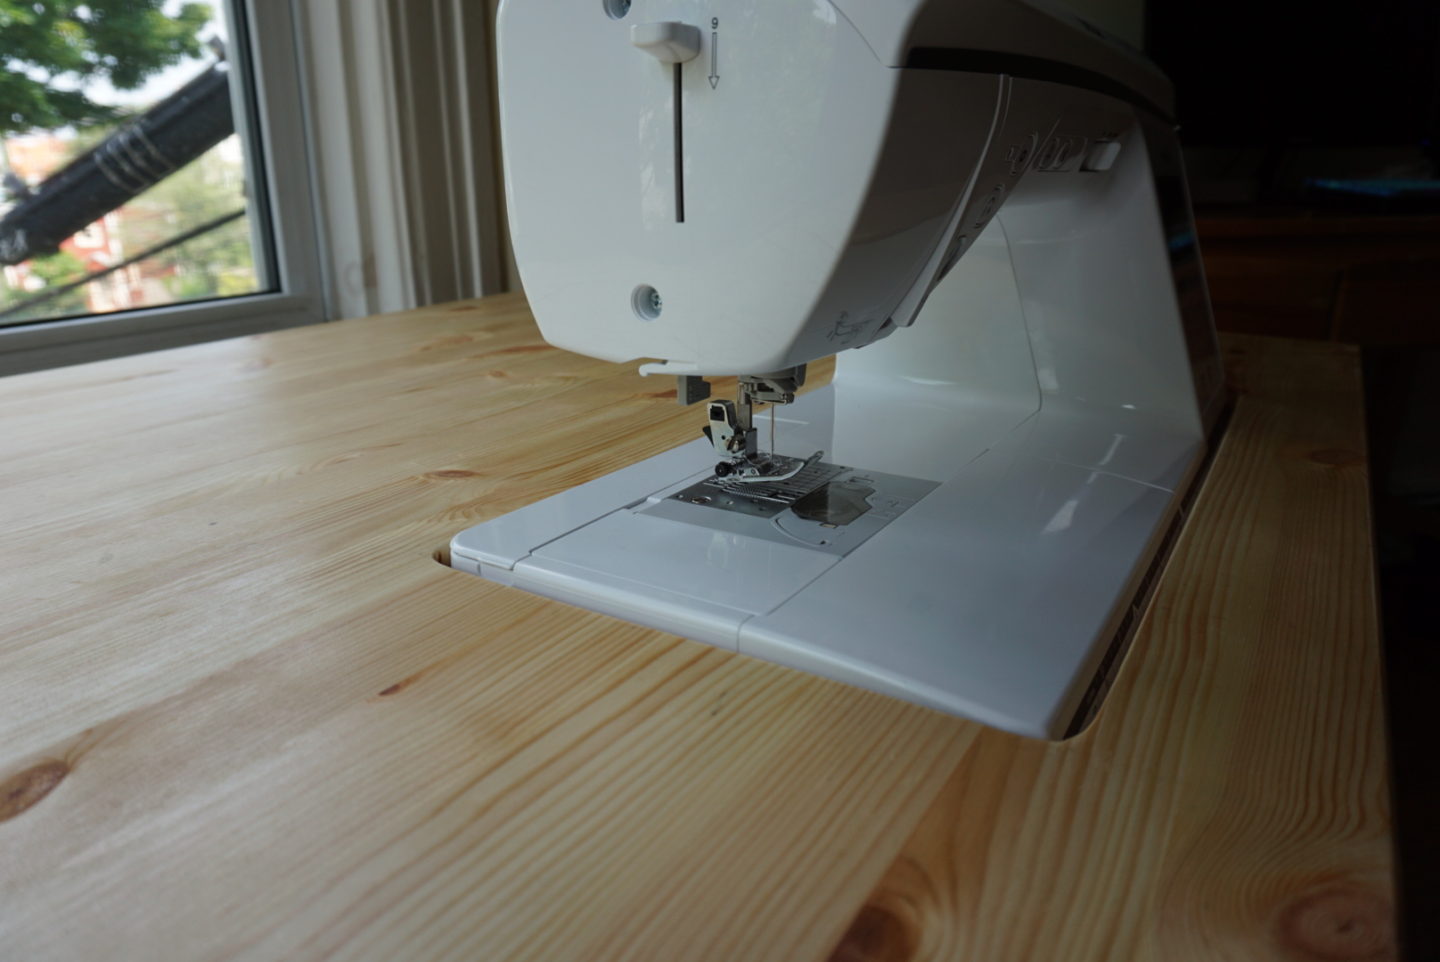
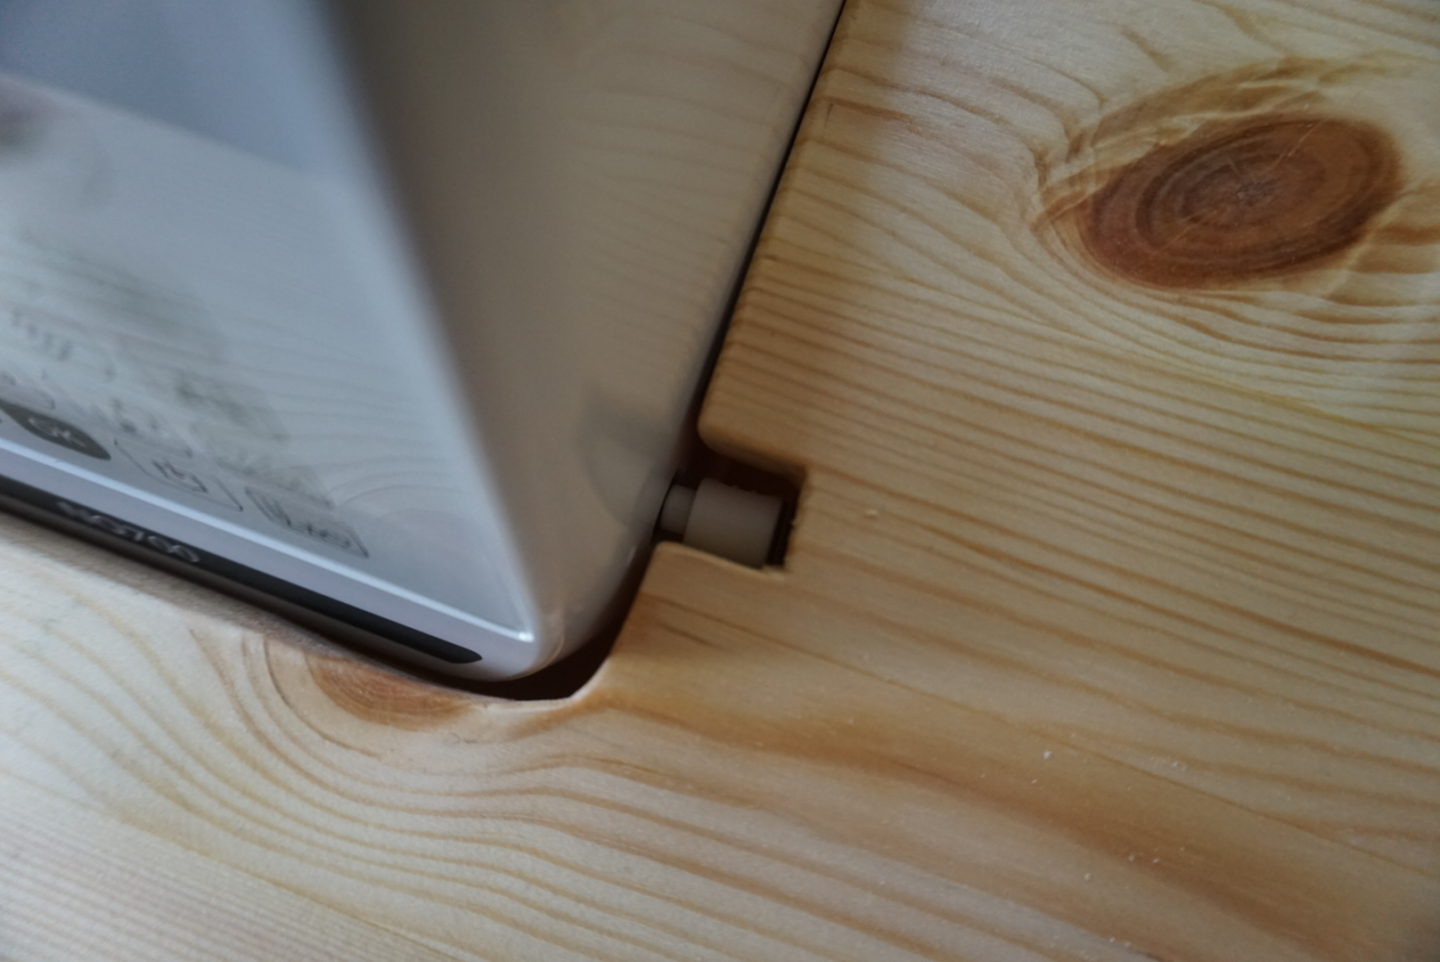
I had a lot of assistance from my friend’s dad (who also has lots of fun tools like a power sander and power saws), especially with cutting the corners of my hole. To figure out where I wanted my hole to be, I placed the sewing machine on the table and moved it around until it felt natural to use when I was sitting in a chair. We traced around it (measuring to make sure it was squared with the table edges and making sure there was enough space in front to fit the shelf – you’ll see this below in other photos) and then cut the hole with a jigsaw. After it was cut, it was a bit tight so I ended up sanding down the inside edge with the power sander until it was just the right size. It also needed space for the pedal cord to plug in, so we traced around that and then my friend’s dad cut it – I did not feel confident with such a small precise cut! I love how snug it tucks in there, as you can see below!
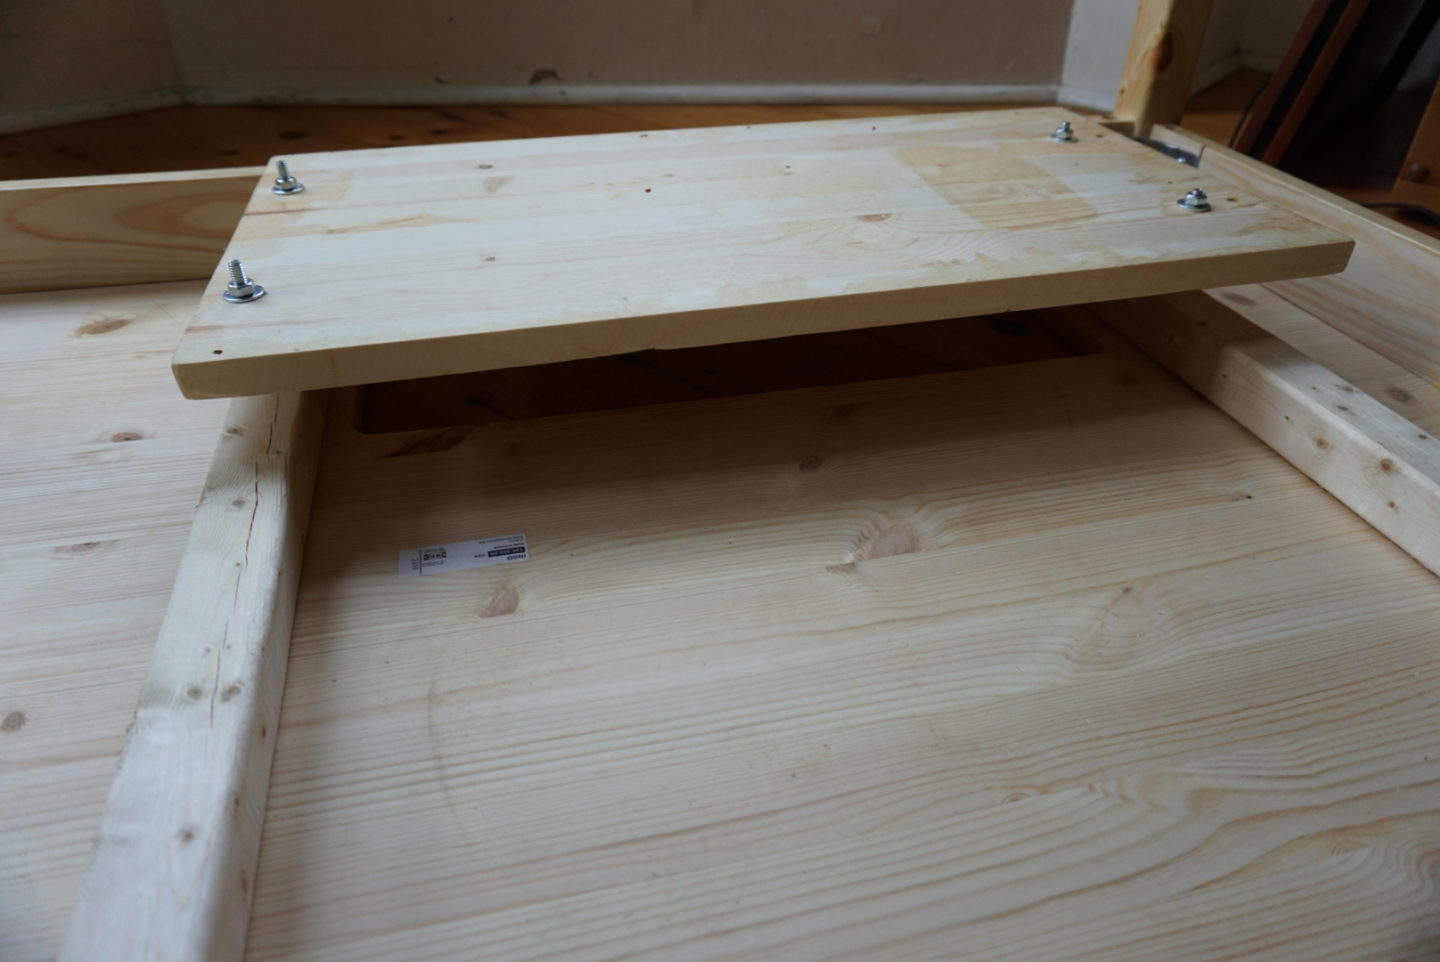
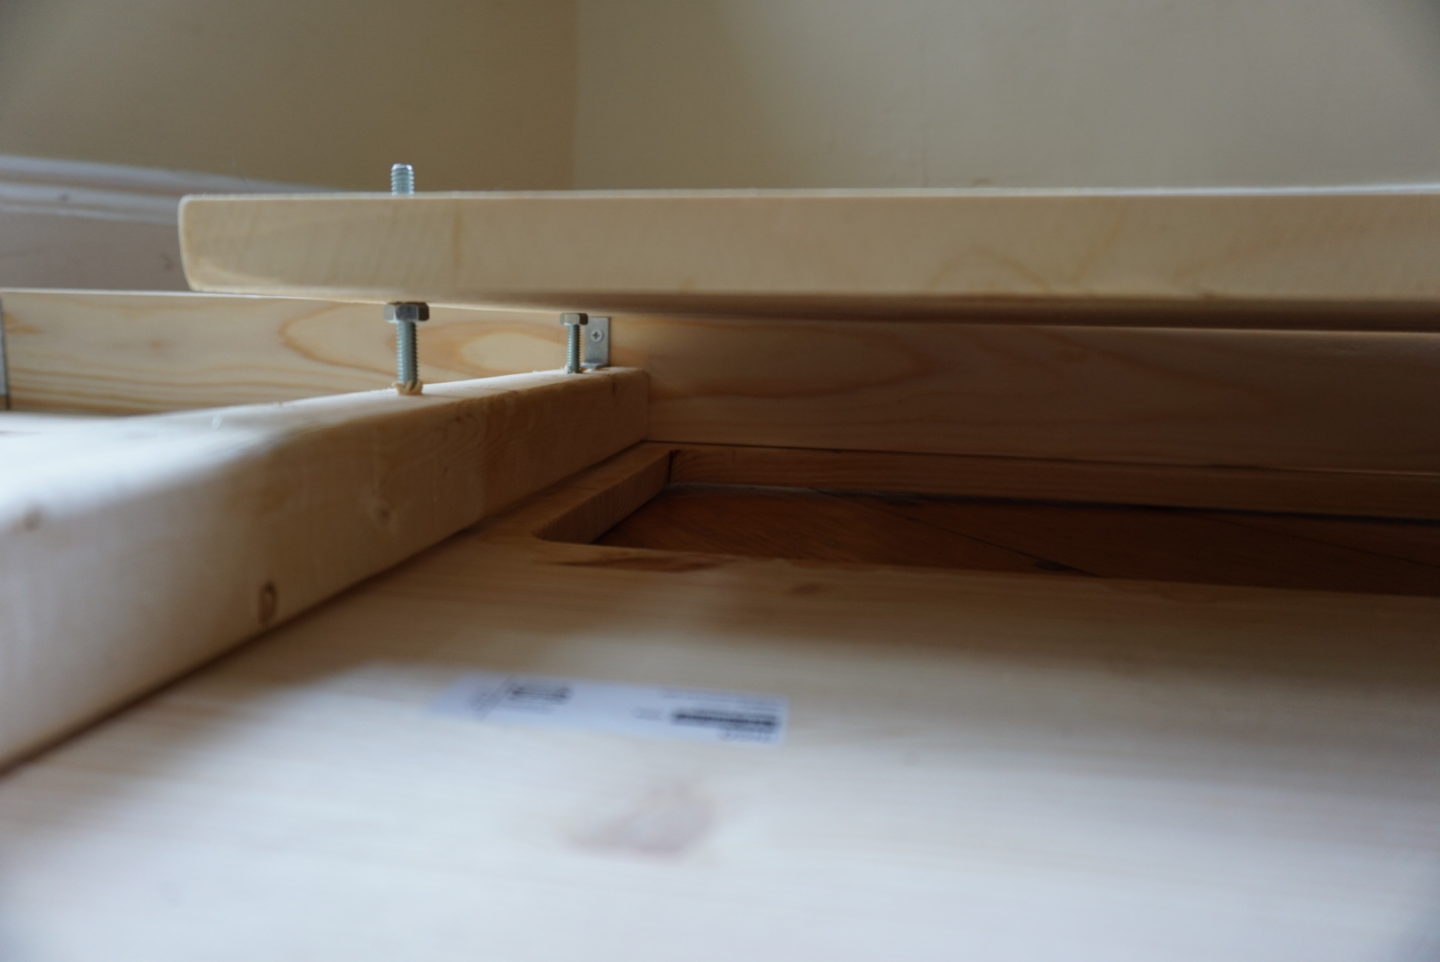
After you cut the hole, you need to make the shelf part. You should look at the original tutorial for details on this, but I used a cheap piece of wood to make the supports that run across the table, and then a precut pine shelf. I had a bit of an issue when I drilled the holes for the support bolts. I measured very well, and the shelf fit on them, and then I took it off to check something else, and when I went to put it back on it just wouldn’t fit at all?? In any configuration? So I had to redrill. Luckily there was space and it was fine, and no one will see them under the table anyway! In the tutorial, you need to countersink the tops of the bolts into your beams so they’ll sit level with the table on top, but we didn’t have a big enough countersink bit so we ended up countersinking both the beams AND the underside of the table. The tabletop is pretty thick so there was a bit of wiggle room there to be able to do that, and the bolts sit fine now.
A new thing I learned all by myself was how to make a pocket hole! Those are the things you’ve likely seen on lots of furniture where a screw hole goes diagonally into a piece of wood to allow it to screw into something else perpendicularly without having to have a screw that is a mile long. It was weird to set up with the jig and a clamp, but then worked like magic once I got to the drilling part! It kind of reminded me of the burrito method for shirt-making where it feels wrong the whole time but then turns out exactly as you expected. There’s a few detail shots below so you can get a sense of how the shelf is held up. The great thing about the nuts and bolts is that it means it’s very easy to adjust the height of your shelf on all four corners. I used a level app on my phone to check that my sewing machine was level – I’m not sure why some of the nuts ended up higher or lower on the bolts, but it IS level, which is what matters! My sewing machine slopes down at the front, so I compromised on the height of the machine so that the front wasn’t super low and the back wasn’t sticking out too much.
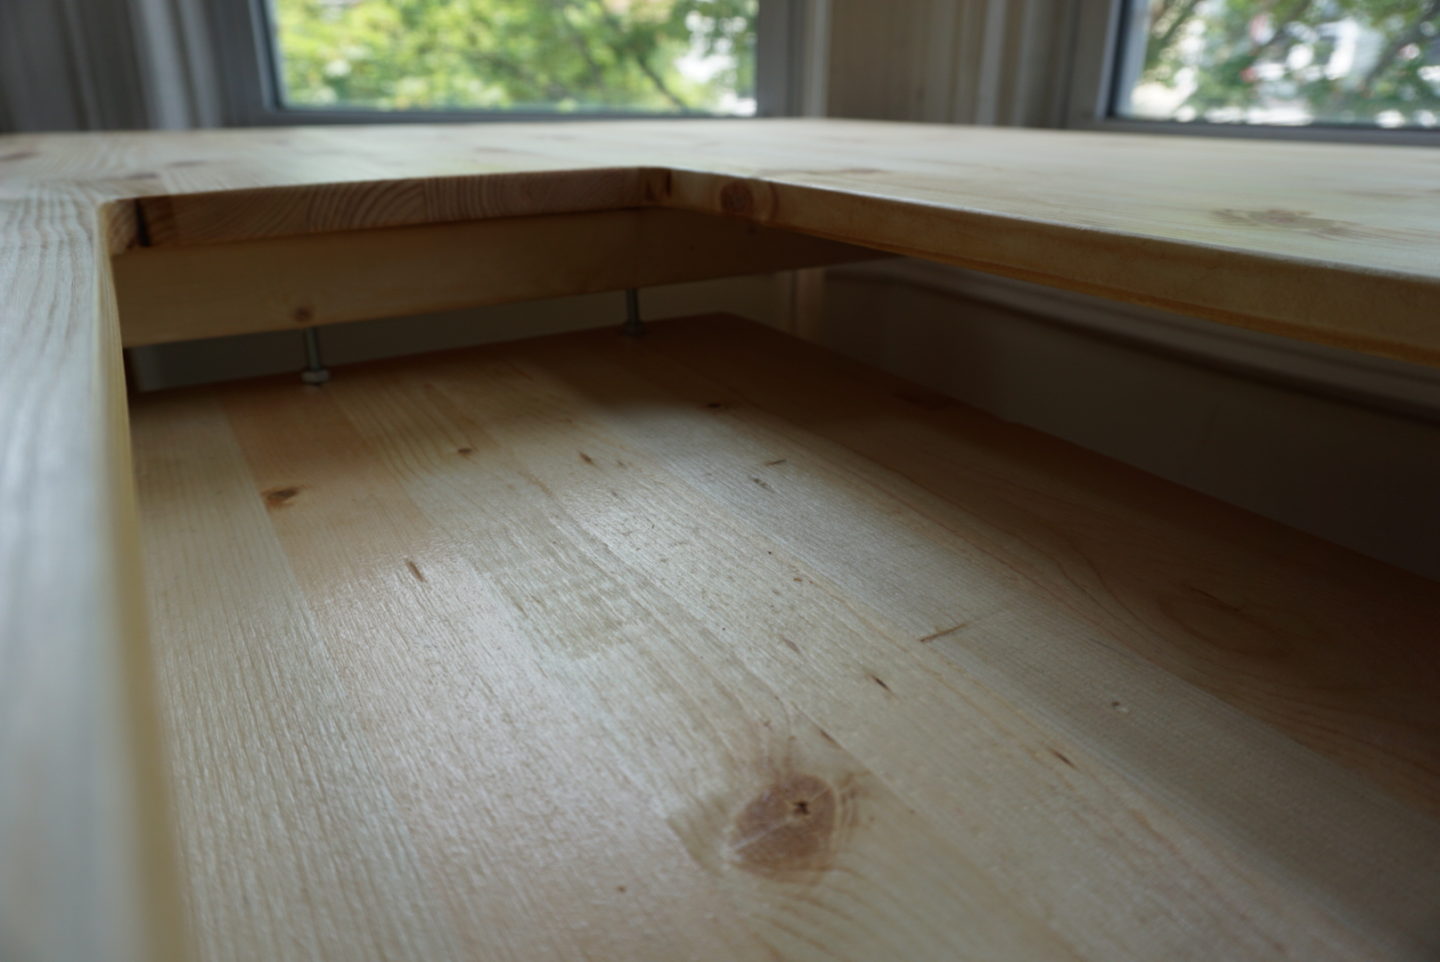
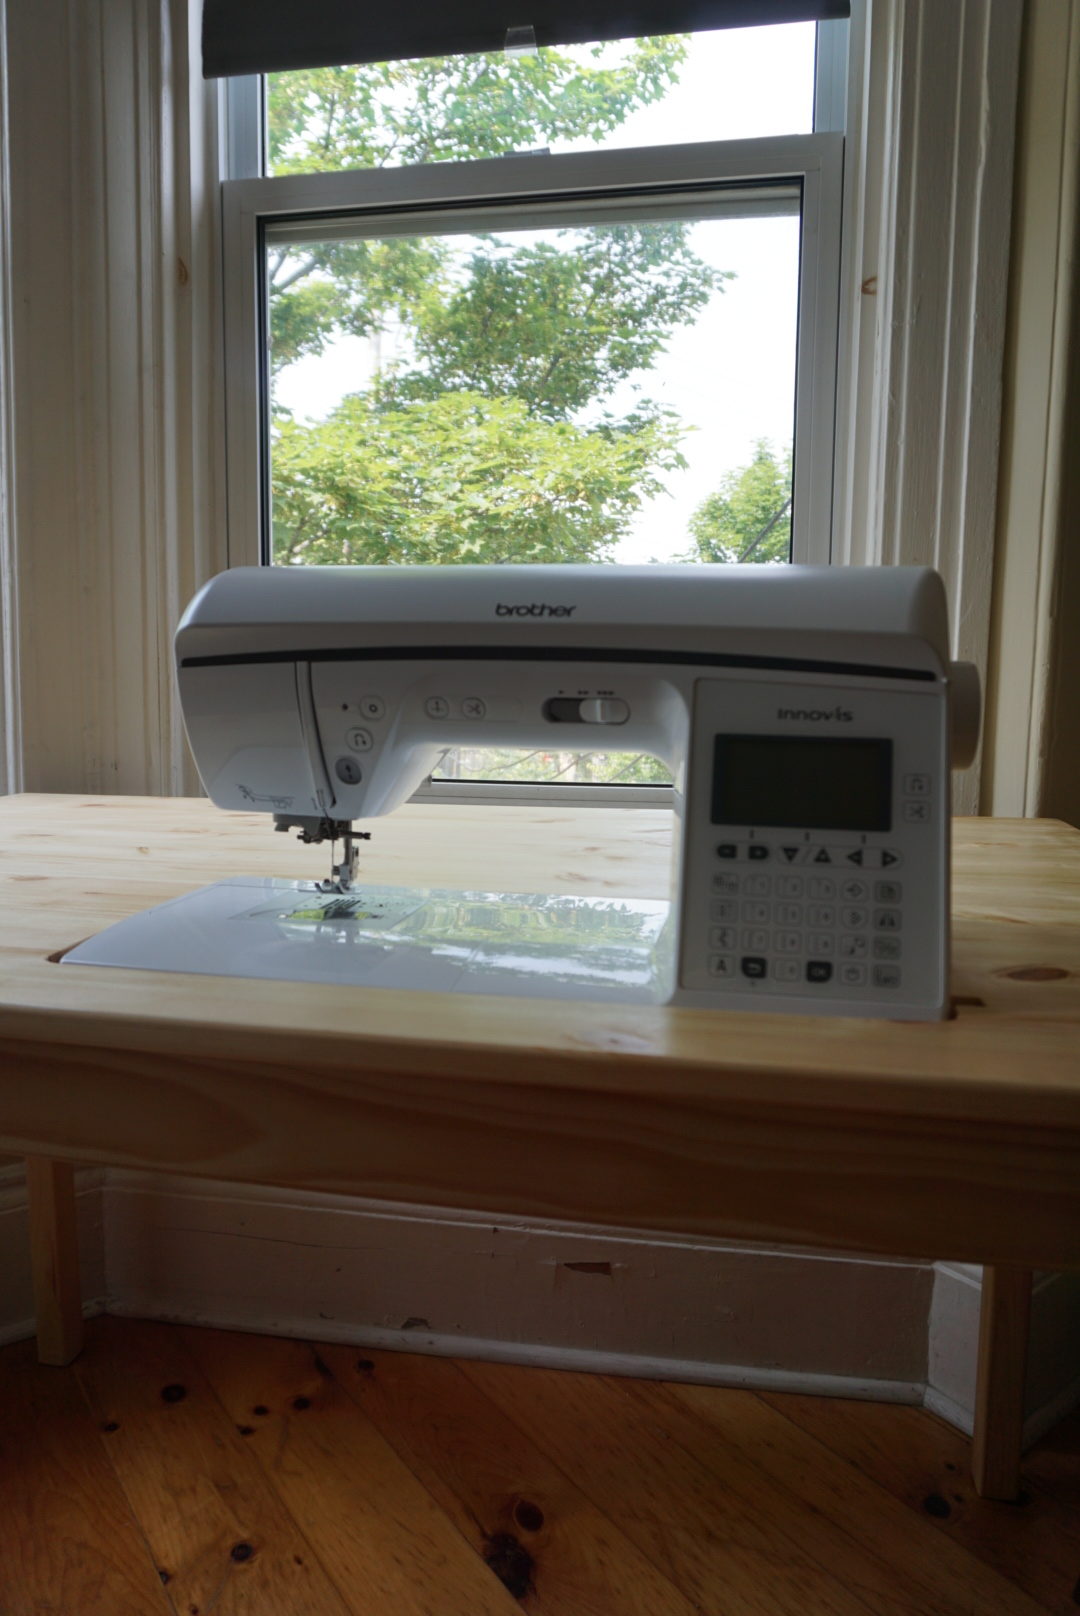
As you can see below, the cords tuck nicely into the gap between the shelf and the tabletop. If your sewing machine isn’t as deep as mine, you might need to experiment with cords and cutouts during the hole-cutting phase of the process. It also depends a lot on where the plug-in locations are on the machine. My pedal hole is directly in line with the tabletop, so I had to make that hole for it to fit in. The power cord is lower down on the machine (black cord) so I can plug it into the socket after the machine is snug in the hole. With the pedal cord, I need to feed it through the side of the hole, plug it into the machine on the table, and then nestle the whole unit into the hole. Since it’s going to live in the table and won’t get moved very often, this isn’t a big deal. My on/off switch is a little hidden by the table, but if I just lift the back corner of the machine a teeny bit, I can easily access it. As you can see in the second photo below, the location of your holes in the shelf is very very important because you need to make sure it covers the entirety of the hole you’ve cut for your machine, but also that it isn’t sitting too far forward. If it’s too far forward, you won’t be able to raise it high enough for your sewing machine to be at a useful height because it will be jammed underneath the outside edge of the table. If you take this into account at the beginning, it’ll save you some heartache down the road.
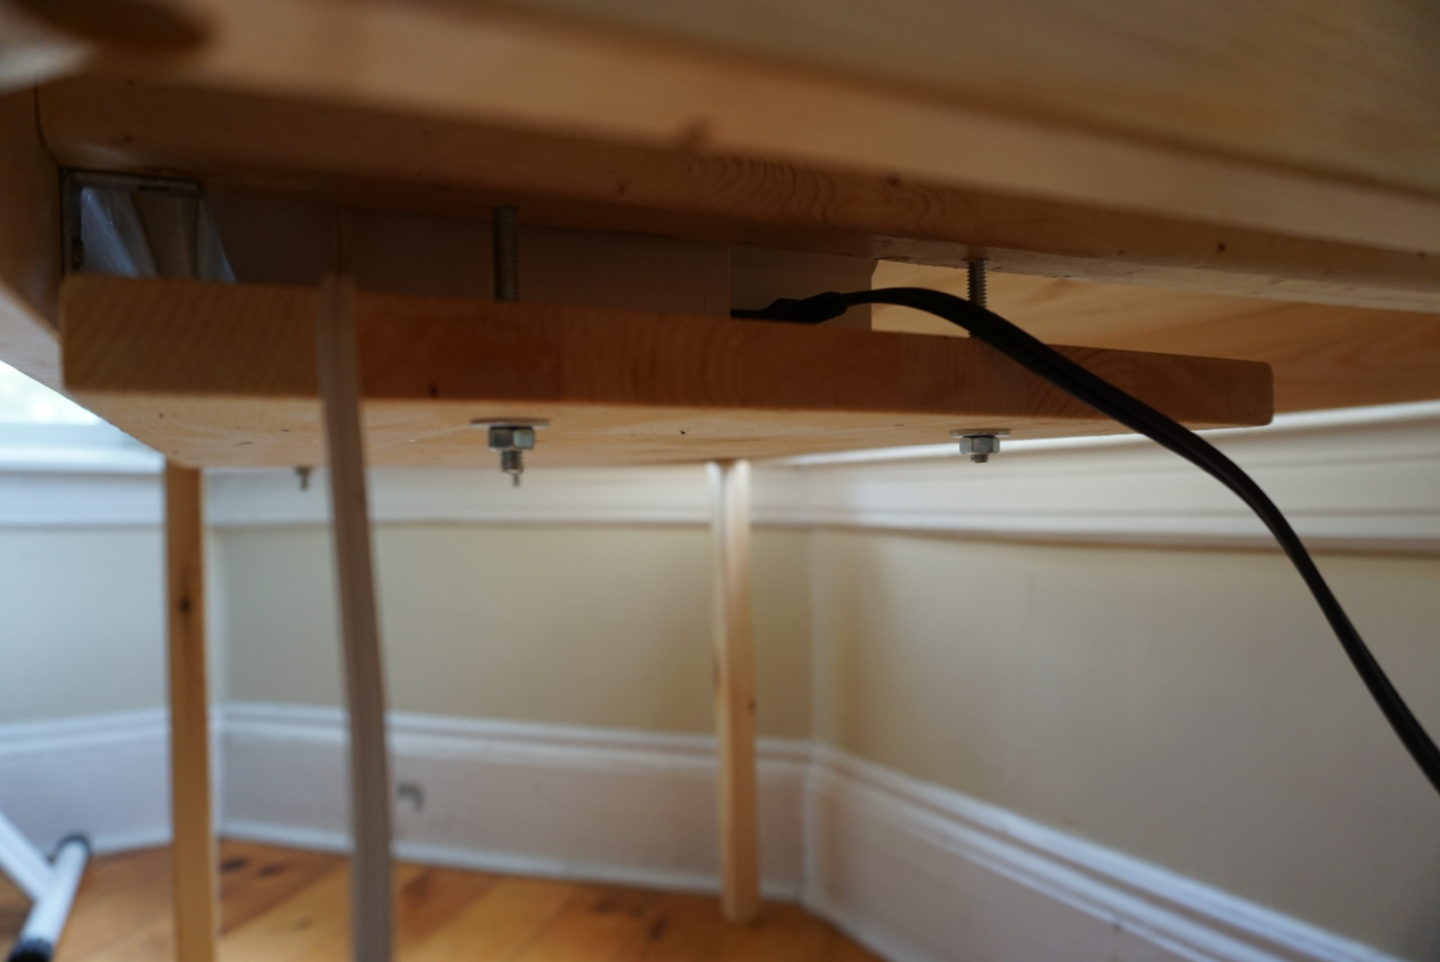
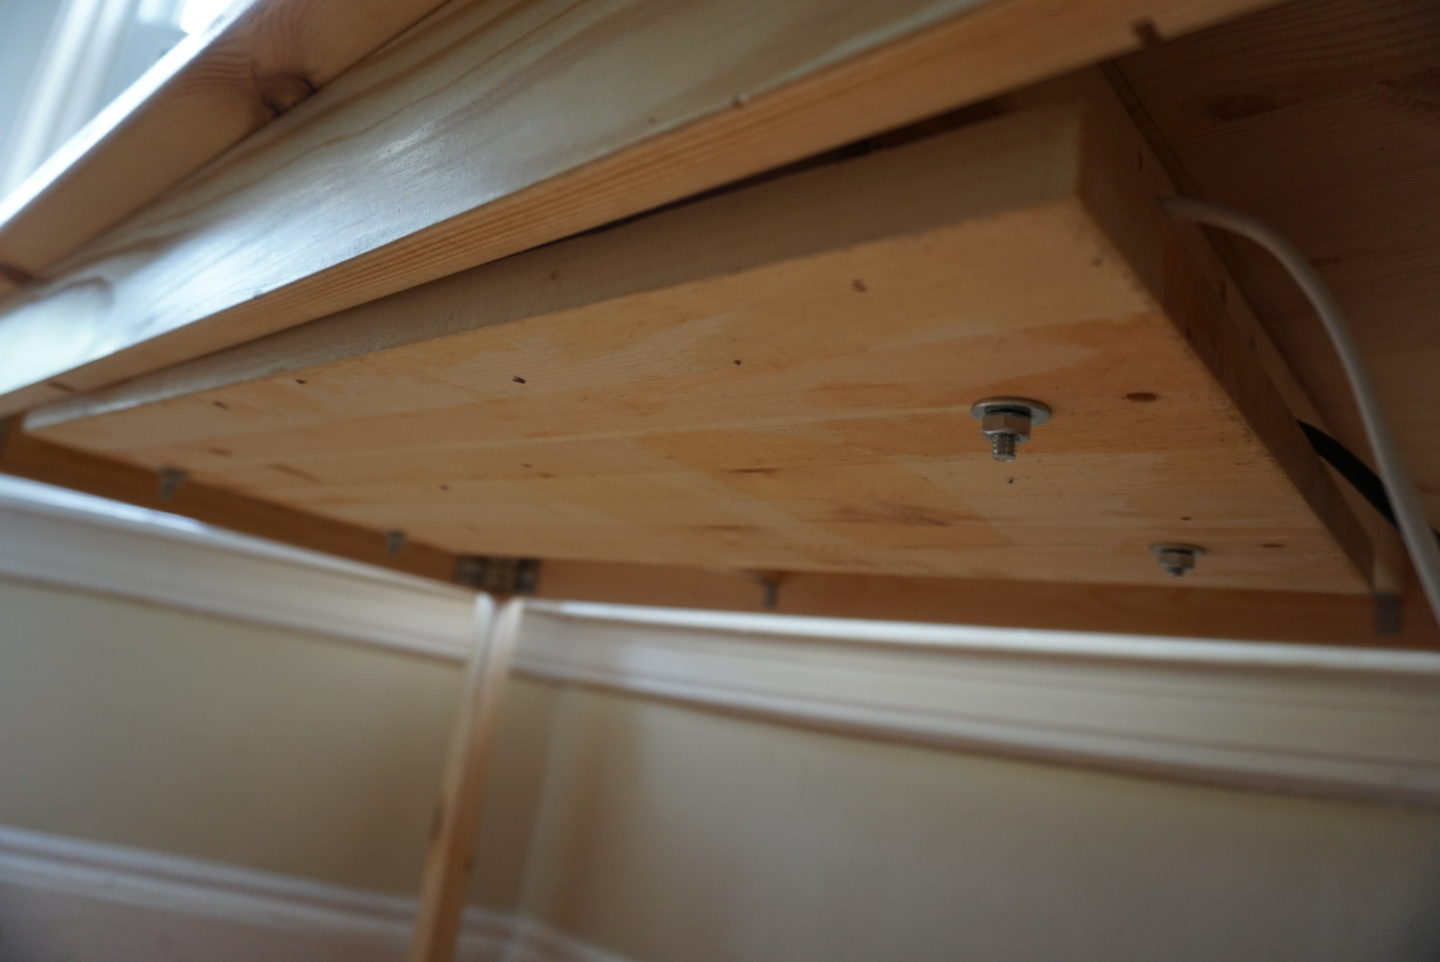

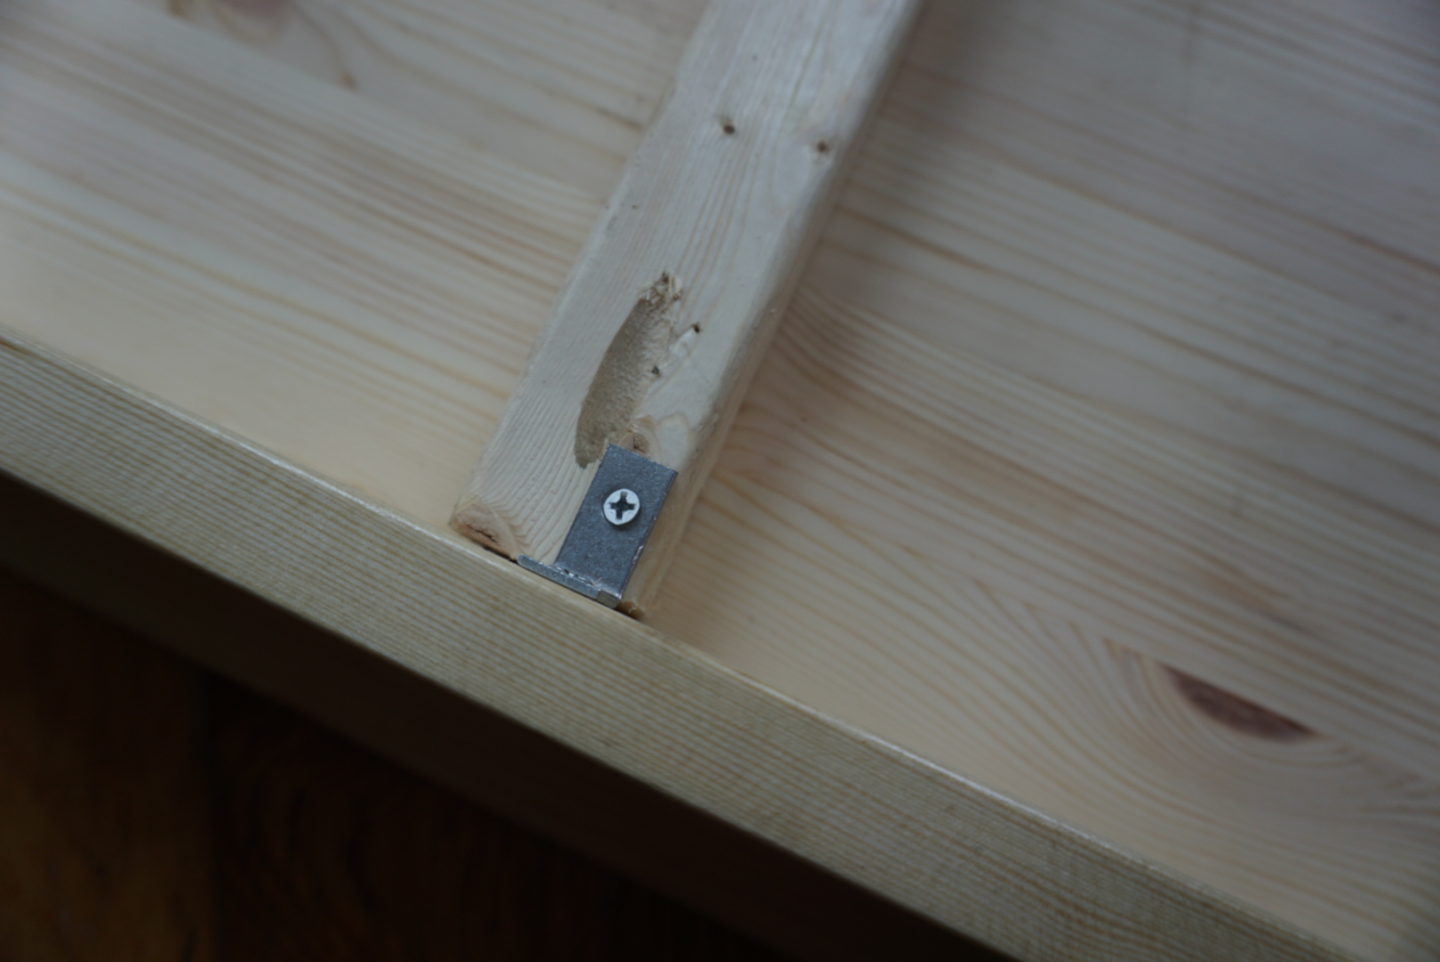
As you can see in the photo above, I added small L-brackets to each end of my support beams. My machine is heavy, and it felt precarious to have the entire weight of the machine sitting on four screws. These little brackets came with short screws that worked well with the table and didn’t poke through to the other side, and it all feels a LOT more secure. This isn’t something that was part of the original tutorial, but I highly recommend adding this step for stability. Also, you can see the pocket hole in this photo that I was talking about earlier! Isn’t it pretty?!
After it was all assembled, I did two coats of a clear varnish to protect the table since it’s just naked wood otherwise and I am prone to spilling and messes. And that’s it! It took me some time due to my inexperience, but I think it turned out really well and I’m very excited to use it! All of my fabric and patterns are moved into the new apartment, so I can start figuring out the best organization system for the space and finally get sewing again!
Oh that is awesome. It’s the like the biggest sewing bed ever. 👀 Nothing is going to drag or pull! It’s beautiful!
Is it going to make it challenging to sew sleeves/pants hems and so on? I usually sew those ‘around’ the machine, but I’m still very tempted by this set-up.
Author
It’s funny, my friend also asked me about the sleeve/pants hems thing with this set up, but I actually rarely if ever sew things ‘around’ the machine. I pretty much always sew the from inside the circle, even before this set up, so it’s been a smooth transition!
I love this. Can it be modified for a machine that has a front load bobbin and a knee lift? I’m thinking I could use an acrylic insert for my machine pull this out and the free arm Is available.
Author
I think maybe you could for the knee lift, but I think it would depend on your machine height and other factors. Maybe do some experimenting with measurements? The front loading bobbin might be more of an issue – if mine was front loading it would be a huge hassle to change it while it’s in the table. Sorry I can’t be more specifically helpful!
Can you tell me the table you got
Author
Hi Marijke! I used the IKEA INGO table as my base, but I don’t think they make that particular model anymore. The PINNTORP might be a good current option, but as long as you can cut a hole in the top, you could use a lot of different things!