
I’m back! With a new party trick! I tried out block printing and I’m already excited to do it again. I’d tried it once before a whiiiile ago and had lofty goals of printing on a handmade garment except didn’t know enough to know that I should’ve printed on flat fabric pre-assembly and instead assembled the dress and then printed some very inconsistent fish on it. Shockingly I never wear that dress. Let’s pretend it never happened and reset the clock on block printing so I can tell you about this much more successful adventure!
I’ve followed Jen Hewett on Instagram for a long time, and bought her book about block printing and pattern when it first came out. I read through it but never found the time to actually put it into action. Then came quarantine, and BluPrint made all of their classes free to watch for a couple weeks. Jen Hewett has a class all about the topics covered in her book and I watched the whole thing. It was so helpful and I highly recommend the class! It made me feel a bit more confident to tackle block printing on my own, so off I went!
The first thing I did was assemble all of my supplies. This included screen-printing ink (not block printing ink, she has very good reasons for why she prefers screen-printing ink instead), soft quick carve blocks, a plastic rectangle to use as an inking plate, a paint roller and covers, a carving tool (I borrowed my sister’s from when she was in art school), a barren (a thing you’ll see in photos below that helps apply even pressure when printing and saves your fingers/wrists), and a big ruler. I think that’s it, or at least all the important bits. Then, I decided to use one of the designs from Jen’s book as my first printing project. I was initially going to design my own but in retrospect I’m glad I didn’t because I was able to focus on this project as “practice” instead of trying to make a Work of Art. I definitely want to make my own design for next time though!
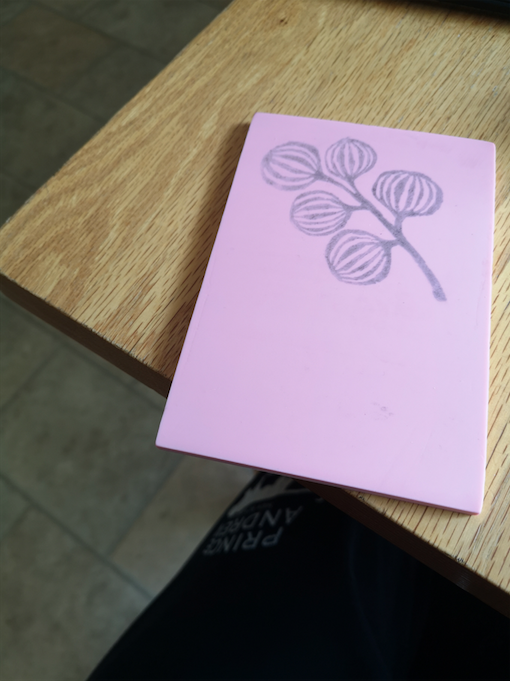
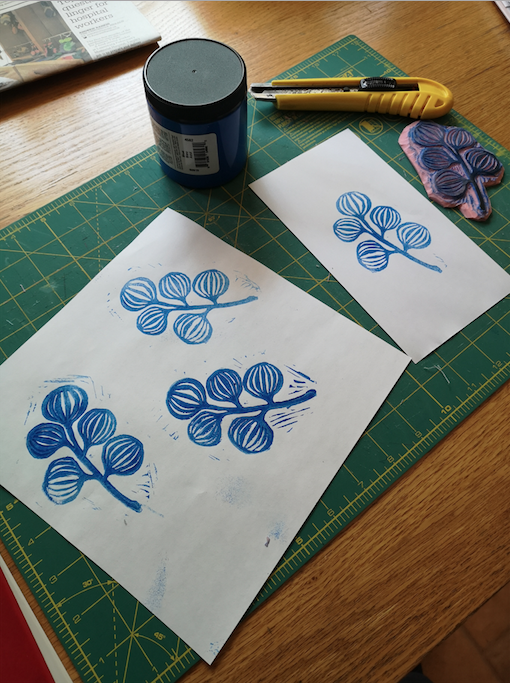
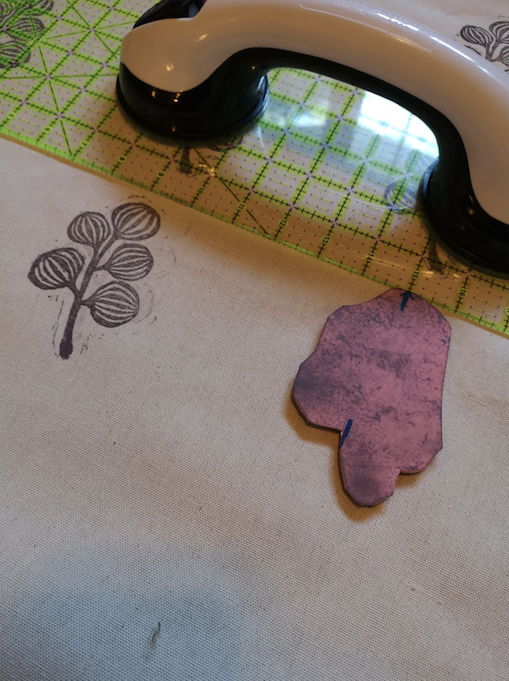
I photocopied the design out of the book, coloured it all in thoroughly with pencil, and then rubbed it from the back onto the block so it would transfer. You then use the carving tool to carve out the parts you DON’T want to print. As you can see above, I did a few test prints on paper with it after I was done in order to check how much background noise was coming out around the edges, and carved away the extra bits until there wasn’t as much noise. For the record, I used the knife in the picture above to trim the shape of the block, not to carve it! Definitely not the right tool for carving.

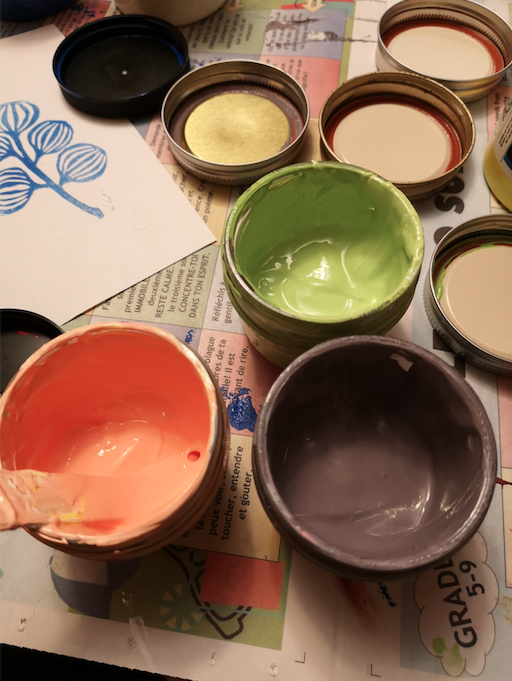
After I carved my block, I mixed up three colours of ink to use. Rookie that I am, I learned through my first big botched batch of ink that you should start with white and then add the colours to it instead of adding colours directly to each other. I’m definitely not a painter! I also initially was mixing the colours in a normal mason jar but the opening was not ideal for stirring and it was too tall. So I switched to the smaller ones pictured above and it worked muuuch better.
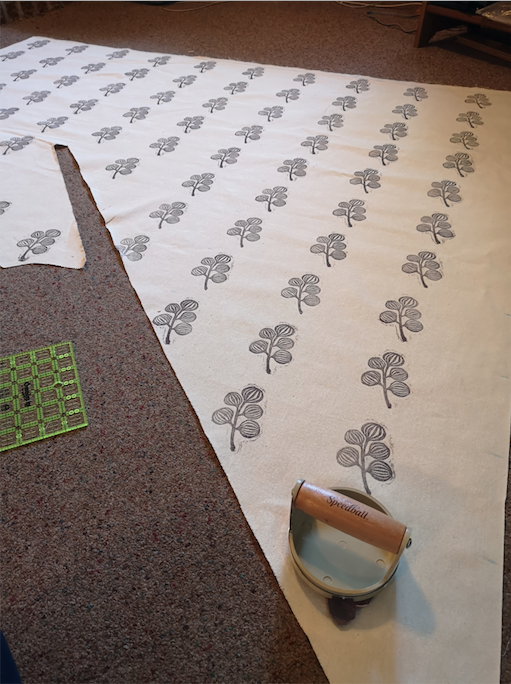
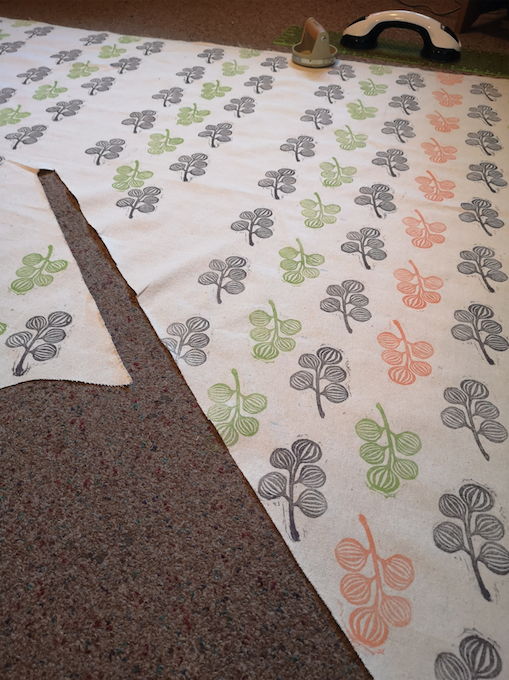
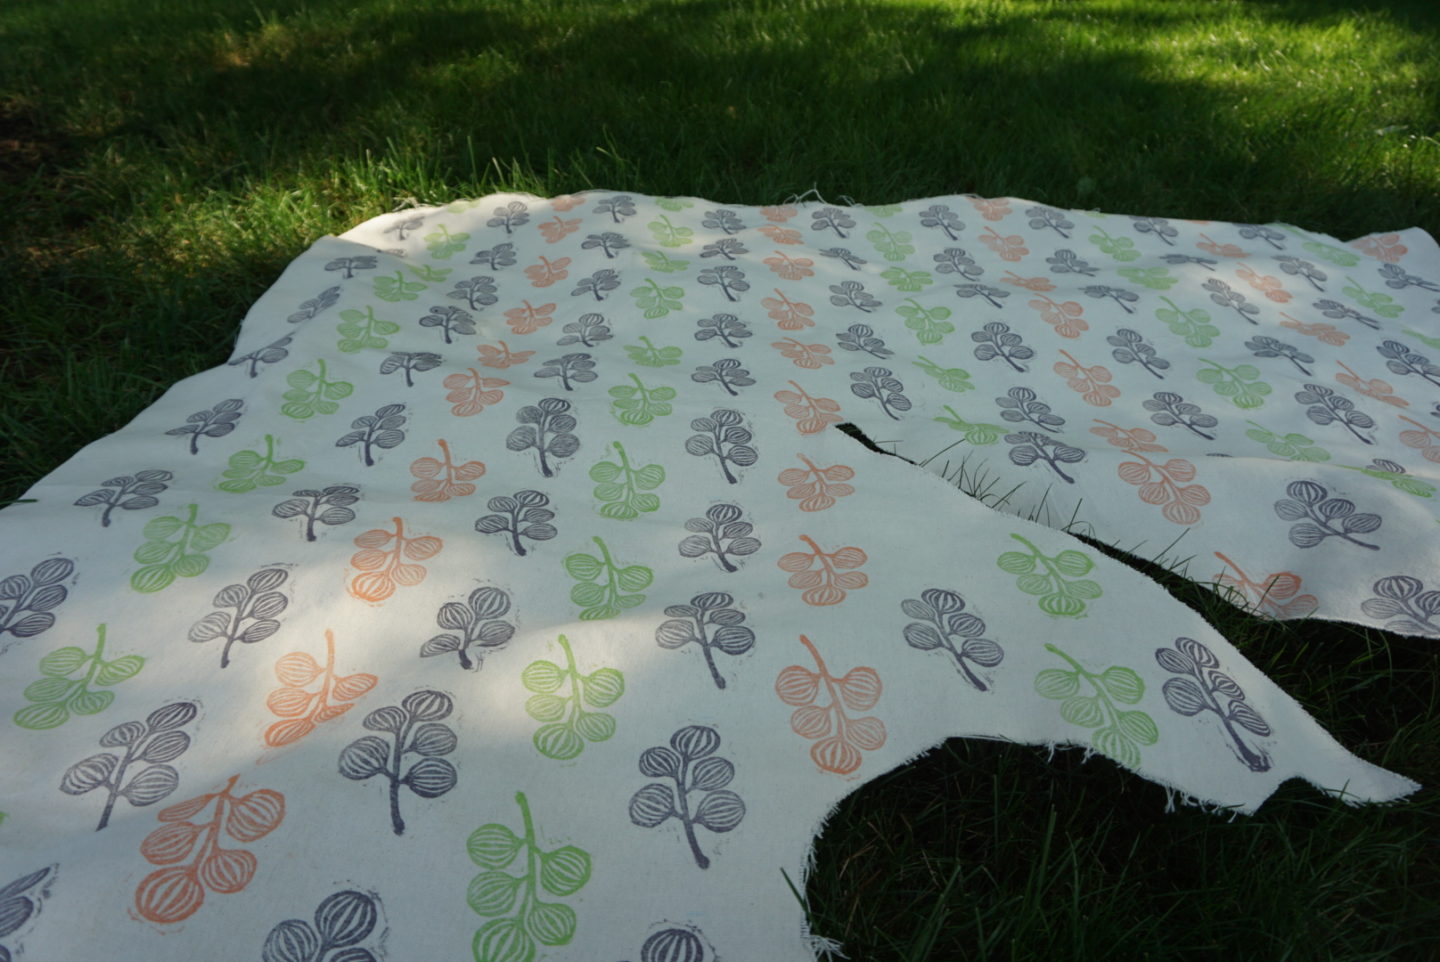
Then, I waited about a week and then did the printing yesterday. I’m finding the slowed down pace that resulted from quarantine has been good for me to practice not rushing into things if I’m not in the mood to do them, so then when I actually do them I enjoy them a lot more! I had a pretty big piece of natural cotton canvas that was leftover from when I helped my friend make a pottery apron quite a while ago. Hence why it has weird shapes cut out of it.
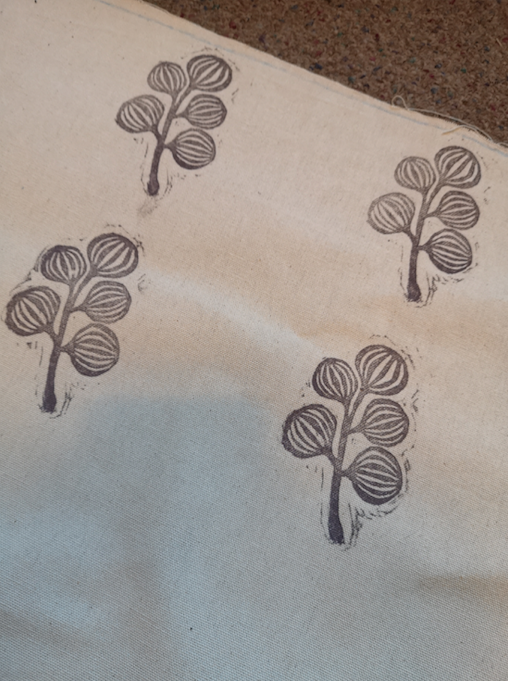
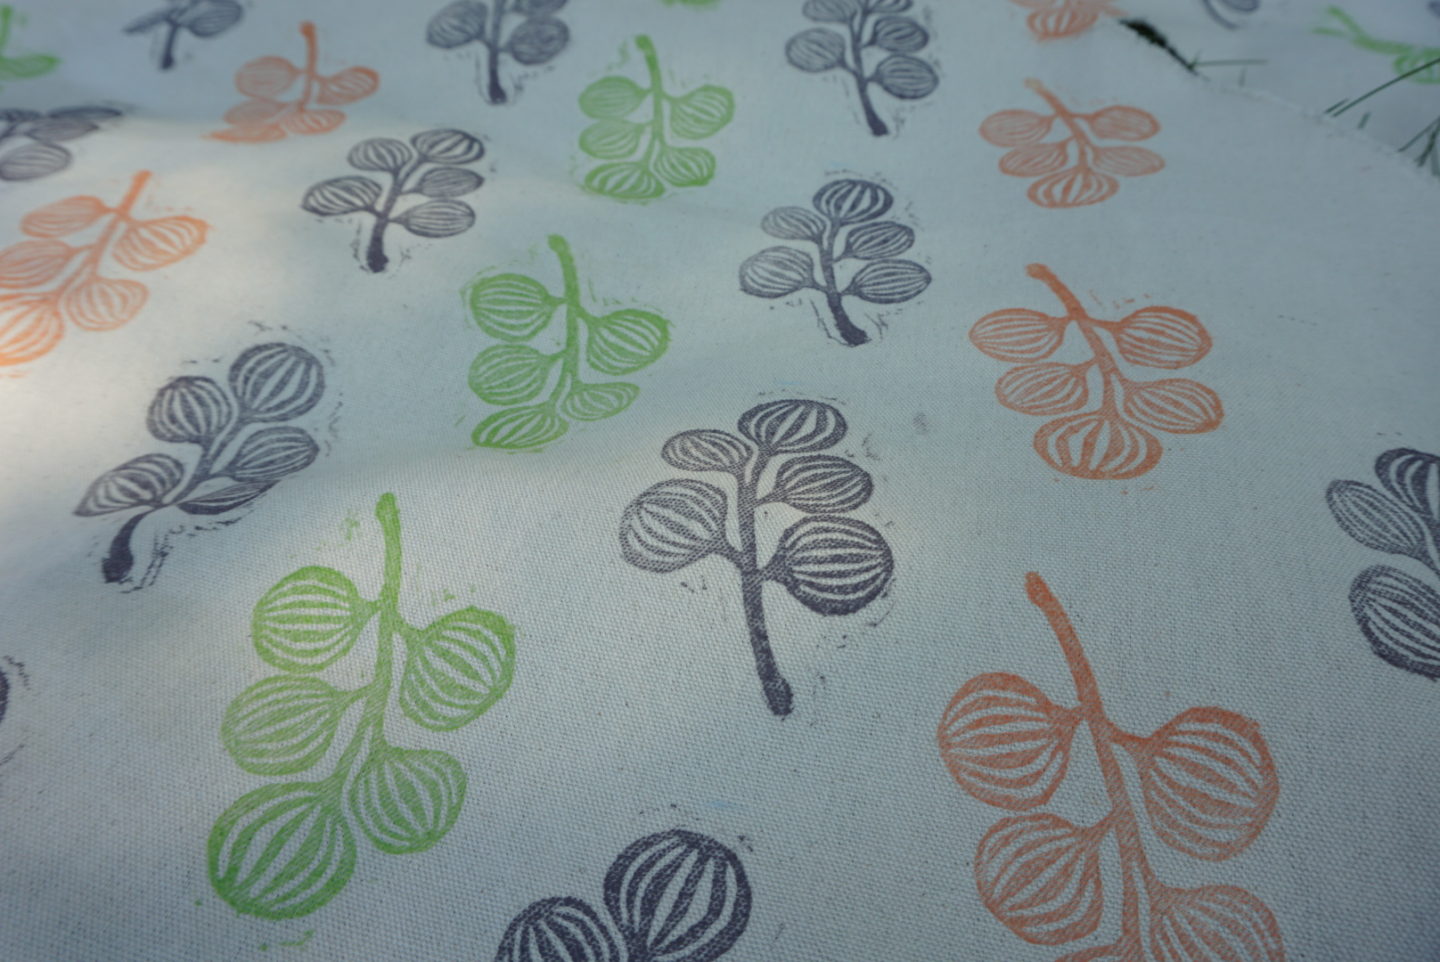
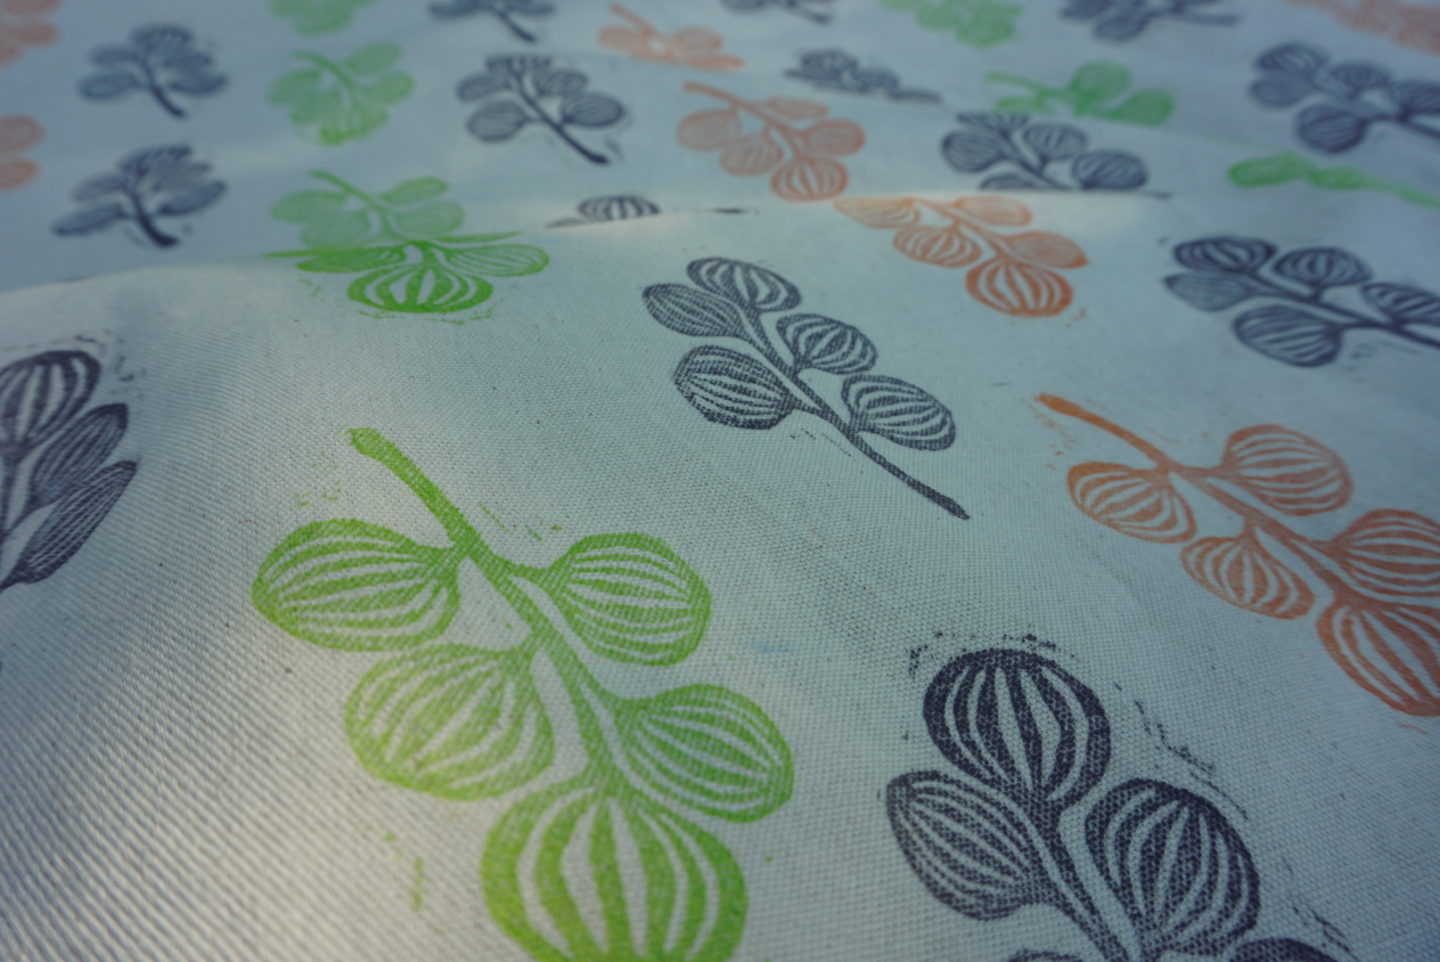
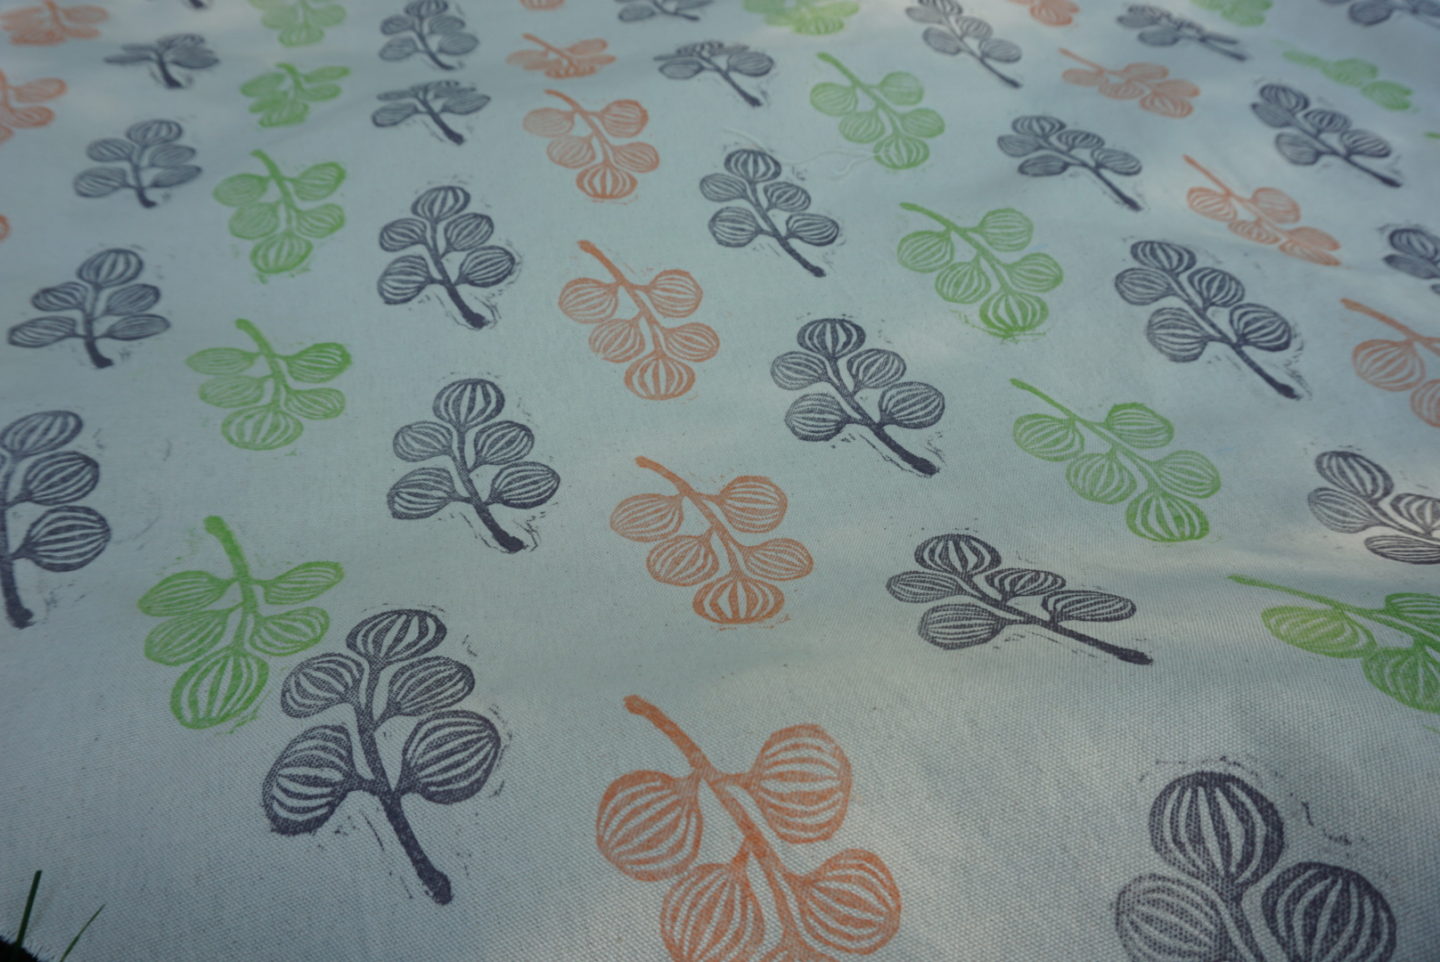
I decided to do a repeating pattern called a half drop, which means you print in evenly spaced columns but every other column is dropped down by half of the height space so that the prints appear directly in between the ones next to it. I hope that makes sense! If you search half drop it will show you examples of this, in addition to mine! I decided I would use the purple for all of the odd numbered columns and then trade back and forth between the peach and the green for the columns in between. You can see all of the purple columns printed below. The only tricky bit for the repeat was figuring out what your vertical and horizontal offset measurements were going to be so that you would line up your block with the right intervals on the ruler, and then it was very meditative and relaxing! I found the barren very helpful because otherwise I think it would’ve been hard on my hands. You can see it in the bottom corner of the photo below.
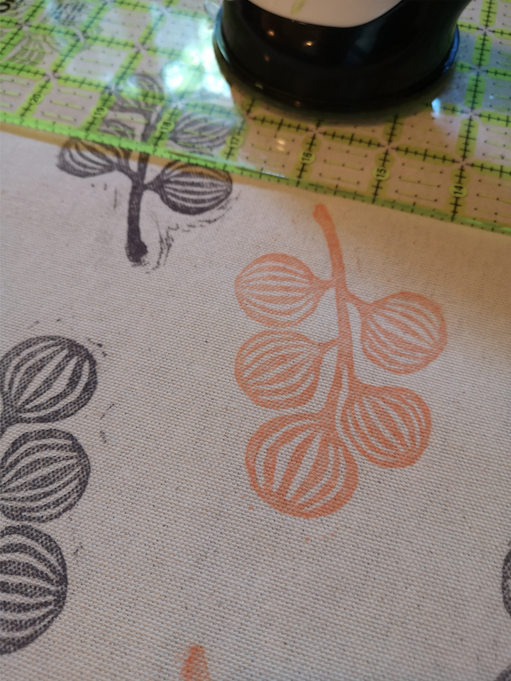
Next up was the green! I found as I went along that I got better at being neat with my ink and block in terms of getting it on my hands. I use a new sheet of newspaper for each colour to avoid transfer/contamination. My purple ink was pretty dry, so it was safe for me to lay the ruler over top of the previous prints while I was doing the green columns. I also decided to flip the green and peach columns upside down and I’m really happy with that decision!

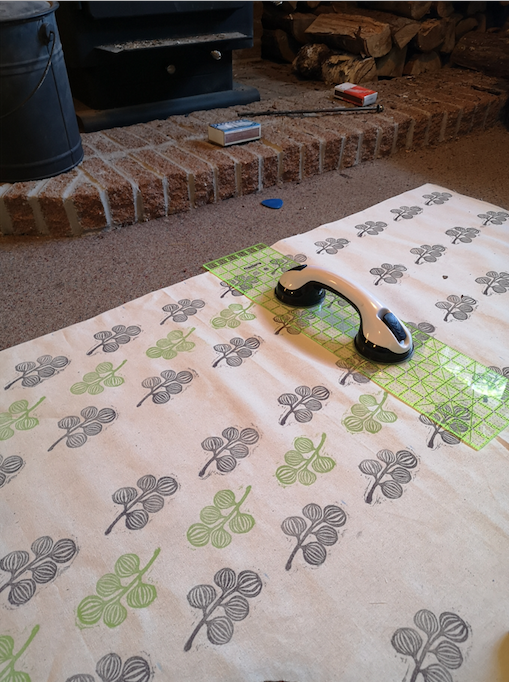
Something I had vaguely read about but not really taken in was that in printing, some colours of ink have different textures and consistencies. I’m not sure if it was TOTALLY that or whether I was just improving at printing as I went along, but I did find the peach rolled on the block nicer and I got a lot less background stuff in my prints as you can see below. After I started filling in the peach columns, it felt like it really started to take shape! It looked like a Real Print! I made a few mistakes with colour placement and one time with one of my measurements, but I can definitely cut around them so I’m not fussed.

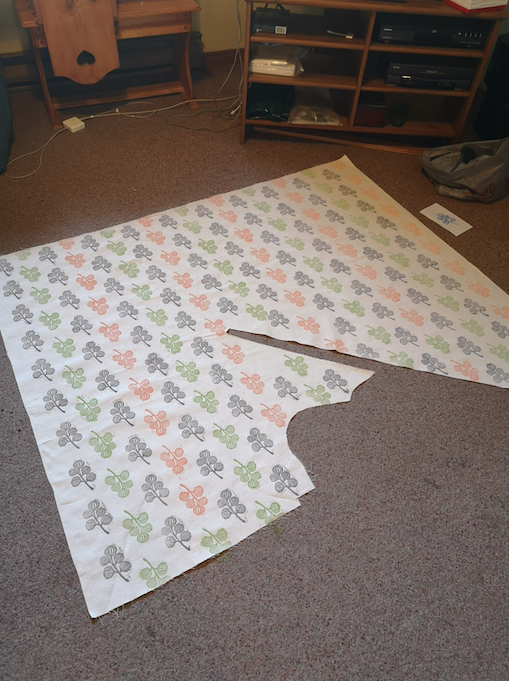
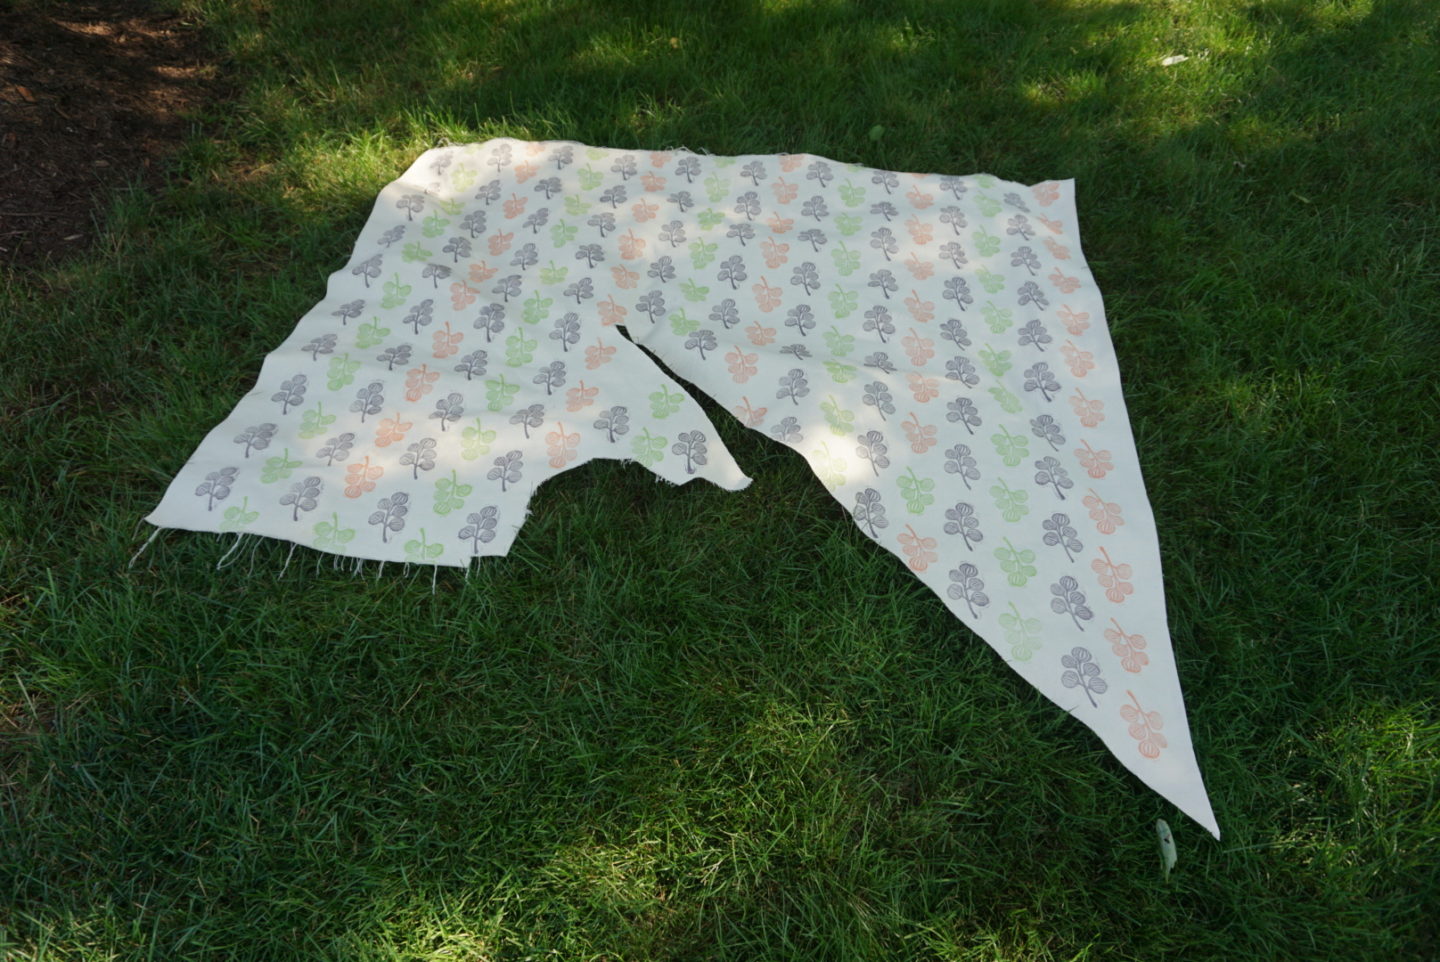
After the ink has dried on the prints, you throw it in the dryer for a short time just to make sure all the moisture is out. After that, screen-printing ink needs to be heat set (I don’t think block printing ink needs this step), so you cover your ironing board with a piece of spare cloth, I used a secondhand sheet, place the fabric print side down, and iron it without steam to set the ink. After that, I dragged the fabric outside to try to give it a little photo shoot but it turned out the lighting was either “912734 Suns” or “Shaded Woodland” so they’re darker than the ones I took inside. Oh well!
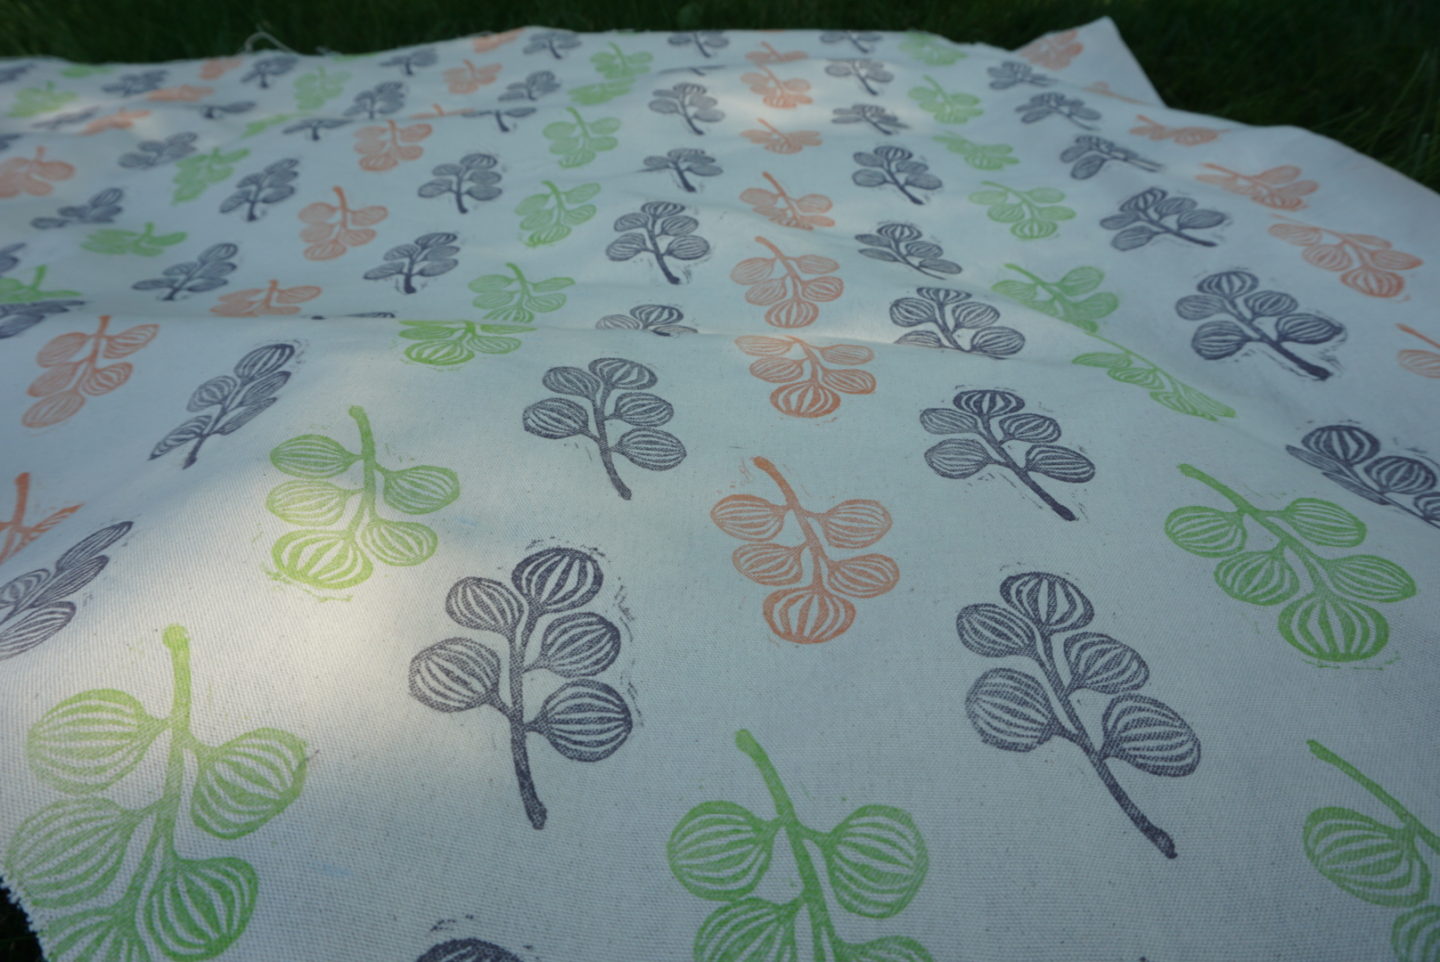
I’m super happy with how it all turned out considering it was my first real try, and my total first go at doing a repeating pattern! I’m going to make it into a bag, I decided! There’s quite a bit so I feel like I have options. I’m thinking maybe the Noodlehead Crescent Tote, but I also have patterns for the Wool + Wax Tote, the Explorer Tote, or the Pepin Tote from the latest issue of Making. Yes, I’m obsessed with Anna Graham at Noodlehead. What do you think I should make with it? Let me know in the comments! Also, I’m curious if anyone else has tried block printing before. I think I want to play with block printing in intentional places on a garment.
