
I have to say up front that I had a lot of reservations about this while I was making it. It’s not a usual shape for me, any kimono sleeved things I’ve made recently have been very Not Good on me, and I’d heard that it’s quite an oversized pattern. But while I took the photos for this post, it grew on me and I think I’m board now! The pattern is the Unfolding Jacket by Wiksten. It was originally published in Making zine, but (I believe) was revised to be less oversized before its release on Wiksten’s website. I’m planning on making a couple of these for people for Christmas gifts, so this was sort of a test run on the pattern while finally getting some time to sew something for me!
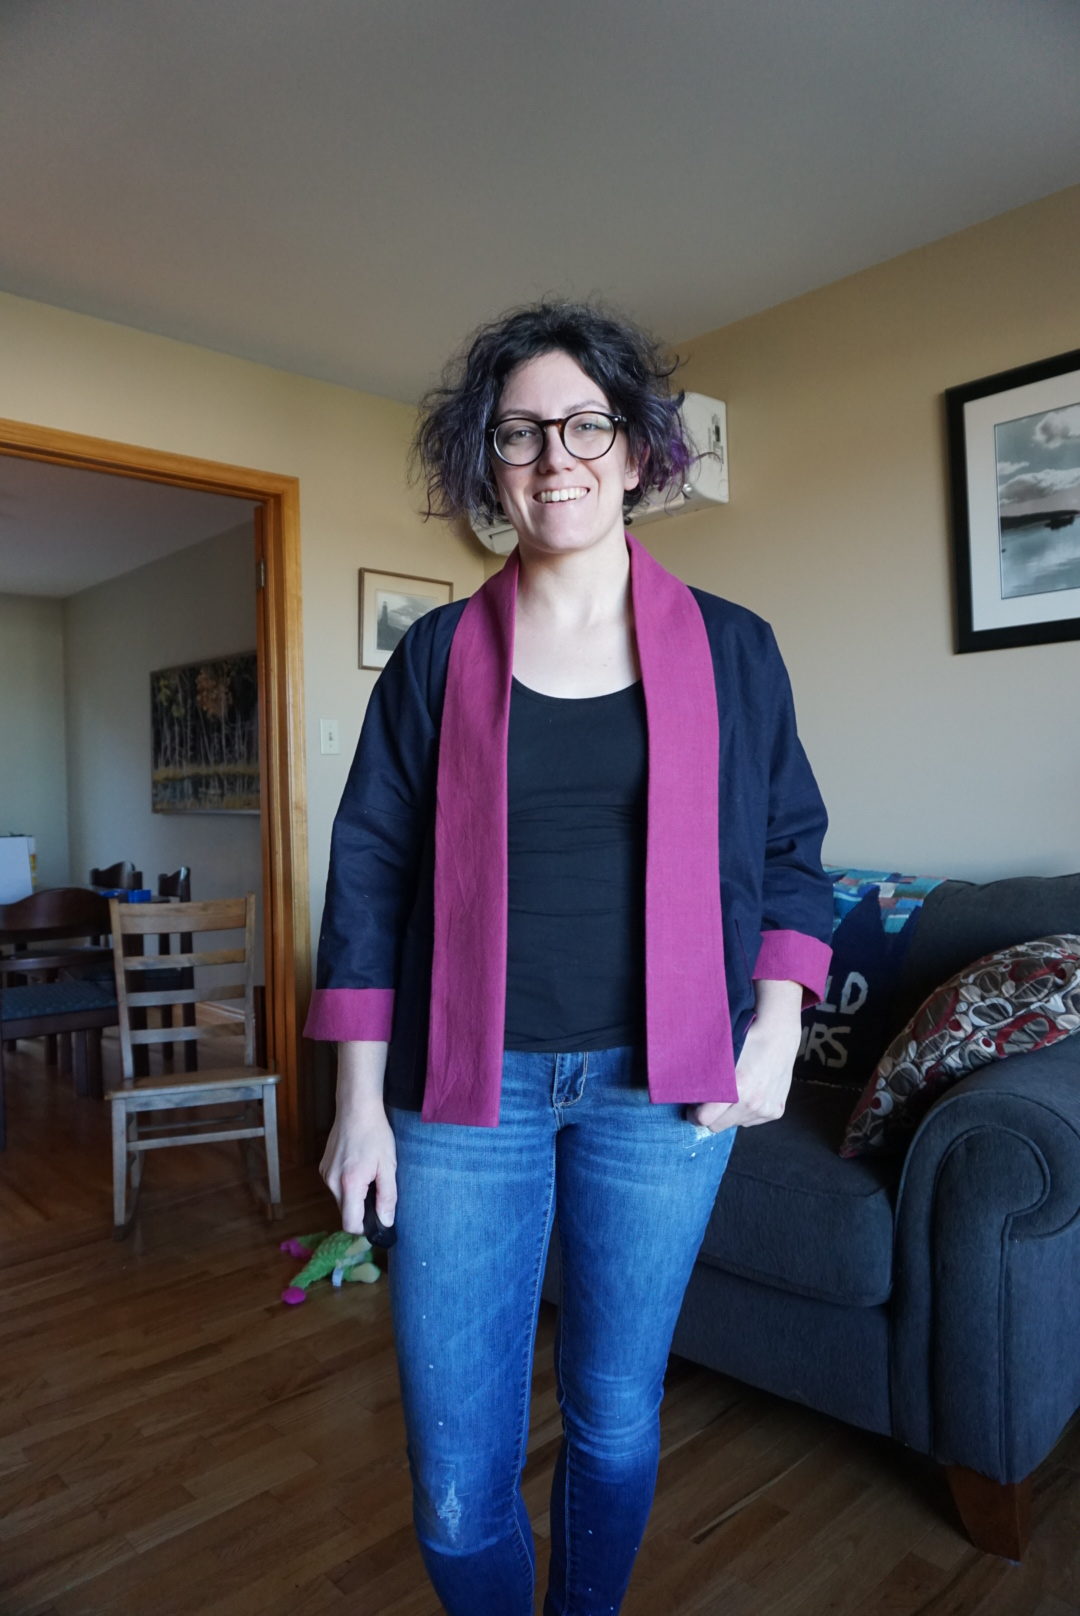
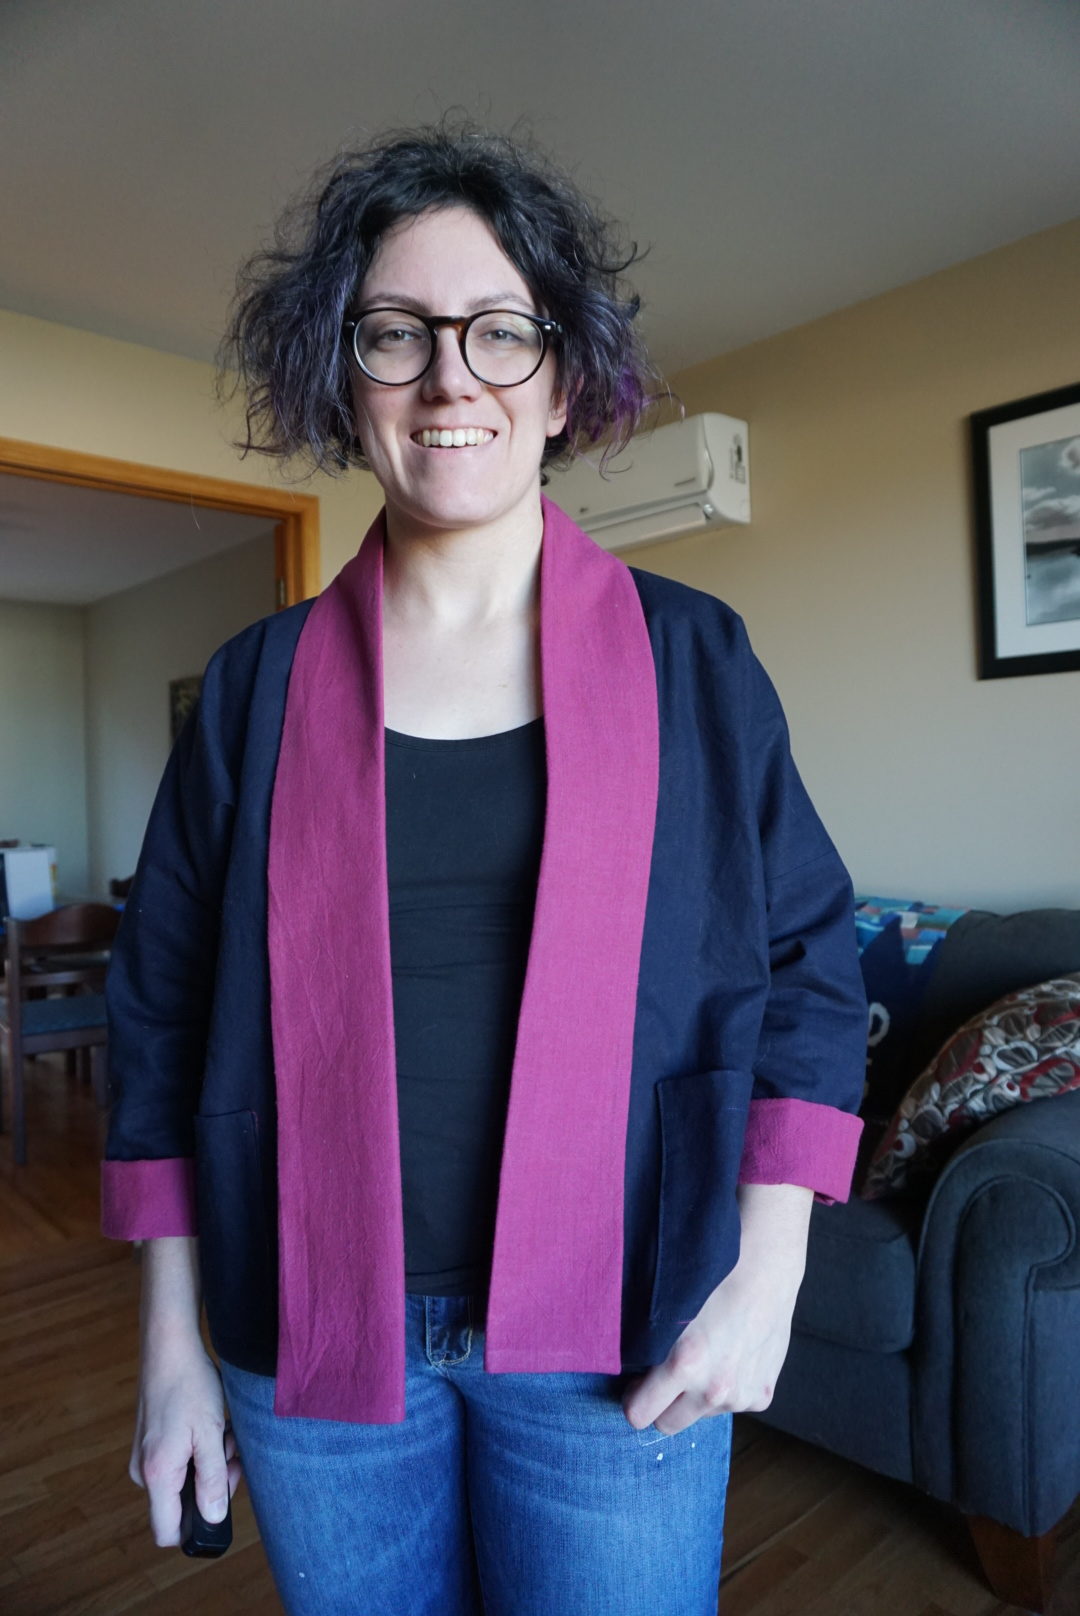
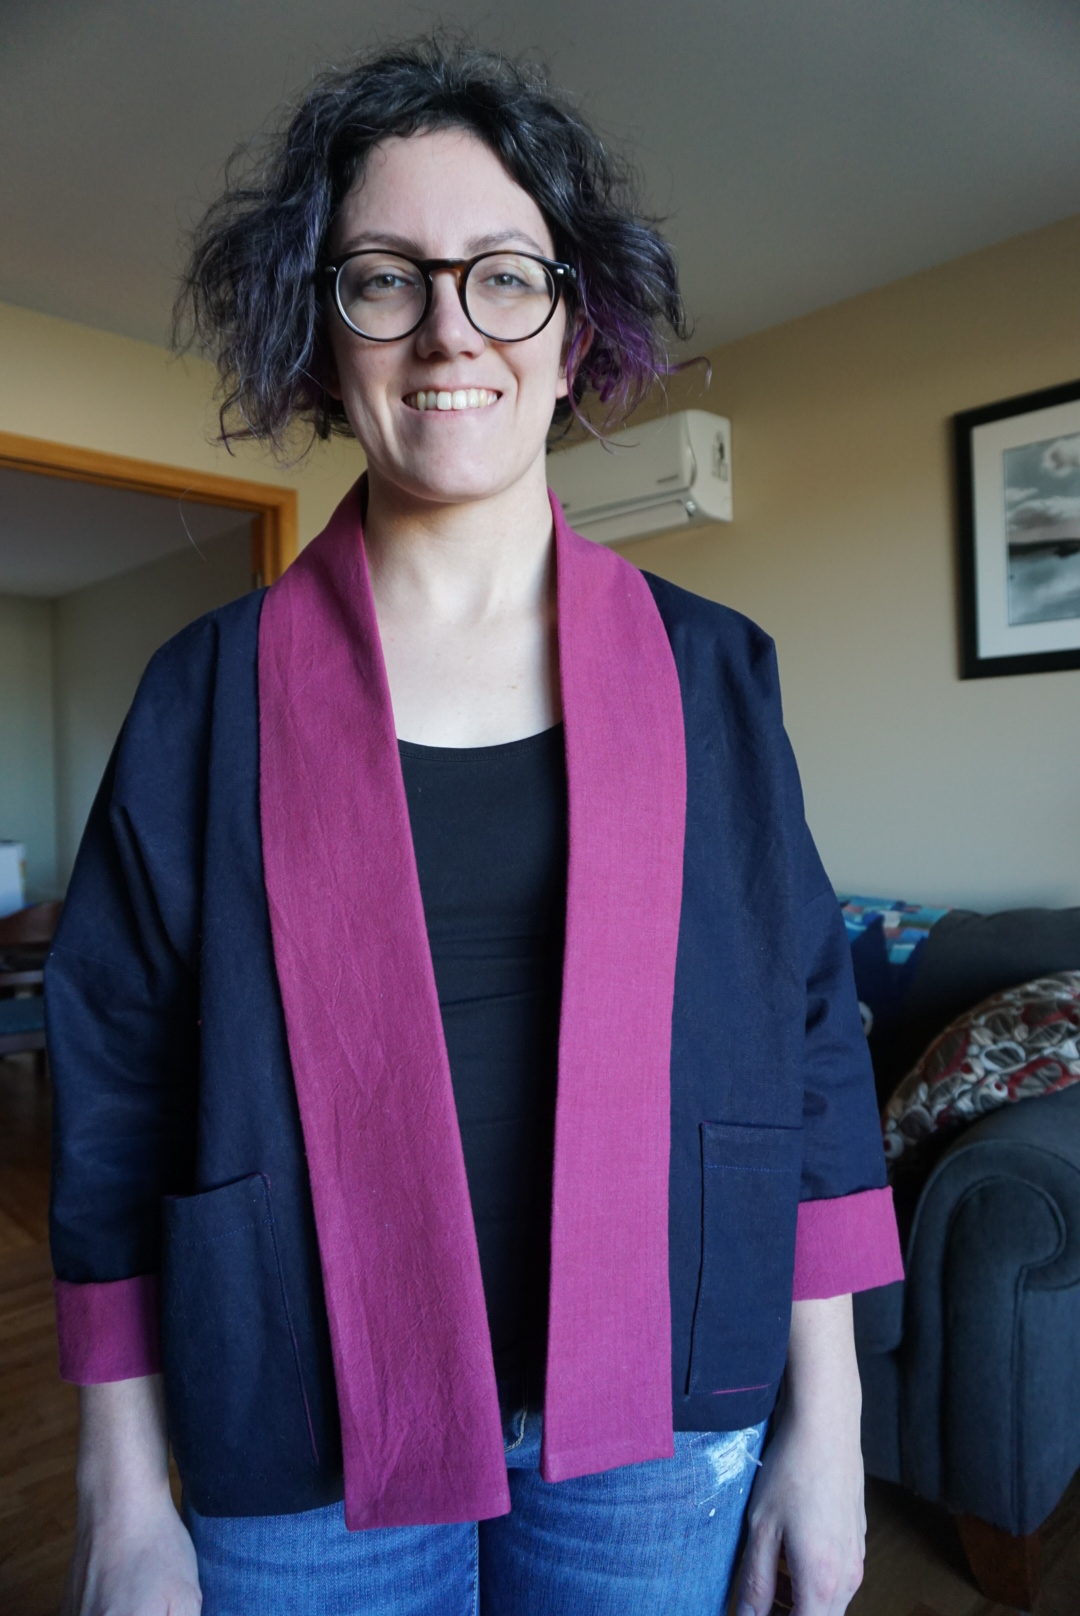
The outer fabric is a dark blue Essex cotton/linen, and the lining is a shot cotton from Alison Glass’s collection called Kaleidoscope. Both of the fabrics were purchased at Patch. I really really love the shot cotton. Andrea at 3rd Story Workshop did a version of her new pattern Our Song in all Kaleidoscope and it’s SO BEAUTIFUL and soft. Check out her blog post about it and drool. My measurements (36.5″ – 29.5″ – 38.5″) fall mostly into a size medium, but I traced off an extra small instead. Patch had a sample of the pattern sewn up, so I knew I wanted to sew the shortest length (there are two other length options included in the pattern) since I’m only 5’4″. I’m not super into giant slouchy things so I figured I was pretty safe going down to XS, and I was right!
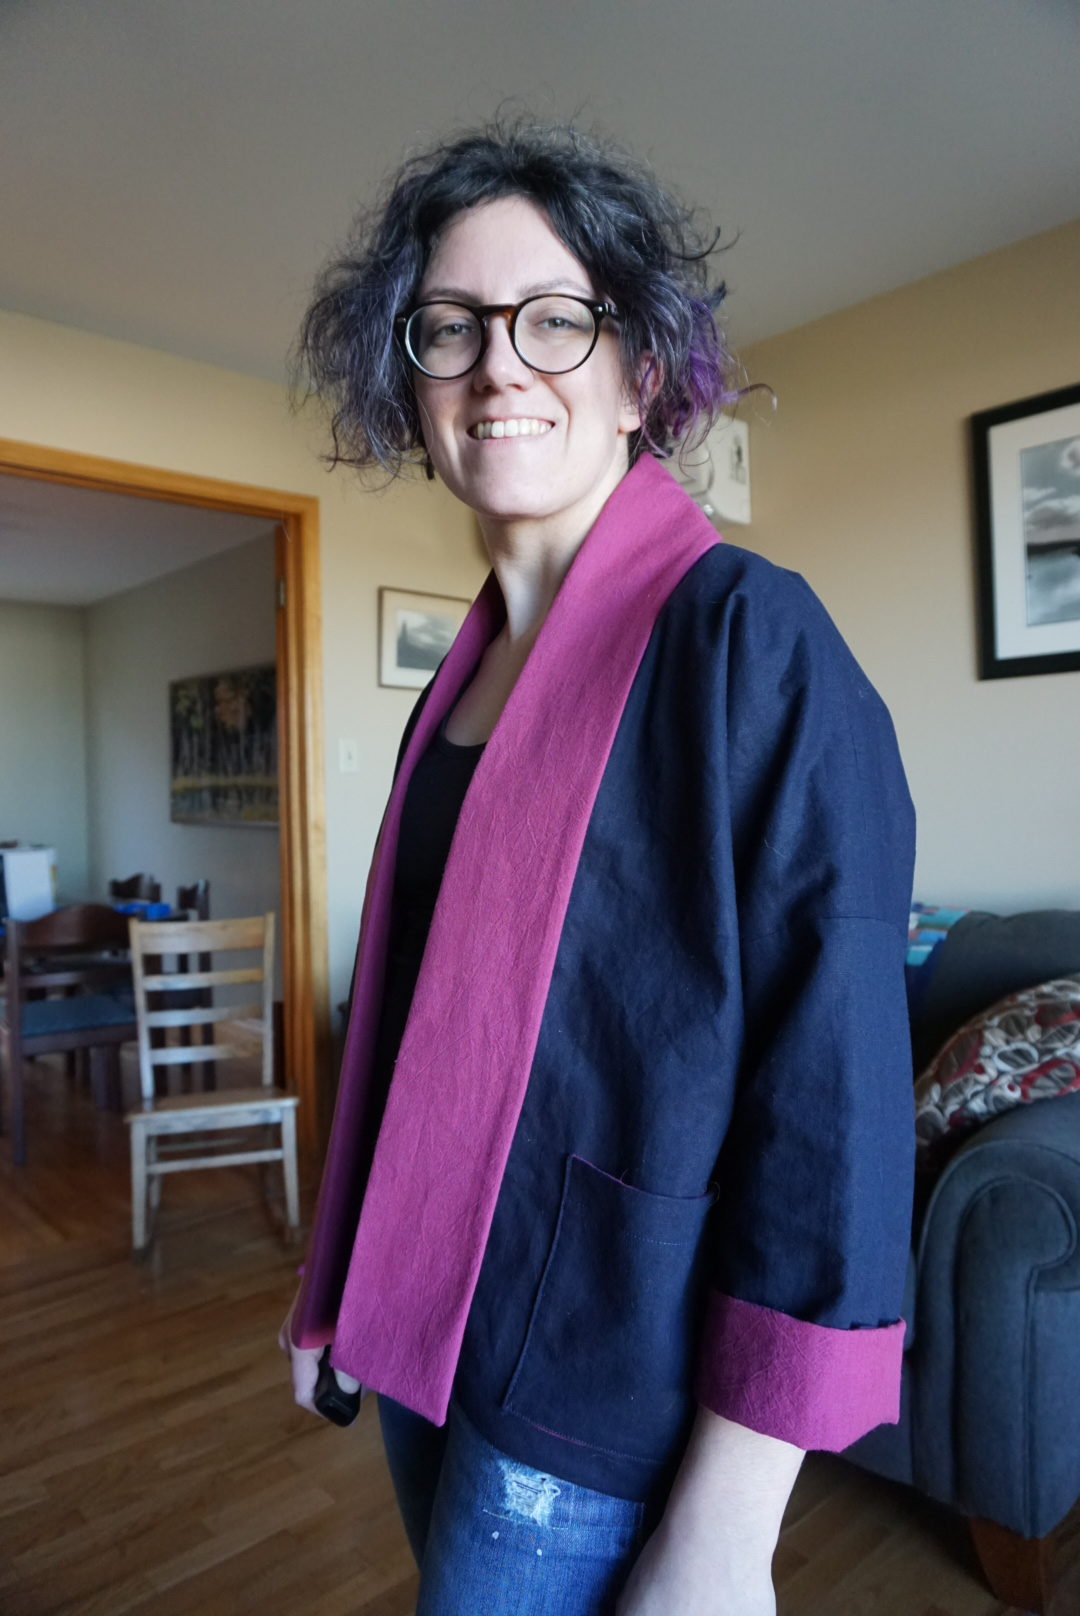
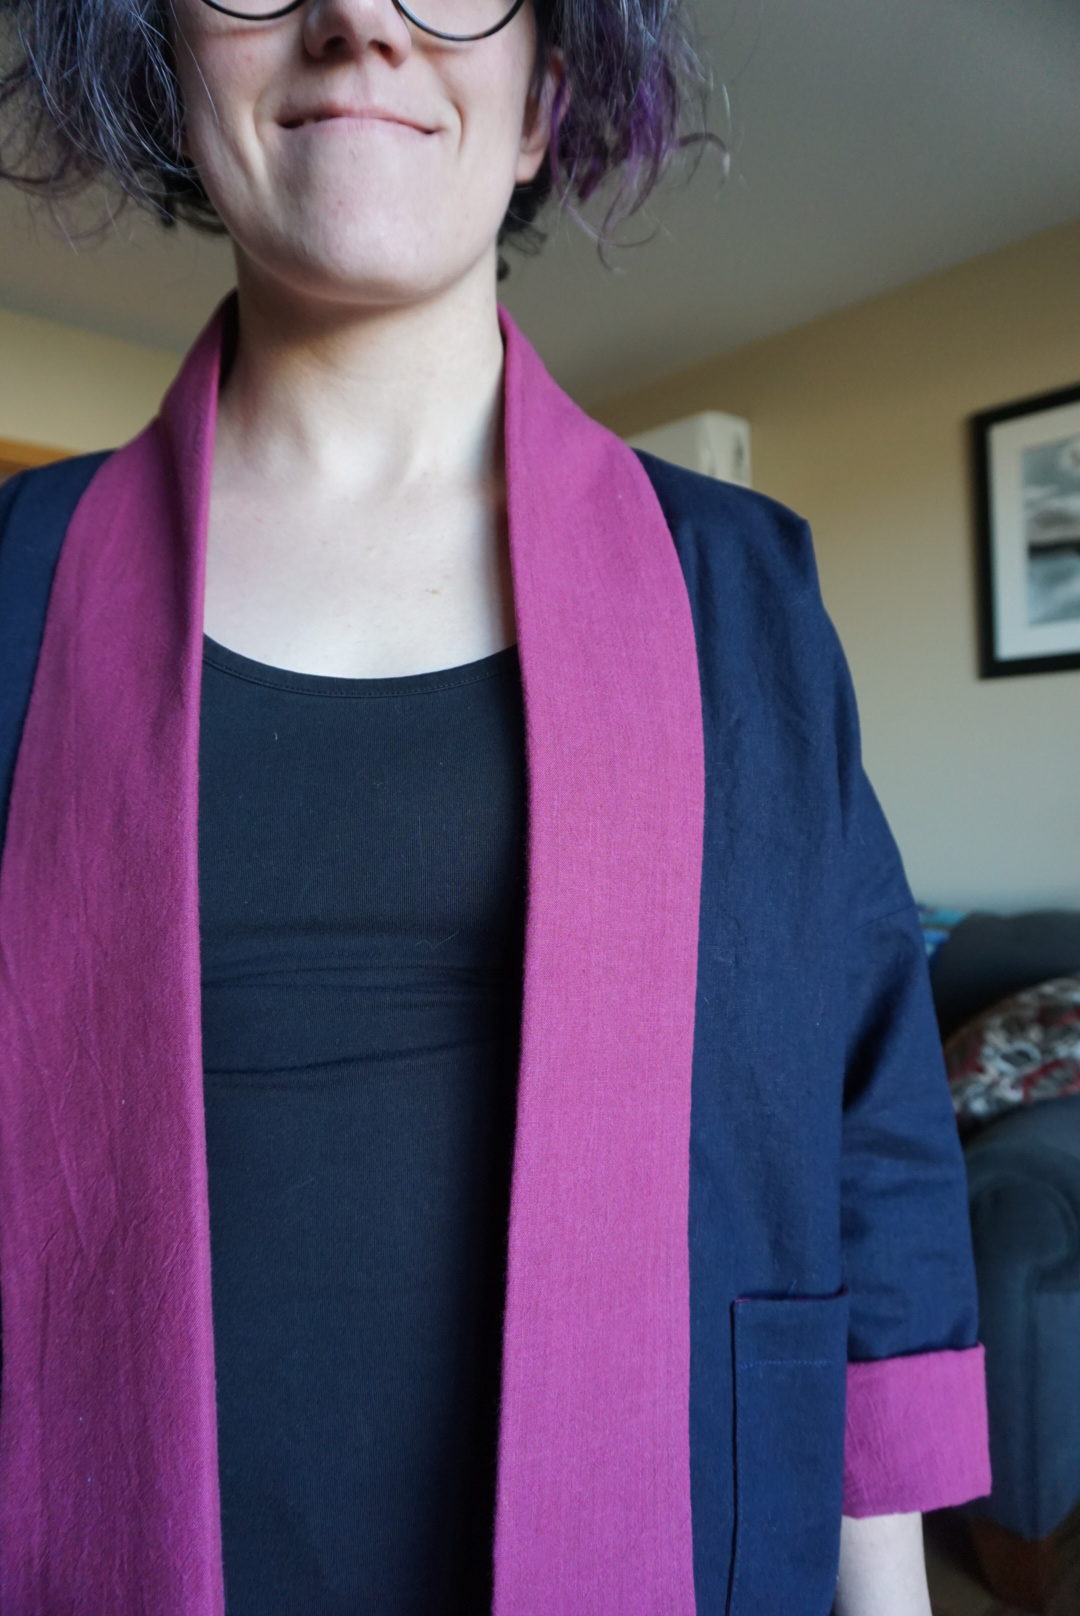
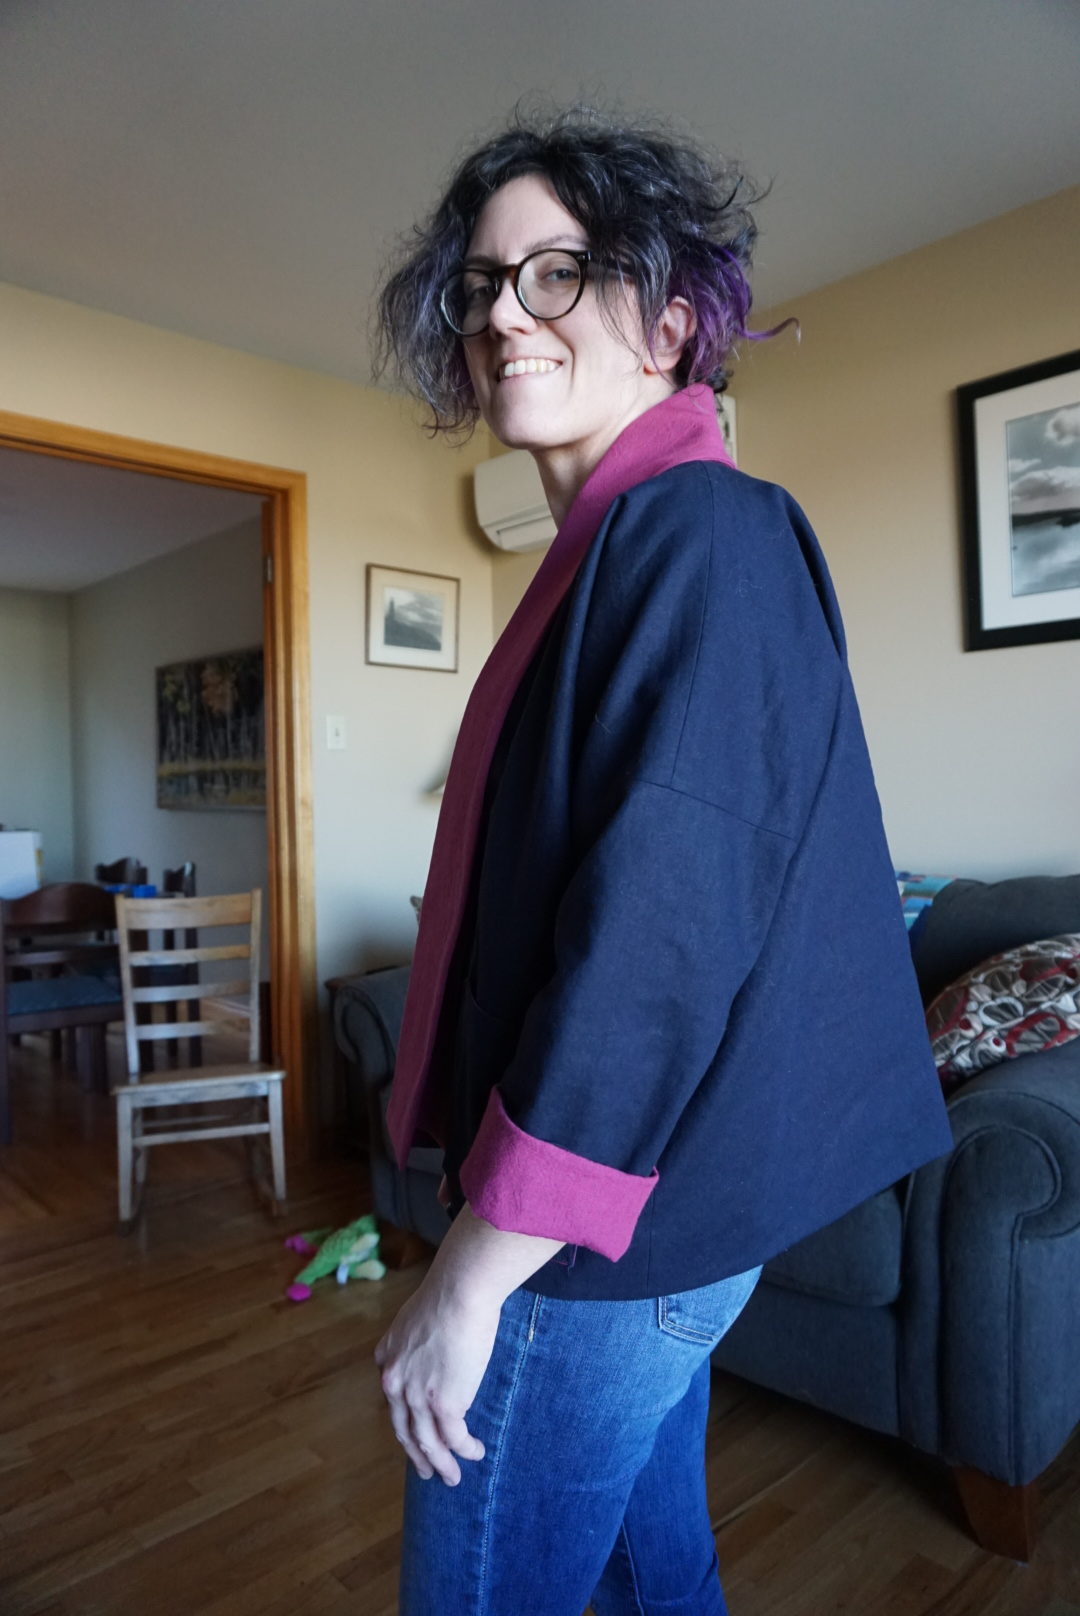
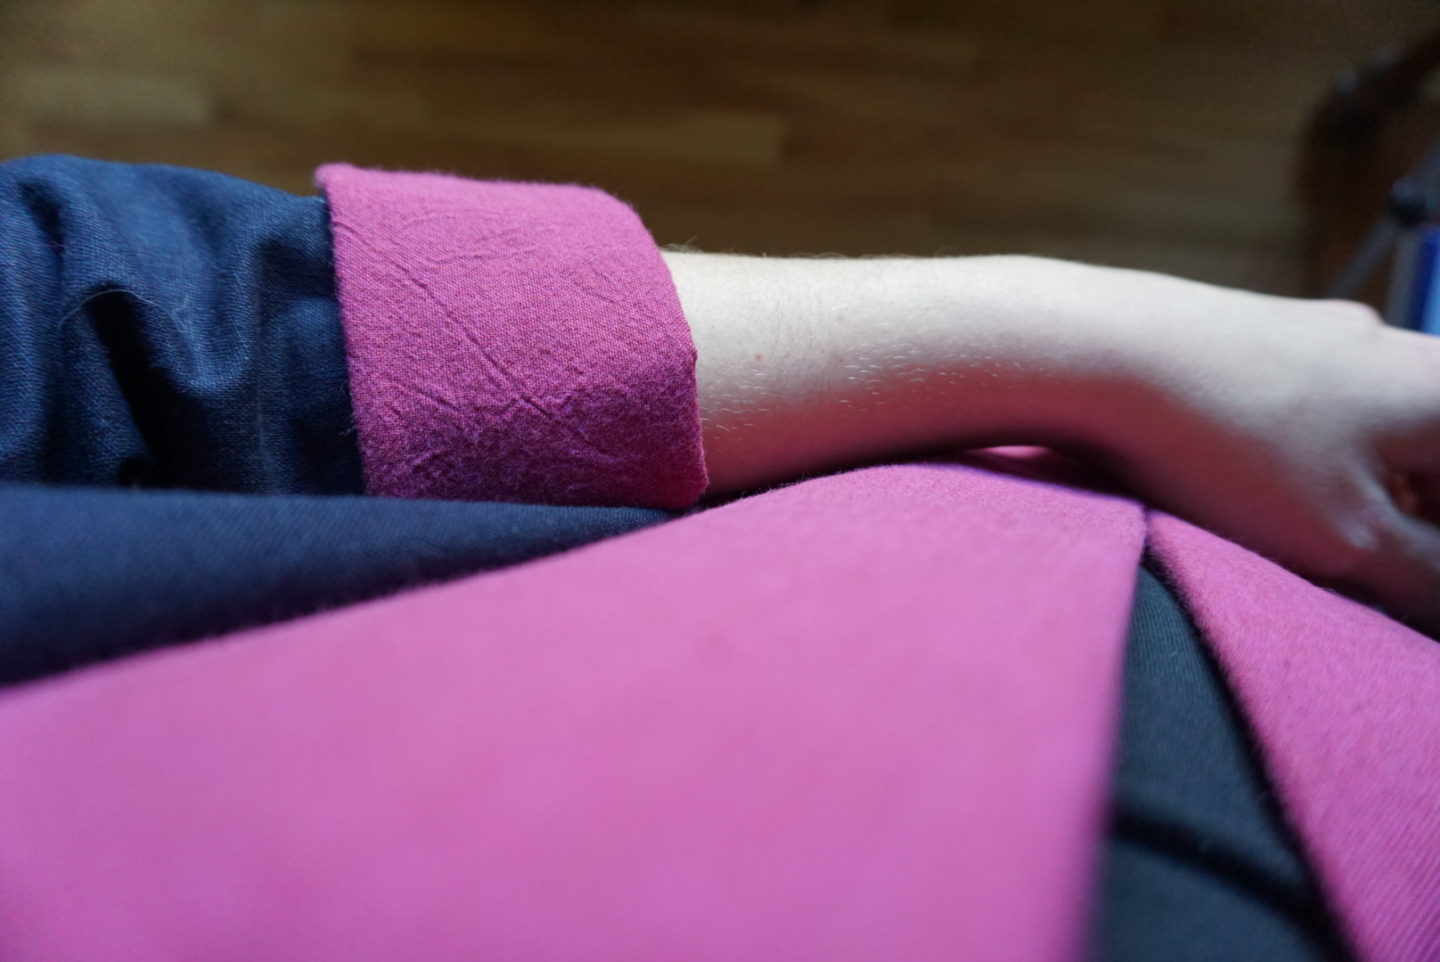
I really love the construction of this pattern! It’s nice to make something that’s completely lined and not have to worry about seam finishes. You construct the pockets first and sew them onto the front exterior pieces. As you’ll see, I didn’t do so well at hiding the contrast fabric at the edges – for the ones I make as gifts I think I’ll steal the tip from the instructions for True Bias’ Lander Pants and trim a teeny bit from all of the edges so it rolls under more easily. After the pockets, the lining and exterior go together in the same way. Shoulder seams, then attach the sleeves, then sew up the side seams and underarm. You then sew the two together along the bottom edge. The method to have a clean finish at the end of the sleeve is so simple and smart! The exterior sleeve piece is slightly longer than the lining, and you fold it under twice as though you’re going to hem it normally, but then the lining tucks right up against the outer fold and gets sewn in when you edge stitch the fold! While I’m talking about the sleeves, I love the length. I have them rolled up a little bit and then a few inches, and I like the 3/4 length it gives. I hate having things around my hands that get in my way, so this is perfect.
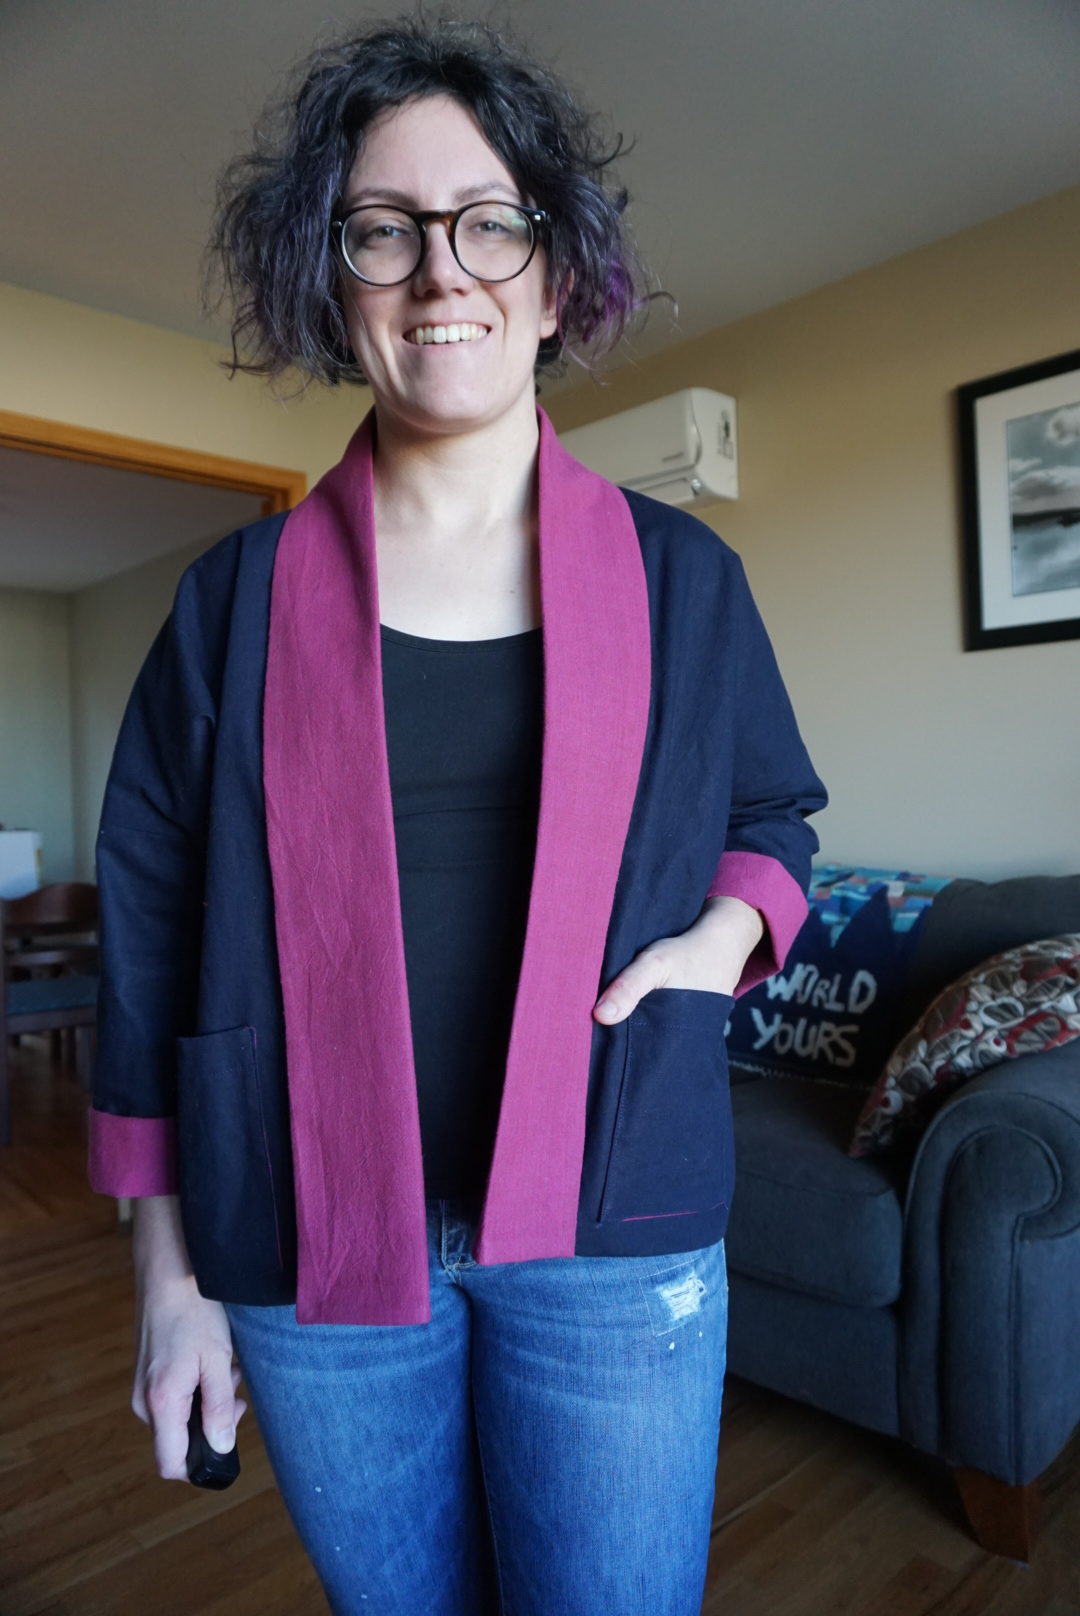
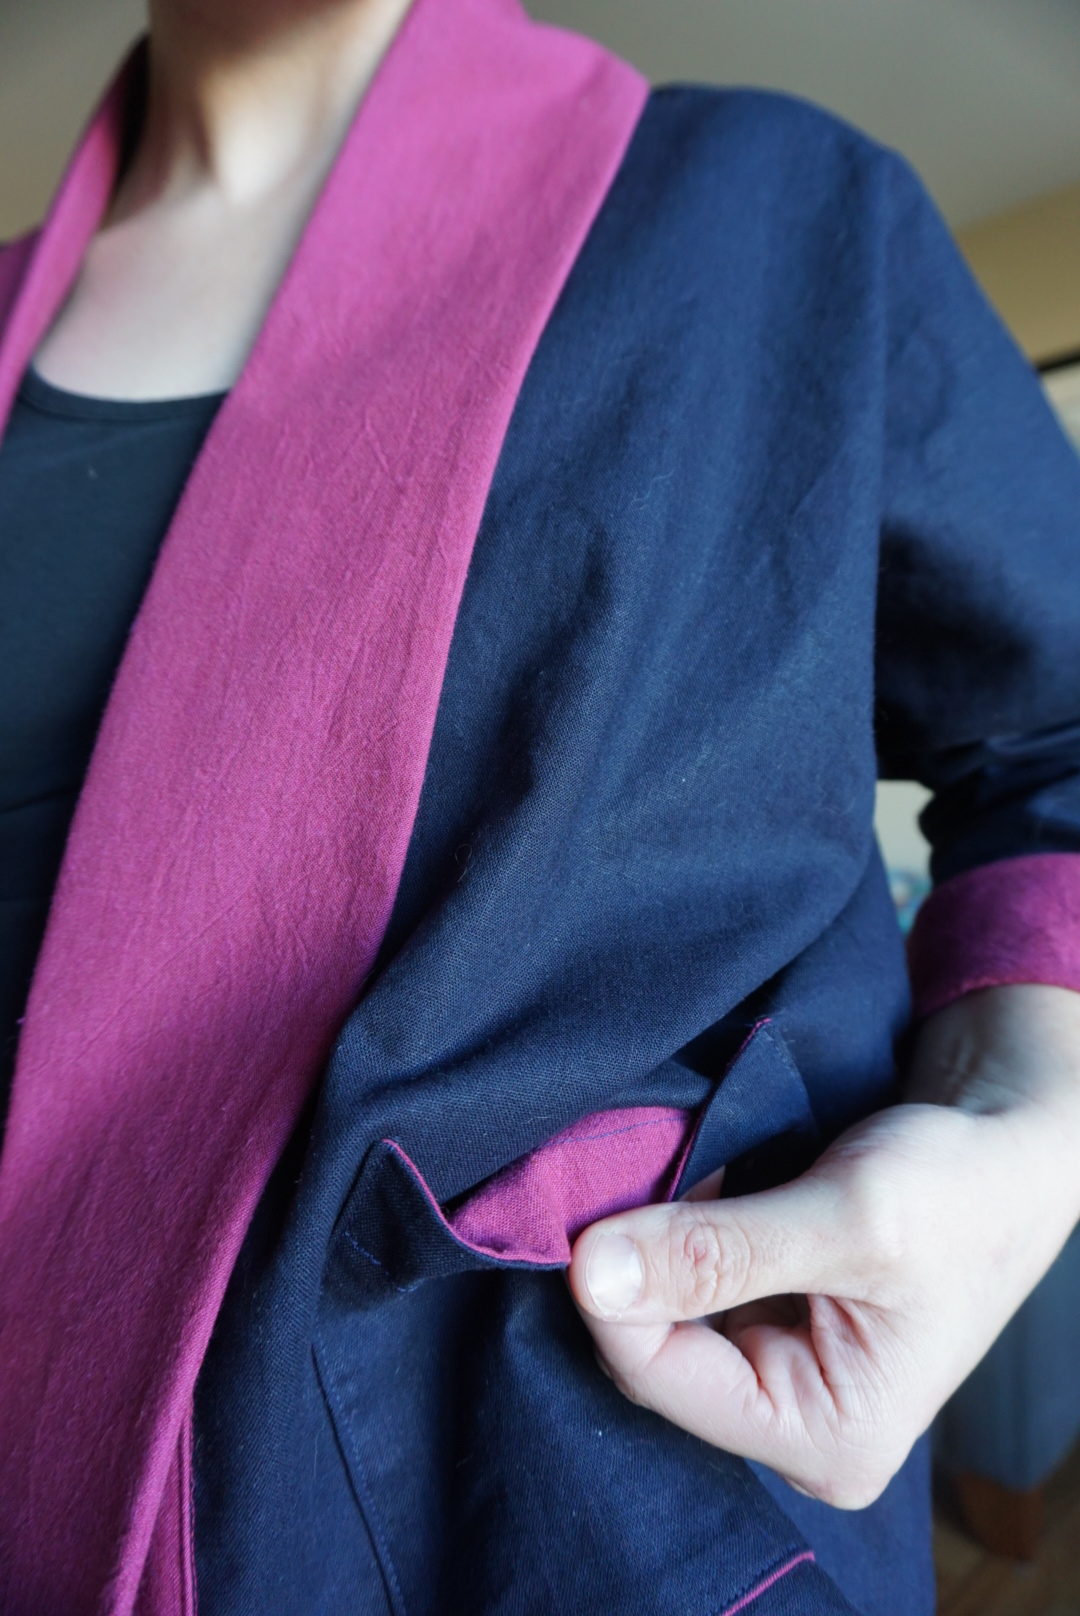
After you’ve finished with the sleeves, all that’s left is the collar. It’s pretty straightforward, and I especially liked that you sew it to the lining first and then top-stitch from the exterior side. It means that you have a lot more control over the overlapping edge. In retrospect, if I’d looked ahead to the construction order of the collar, I would’ve used blue thread instead of the pink to baste the lining and exterior together, and to attach the collar, so it wouldn’t have been so visible if I didn’t completely cover it. But I’ve made a mental note for my gift versions, so that’ll be fine. After you attach the collar and everything is sewn, it gets folded in half back against the coat and you’re done! It didn’t take me very long – just Saturday evening and a few hours Sunday morning. This was very reassuring to me, as I’ve been feeling a bit down to the wire (even though there’s two months to go) in terms of completing handmade gifts on time. It’s nice to know that it’ll only take me a day per jacket, so I can plan accordingly! I’m making one of them for my 88 year-old great aunt along with a pair of Named Ninni Culottes to make a full outfit – the contrast colour on the jacket will be what I use to make the pants!

I also wanted to talk quickly about my blog photos. I know I have totally wacky hair in the above photos, haha. To be honest, I had gotten so absorbed in sewing that I decided I’d rather do that than shower/wash my hair that day. I know a lot of people who have blogs have super beautiful photos and they plan out their setting to match their makes/outfits, and I LOVE reading those blogs. But I am not that girl. I never schedule posts, most of them are written the day before I post them, and all of the photos are always taken immediately after I finish making the garment in my living room otherwise I feel a sense of the photos being a chore I have to complete. Plus, let’s be honest, I just want to be able to share the things I’ve made with you as quickly as possible! Yup, that’s a green stuffed dragon on the floor in a few of the photos because I didn’t notice there was a dog toy lying around until after I’d taken the photos. I do have a pretty good camera and a remote – I got the camera about a year ago (maybe less) and I love it so much. It’s a Sony Alpha a5100 – a mirrorless digital camera. I use it for all of my blog photos, and used it for all of my travel photos in the summer, and was really happy with the results. I would love to have a macro lens eventually so I can get good close-ups of the texture of fabrics, but that’s not a pressing need right now. Anyway, I just wanted to keep it real and also make sure you knew that I knew that my hair is bananas sometimes. 🙂 (But also I don’t even own a brush, so there’s that.)

This is pretty fly! I’ve seen it sewn in a lot of drapey linens but with the slightly more structured blend it is making some gooood shapes. You’re going to have some happy gift recipients. : )
Author
Haha, thanks! I’ve gotten distracted by a different, much more hilarious gift that I’m making, which I really wish I could share right now but it will have to wait until after Christmas because I think the recipient is going to be REALLY surprised and I want to maintain that. 😀 Do you make a lot of your Christmas gifts?
Thanks for the description, I just received my pattern and was a little confused by how the cuffs were done. I like how yours drapes nicely round the neck and down the front, it looks very polished.
Sandra
Author
Thanks! I hope yours turns out well – what kind of fabric are you planning to use? 🙂
Where can I get this pattern
Author
It’s sold by Wiksten, but I see on their website that they are on maternity leave and only doing wholesale orders right now. It’s called the Unfolding Jacket so if you search that, maybe you can find it from a retailer!
I have some wool in stash but I’m thinking for making the first one it would be better in cottons for summer. If it goes well, using the wool would be good for an autumn Wiksten with a nice lining but not bothering about it being reversible.
Sandra
Author
Ooh, I love the idea of a wool jacket like this! What colour do you have?