
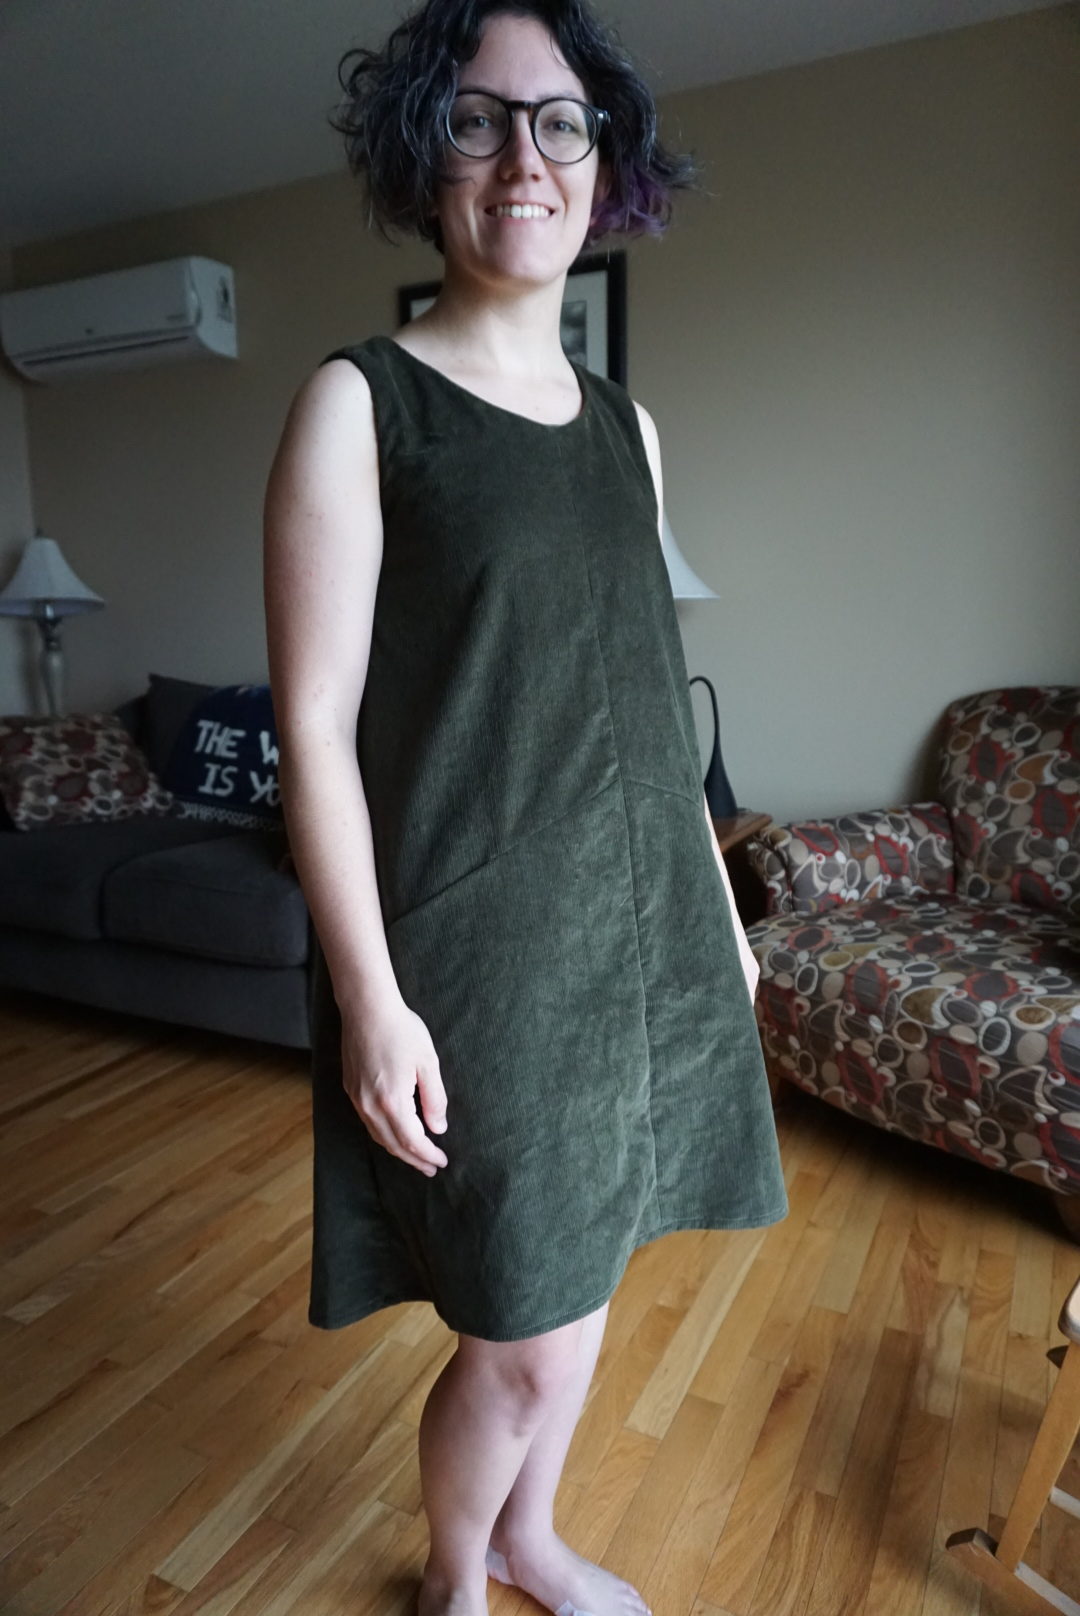
I returned to my usual selfish sewing ways yesterday with this corduroy Farrow dress! I finished up the very last of the bridesmaids dress sewing today (aside from perhaps a teeny bit of hand-sewing Thursday evening) and will hopefully post about the details of those on Saturday, which is the day of the wedding! Yesterday I finished this dress for myself that I’d cut out a week or so ago as a way to preserve my sanity in the midst of endless piles of blue bridesmaid fabric. I didn’t do any sewing at all on it until I was done the bulk of the other dresses, but it was a good motivator to look at the prepared pieces and know it was there once I knuckled down and finished.
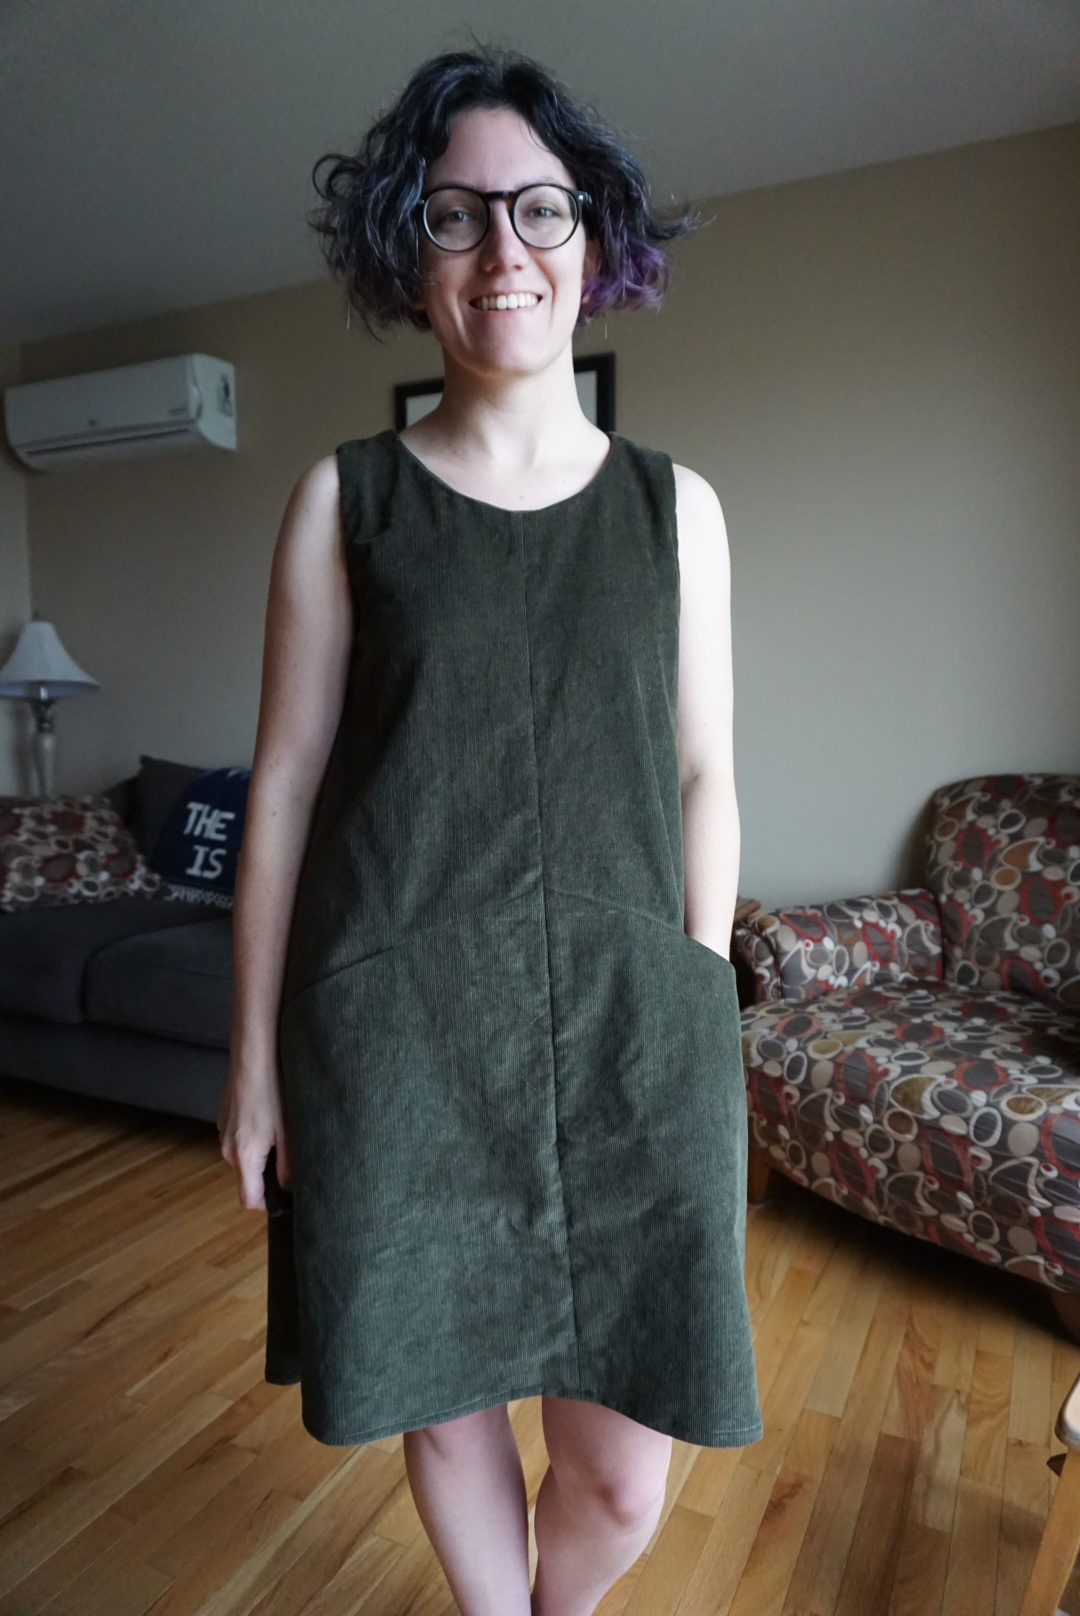
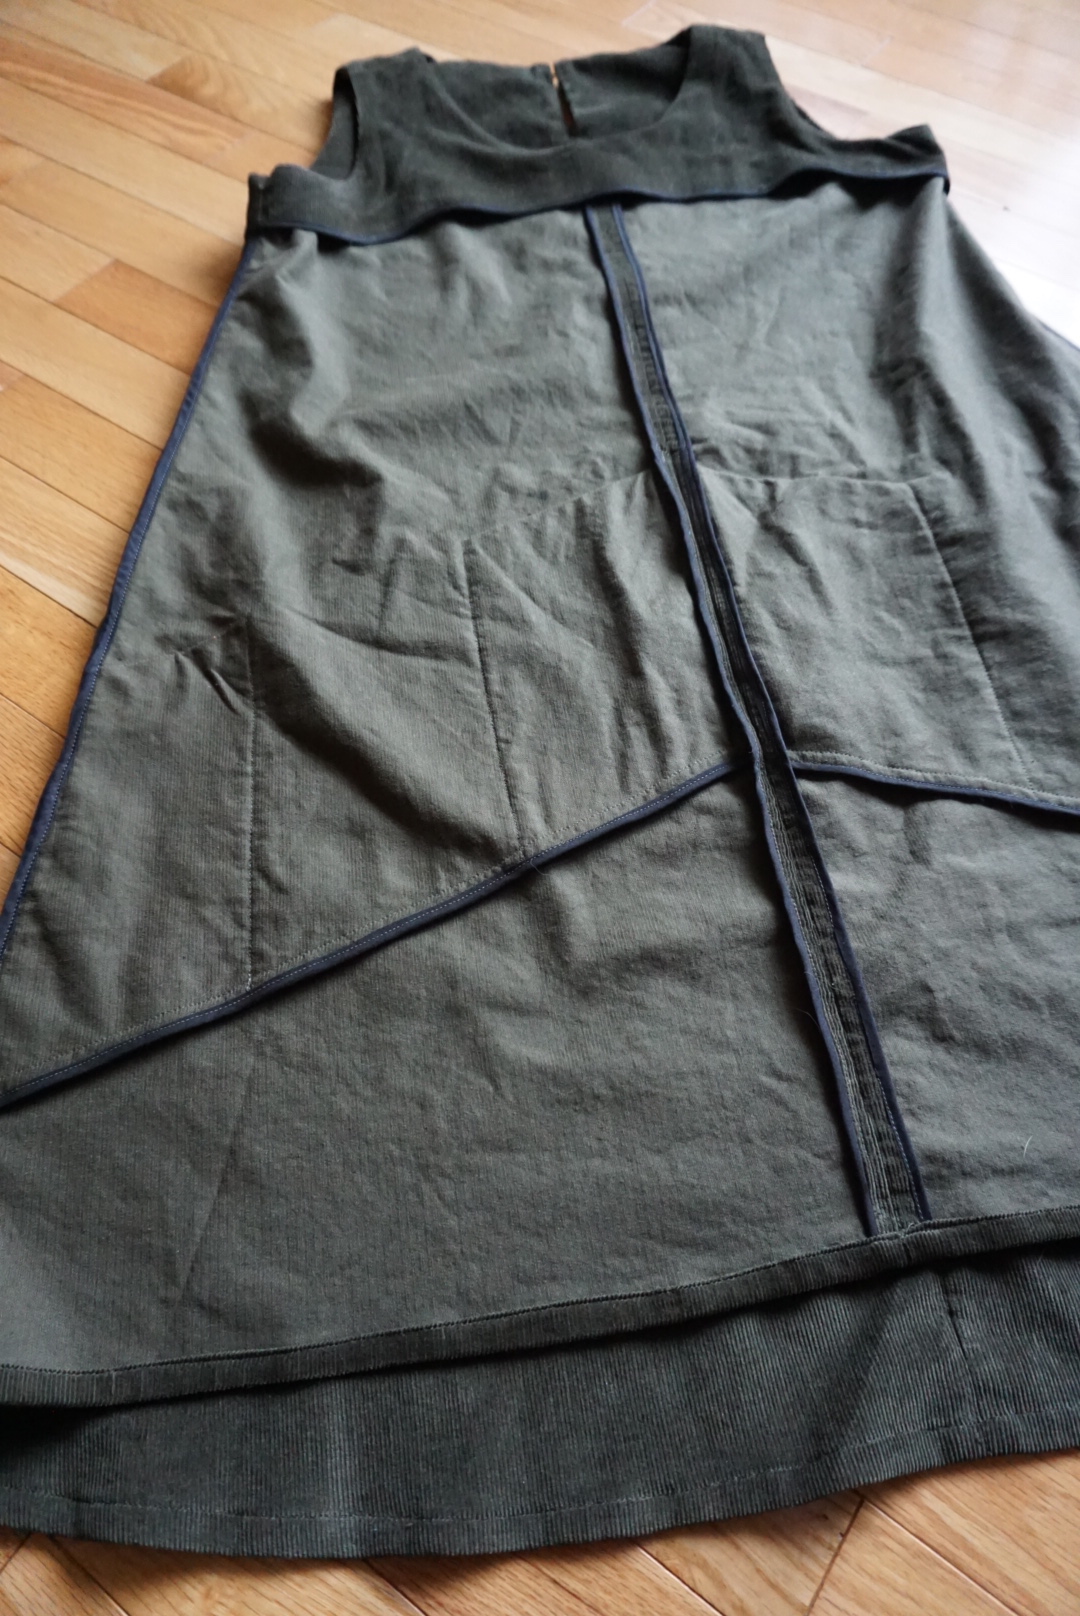
My sister gave me a $30 gift card to Fabricville for looking after her cats a few weeks ago, and I used it to get this green corduroy and a rusty linen/cotton that will hopefully become another jumpsuit soon. This colour and the rust really feel like fall to me, and I’m hoping this dress will get lots of wear in the cooler months. I already wore it today to run a couple errands, and it was perfect for the misty weather we’re having right now.

This is the first time I’d ever sewn with corduroy, and I did a bit of reading about it before I cut into the fabric. The first thing I took note of was that you have to be careful with pressing/ironing corduroy, because if you crush the pile, it’s hard to recover it and you can get iron marks on the fabric. To combat this, the internet recommended I use a spare piece of the corduroy as a pressing cloth, with the fuzzy sides touching in order to cushion the fabric from the iron. As well, sources suggested using light pressure and if possible only steam (this wasn’t possible for me because the cord is a bit too substantial).
Another thing to watch out for is making sure the nap of the fabric all goes in the same direction on the garment when you’re cutting out your pieces. It actually doesn’t matter whether the smooth stroke goes up or down the garment, but it should be the same otherwise it will look funny. I feel like this could be used as a design detail, but I didn’t want to get that funky on my first time. Something that stuck out to me in reading about the nap was related to the history of corduroy! Apparently when corduroy was first around, the “correct” direction of the nap was actually the opposite of the direction we normally use now (the smoothness travelling down the garment), because it was thought to make a more interesting texture and lustre. The reversal of the nap was actually a fashion innovation in order to go against convention, but then it seems to have stuck and become today’s convention! (This is just according to sources I read online, I’m not a fashion historian!)
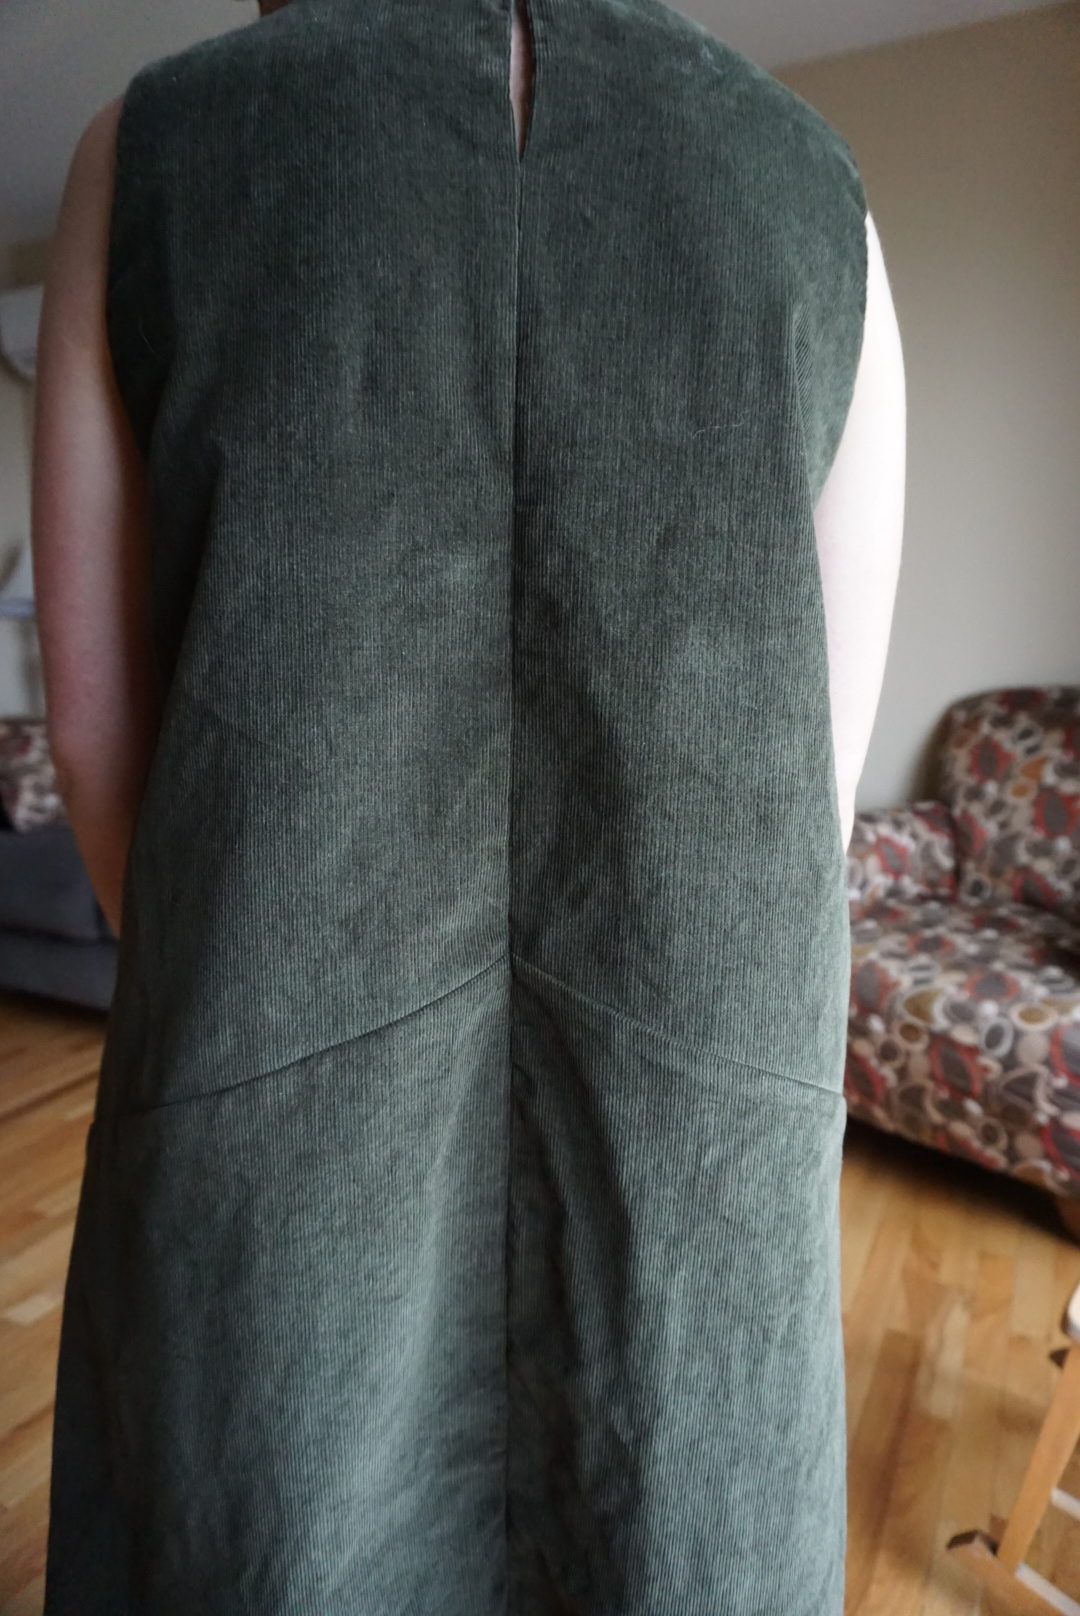
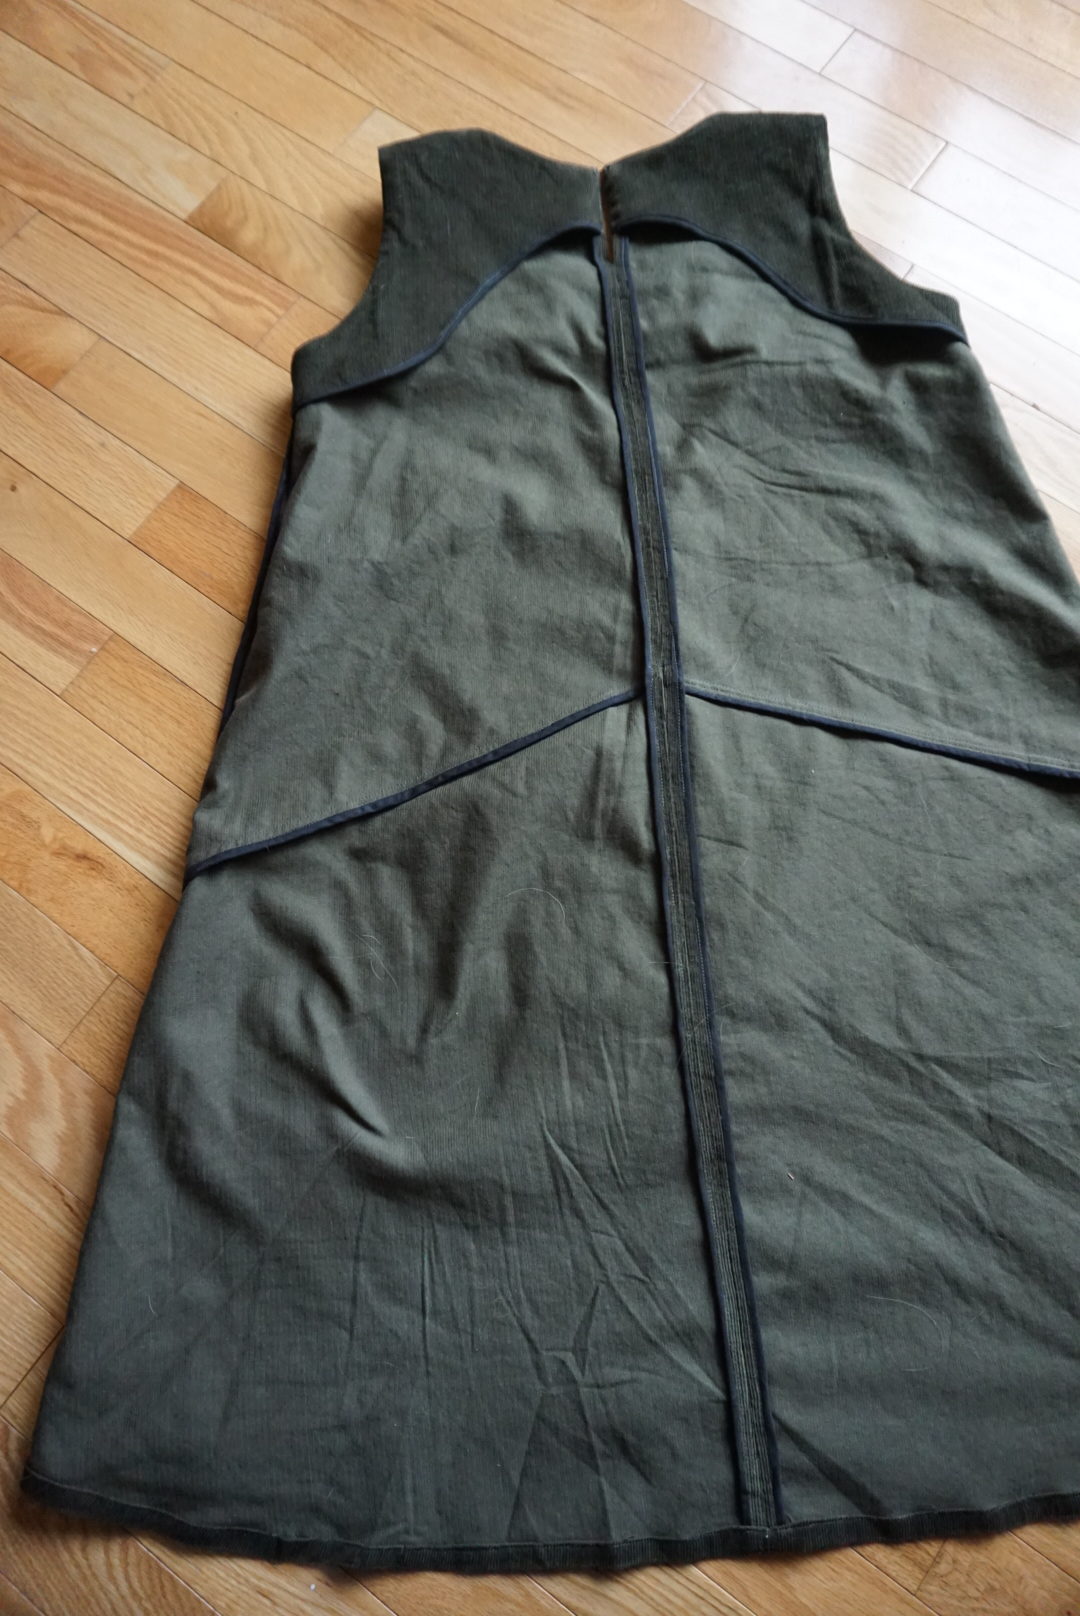
As in the last Farrow I made for myself, I used the all-in-one facing I drafted at the same time as I altered the shape of the armholes near the shoulder, as well as the height/shape of the neckline. I had some strange issues with one of the armholes lining up with the facing this time, but I eased them together. I’m wondering if maybe I stretched it out a bit during handling, because I didn’t have this problem in the past OR with the other armhole on this same dress. Using an all-in-one facing changes the order of construction a bit, which I forgot and got a bit gung-ho and sewed up the centre back seam as instructed. Which I then had to unpick because you have to be able to pull the two back pieces through the inside of the shoulders in order to get the clean finish on the armholes and neck at the same time. Oops! This is what I get for sewing late at night.

I’m also very proud of my point-matching on this version! I achieved perfect alignment at the centre front and back, and at the side seams!


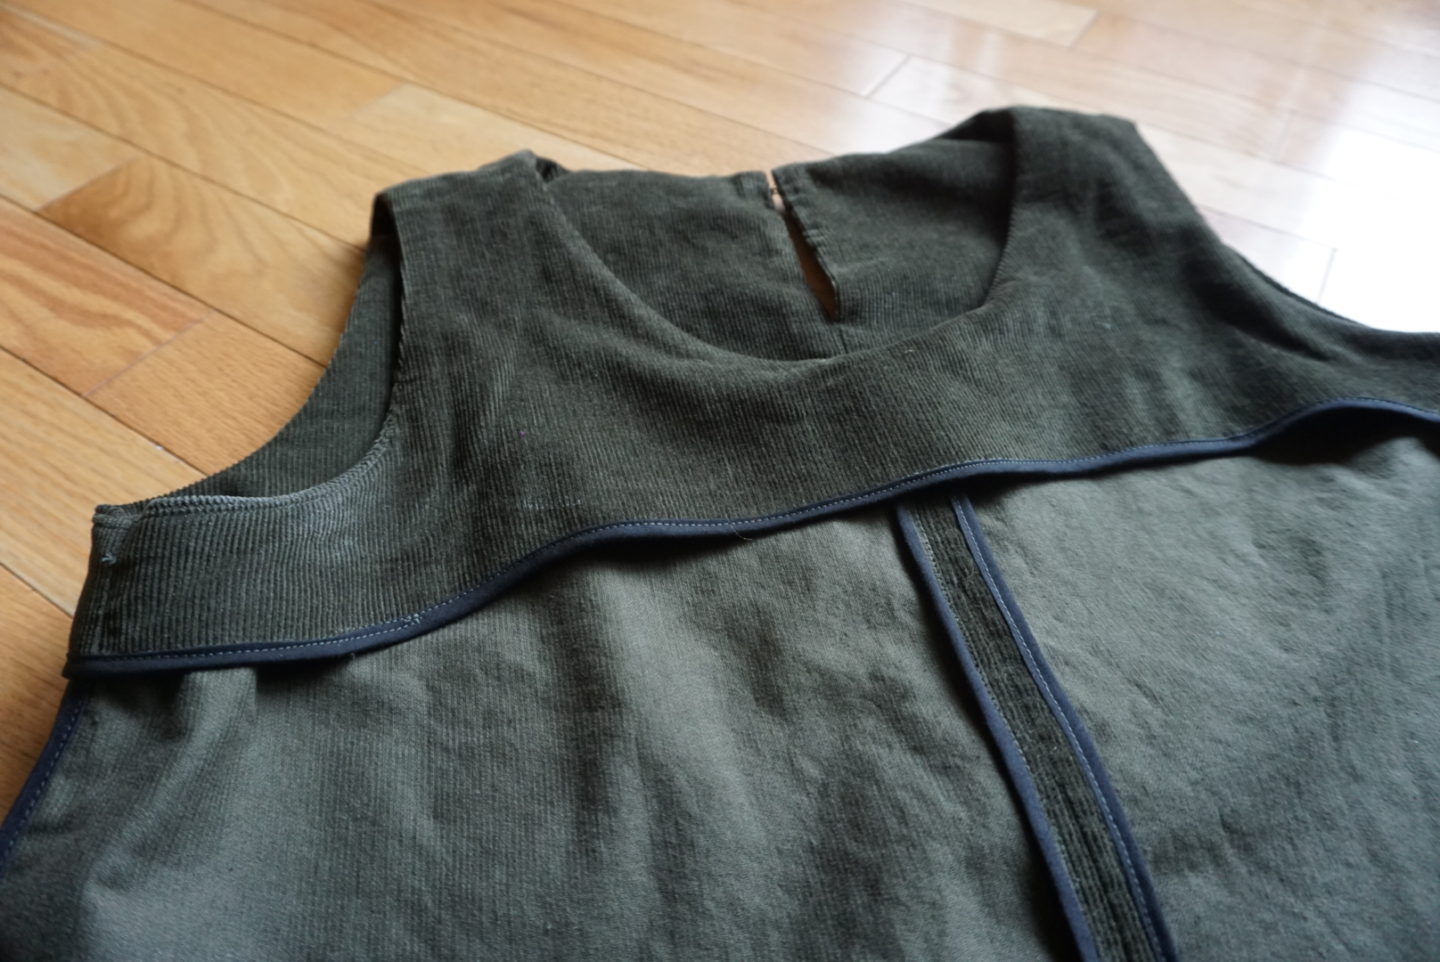
I can’t remember why I gravitated toward bias binding for this. I think I must have read online that corduroy can fray easily? Or maybe I was just feeling fancy? In any case, I find with the Farrow you can’t really do French seams everywhere because then you end up pressing the centre front seam to one side instead of open, which I prefer not to have to do. As well, you have to finish the centre back edges separately, and I didn’t really want to serge everything. I’ve been using it a lot for the bridesmaids dresses because the ones lately have been knits, and I think I just wanted to do a more elevated finish for this one. I even used it on the bottom edges of the facing and the front pocket seams, which I think looks really nice on the inside.
 This also might be my best hook-and-eye sewing job so far! I find I often have issues with misalignment, or sew them too close to the edge and have the hardware be visible between the fabric at the edge, which I’m not a fan of. But I think this time I got closer to the ideal!
What are you folks sewing for fall? Or are you still in summer mode? Now that I’ve tried corduroy for this, I’m thinking a pair of Lander cords might be in my future. Maybe in the winter. (And maybe with the zipper fly expansion.)
